Steps to perform Smart Upgrade in Failover configured servers
Smart Upgrade is a feature in OpManager designed to streamline the process of upgrading your failover-enabled servers. With OpManager's Smart Upgrade, after upgrading the Central, the Probes will automatically be upgraded, and the live upgrade status of each Probe will be displayed in the Central. This document will guide you through the steps to update failover-enabled servers with Smart Upgrade.
Note: These steps are only applicable for base versions prior to 128344. For later versions, please follow the steps for upgrade manager.
Pre-requisites for upgrade
Please refer this page to learn more about the pre-requisites for upgrade, and ensure to follow all the steps before upgrading.
Smart Upgrade for Old Model failover:
For base versions prior to 128344, follow the steps below to upgrade the setup configured with Old Model failover via Smart Upgrade:
- Stop all the secondary services.
- Download the PPM file.
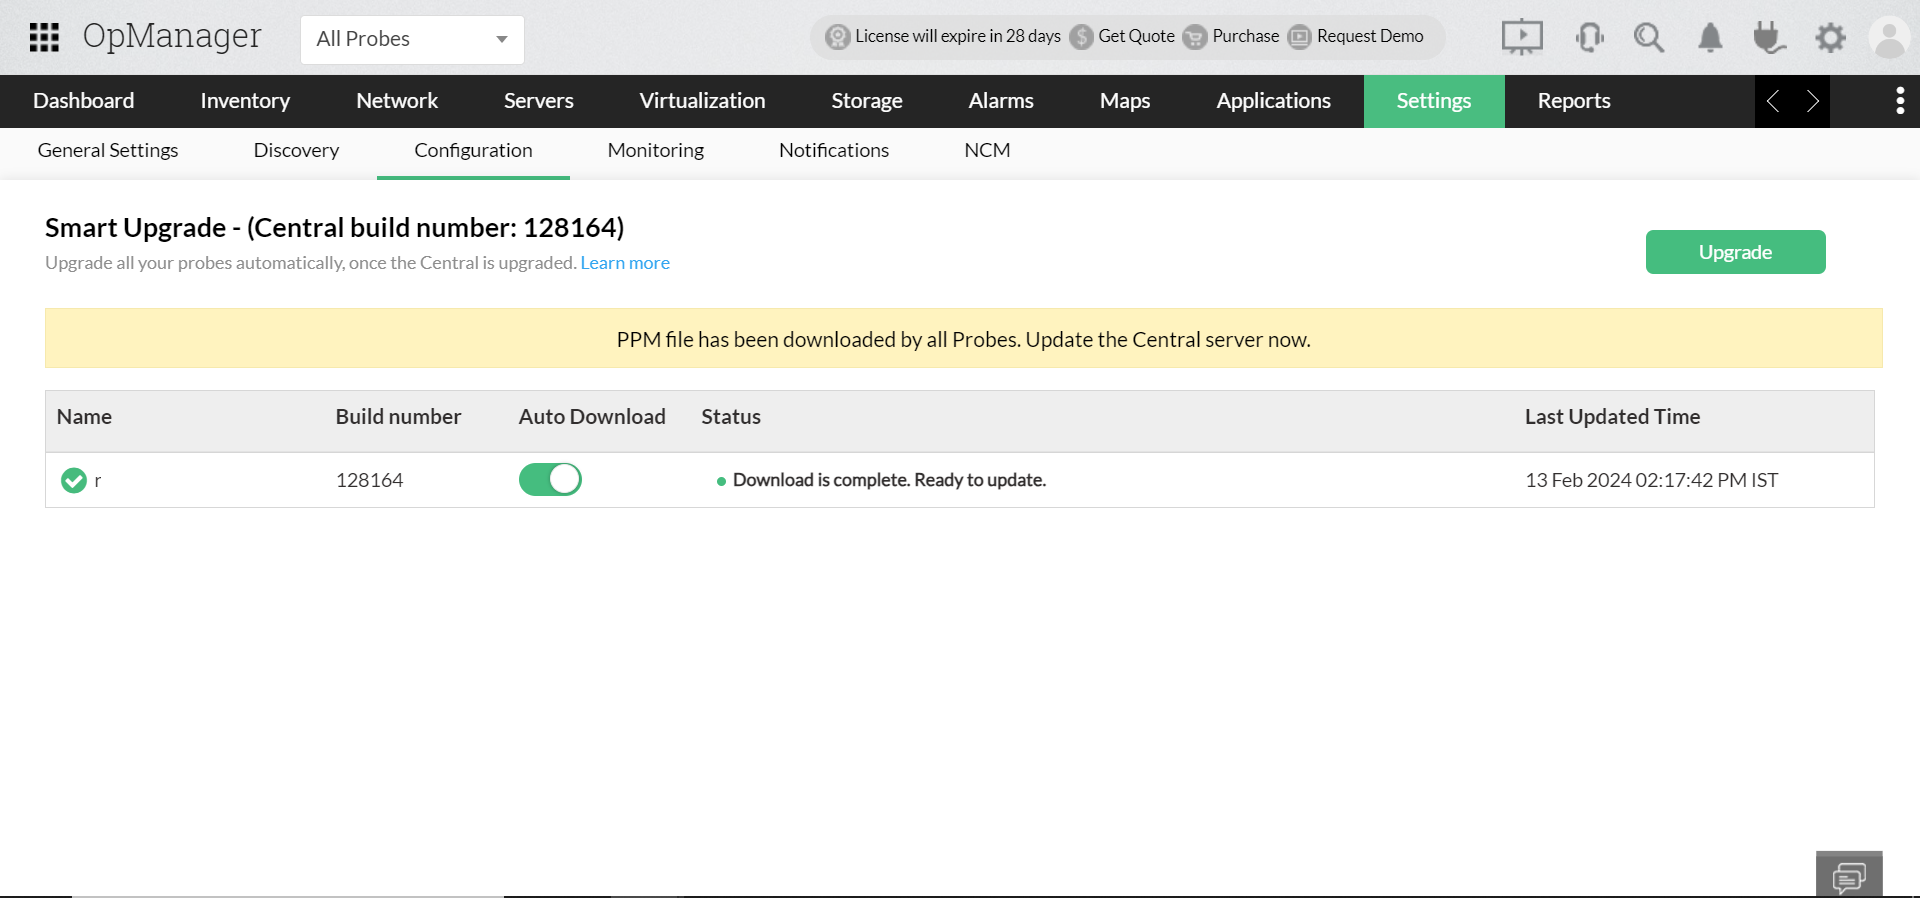
- Go to the Primary central server, navigate to Settings --> Configuration --> Probe Details page, and click on "Smart Upgrade." Then, upload the PPM file by clicking browse.
- Once the ppm is uploaded in central, it will be downloaded by all the probes.
- Click "Upgrade" to start the Smart Upgrade.
- The primary central server will start the upgrade, and once it is complete, the primary probe will upgrade.
- After the upgrade is complete, stop all the primary services completely.
- Manually upgrade the secondary central and secondary probe using the UpdateManager.bat file, from the <OpManager>/bin directory.
- Start the secondary servers first, and they will enter active mode.
- Now, start the primary servers. The primary servers will take 20 to 30 secs to switch into active mode, and the secondary servers will revert to standby mode.
Smart Upgrade for New Failover (Virtual IP):
For base versions prior to 128344, follow the steps below to upgrade the setup configured with New failover (Virtual IP) via Smart Upgrade:
- Stop all the secondary services. Ensure that the secondary server's OpManager folder is accessible to the primary server.
- Download the PPM file.
- Go to the Primary central server, navigate to Settings --> Configuration --> Probe Details page, and click on "Smart Upgrade." Then, upload the PPM file by clicking browse.
- Click "Upgrade" to start the smart upgrade.
- All the primary and the secondary servers will be upgraded simultaneously.
- After the upgrade, the primary servers will start automatically. Start the secondary servers after that.
- The primary servers will enter active mode, and the secondary servers will be in standby mode.
How to identify the failover model
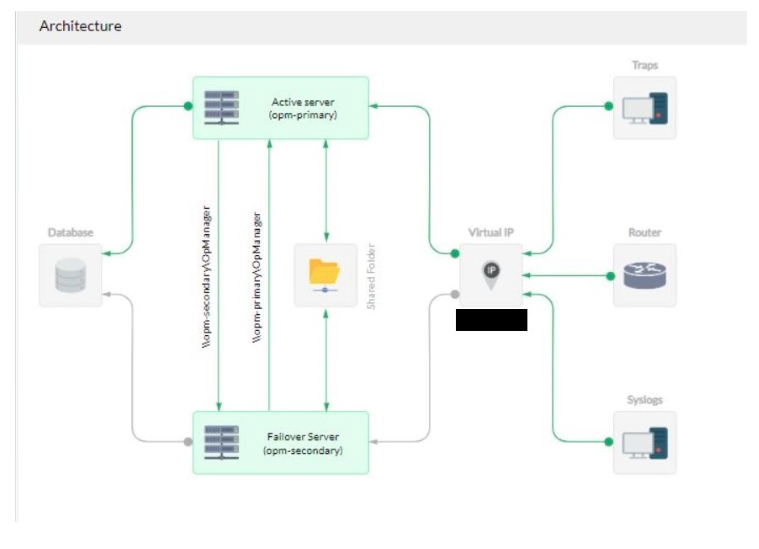
Failover models that do not use Virtual IP and share folder are called Old failover model, whereas, failover models that use Virtual IP and share folder can be called as the New failover model. There are two methods to identify the failover model.
Method 1 (via UI)
- In OpManager UI, navigate to Settings -> General Settings -> Failover Details.
- If there is only a table, it is the old failover.
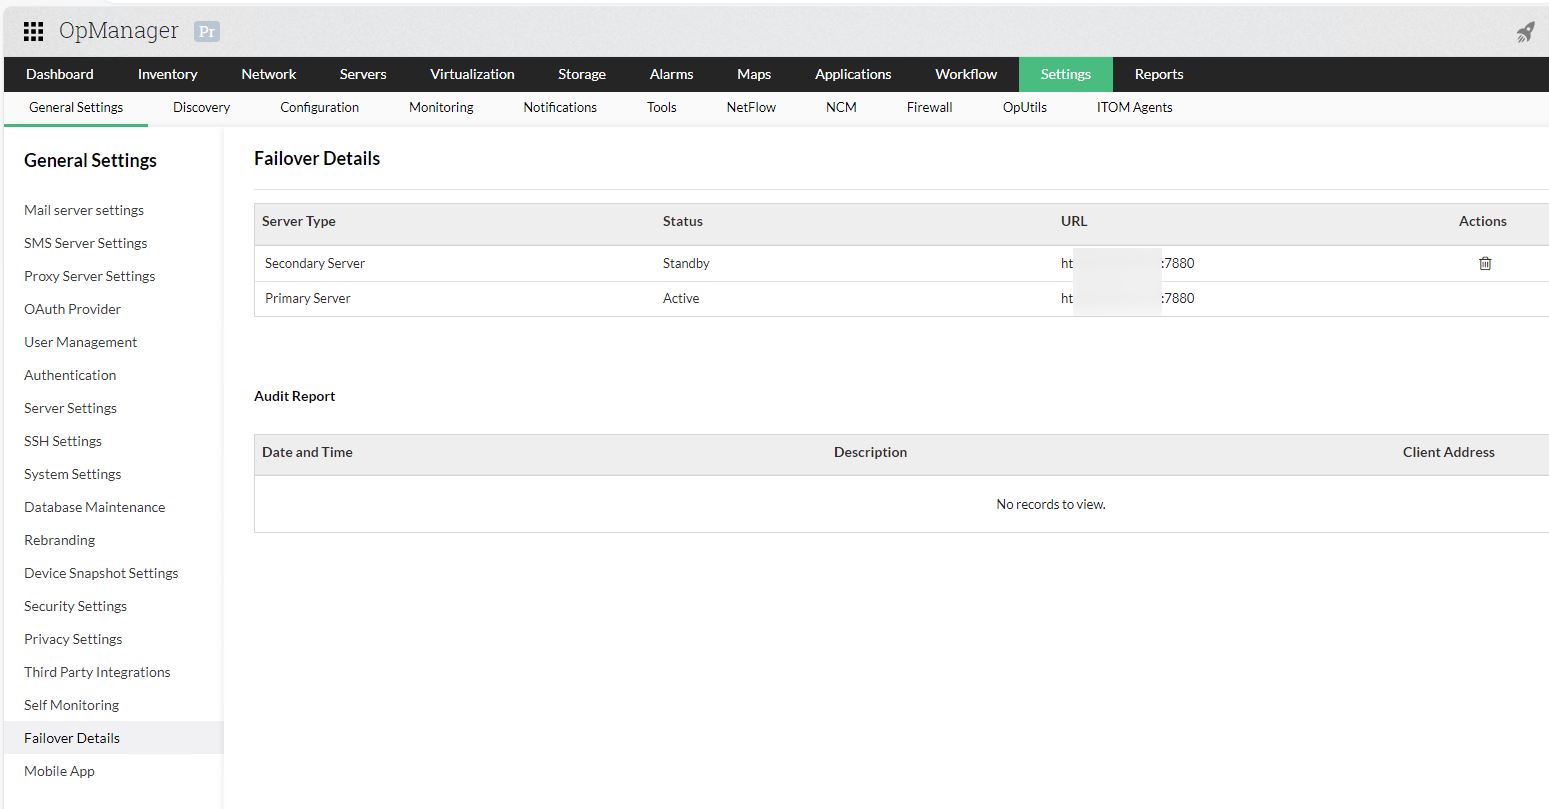
- If the failover architecture is displayed, it must be the new failover model.
Method 2 (manual steps)
Old failover
Connect to OpManager database. Or ensure that DB Query is enabled under System Settings -> Client settings tab, and click the Support icon from the OpManager UI, select DB Query and then execute the below query. If there are two rows, then it is the old failover model.
- For Essential / Central - Select * from FailOverDetails where ID = -1;
- For Probe - Select * from FailOverDetails where ID = (Select MOID from ManagedObject where TYPE='Region');
New failover
- If the file itom_fos.conf is present in both the primary and the secondary server, under <OpManagerHome>/conf directory, then it is the new failover model.