Scheduled Reports
What are scheduled reports?
Scheduled reports is a feature in Endpoint Central that helps you to receive predefined reports, query reports and custom reports in specific formats like CSV, XLS and PDF. By using this feature, you do not have to go to the Endpoint Central web console and individually view reports. Instead, you can simply use this feature for the reports to be sent to you via mail at scheduled times. These reports are automatically scheduled and compiled and can also be sent to multiple people at once by configuring the settings.
You receive scheduled reports in the following formats namely:
Attachment : You can receive the scheduled reports as an attachment to your e-mail ID.
Zipped file : In case you have selected a lot of reports to be received as a scheduled report, you can choose to receive these as zipped files to you mail.
URL : If the size of the report exceeds the permissible size by your mail server, you can choose this option to publish the reports that you have selected on Endpoint Central server and the path will be sent to you mail ID.
How to create scheduled reports?
To create a scheduled report, follow the steps given below:
- Click on Reports > Scheduled reports tab and navigate to Add Schedule Report.
- After providing a Scheduler Name and Description, choose the required reports from the reports category.
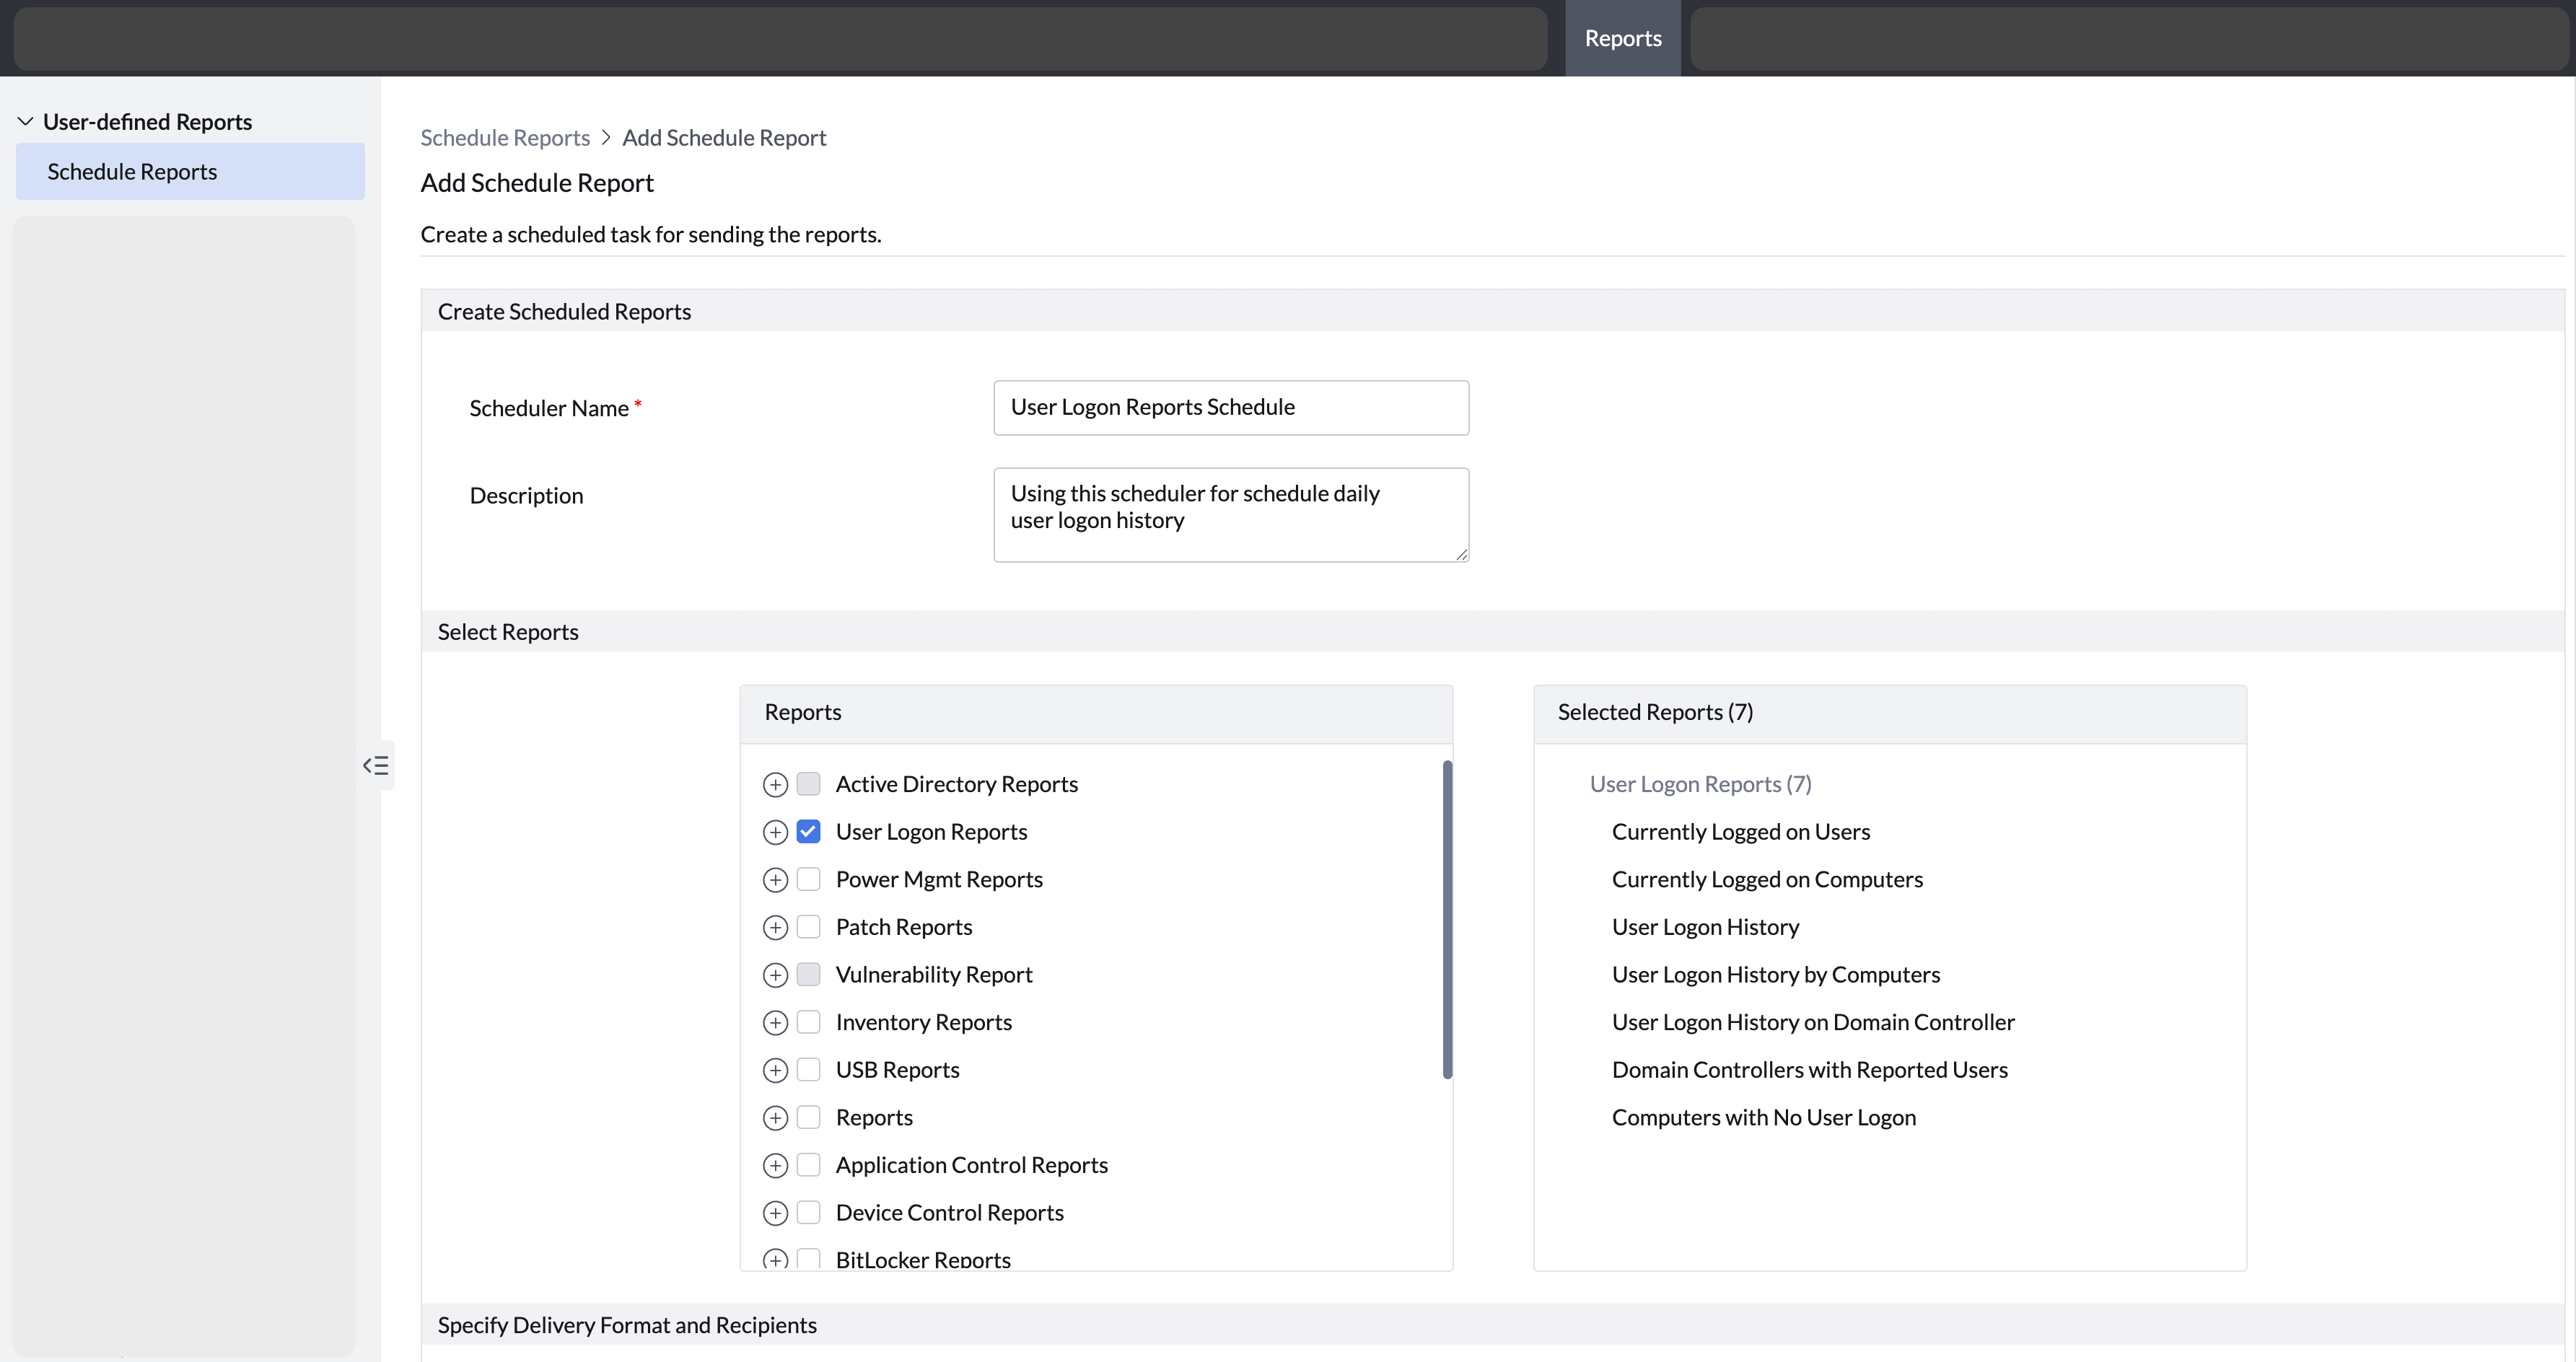
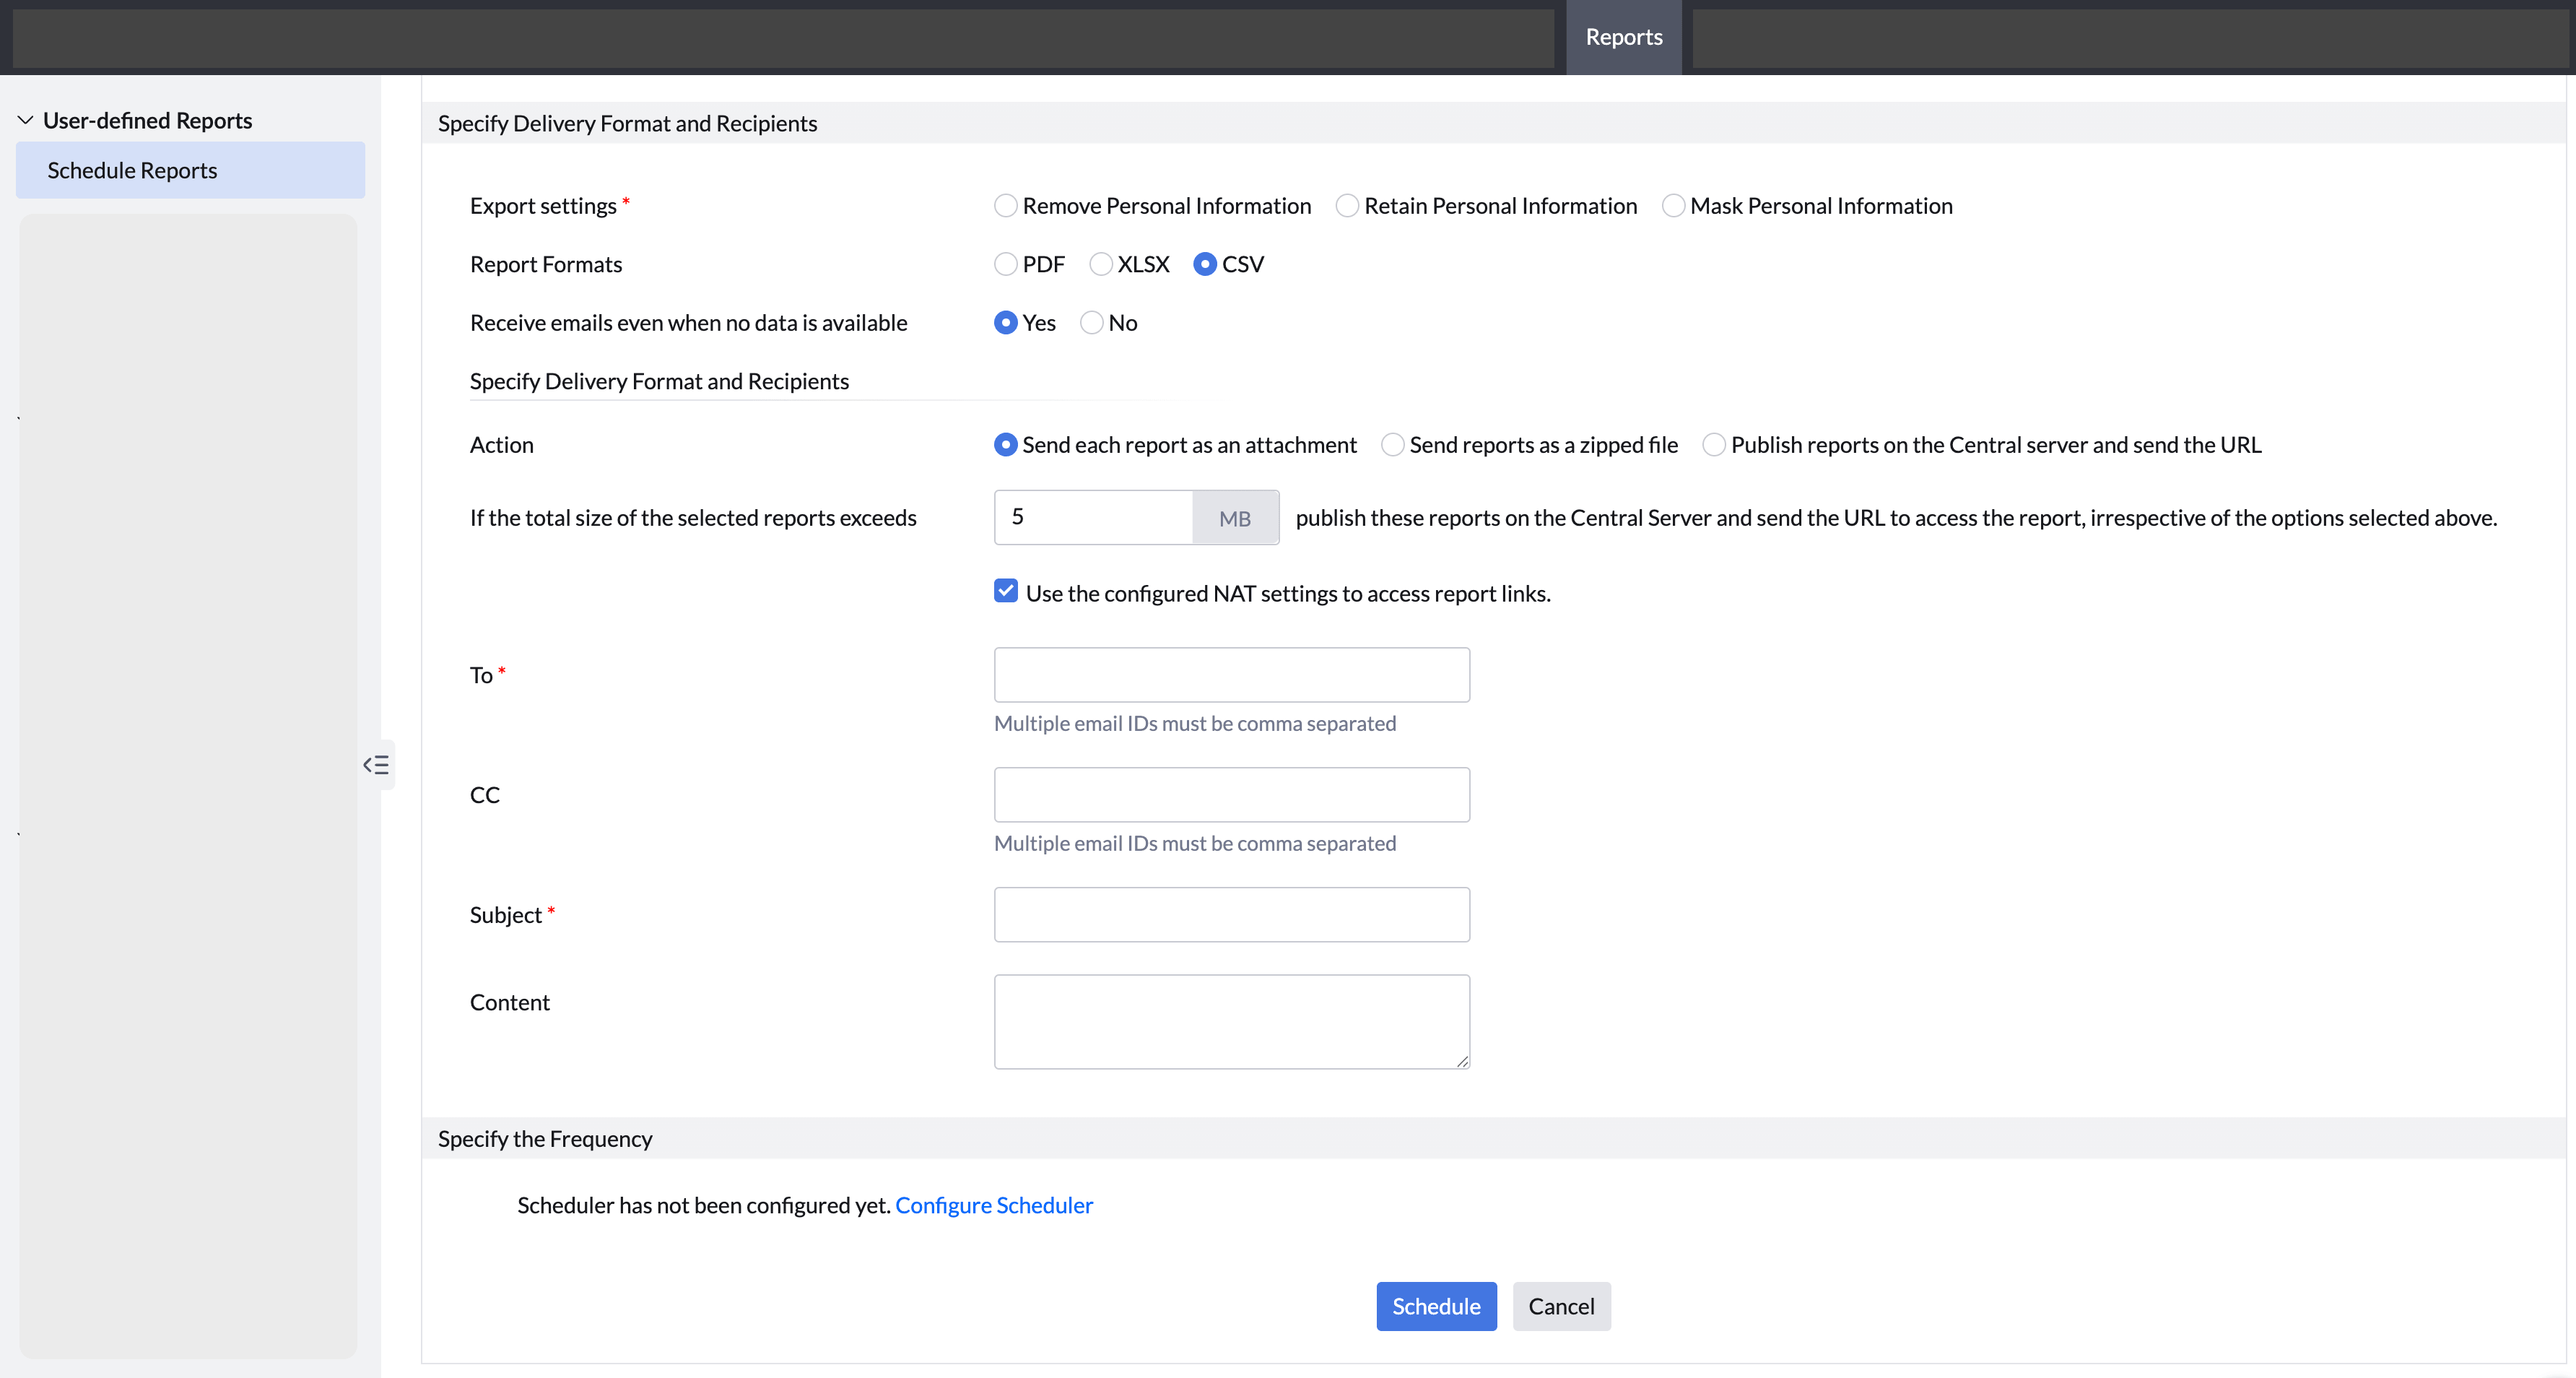
- Select the required export settings. You can use this to remove, retain and mask the Personal Information data from the reports
- Specify the report format. You can select PDF, XLSX or CSV
- (Optional) Select "Receive emails even when no data is available" as NO if you don't want to receive empty report data to be scheduled and mailed to you
- Choose to send the reports as attachments or zipped files with a specified size limit; if the total size of selected reports exceeds the limit, Endpoint Central will publish them on the Central Server and provide a URL for access via email.
- Specify the size limit (in MB, e.g., 5 MB). If the total size of the selected reports exceeds this value, the reports will be published on the Central Server and a URL to access them will be sent instead — irrespective of the Action selected above.
- (Optional) Enable the checkbox "Use the configured NAT settings" to access report links so that report URLs are generated using the NAT configuration.
- Enter the recipient email address(es). Multiple email IDs must be comma-separated.
- Enter additional recipients as CC, also comma-separated.
- Enter the subject and body content for the report email.
- To configure the schedule, click Configure Scheduler and set the Frequency (Once, Daily, Weekly, or Monthly), specify the Start at date and time along with the time zone, choose the recurrence under Perform this (Everyday, Alternate days, Weekdays), and click Schedule.
Once scheduled, the report appears in the Schedule Reports summary view, which lists all schedulers along with their Last Run Time, Next Run Time, Email To, Status, and Frequency. If you want the report to be generated immediately, click the Action icon against the scheduled report and select Execute Now. The report will be generated and delivered immediately, in addition to running at the scheduled time. You can also use Modify to edit or Delete to remove the scheduler from the same menu.