In this article:
This article explains how to use RecoveryManager Plus, a comprehensive backup tool for SharePoint Online and OneDrive for Business, to configure and perform site data backups. It guides administrators in securely protecting their site data by setting up automated backup schedules, simplifying site selection, applying customizable retention policies, and ensuring secure backups with encryption. It allows administrators to safeguard essential site data and quickly restore it in case of accidental deletion or corruption.
Note: The minimum item-level retention for SharePoint Online and OneDrive for Business backups is 30 days.
Choose the sites to include in the backup schedule
Configure the schedule and frequency for the backup to run
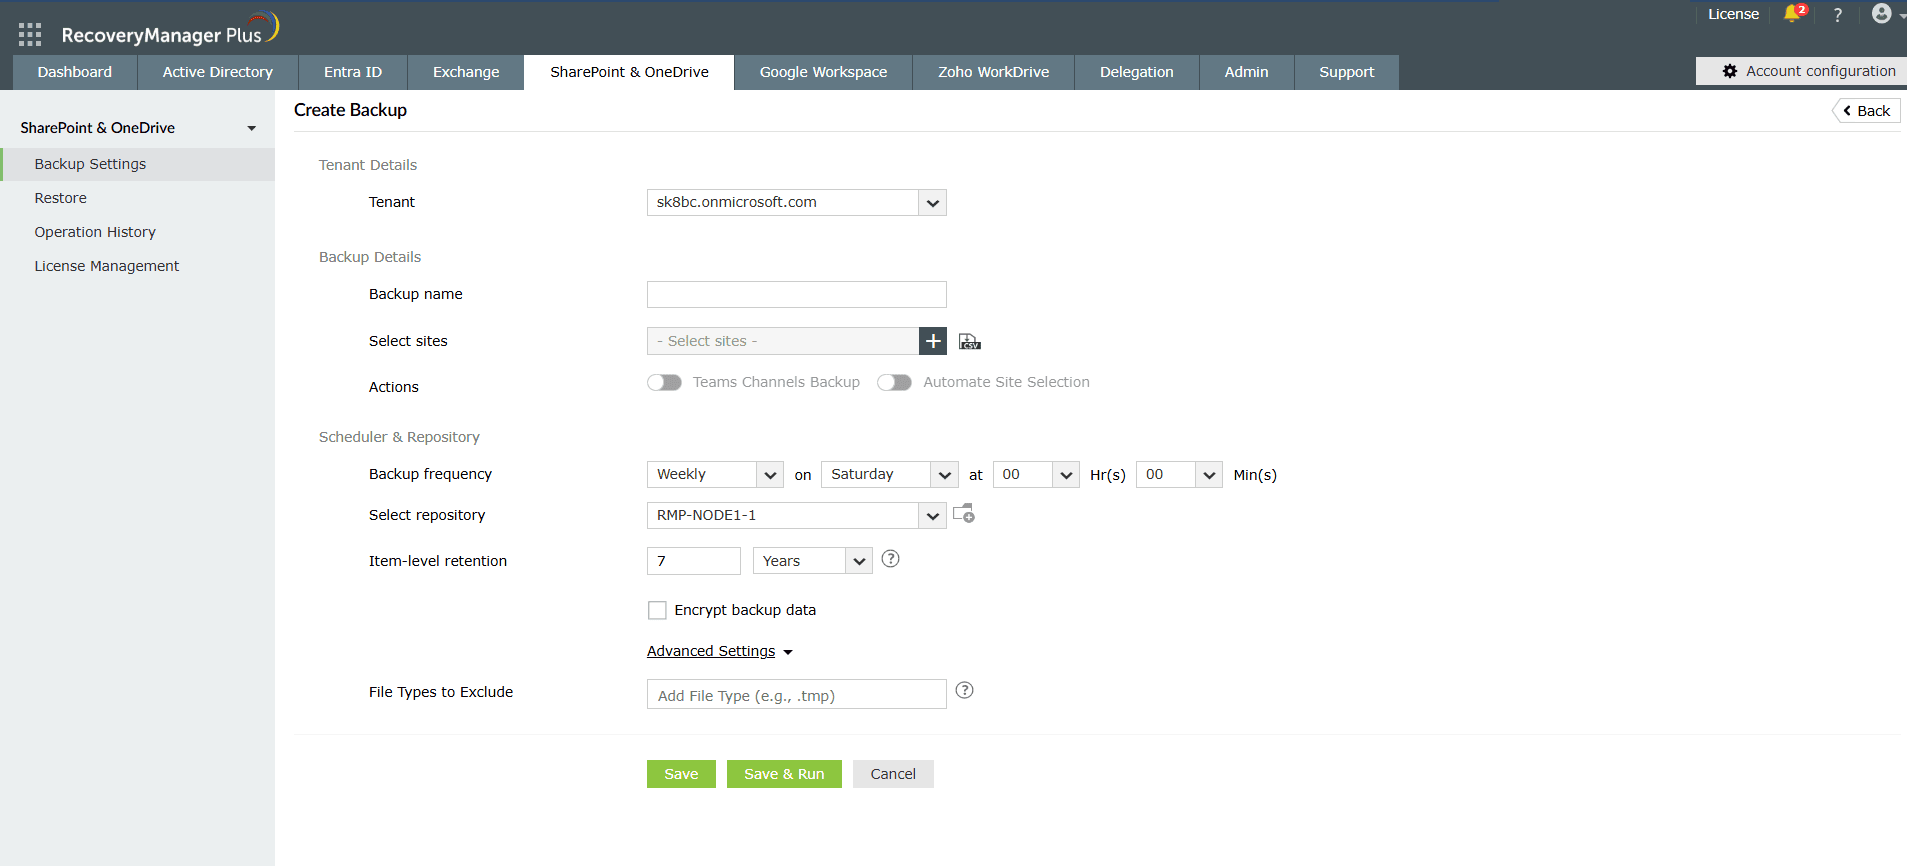
Figure 1: Backing up SharePoint Online and OneDrive for Business sites in RecoveryManager Plus.
Choose the sites to include in the backup schedule
Configure the schedule and frequency for the backup to run
By following these steps, you can securely back up SharePoint Online and OneDrive for Business sites with RecoveryManager Plus.
Once you've configured a backup schedule, you can perform the following actions:
Last updated on: 10-10-2025
Fill this form, and we'll contact you rightaway.
Our technical support team will get in touch with you at the earliest."
