Help Document

Introduction

Getting started

Pre-logging setup

Logging setup

Product features

Admin settings

Product settings

Google Cloud Platform

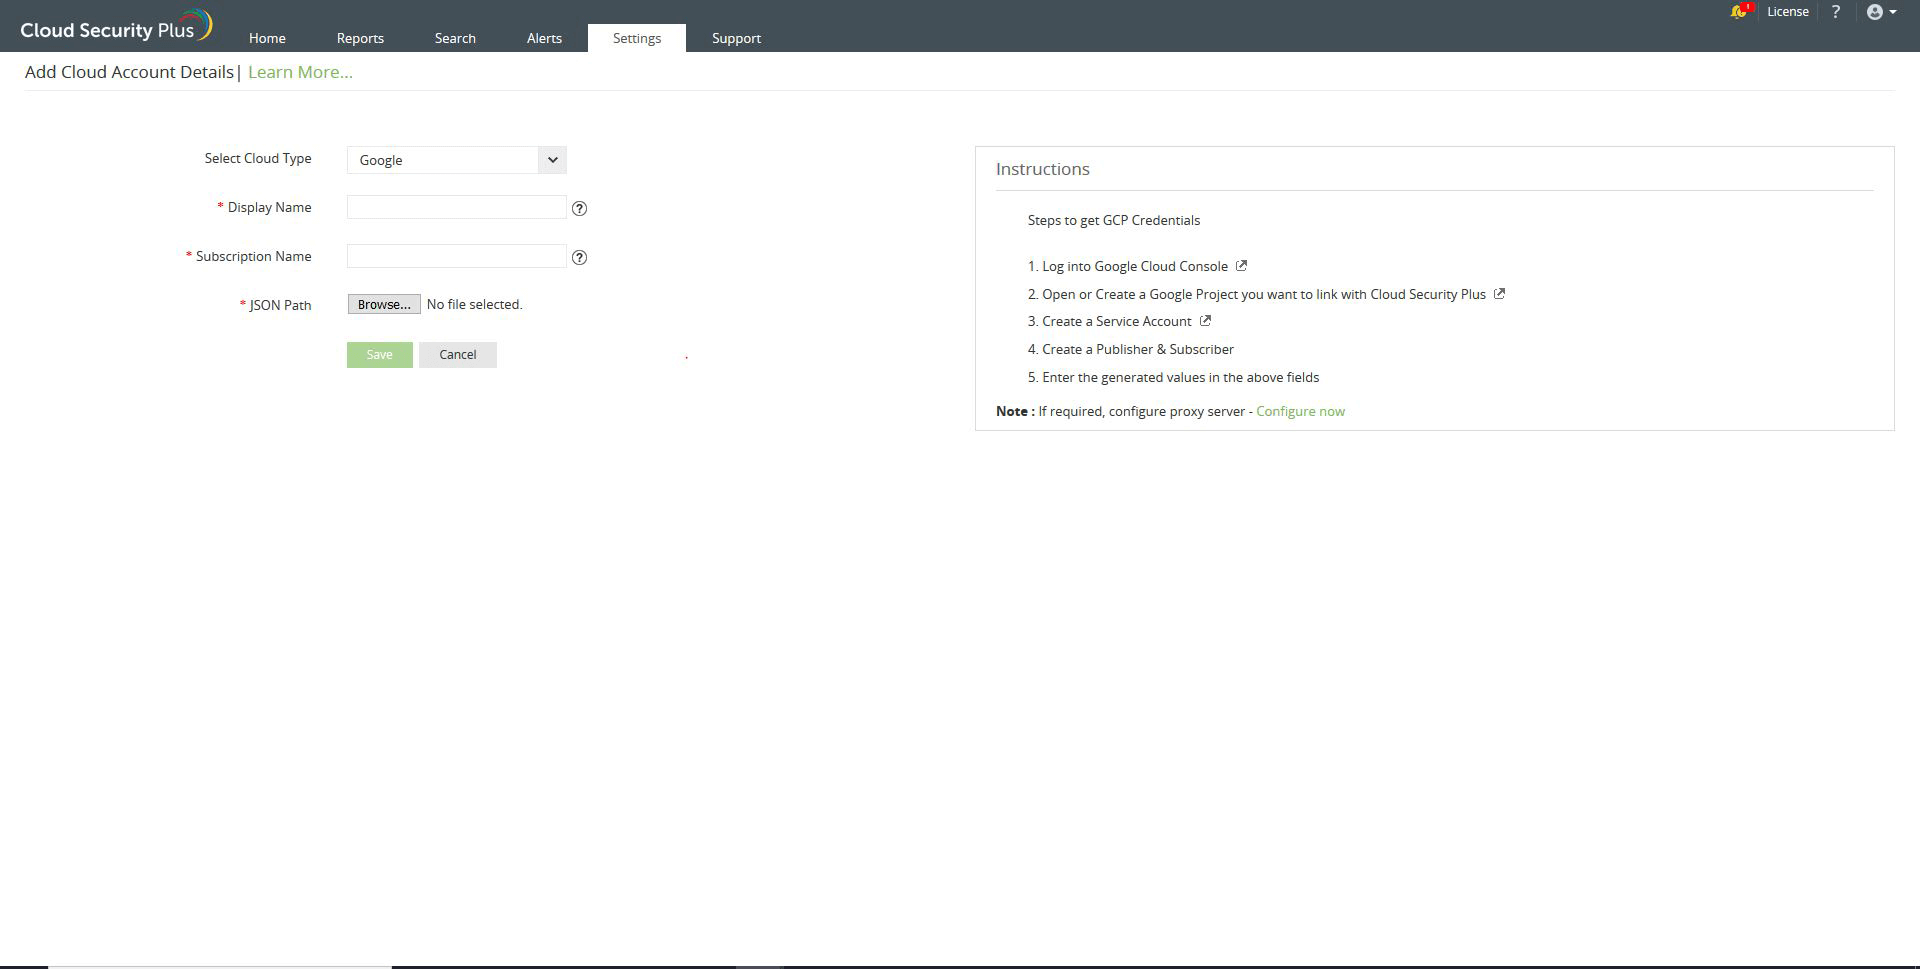
To monitor your Google Cloud Platform, Cloud Security Plus requires a valid service account with the necessary permissions. The solution will use the designated service account to collect logs from your Google Cloud Platform project.

To configure Cloud Security Plus with Google Cloud Platform, please follow the steps below.

Create a service account:

  • Open the service accounts page in the Google Cloud Platform Console.
  • Click on Select to view the list of projects.
  • Select the project to be added to Cloud Security Plus.
  • In the service accounts page, click on +CREATE SERVICE ACCOUNT. Fill in the necessary details and click on Create.
  • Provide this service account with the role: Pub/Sub → Pub/Sub Editor, so that it has complete permissions for actions on the resources in your project.
  • Click on Done.

A service account will be successfully created with the required permissions.

Create Key for service account:

  • Open the service accounts page in the Google Cloud Platform Console.
  • Click on Select to view the list of projects.
  • Select the project to be added to Cloud Security Plus.
  • Select the service account (email address) that you created.
  • On the Keys tab, use Add key drop-down menu and select Create new key.
  • Select JSON as the Key type in the dialog and click Create.
  • Click on +CREATE KEY and select JSON key type.
  • Save the JSON file in the machine where Cloud Security Plus is installed.

Export logs with Pub/Sub:

  • Click on Menu.
  • Under Operations, click on Logging, and select Logs Router.
  • Click on Create sink.
  • Enter sink name and click Next.
  • Under Select Sink service dropdown, select Cloud Pub/Sub topic and sink destination as create a topic.
  • Enter the Topic ID and click on CREATE TOPIC. Click Next.
  • Under Choose Logs to include sink, Paste the below filter in to Build an Inclusion Filter
  • resource.type!="container"
    protoPayload.serviceName!="monitoring.googleapis.com"
    protoPayload.serviceName!="logging.googleapis.com"
    protoPayload.serviceName!="cloudbilling.googleapis.com"
    resource.type!="gke_nodepool"
    protoPayload.serviceName!="pubsub.googleapis.com"
    protoPayload.serviceName!="clouderrorreporting.googleapis.com"
    resource.type!="gke_cluster"
    resource.type!="gce_backend_service"
    resource.type!="gce_forwarding_rule"
    resource.type!="gce_target_http_proxy"
    resource.type!="gce_url_map"
    resource.type!="gce_target_pool"
    resource.type!="gce_target_ssl_proxy"
    resource.type!="gce_operation"
    resource.type!="http_load_balancer"
    resource.type!="gce_ssl_certificate"
    protoPayload.serviceName!="k8s.io"

  • After the successful creation of sink destination, click on Create Sink.

Enable audit logs:

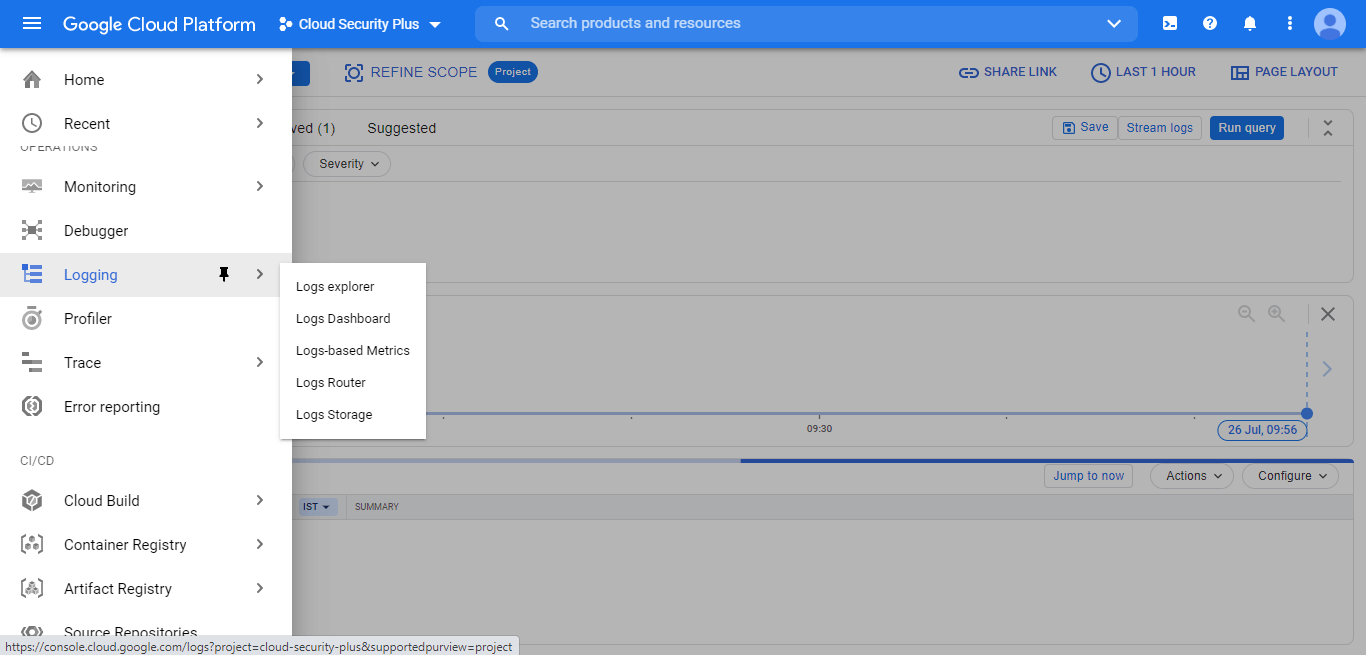
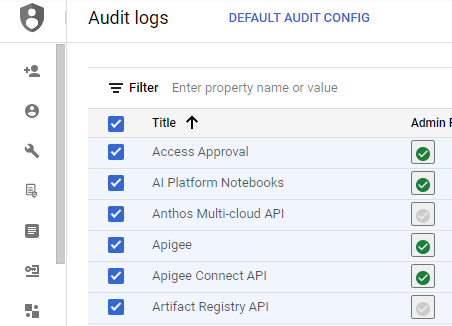
Open the Google Cloud Platform console, select IAM & Admin, scroll down and click on Audit Logs. In the Audit Logs page, click on the check box to the left of the Title to select the services that are available.

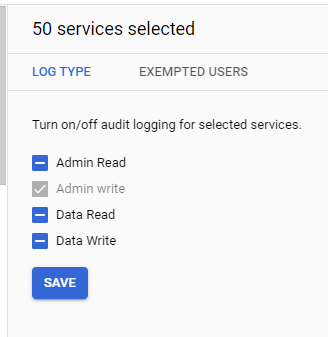
In the Log Type tab on the right side of the screen, select all the three boxes and click save.

Create a subscription:

  • Navigate to Pub/Sub → Topics
  • Create a subscription for a previously created topic by clicking on the topic.
  • Click on the newly created topic.
  • Scroll down and click on CREATE SUBSCRIPTION dropdown and select Create Subscription.The Add subscription to topic page will open.
  • Enter the Subscription ID.
  • Keep the delivery type as Pull.
  • The maximum message retention duration should be 7 days. Do not make changes to the remaining fields.
  • Keep the subscription expiration as Never expire.
  • Keep the acknowledgement deadline at 600 Seconds.
  • Click on create

Configuring Cloud Security Plus with Google Cloud Platform.

To configure Cloud Security Plus, please follow the steps below.

  • Log in to Cloud Security Plus.
  • In Select Cloud Type, choose Google.
  • In Display Name field, enter a display name. Make sure it does not contain any spaces and special characters other than underscores. This name cannot be changed later.
  • In the Subscription Name field, enter the Subscription Name you had configured in the previous step.
  • In the JSON Path field, browse and select the downloaded JSON file.