Microsoft Azure
Creating an app with permissions in the Microsoft Azure AD
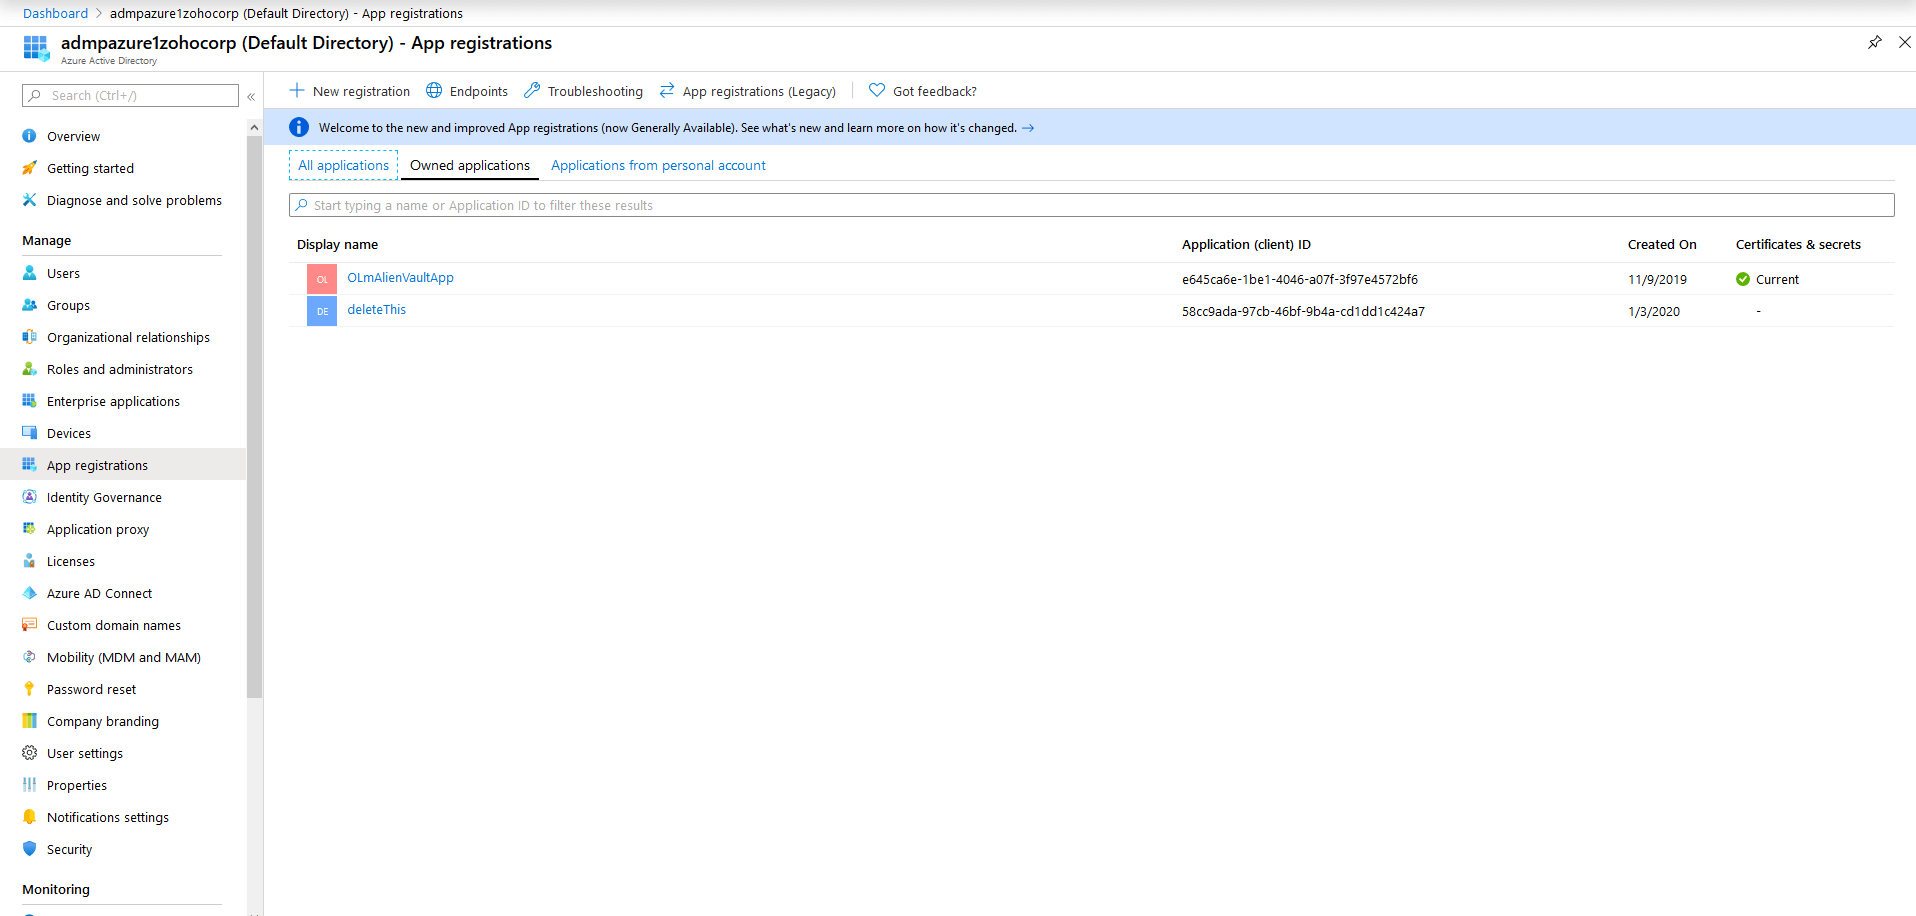
- Adding a new app
- Go to your Azure Active Directory.
- Click on App Registrations under Manage.
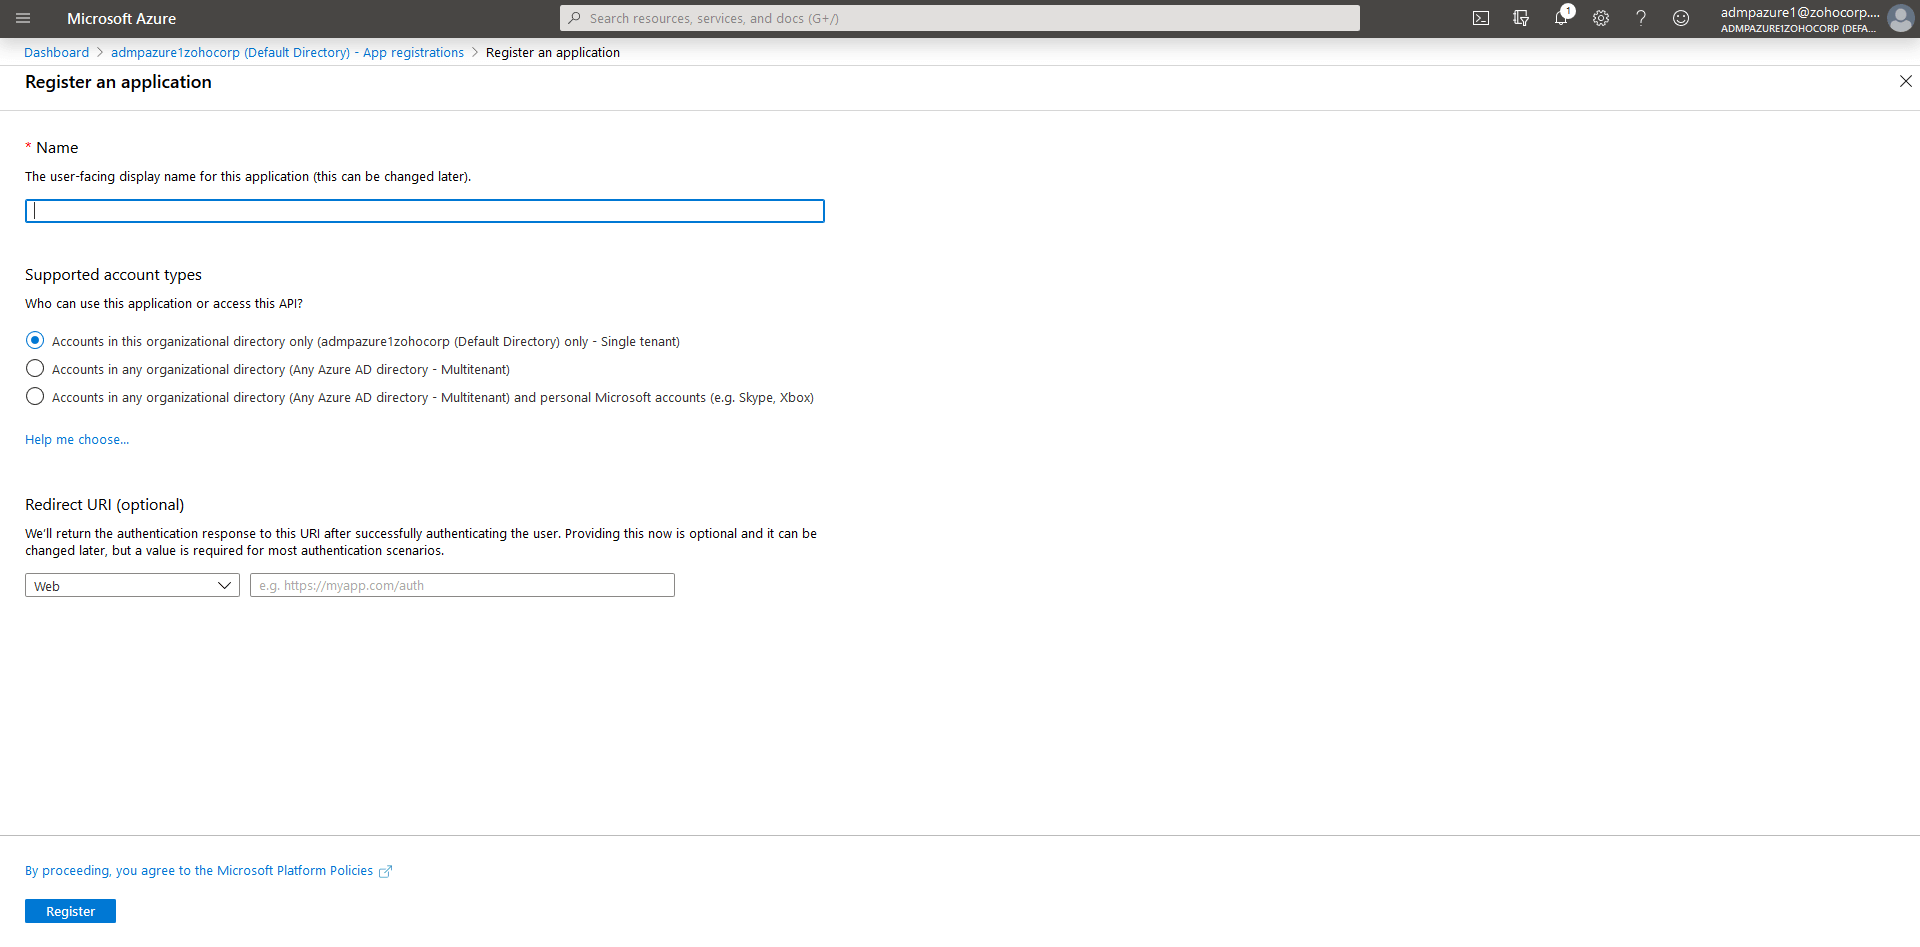
- Click on New Registration.
- Fill in a valid Name and Redirect URI (which is optional) in the given fields. The preferred URL is http://localhost. Kindly leave the rest of the fields unchanged.
- Click on Register and a new app with the entered details is created.
- Assigning the necessary permissions to the app designated for Cloud Security Plus.
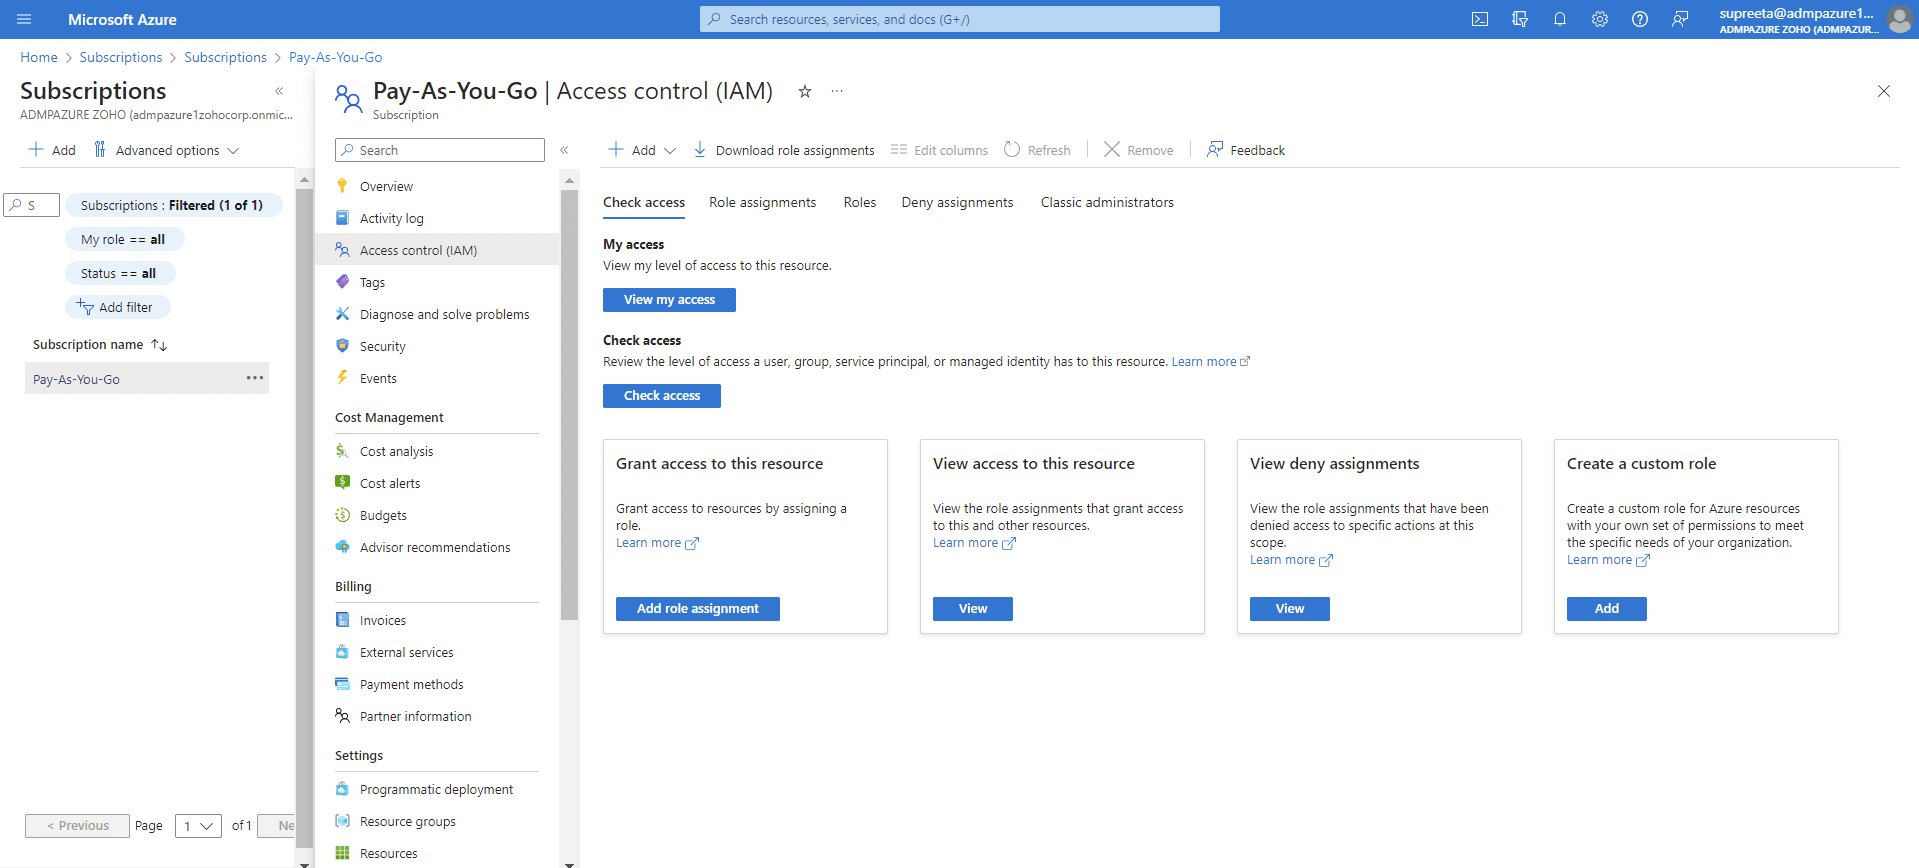
- Go to Subscriptions tab in the main menu.
- Choose the subscription you wish to monitor.
- Select Access control (IAM).
- Click on Add and click on the Add Role Assignment tab below.
- Choose the necessary role from the given list. The minimum permission required for Cloud Security Plus to collect logs is Reader.
- Search for the App created in the Select field and select the App.
- Click on Save.
Enter Azure AD credentials in the Cloud Security Plus console
- Click on the Settings tab
- Select the Cloud Type as Azure.
- Enter a Display name in the given box.
- Enter the following details to enable Cloud Security Plus to start collecting Azure activity logs.
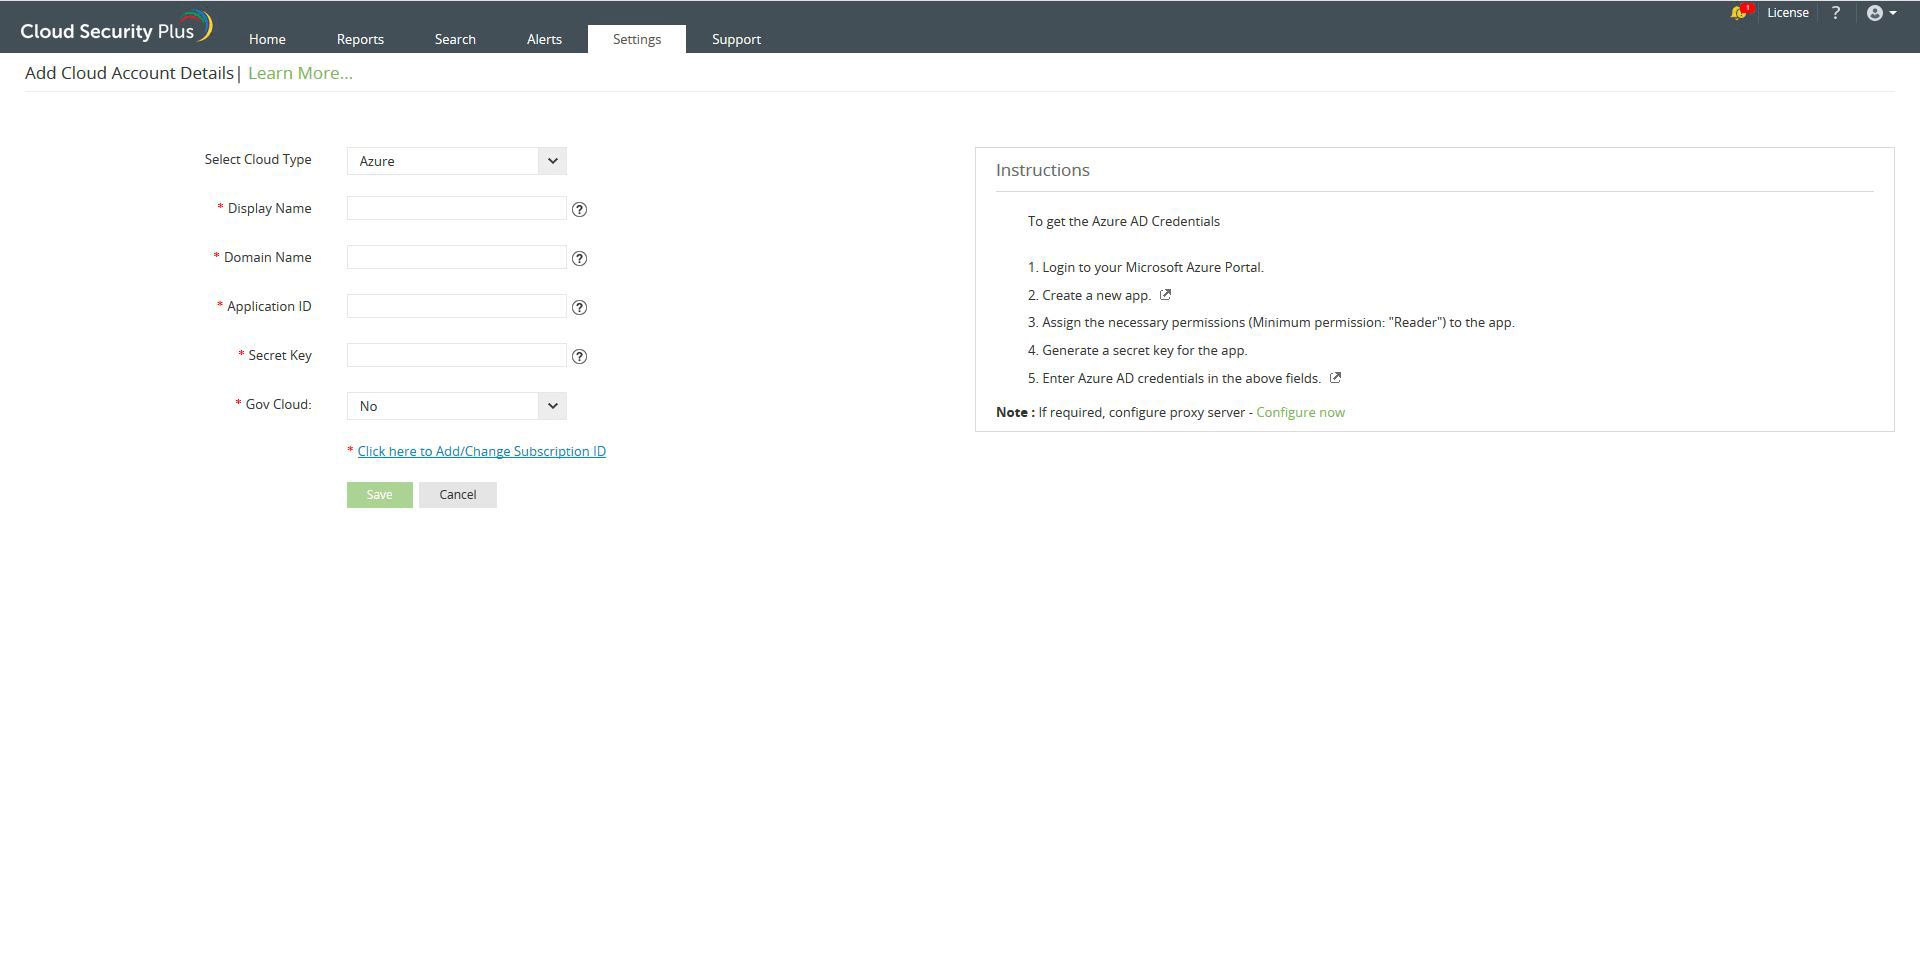
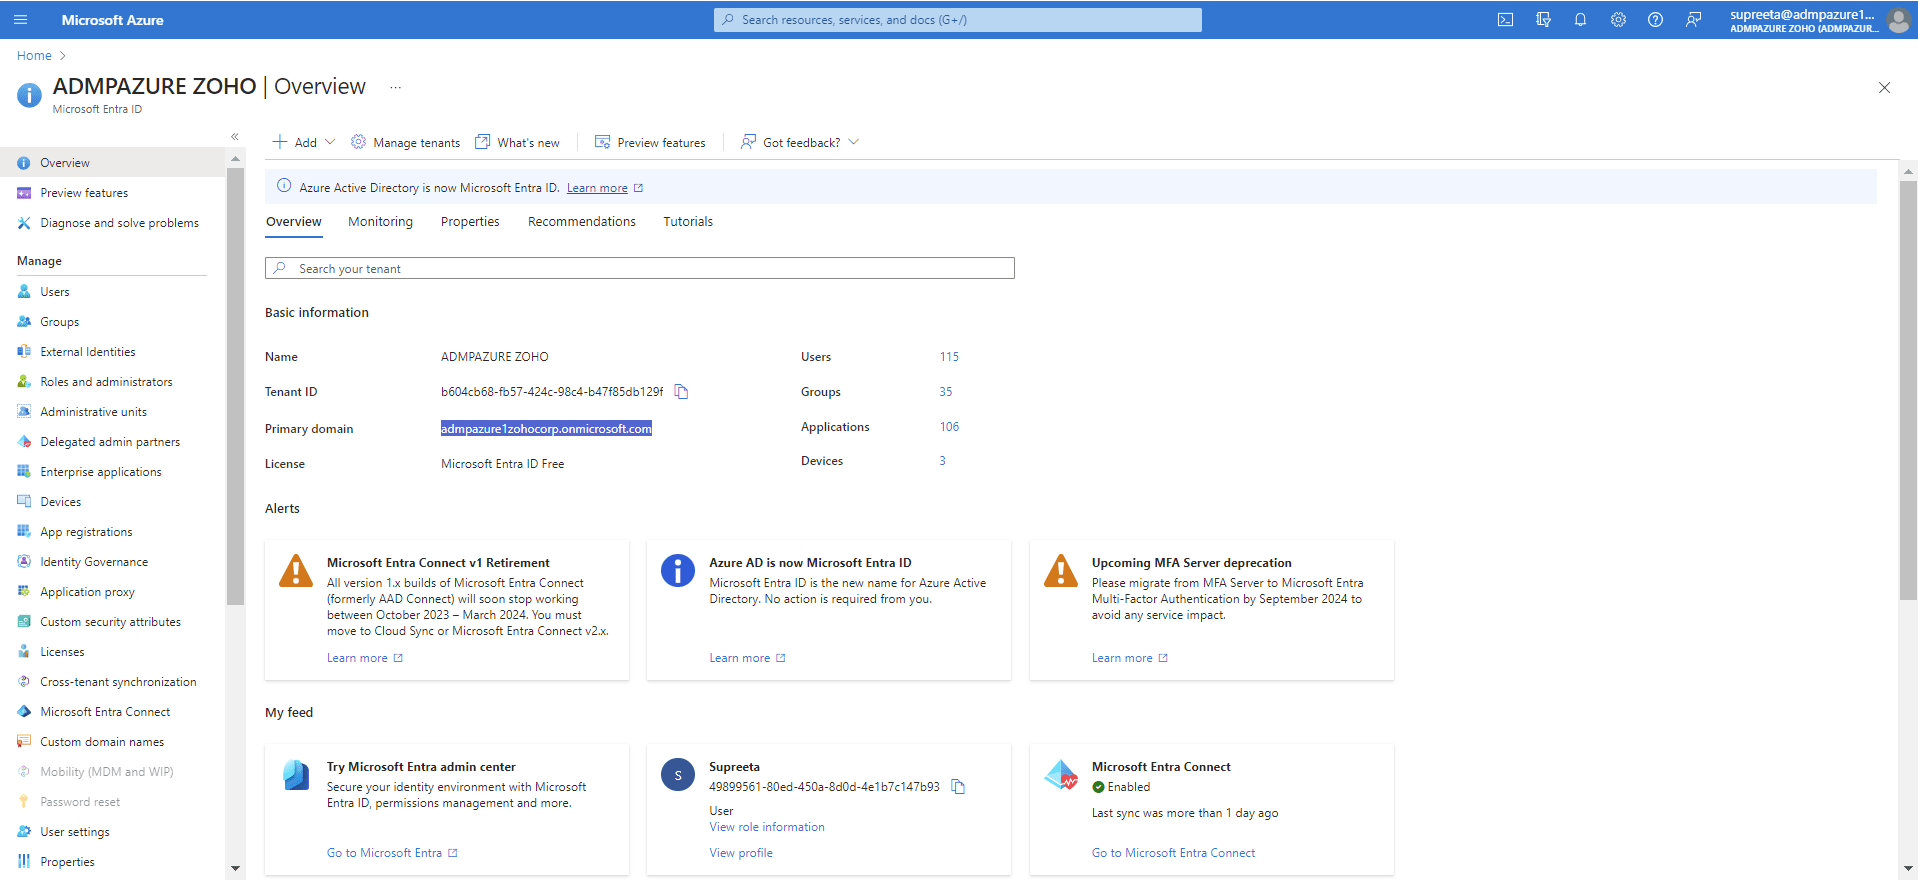
Domain name of Azure Active Directory.
- To view the domain name, go to the Azure Active Directory. Under overview, you can find your Domain Name.
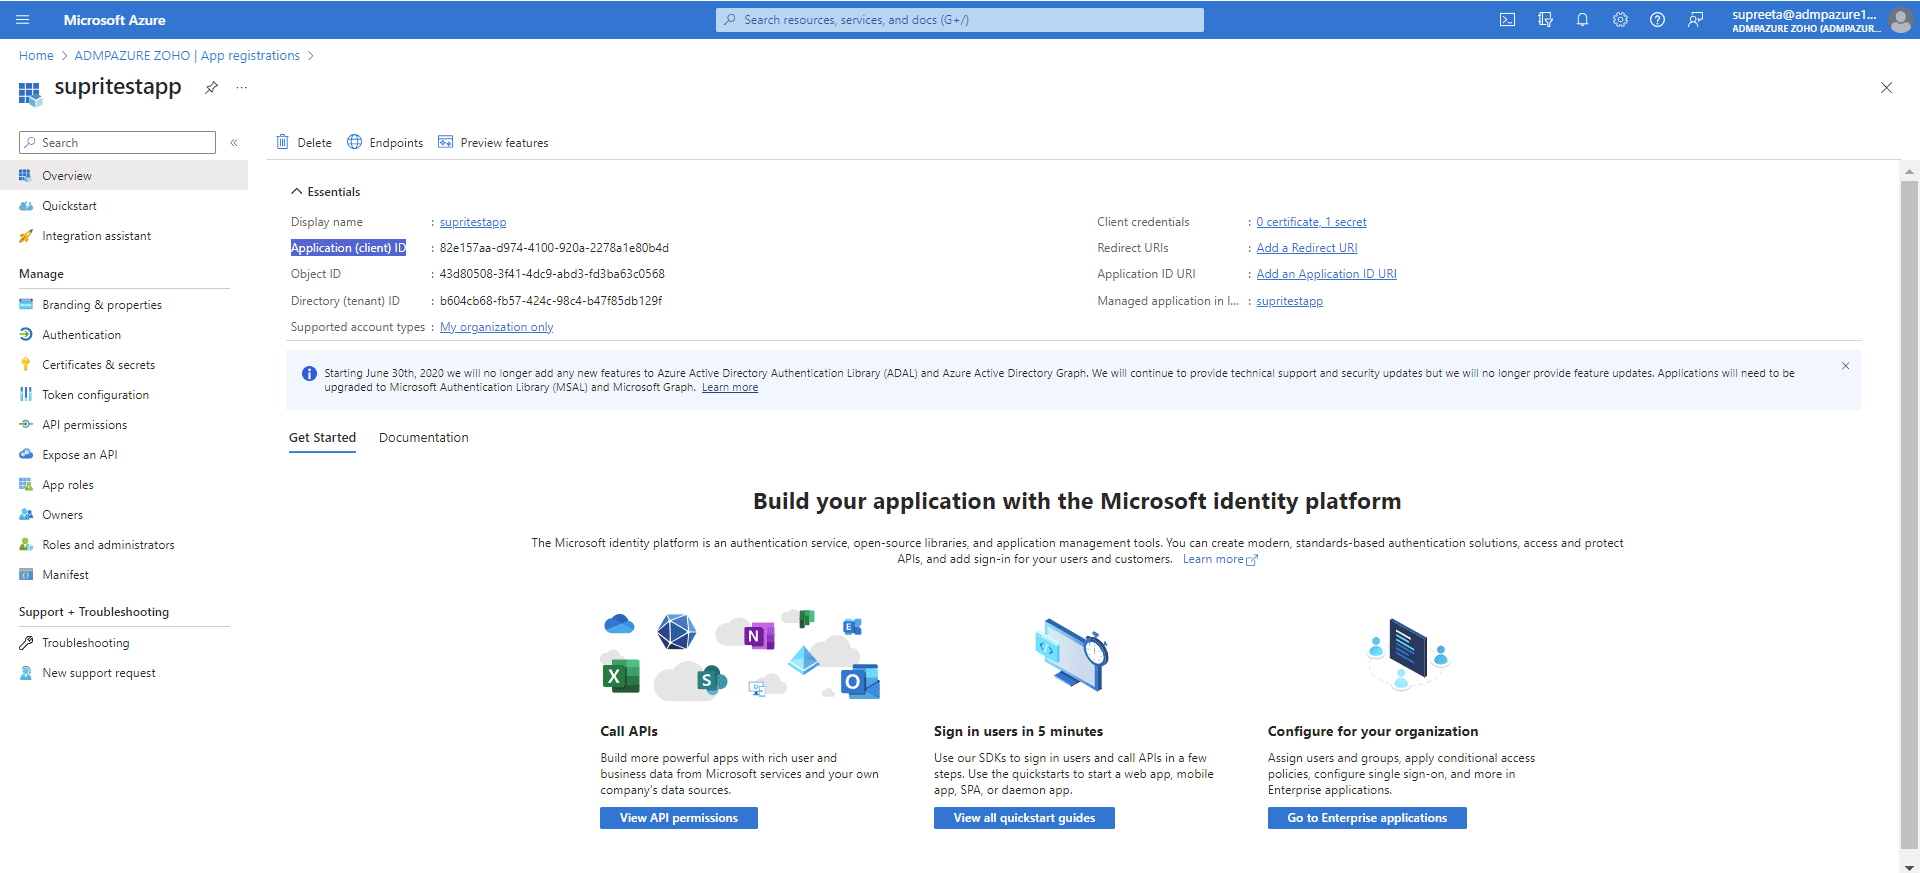
Application ID of the app
- To view the application ID, go to the Azure Active Directory → App registrations.
- Select the app that you have designated for Cloud Security Plus.
- The Application ID of the app appears in the top-right under Essentials.
- Copy the Application ID.
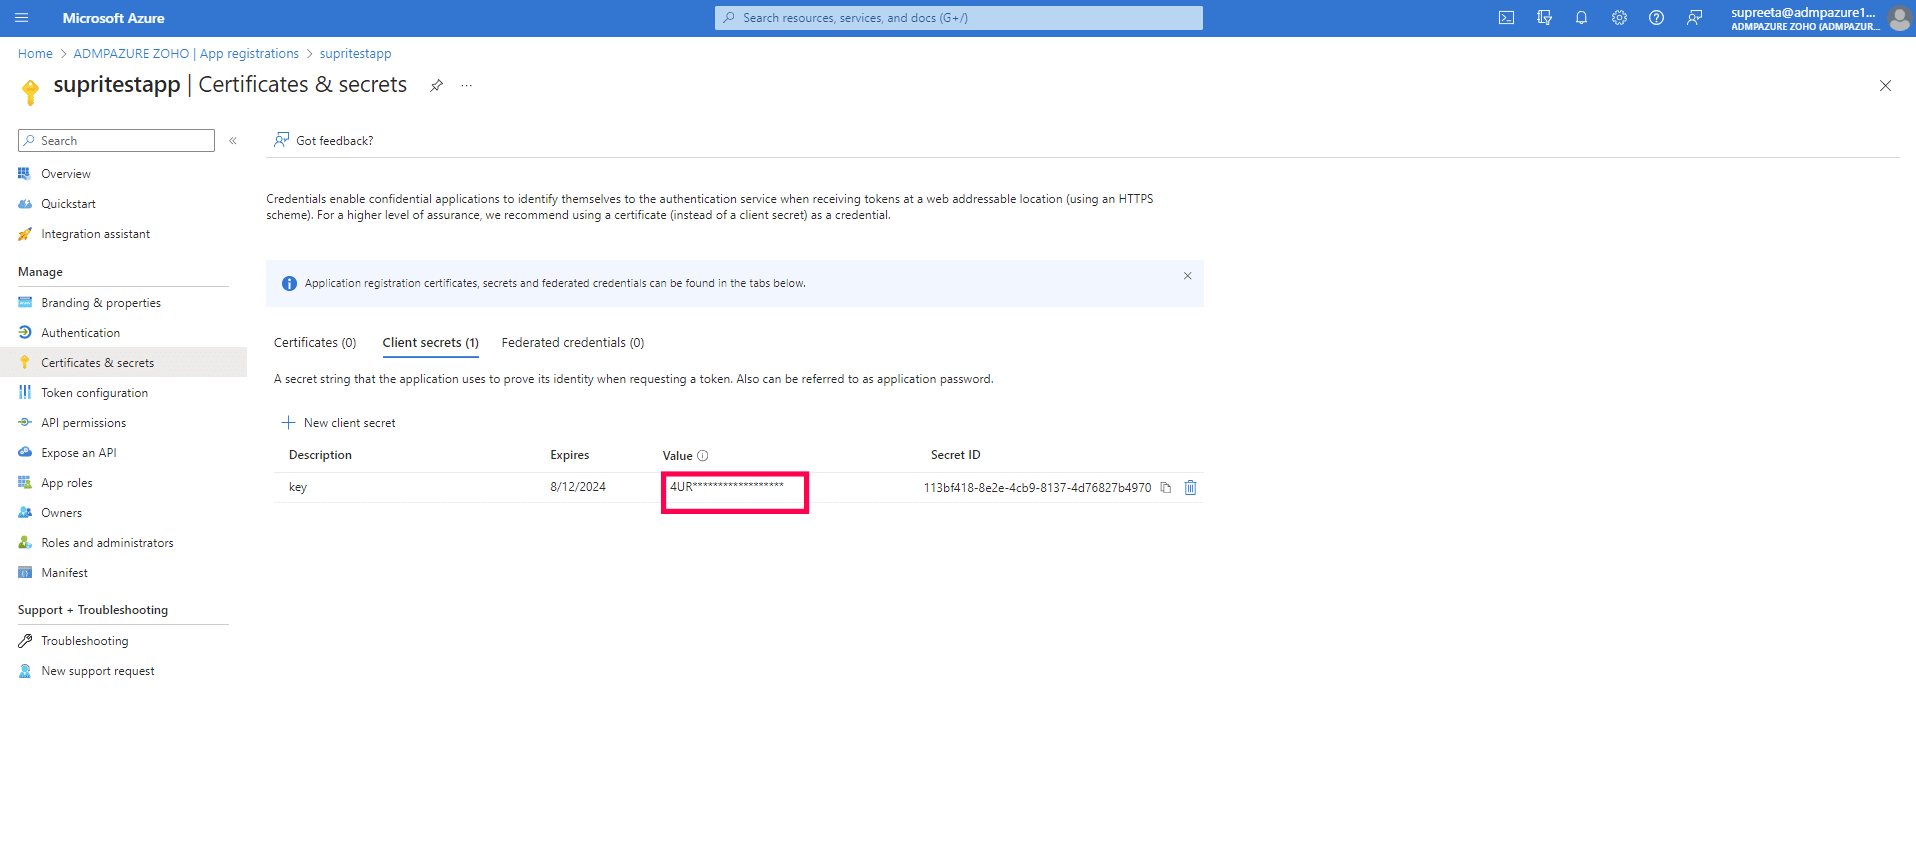
Secret key of the app
- To view the Secret Key, go to Azure Active Directory → App Registrations.
- Select the designated app for Cloud Security Plus.
- Click on Certificates & Secrets.
- Under Client Secrets go to New Client Secret.
- Enter the Description and fill-in the date of Expiry. Please ensure that the date of expiry is set as "Never".
- Click on Save.
- Copy the Value of the Client secret that is created. This is the Secret Key.
Subscription ID of Azure Active Directory
- To view the subscription ID, go to Subscriptions and copy the subscription ID.