Salesforce
Creating a Connected App with permissions in Saleforce
- Login to your Salesforce account. Ensure that the user account with which you log in has API Enabled and access to View Event Log Files.
Note: 
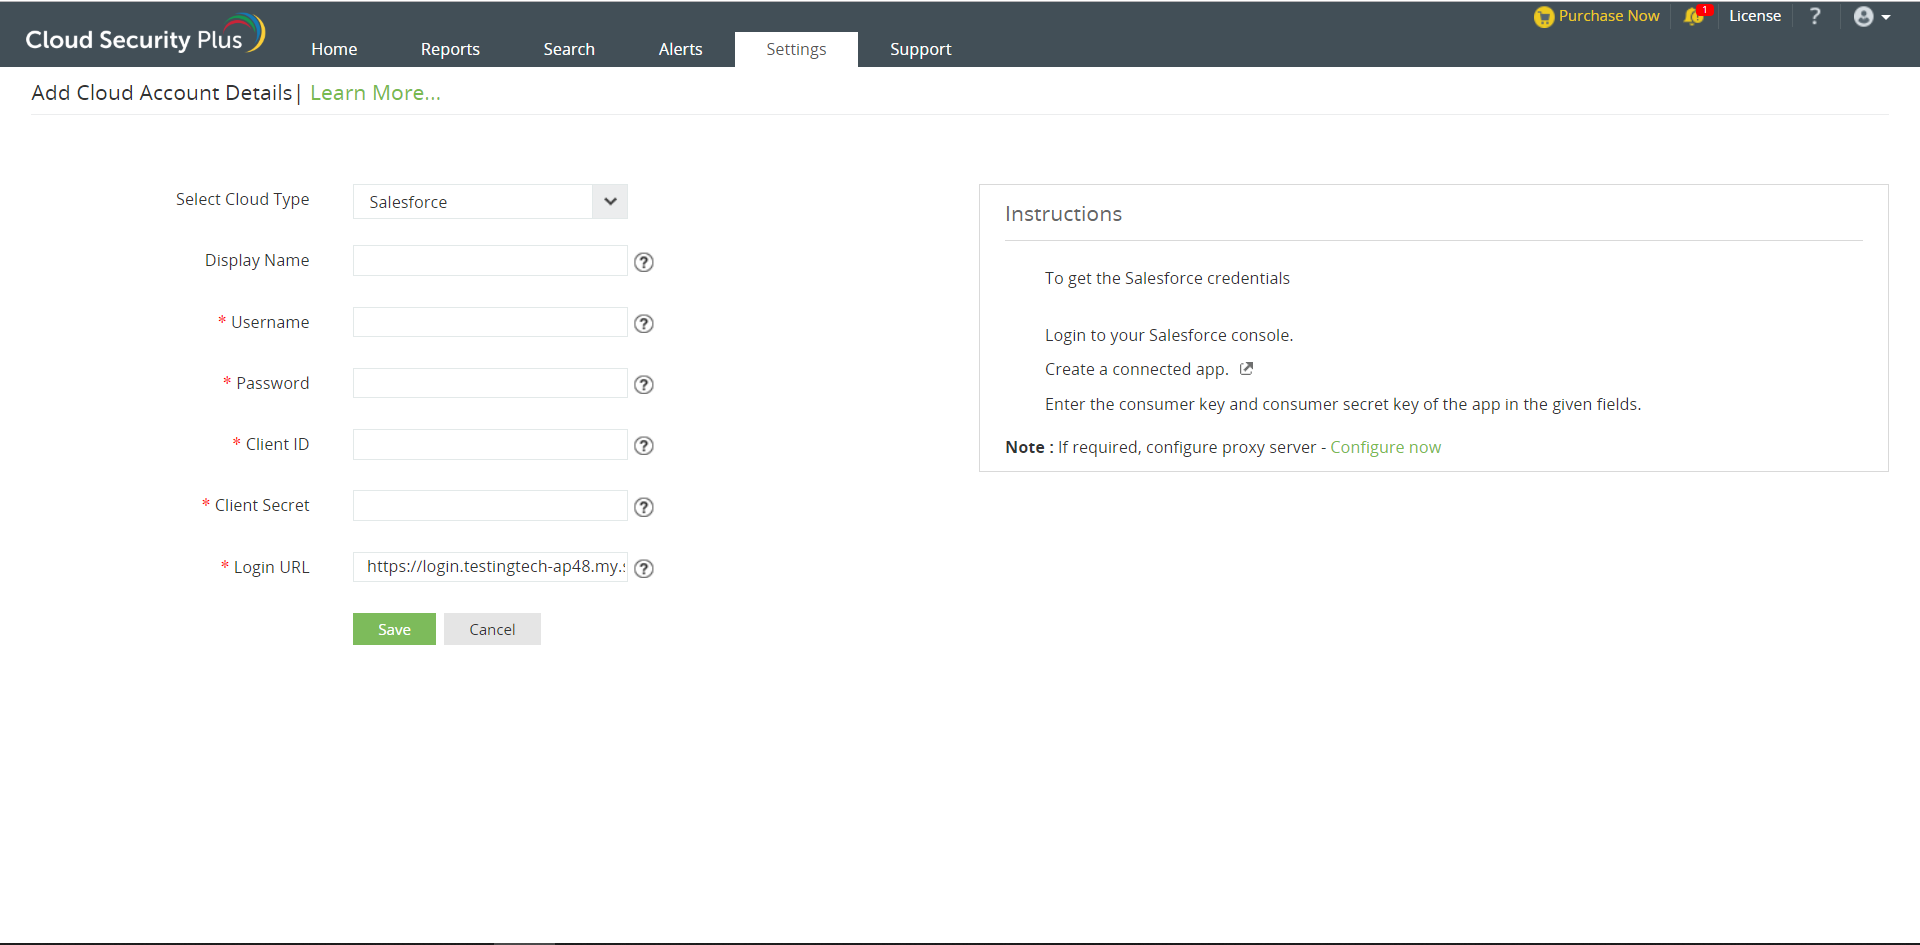
Please make sure you have the Salesforce Event Monitoring add-on license to fetch and analyze Salesforce logs in Cloud Security Plus.
- Navigate to Setup → Build → Create → Apps → Connected Apps.
- Click on New and fill in the Connected App Name, Contact Email, and Callback URL.

- Enable the OAuth Settings and grant full access.
- Click Save. The Connected App will be created. Click Continue to view the Consumer Key and Consumer Secret.

- Navigate to Setup → Administer → Manage Apps → Connected Apps.
- Click on the newly created Connected App. Relax IP restictions under OAuth Policies > IP Relaxation.

- Click Save.
How to get the Salesforce Client URL:
- Open the login Page of Salesforce and copy the login URL.
For instance, https://testingtech-ap48.my.salesforce.com
- Paste the URL in the Login URL field in the format,
https://login.testingtech-ap48.my.salesforce.com. Ensure that login. is added after https:// in the Salesforce login URL..

Enter Salesforce credentials in the Cloud Security Plus console
- Click on the Settings tab
- Select the Cloud Type as Salesforce.
- Enter a Display name in the given box.
- Enter the username, password, client ID (Consumer Key), and client secret (Consumer Secret) and Login URL in the given fields to enable Cloud Security Plus to start collecting logs.