How to modify AD group attributes using PowerShell scripts
The following is a comparison between modifying AD group attributes with Windows PowerShell and ADManager Plus:
Windows PowerShell
Steps to modify AD group attributes for an AD account using PowerShell:
- Identify the domain in which you want to modify the group attributes of user(s)
- Identify the LDAP attributes you need modify.
- Compile the script.
- Execute it in Windows PowerShell.
Sample Windows PowerShell script
Copied
Set-ADGroup -Identity "CN=AccessControl,DC=AppNC" -Description "Access Rights Group" -Passthru
Click to copy entire script
ADManager Plus
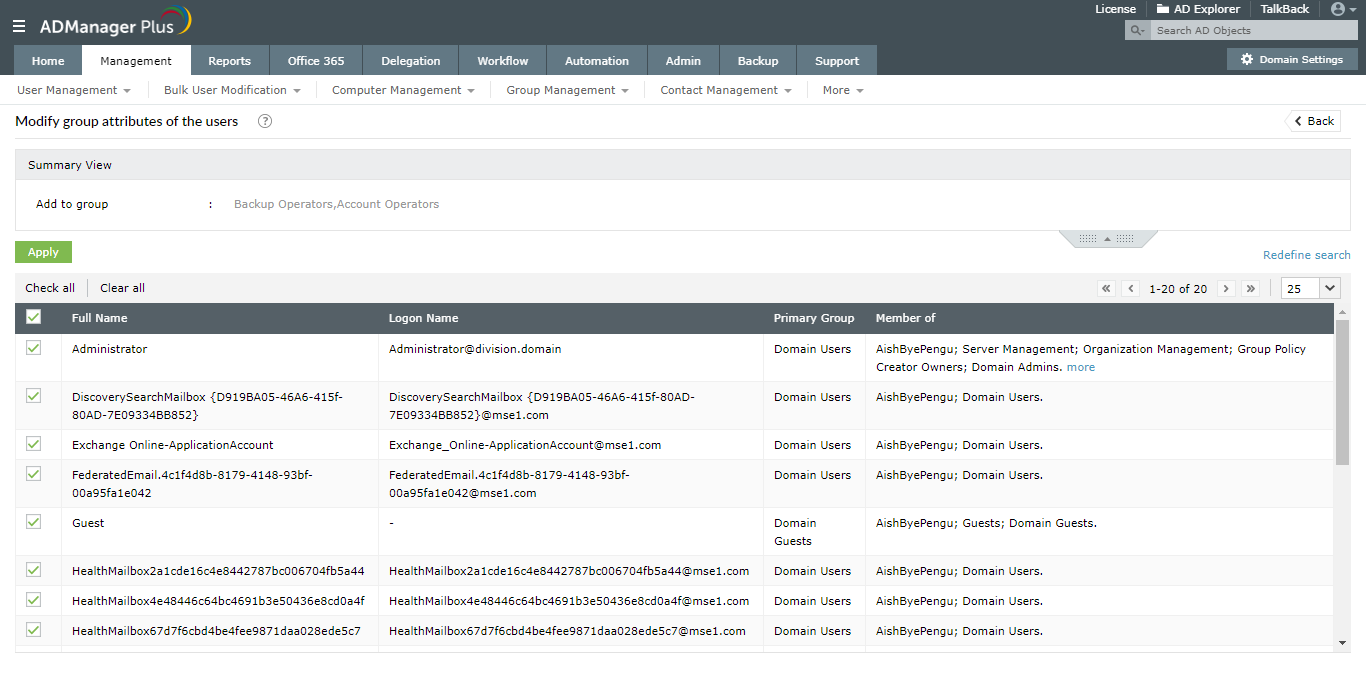
How to modify groups of users:
- Select Group Attributes -> User Management -> Management.
- Select the domain and OU.
- Choose the desired user(s), add/remove preferred groups and select Apply.
Screenshot
» Start 30-day Free Trial
Following are the limitations to modify AD users' groups using native tools like Windows PowerShell:
- We can run this script only from the computers which has Active Directory Domain Services role.
- With each filter and conditions, the script will get longer and complicated.
- Troubleshooting these scripts requires extensive AD and scripting expertise
ADManager Plus can help you modify AD users' groups in bulk with just a CSV file in a simple and intuitively designed UI.