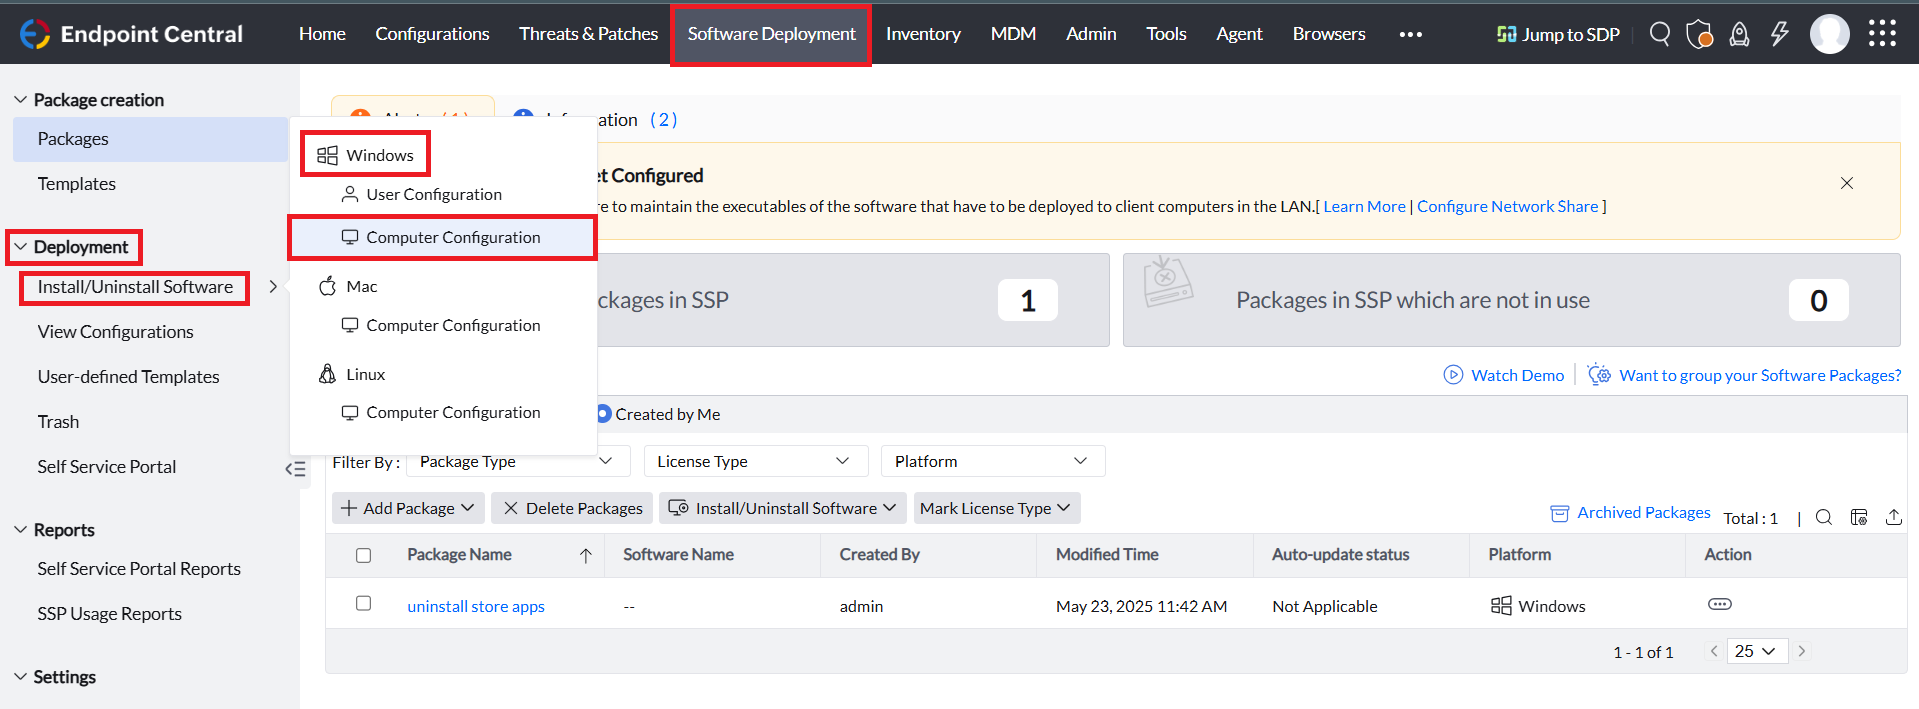

Software deployment is the process of distributing the software to the endpoints in your network from a central location. For deploying a Windows software, creating a software package is essential. Using Endpoint Central, you can create Windows packages manually or using the predefined software Templates.
After creating the software package, the next step is to proceed with the software deployment.
Follow the below steps to install or uninstall Windows Computer based software.


Provide a Name and Description for the configuration.

Define the configuration based on your requirement to install or uninstall software to the Windows computers in your network.
Under Install/Uninstall Software, define the Package Settings as,
For Software Installation:
Select the Package Type as Install and select the installation package you want to deploy from the Package Name field's drop-down menu.
For Software Uninstallation:
Select the Package Type as Uninstall and select the uninstallation package you want to deploy from the Package Name field's drop-down menu.

While deploying the software to target Windows computers, certain users might require elevated permissions to deploy the software. Thus, based on your requirement after defining the Package Settings, specify the user account using which the software needs to be installed or uninstalled.
In the Install As field, select the following options based on your requirement,
System User: The software will be installed using the default System User account, which has the highest privilege. This user account has full access to make system level changes.
User Interaction with the Installation/Uninstallation Window: If the software that you are trying to deploy requires end-user interaction or it cannot be deployed silently, click on the Allow User to interact with the Installation/Uninstallation check box.
Run As User: When a user-based software is deployed to the target computer in the computer session, it is recommended to deploy the software using Run As User. The software gets deployed to the target computers using the configured Domain user account. It is recommended to configure the Domain Admin credentials in the Credential Manager.
NOTE: It is recommended to deploy computer software in the computer session using System User account's privileges and user software in the user session using the Run As User option.
Add More Packages: To deploy multiple packages in the same deployment, click on Add More Packages to add your required packages.
Deployment Policies are a set of customized policies configured to deploy the software based on the enterprise needs. You can configure the deployment window to schedule when the deployment should take place, configure the reboot or shutdown policy, configure users to skip the deployment or reboot, and configure the notification message that needs to be conveyed to the end user when the deployment takes place.

Endpoint Central comes with a set of predefined policies that you can utilize by choosing the policies from the drop-down menu in the Apply Deployment Policies field under.

You can also create your custom Deployment Policy by selecting the Create/Modify/Save As Policy option.
To learn more about deployment policies refer to this link.

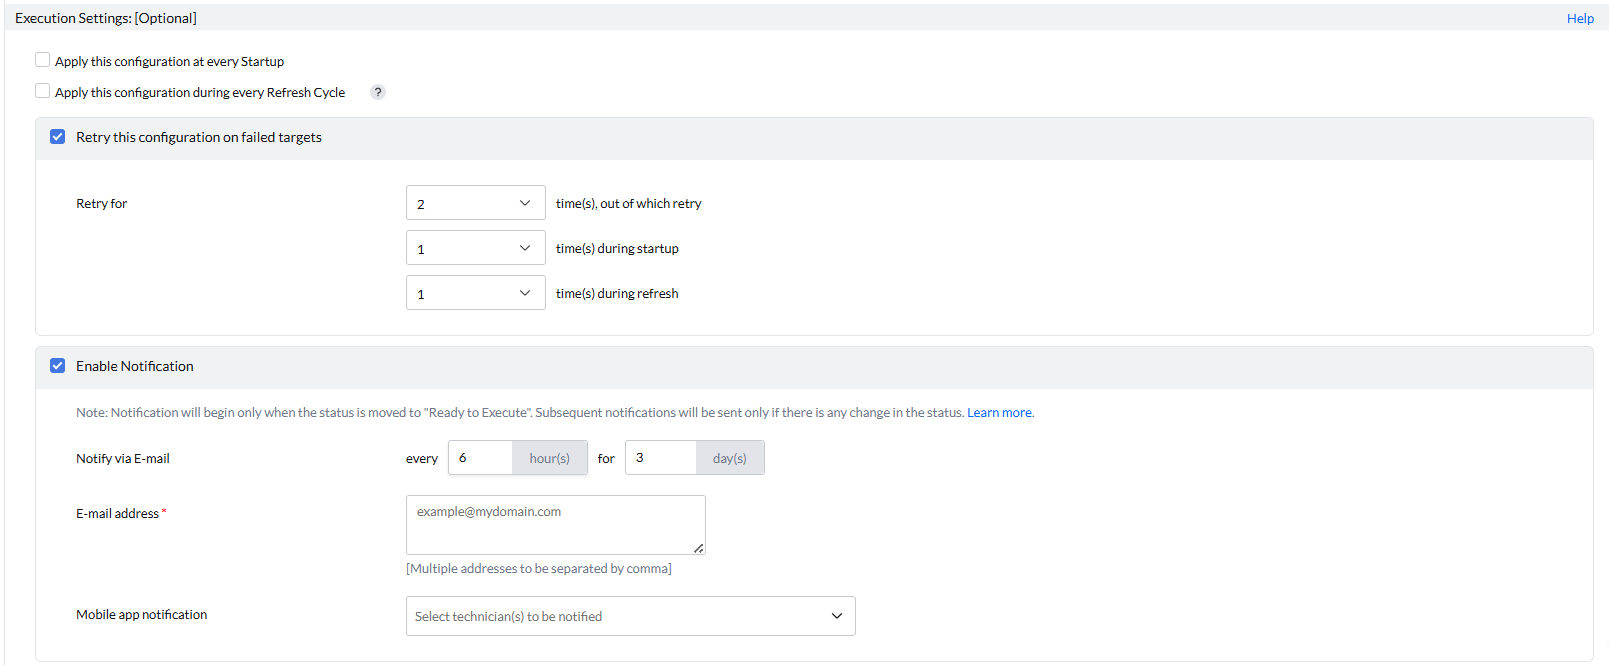
Configuring the Execution Settings is optional, thus, based on your requirement, configure them. The Execution settings include:
To learn more about the Execution Settings, refer to this link

Under the Scheduler Settings, you can configure the below based on your requirement:
Select Deploy to deploy the configuration during the 90-minute Refresh Cycle or System Start-up or during the deployment window configured in the Deployment Policy.
Select Deploy Immediately to deploy the software configuration to the target computers immediately.
Kindly note that while deploying the software immediately to the target computers in a Remote Office with Distribution Server(DS), the software will be deployed only after the files are replicated to the DS based on the Replication Policy configured. To learn more about the deployment flow in a Remote Office with Distribution Server, refer to this link.
The created Software Deployment configuration can be saved as,
Kindly note that the User Defined Templates can be used in case of creating a deployment template that can be utilized by all the users while deploying a group of enterprise specific software that are required to be deployed in the computers.
The created Software Deployment configuration can be modified based on your requirement.
Follow the steps below to modify the configuration:

The created Software Deployment configuration can be moved to trash when the configuration is no longer required or can be moved to trash based on your requirement.
To move the configuration to trash, follow the steps below:

Kindly note that when a configuration is moved to trash, the configuration will still work fine, and the configuration will be applied to the targets that are in progress or if the retry is in progress. If you want to completely stop the configuration from being deployed, suspend the configuration and then move it to trash.
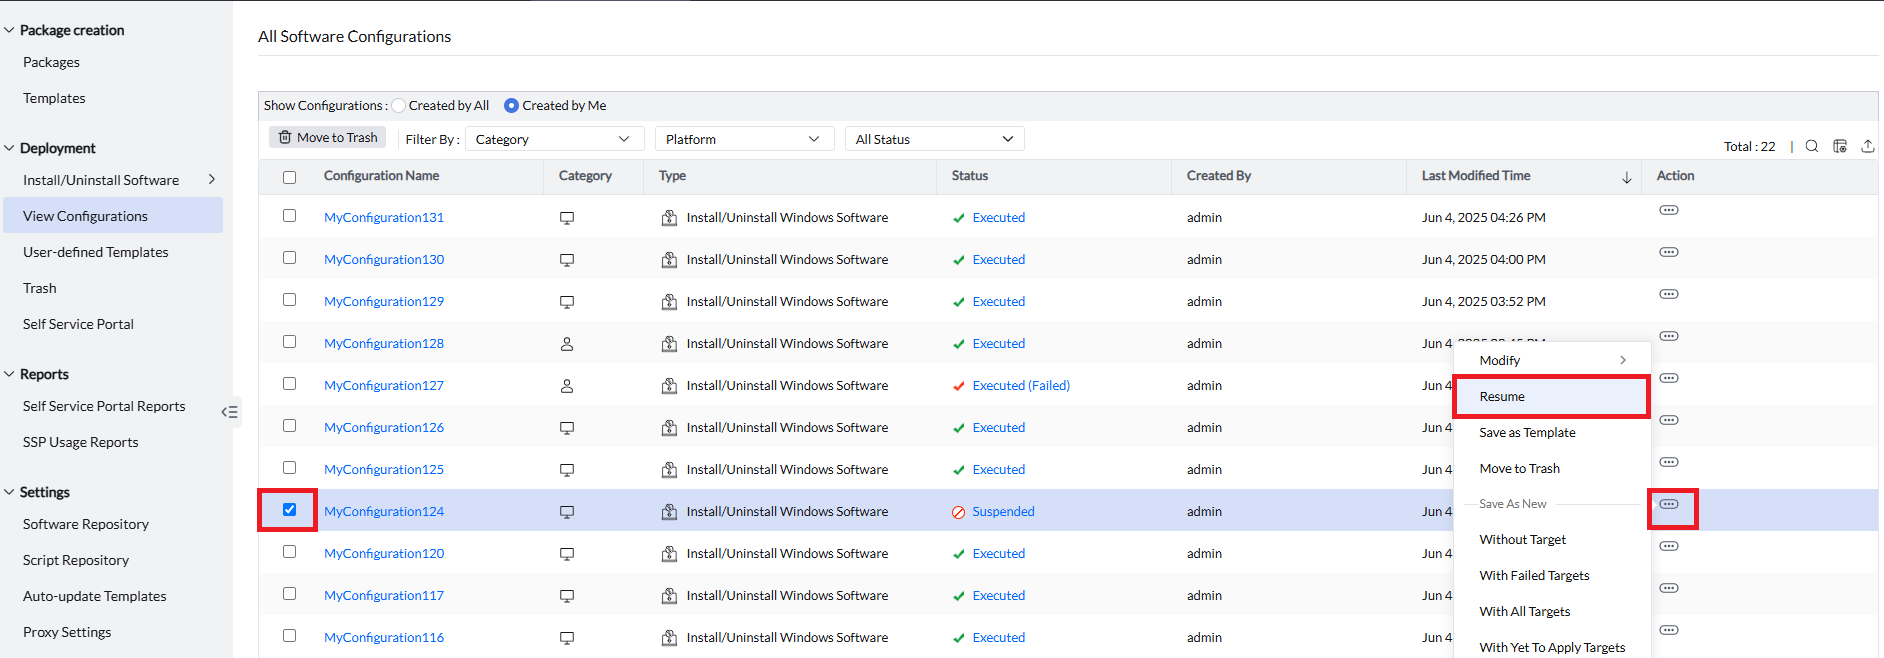
The created Software Deployment configuration for certain reasons needs to be stopped from being deployed to the target computers, then those configurations can be suspended.
To suspend the configuration, follow the steps below:

You can resume the suspended Software Deployment configuration. To resume the configuration, follow the steps below:
