Setting up Managed Google Play
To utilize Managed Google Play features and configurations, you have to setup Managed Google Play in MDM. Managed Google Play can be configured using either a Google Workspace(G Suite) account or a Google account. The differences between these methods are explained below:
| PARAMETER | USING G SUITE(also known as Google Workspace) | WITHOUT G SUITE |
|---|---|---|
| Admin account to be used for configuring Managed Google Play | G Suite account used by the organization. | Any Google account |
| User account creation | Created by the IT Administrator, as a part of G suite | Automatic creation of accounts |
| User account addition | Requisite account to be manually added to the device | Account gets automatically added to the device |
| User account binding | Bound to the specific user and can be reused in other devices | Bound to the specific device and cannot be reused |
| Association of configurations | Associated to the account | Associated to the device |
| Ideally used in | Organizations extensively using G Suite, having employees who use multiple devices. | Organizations without G Suite, having employees who use corporate devices |
| Example Scenario | Users already have device(s) with their G Suite account added. | Organizations have given corporate devices to employees and want to automatically add Google accounts to the devices and prevent users from adding their personal Google account. |
Managed Google Play supported devices
| Versions | Samsung | Non-Samsung |
|---|---|---|
| less than 5.0 |  |
legacy enrolled devices. |
| less than 7.0 | device owner and profile owner and legacy (legacy is not supported, if the device can be managed as a device owner or profile owner). | device owner and profile owner. |
| less than 10.0 | device owner, profile owner and legacy. | device owner and profile owner. |
| greater than 10.0 | device owner and profile owner only. | device owner and profile owner. |
Using Google Workspace(G Suite)
To configure Android for Work in MDM, you need the following:
- Domain Name: The domain with which you've signed up for Google Workspace(G Suite) .
- Domain Admin Account: The account with administrator privileges to be used for integration. Click here to identify your domain admin account.
- ESA JSON file: A JSON file generated by Google, which contains the MDM service details and is to be uploaded here to complete the integration. Click here to know the steps to obtain the JSON file.
- Token: The EMM token is required when you integrate third-party EMM provider with Android for Work. Click here to know the steps to obtain an EMM token.
- Google Workspace(G Suite) for Education cannot be integrated with MDM.
- It is recommended to assign different G Suite accounts to devices for improved app management but a single Gsuite account can be used for upto 10 devices. If the G Suite account is assigned to more than 10 devices, the apps cannot be distributed to devices
- Adding different domains in G Suite can result in the device activation failing.
- Google Workspace account will be used for provisioning all Managed Google Play-based features and configurations to the managed devices.
Identifying the domain admin account
To complete the Managed Google Play integration with MDM, you need to provide a few details, one among which is your Domain Admin Account. To know the same, follow the steps given below:
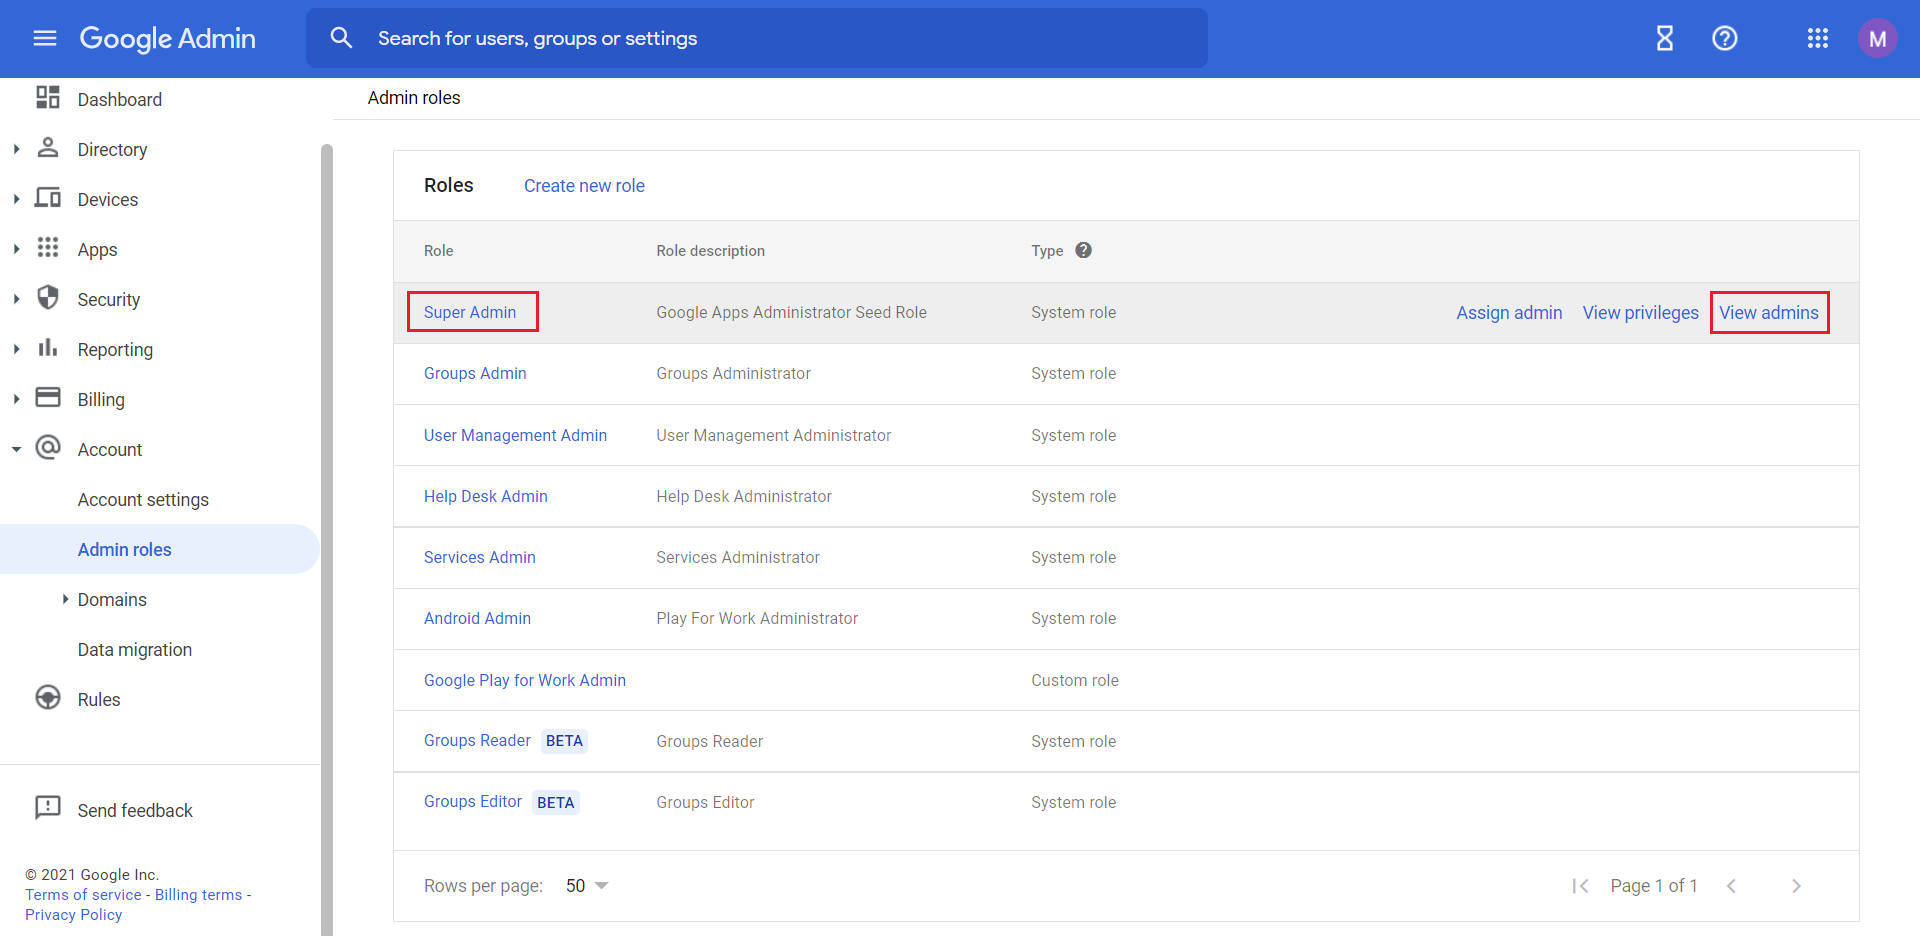
- Login to Google Admin Console and select Admin Roles from the menu.
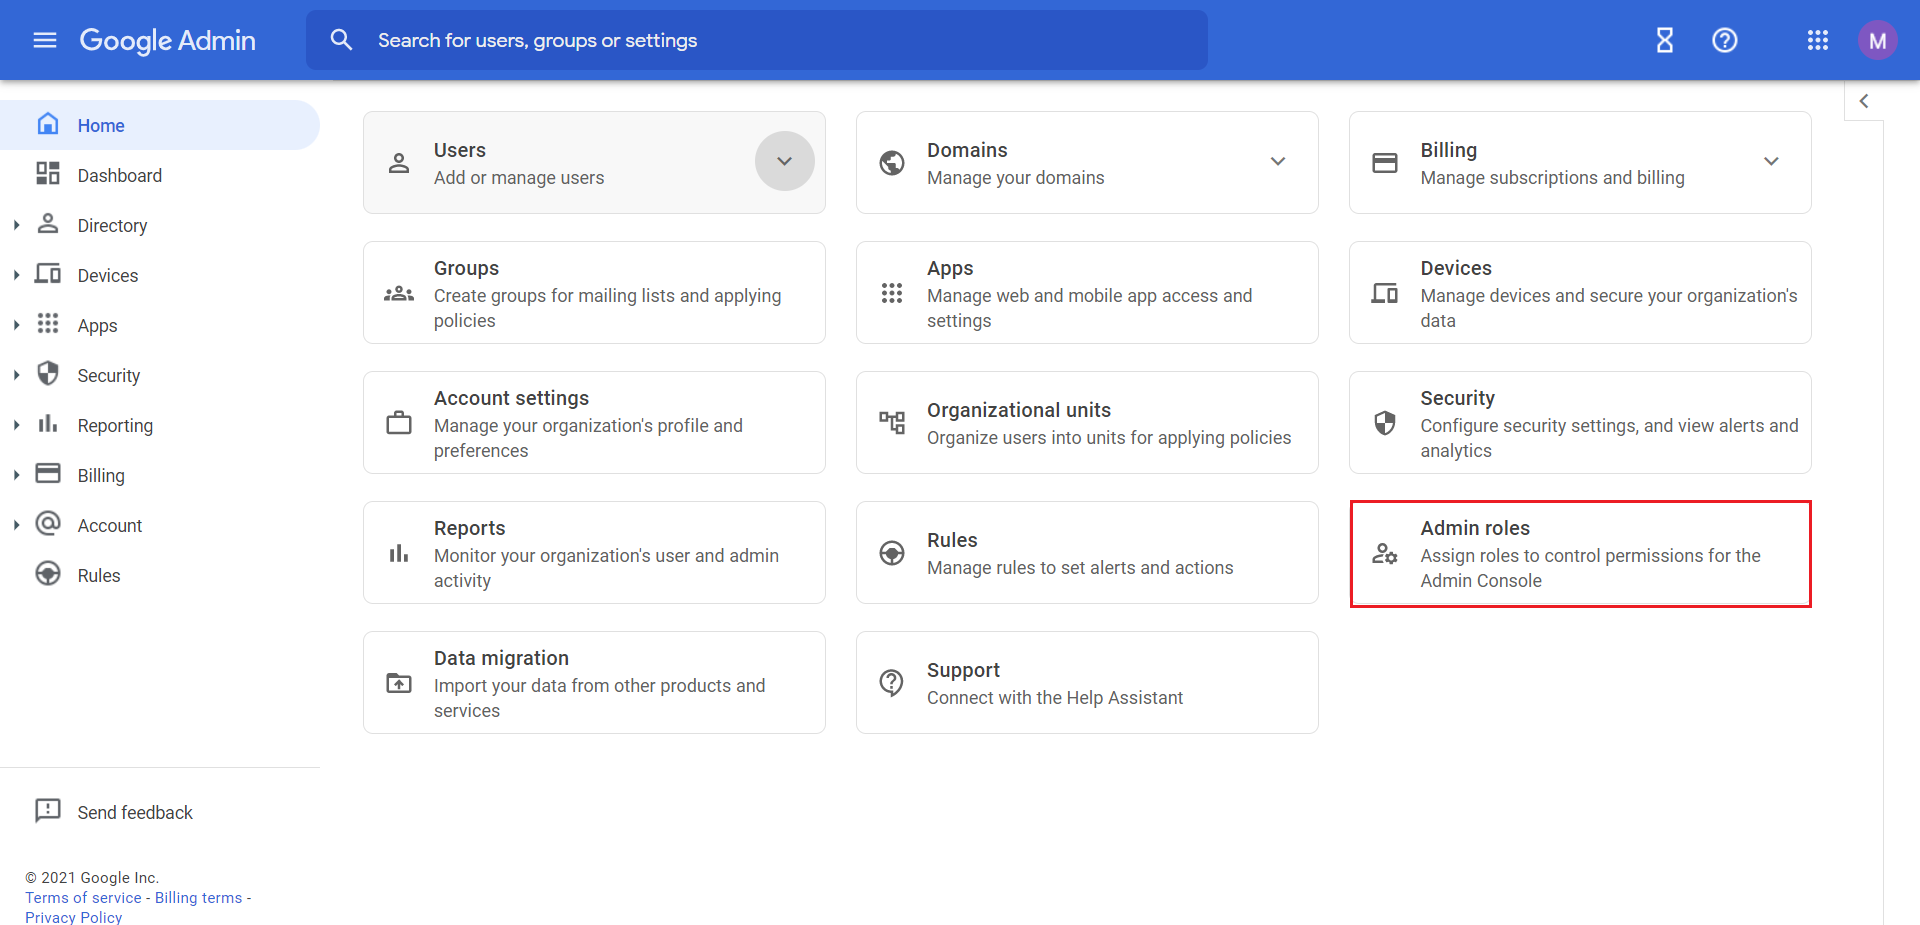
- Hover over Super Admin and click on View admins. Any account listed here can be used as a Domain Admin Account in MDM.
Obtaining the JSON file
- Login to Google Developers Console and click on Create Project
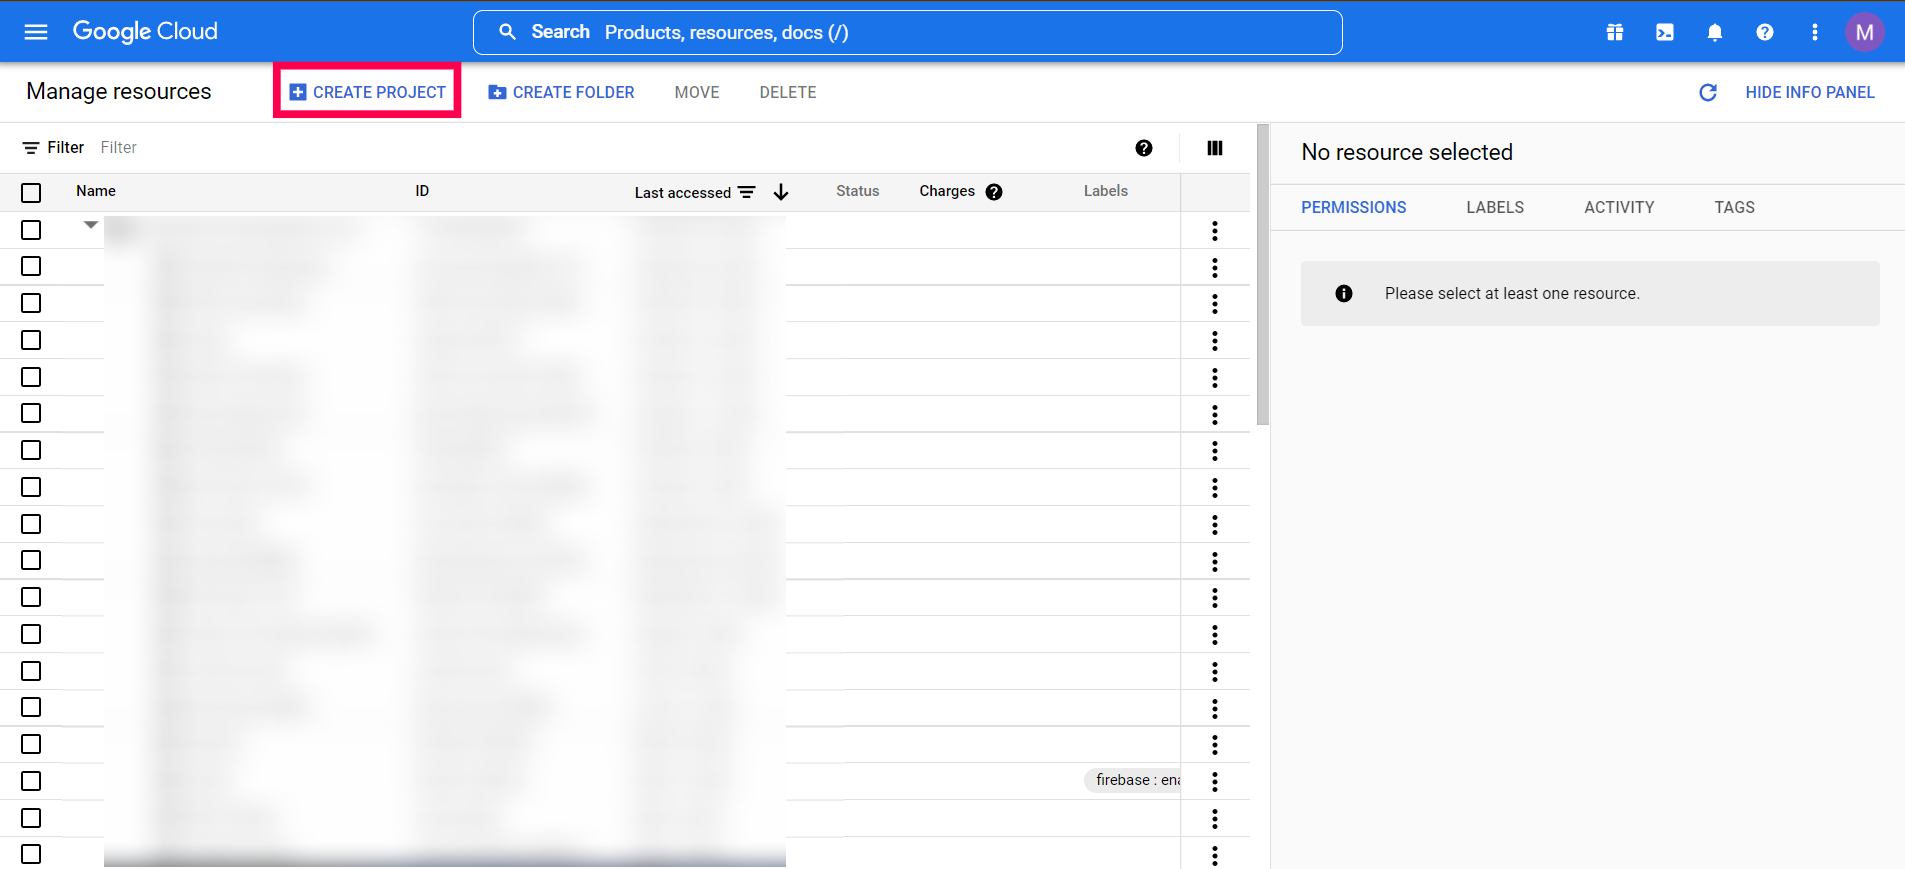
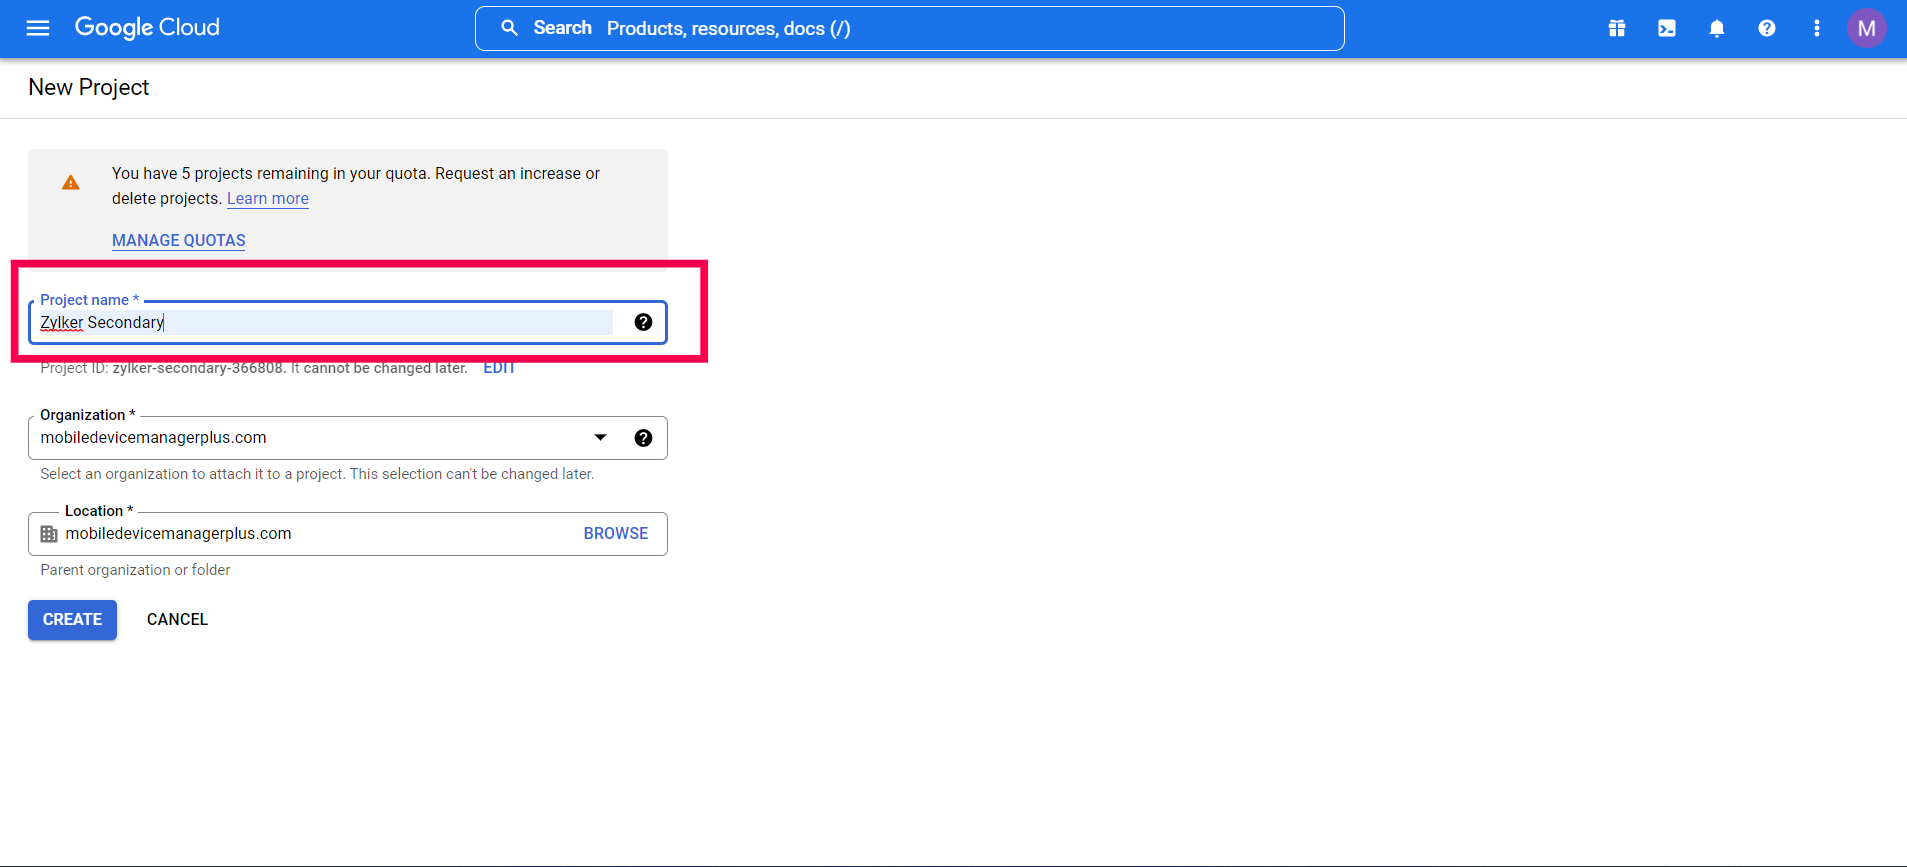
- Create a project by providing a Project Name and then click on Create.
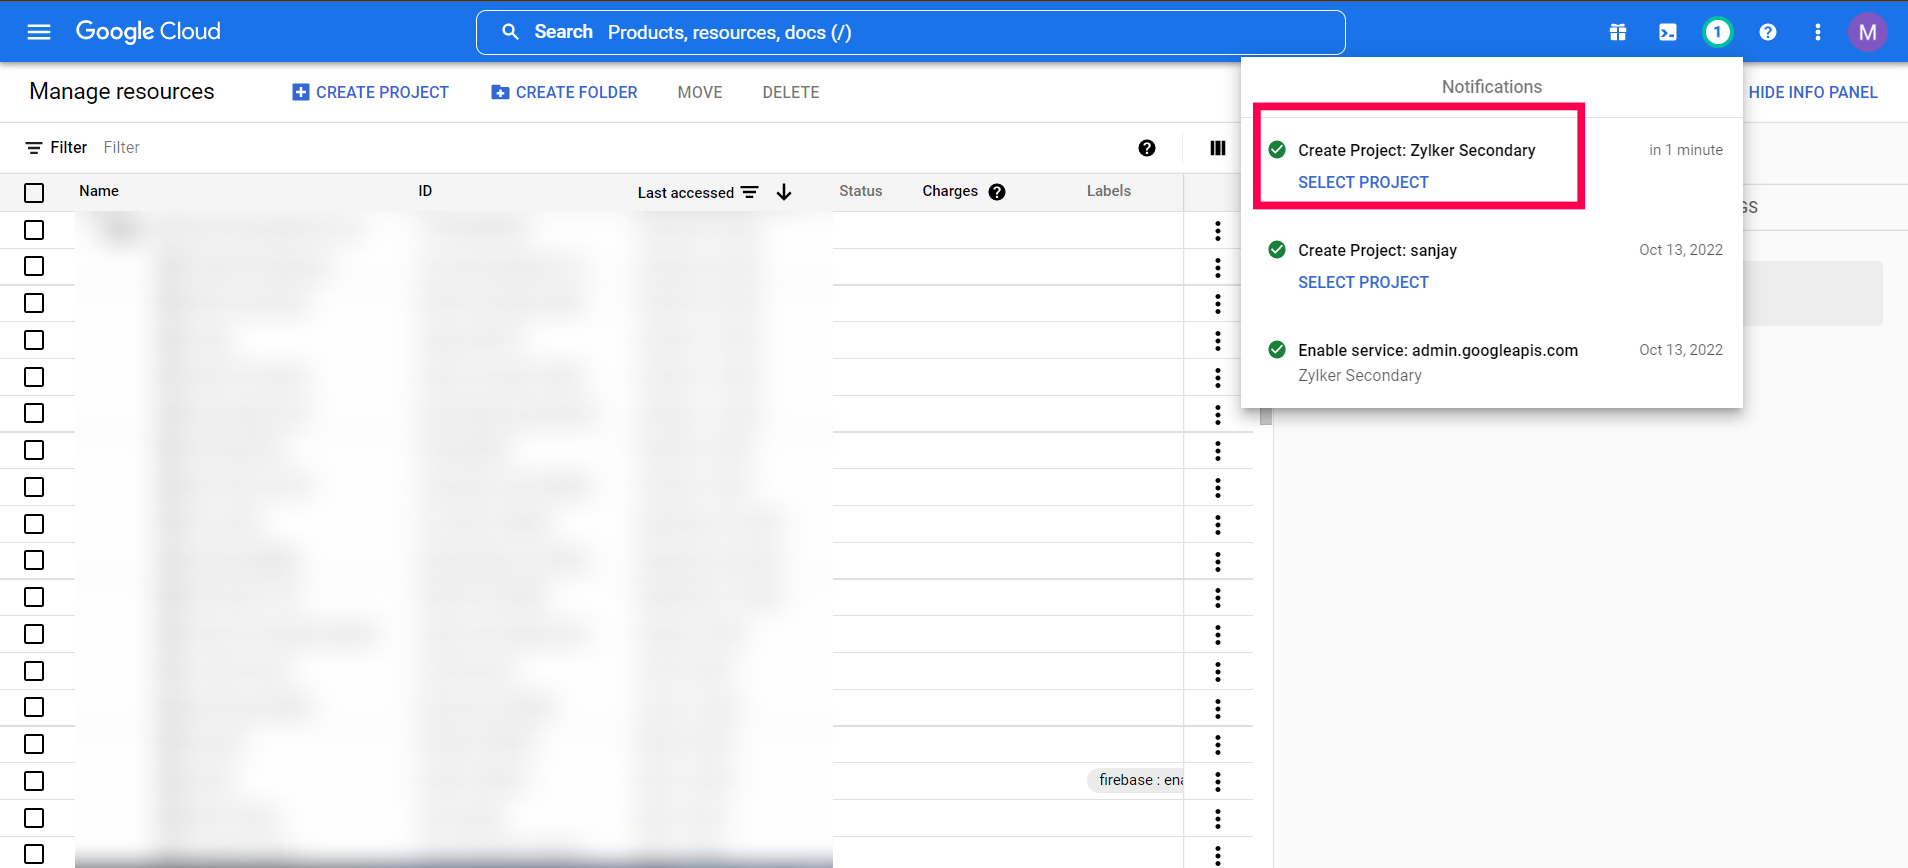
- Once the project is created, click on the Notification icon and click on the project creation notification message.
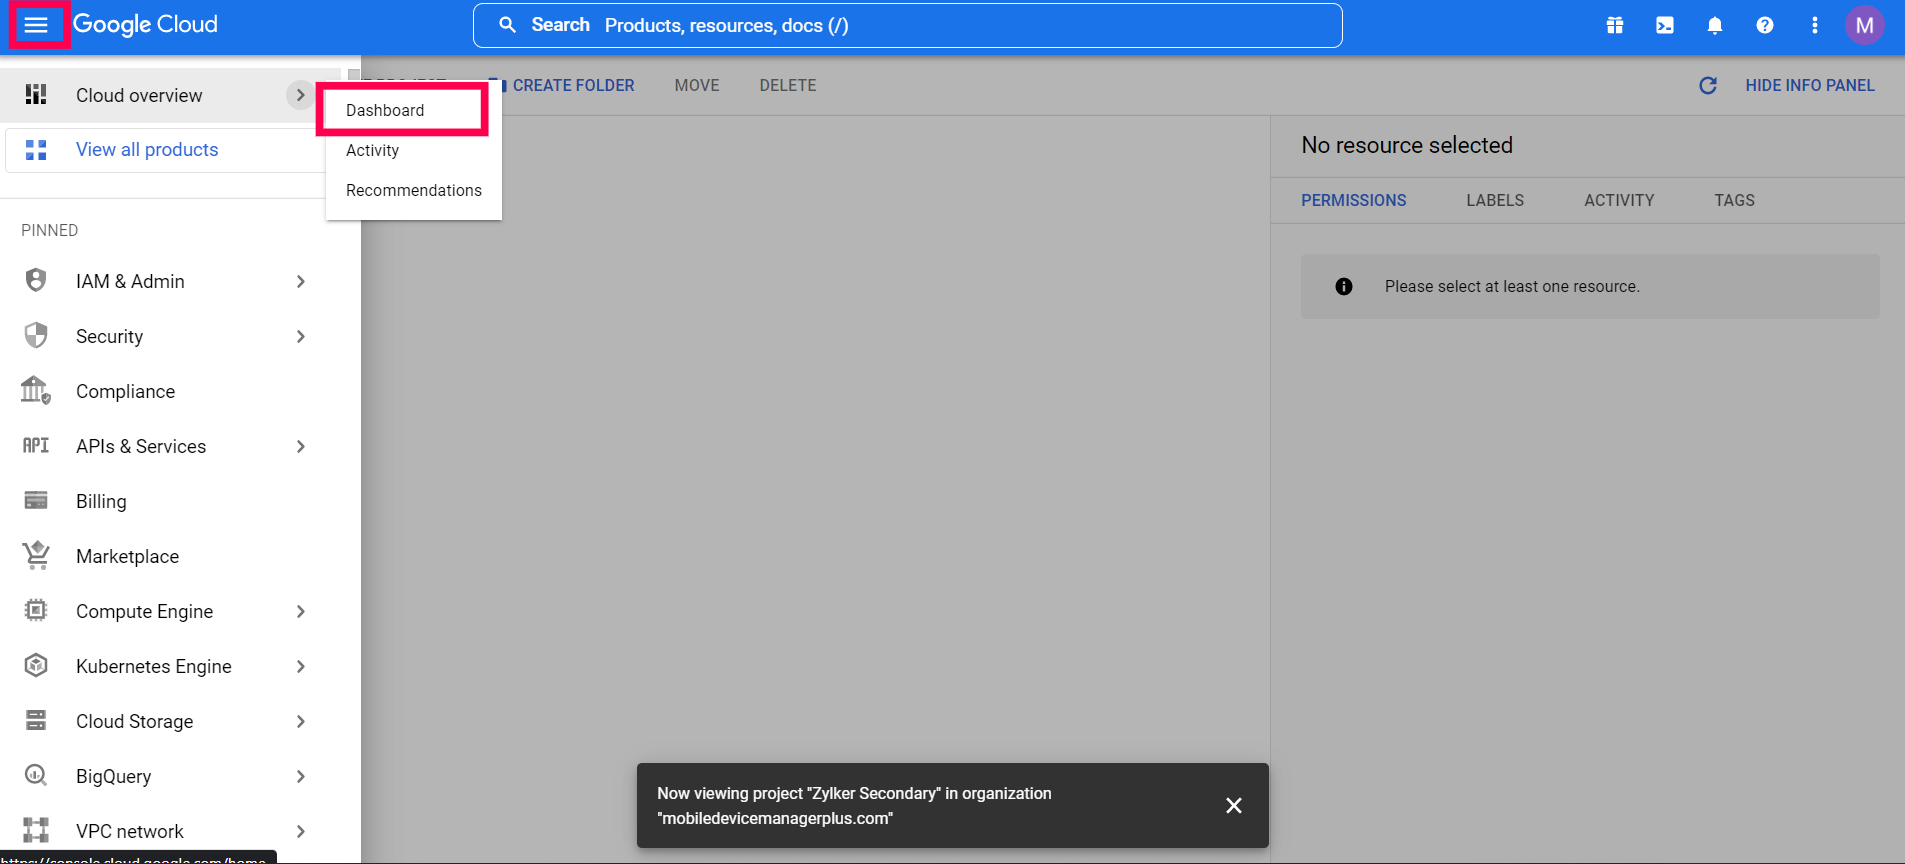
- Click on the hamburger icon on the top left corner, select Cloud Overview->Dashboard.
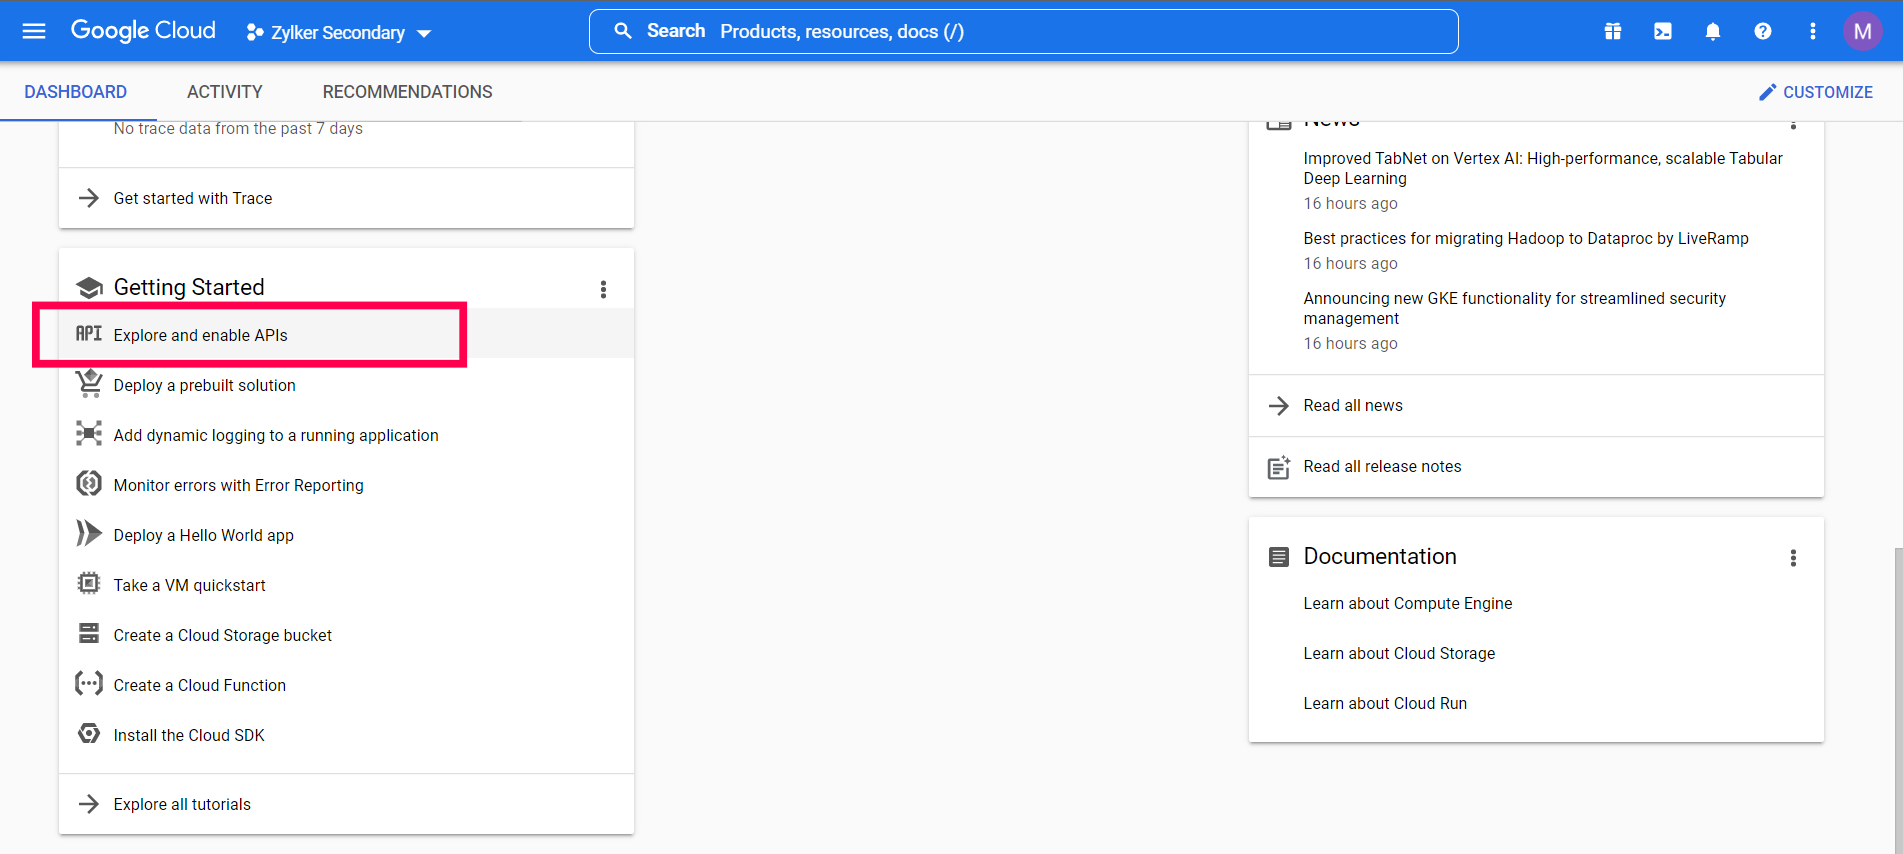
- In the Dashboard, under Getting Started, click on Explore and enable APIs
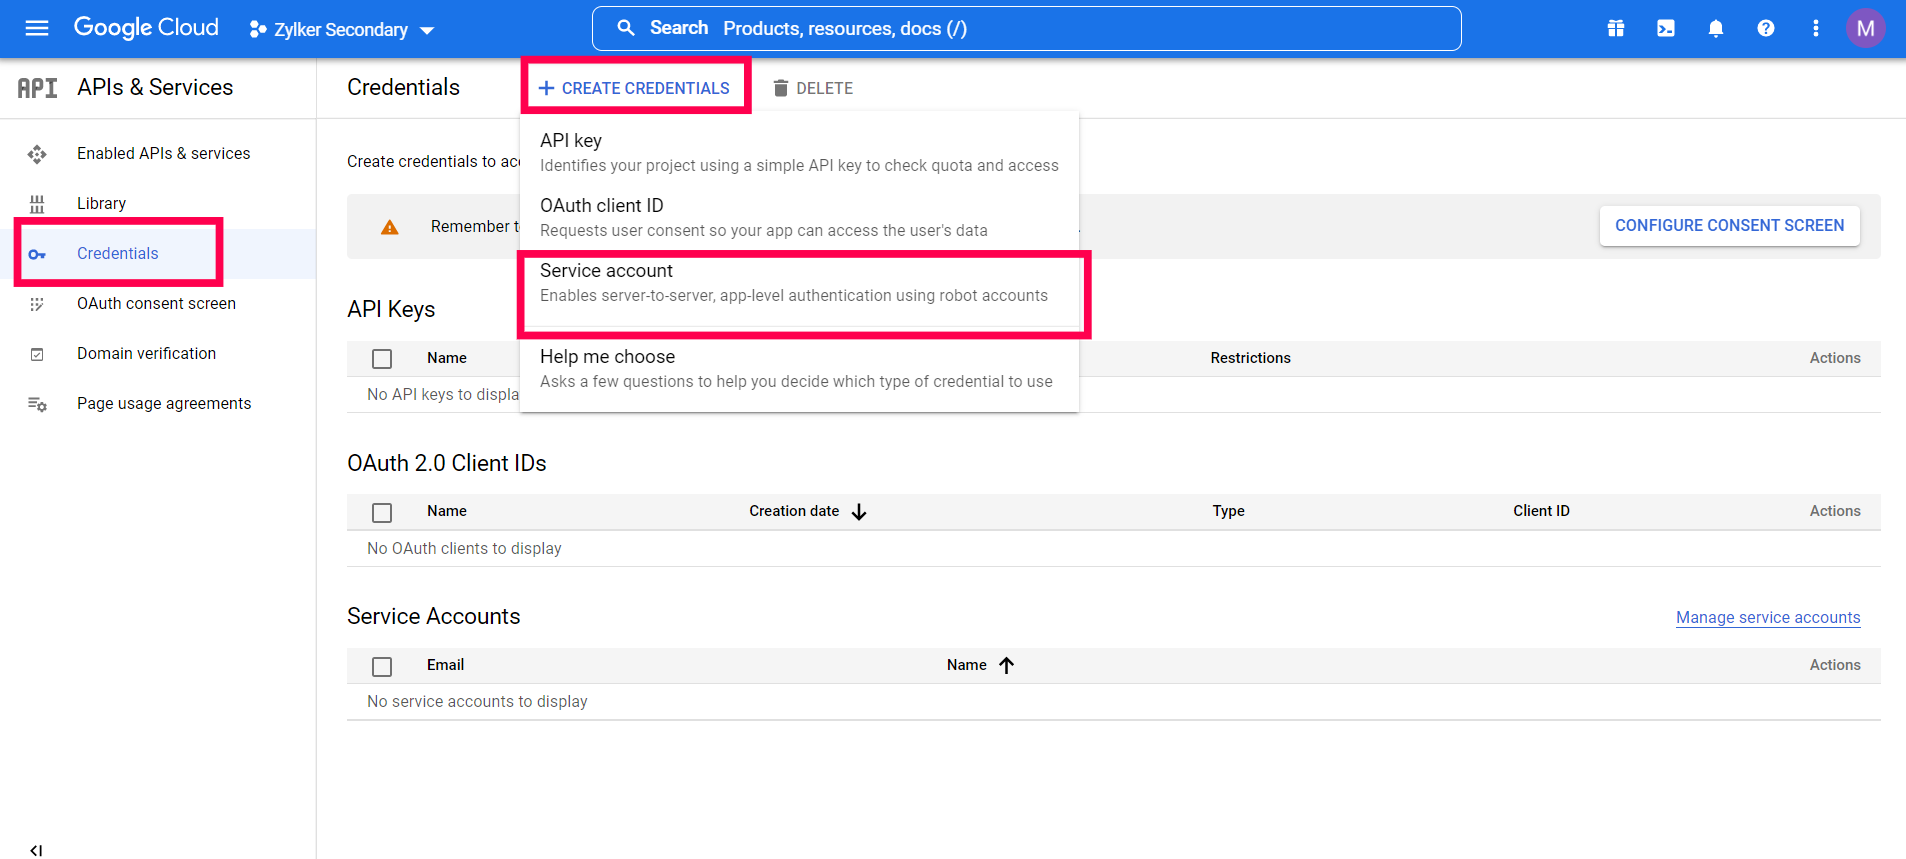
- Click on the Credentials(key icon ) present on the left. Then click on Create Credentials and select Service Account Key from the dropdown.
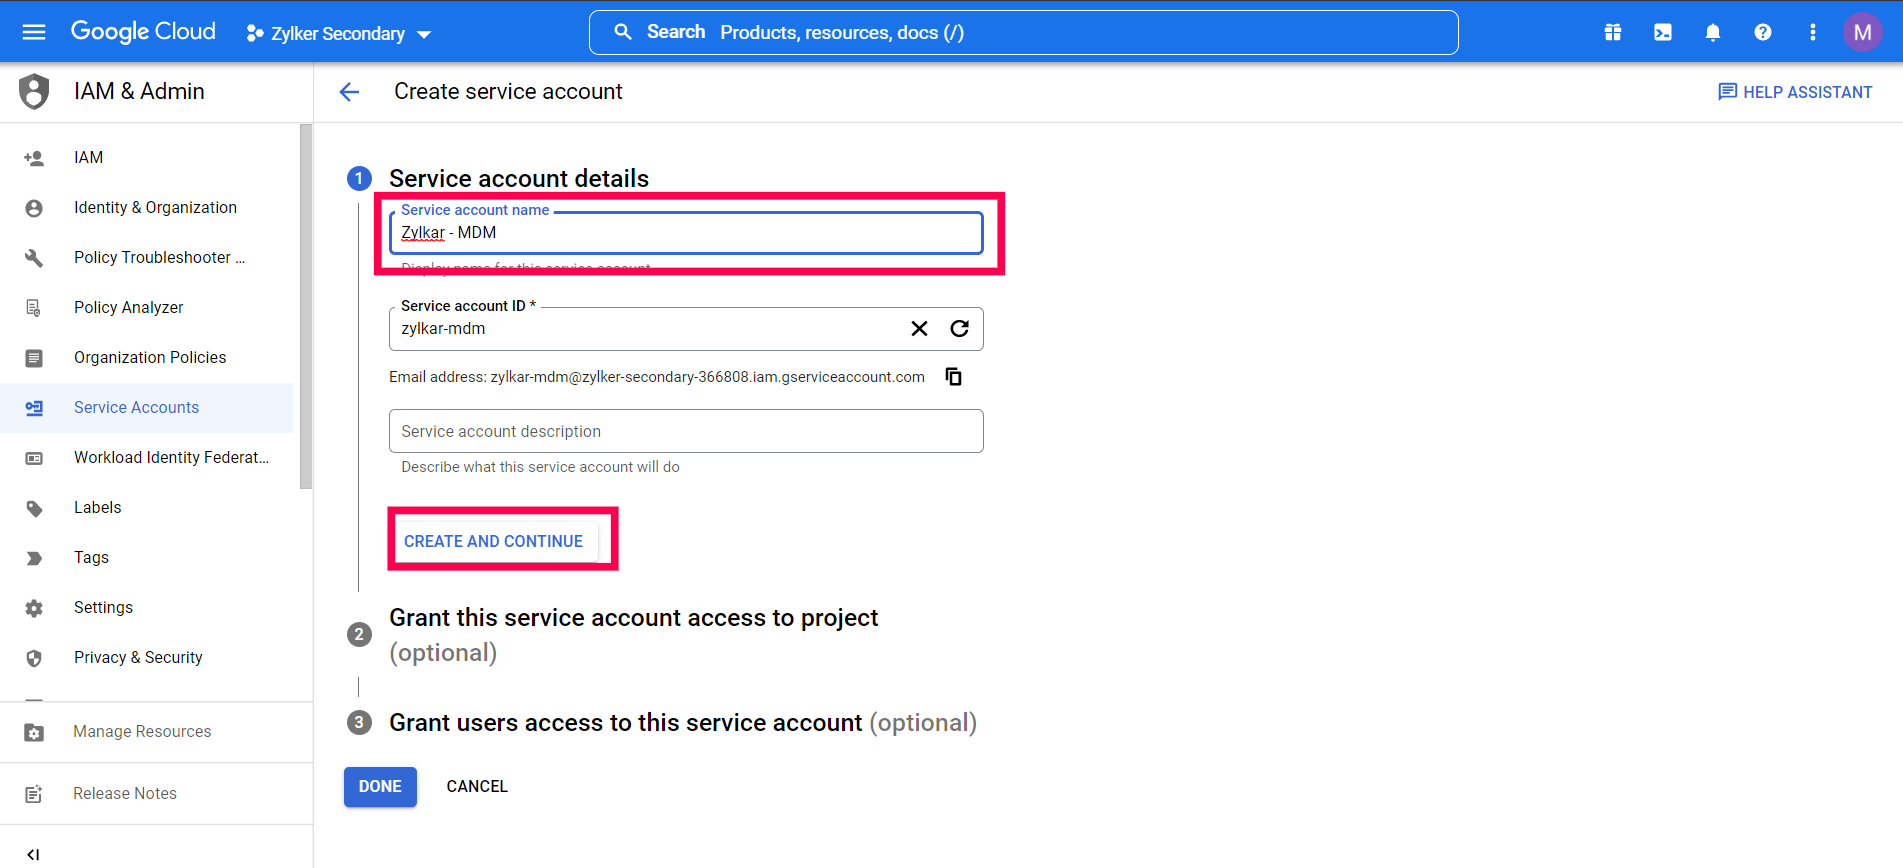
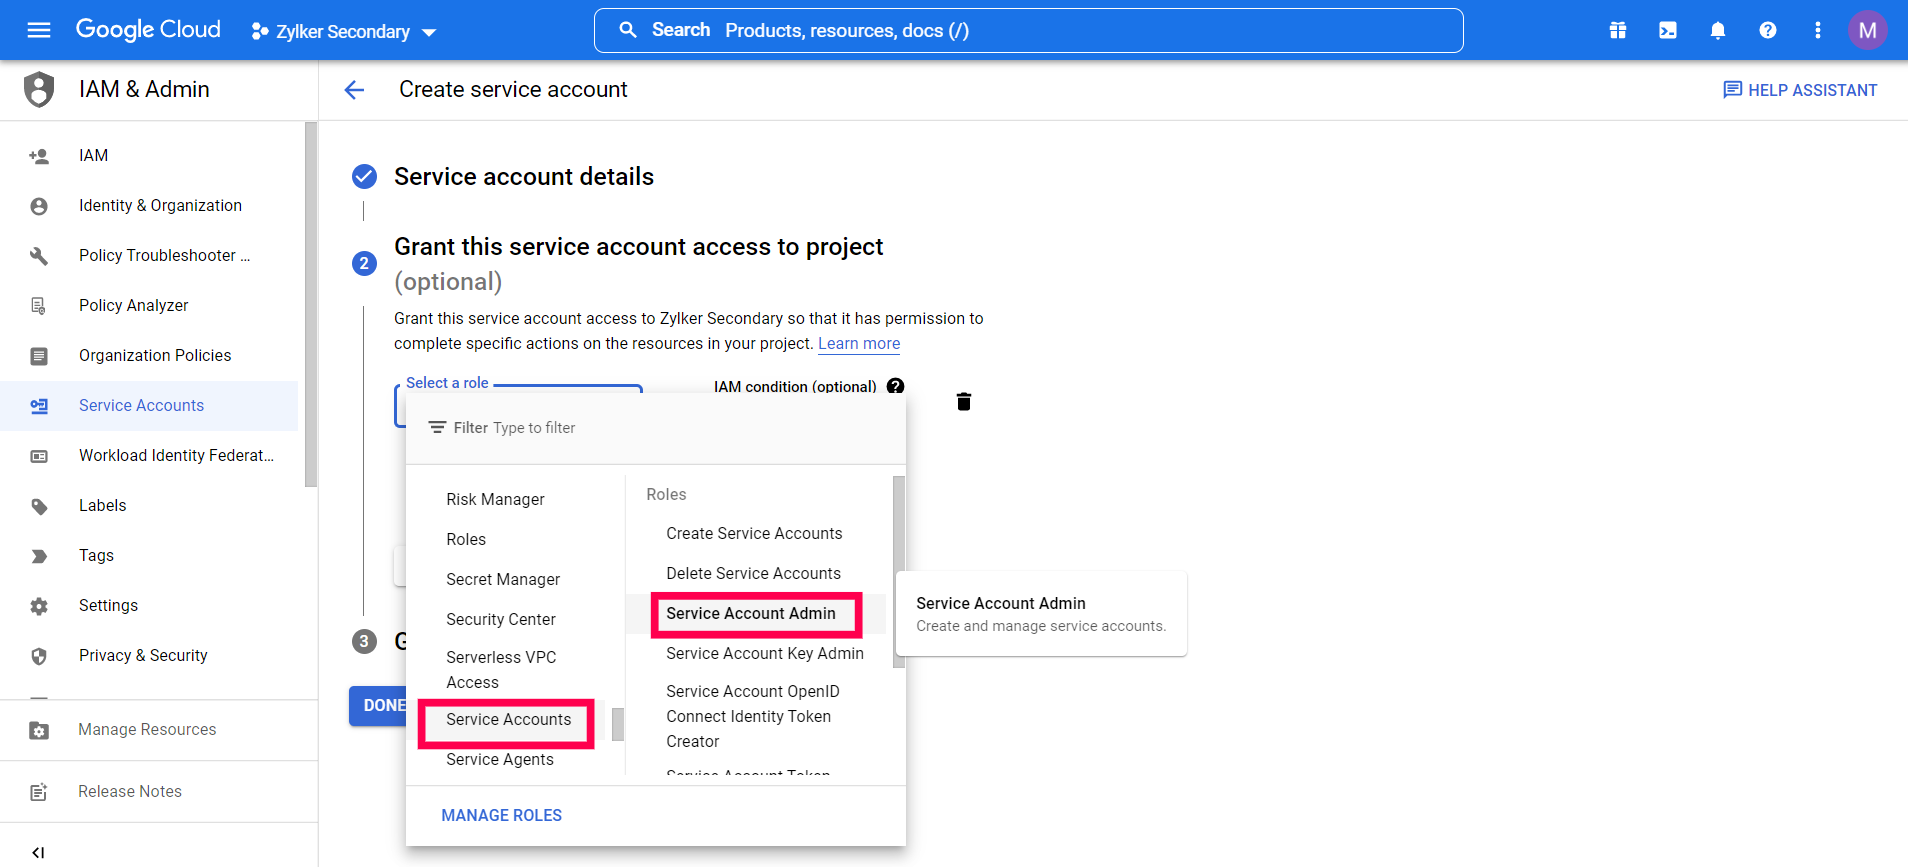
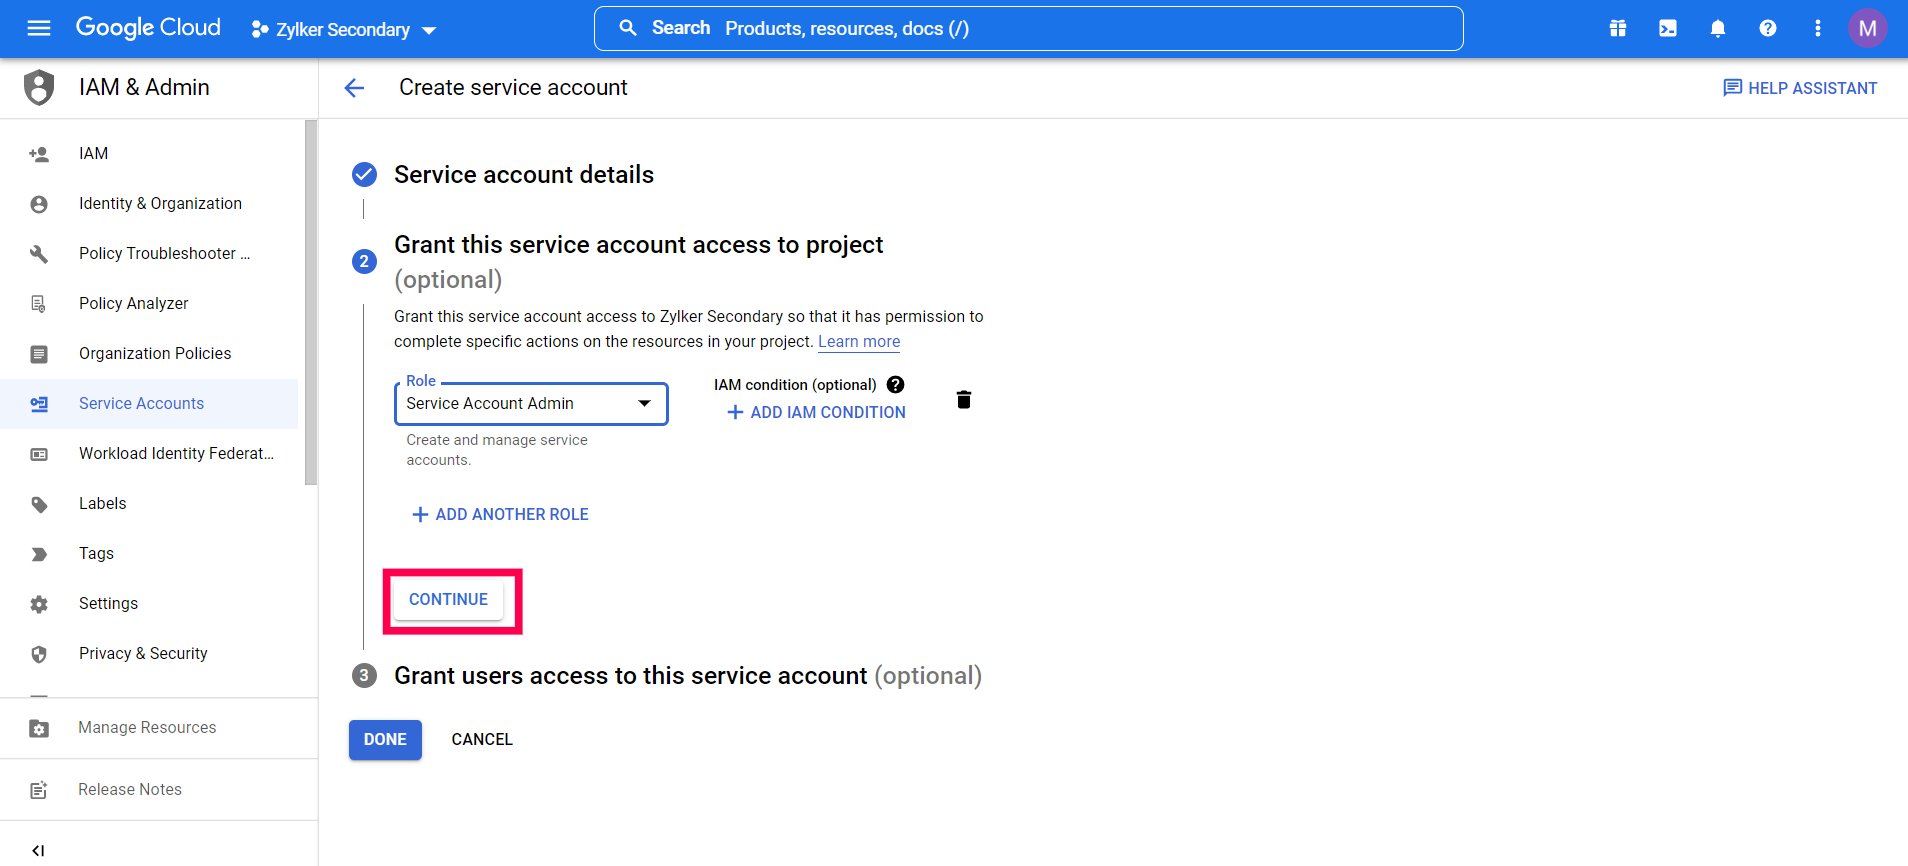
- Click on the dropdown below Service Account and select New Service Account. Provide a Service Account name and click on Save and Continue and for Select a role, select Service Account from the dropdown and select Service Account Admin.

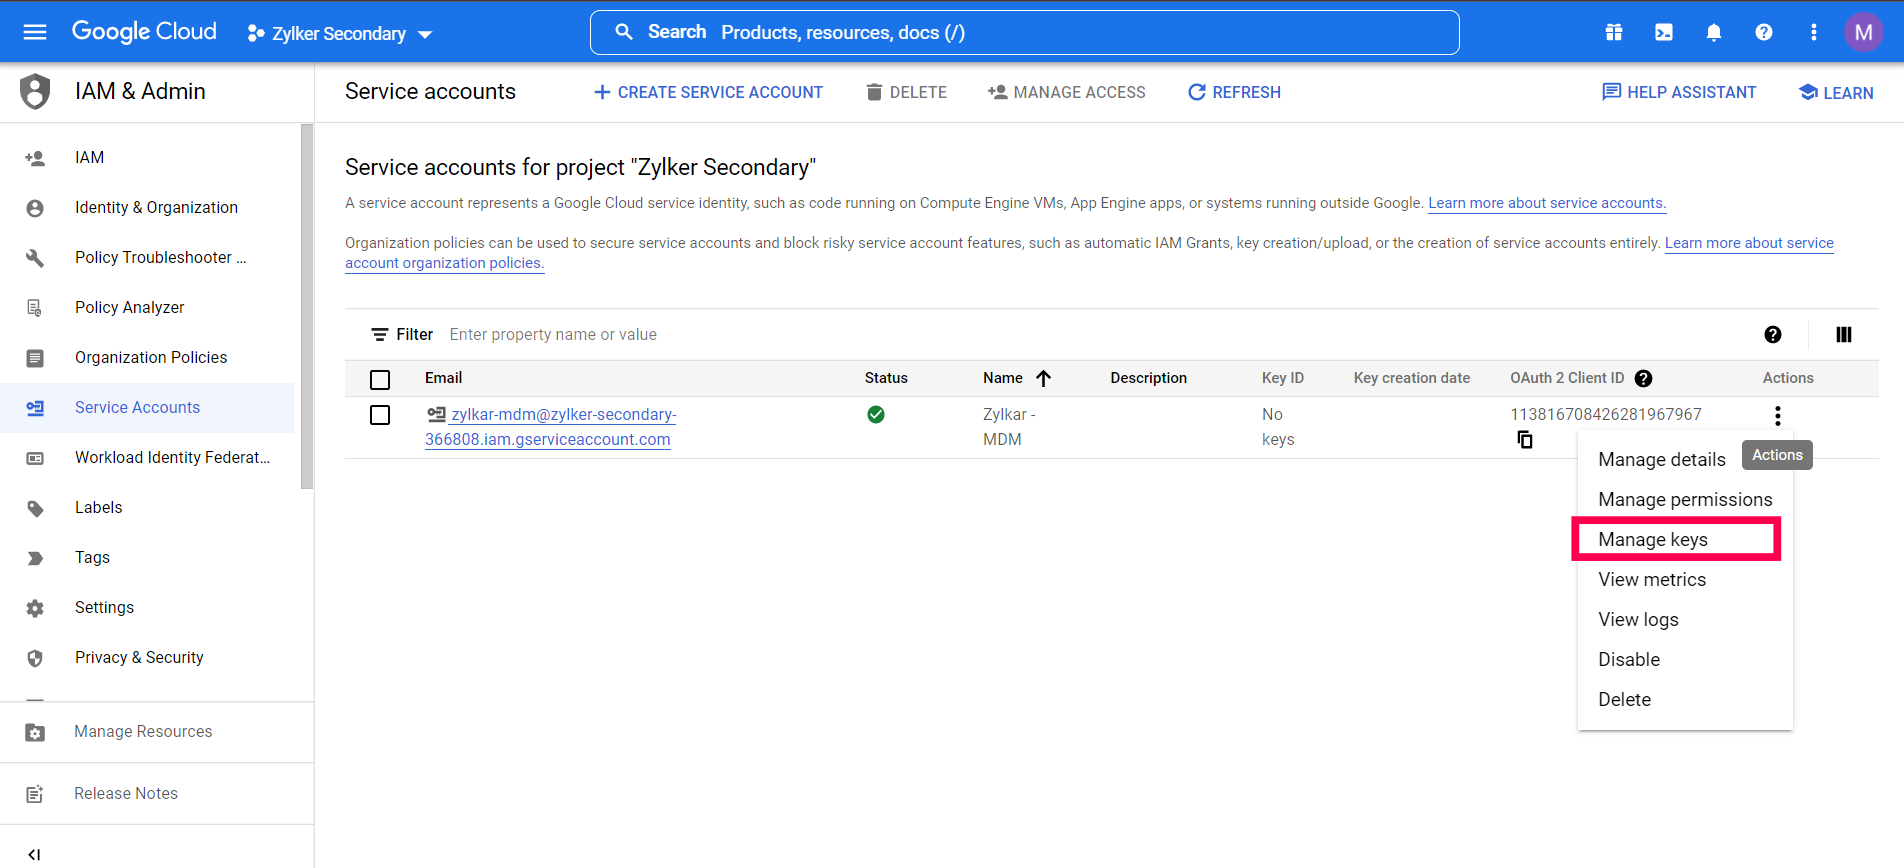
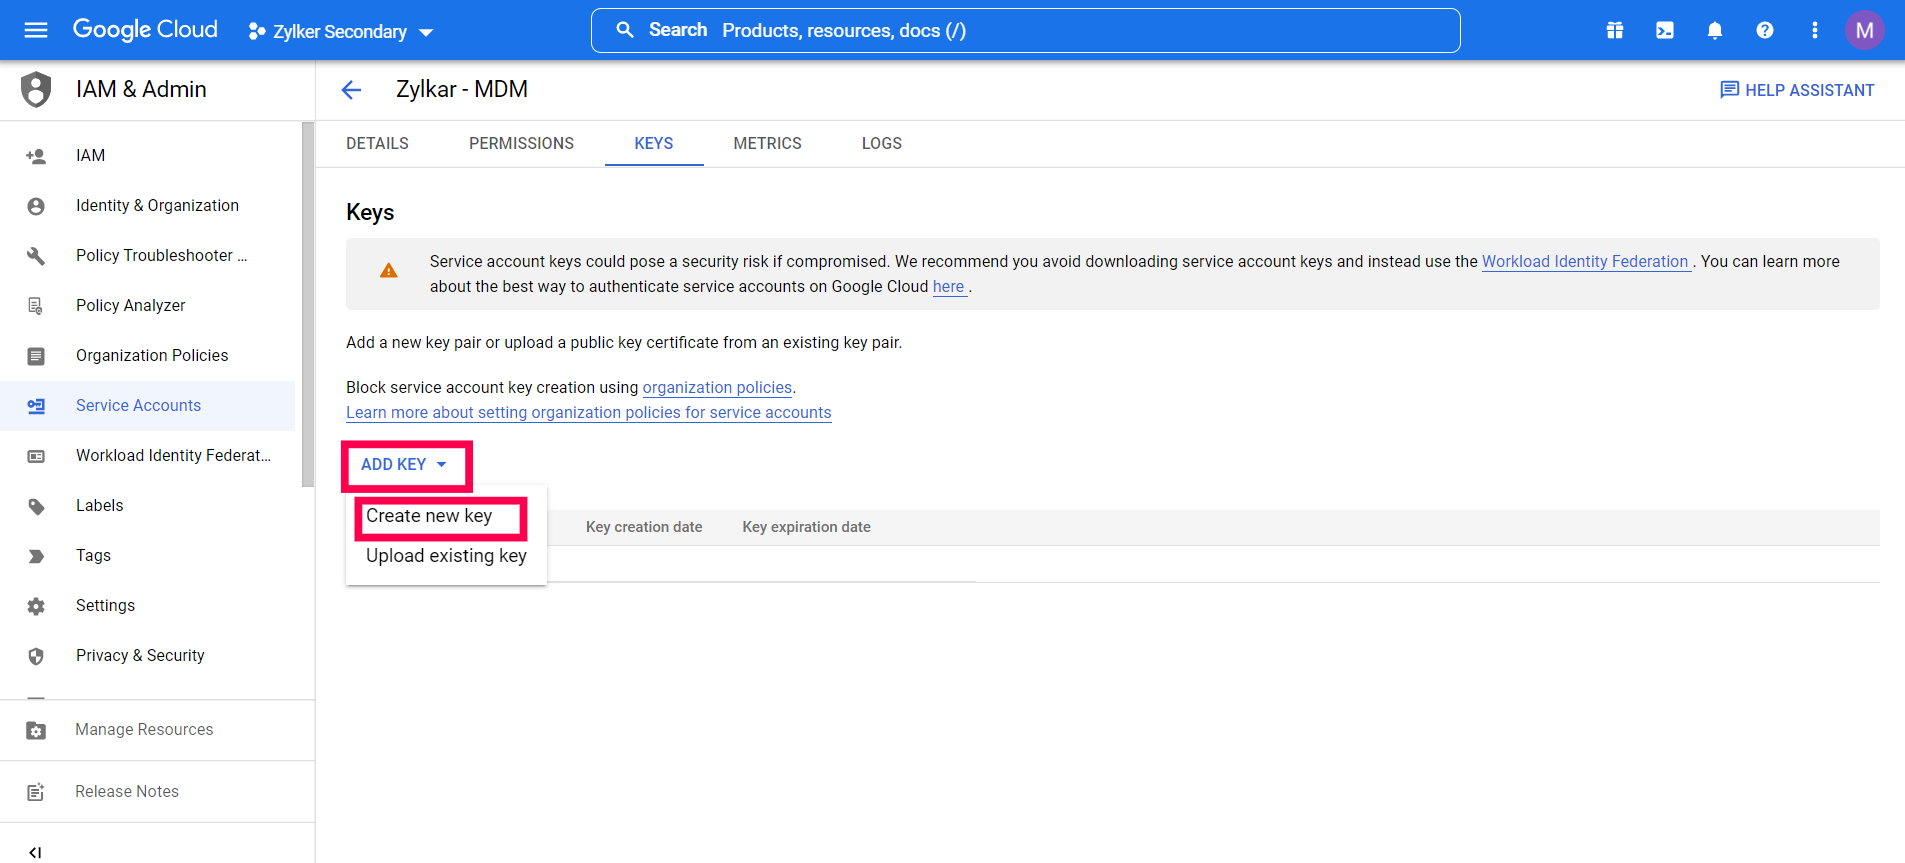
- Go to your service account and click on ellipsis icon present below Actions and choose Manage keys.
- Click on Add Key and select Create new key. Ensure that the key type is set as JSON and then click on Create. Now, a JSON token is downloaded. This needs to be uploaded on the MDM server. After downloading the token, click on Close.

- A JSON file will be downloaded automatically on clicking Create.
Obtaining the EMM token
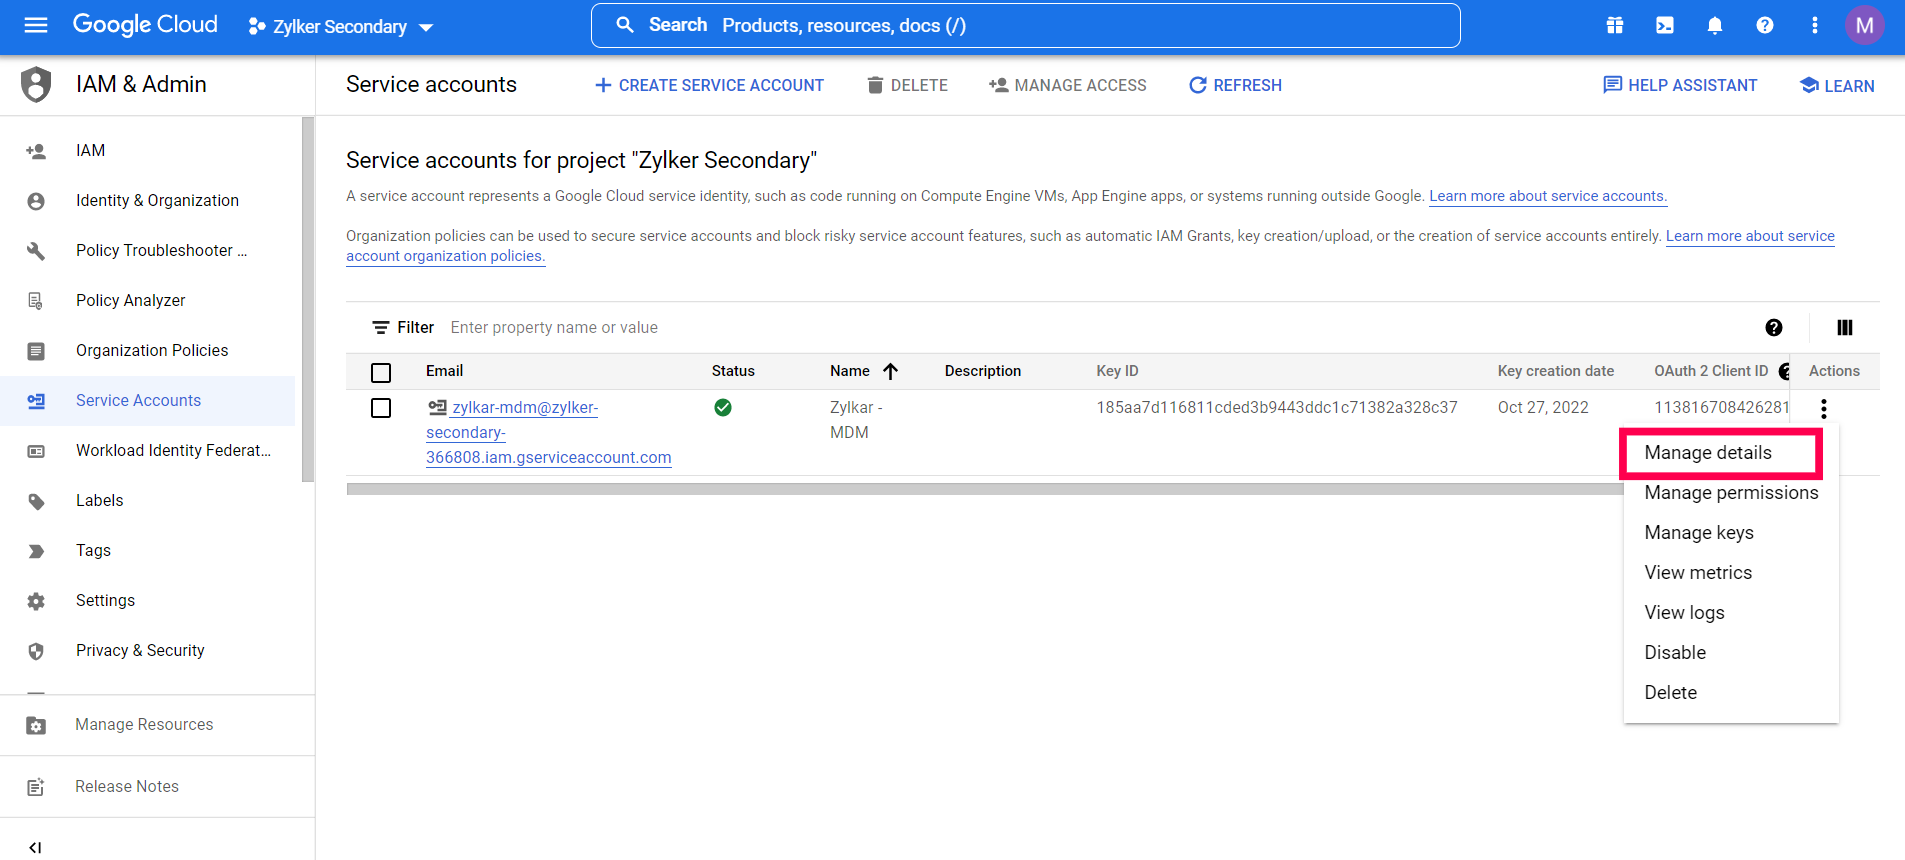
- After downloading the JSON file , go back to the Credentials page and click on Manage Service Accounts. Now, click on the ellipsis icon present against the Service account name and click on Manage Details.
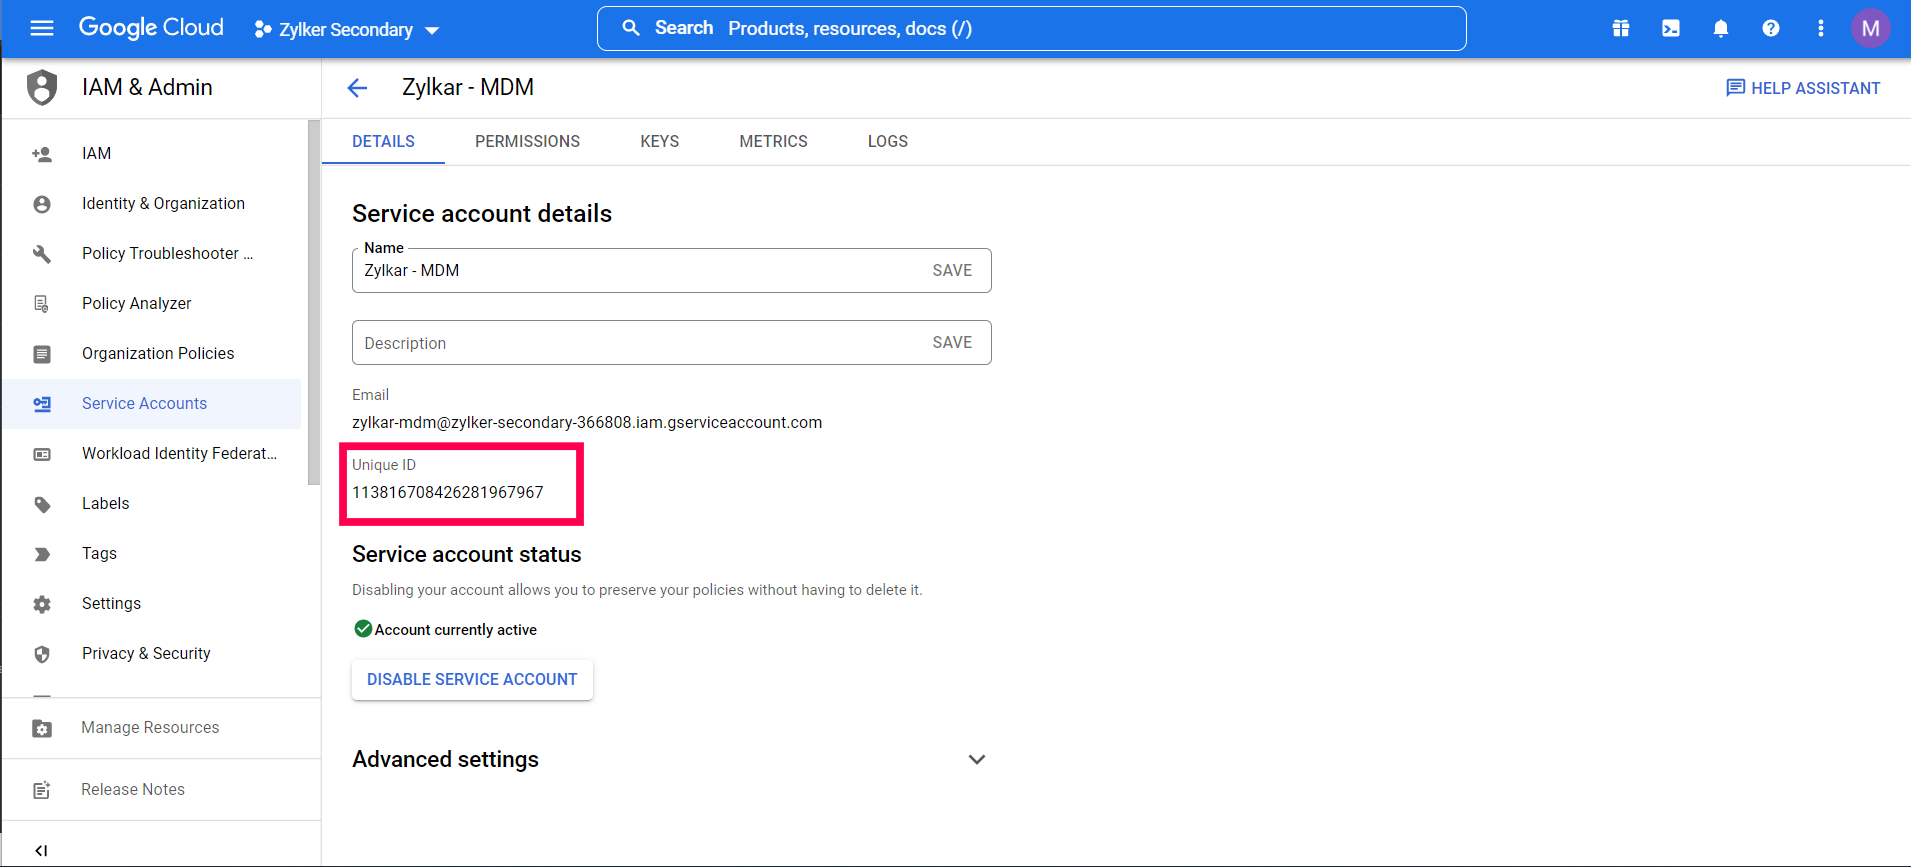
- Copy the 21-digit numeric sequence present under Unique ID and then click on View Domain Wide Delegation Client ID.
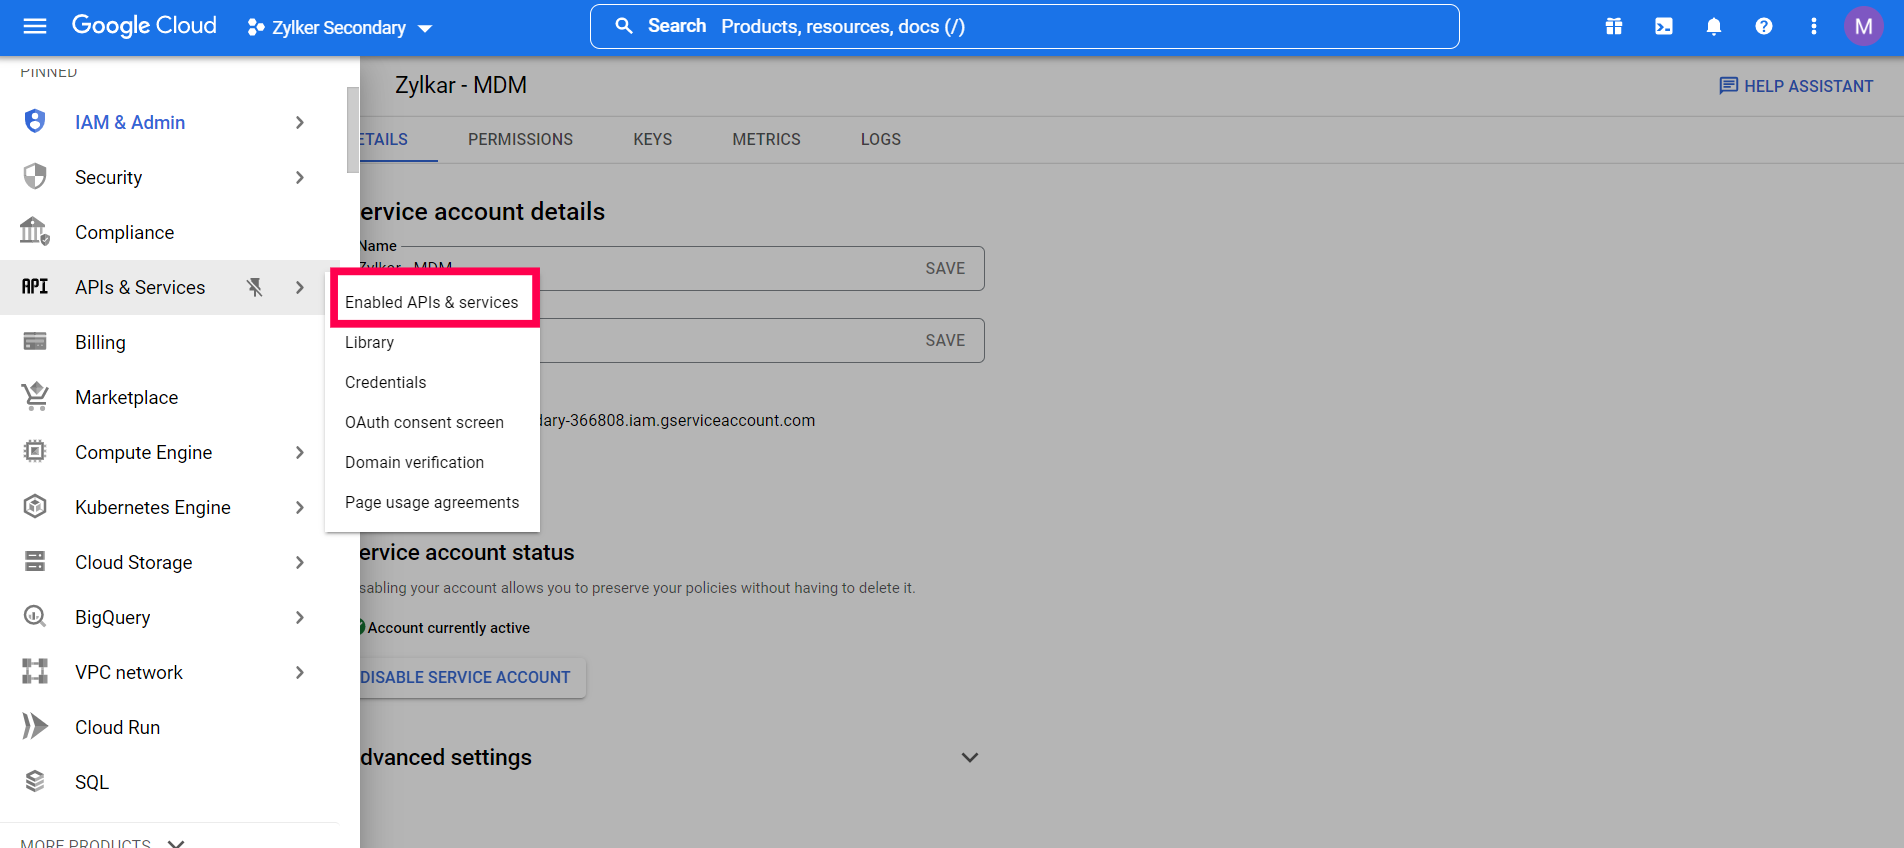
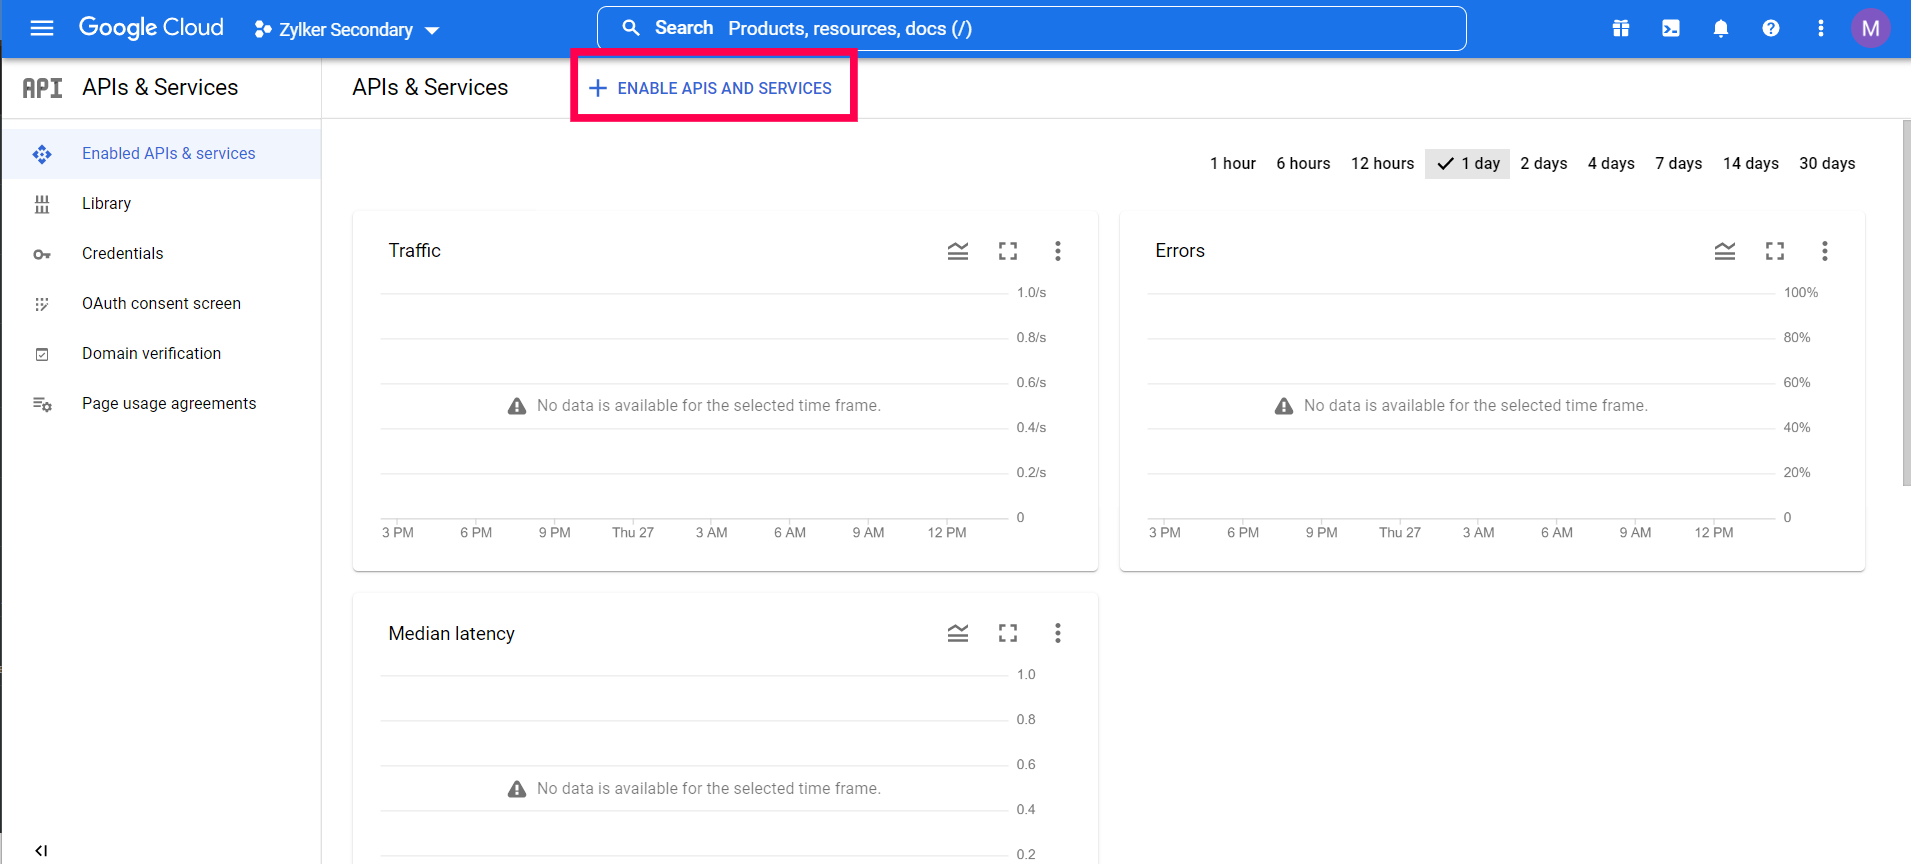
- Click on the hamburger icon and click on APIs and Services from the menu and select Enabled APIs & services.
- Click on Enable APIs and Services to enable device management using Managed Google Play.
- Type in Google Play EMM API on the search box and click on the search icon.
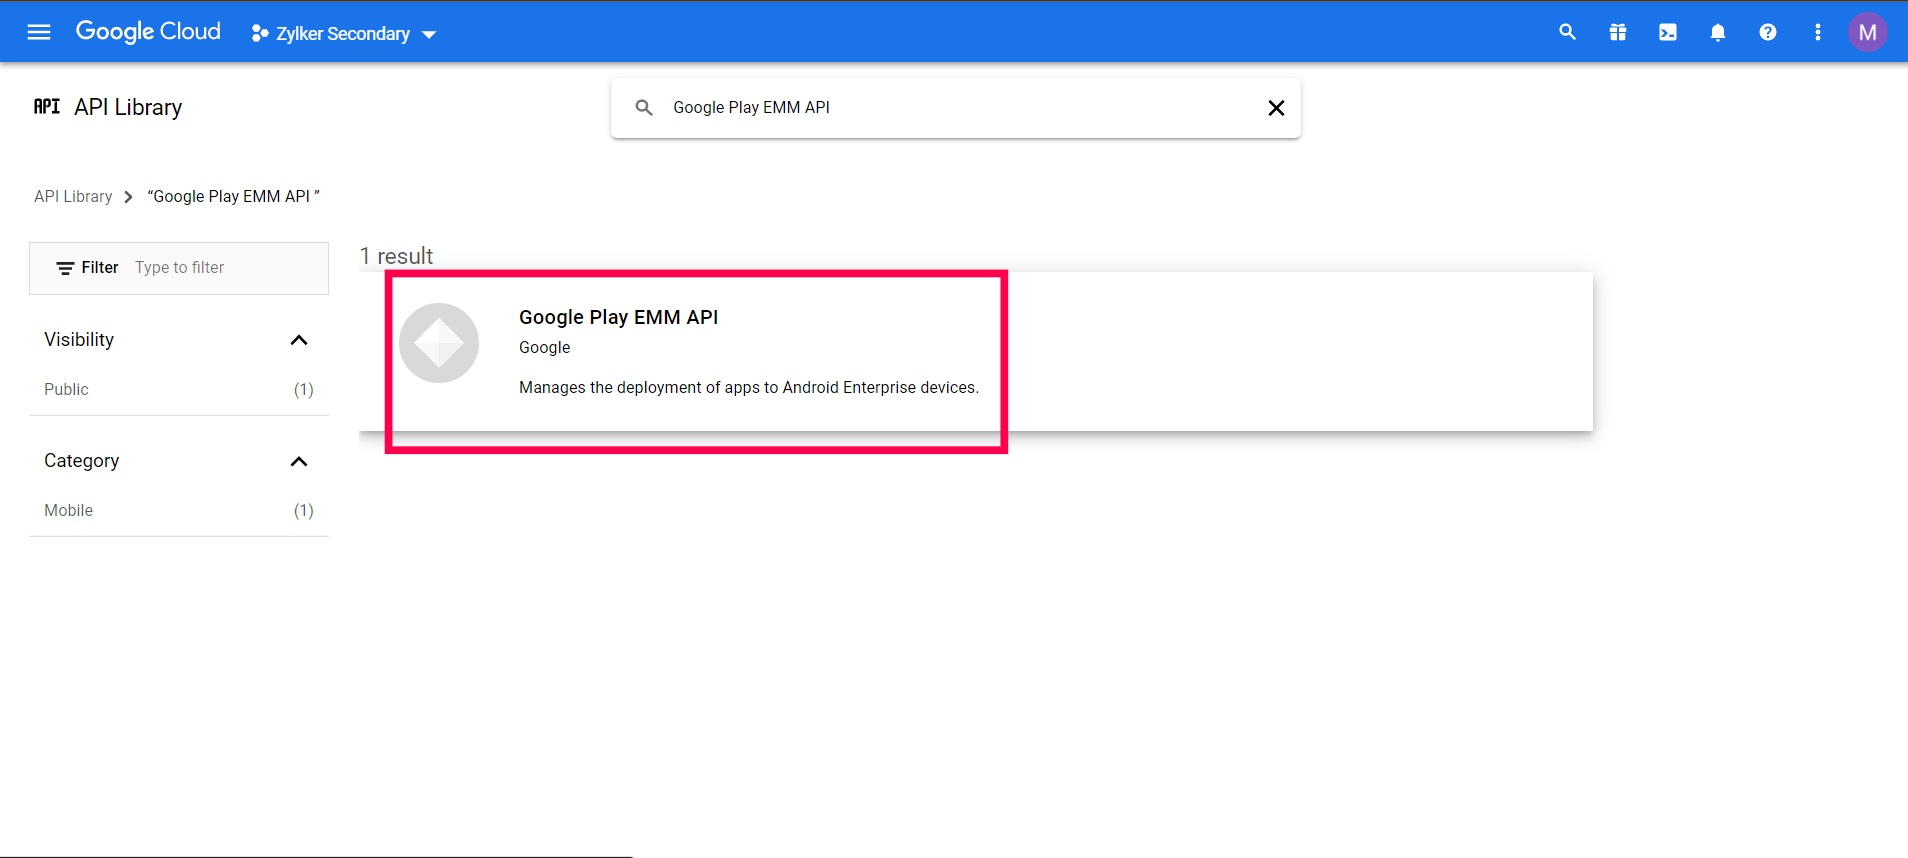
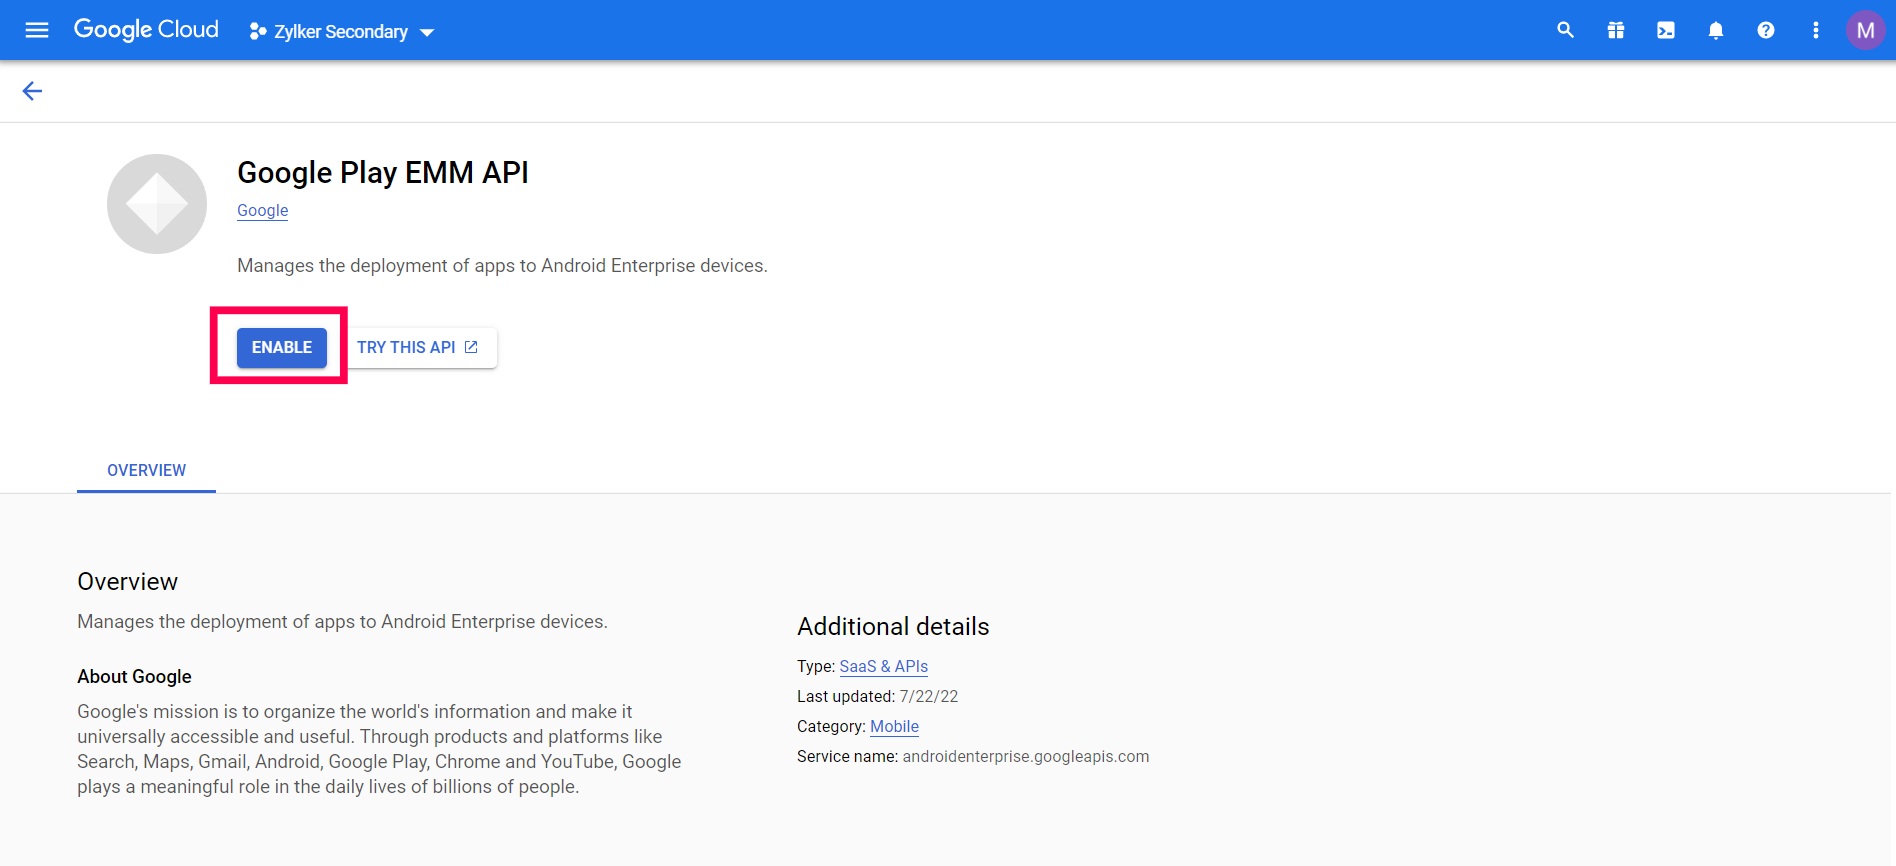
- Now select Google Play EMM API from the search results and Enable the API.
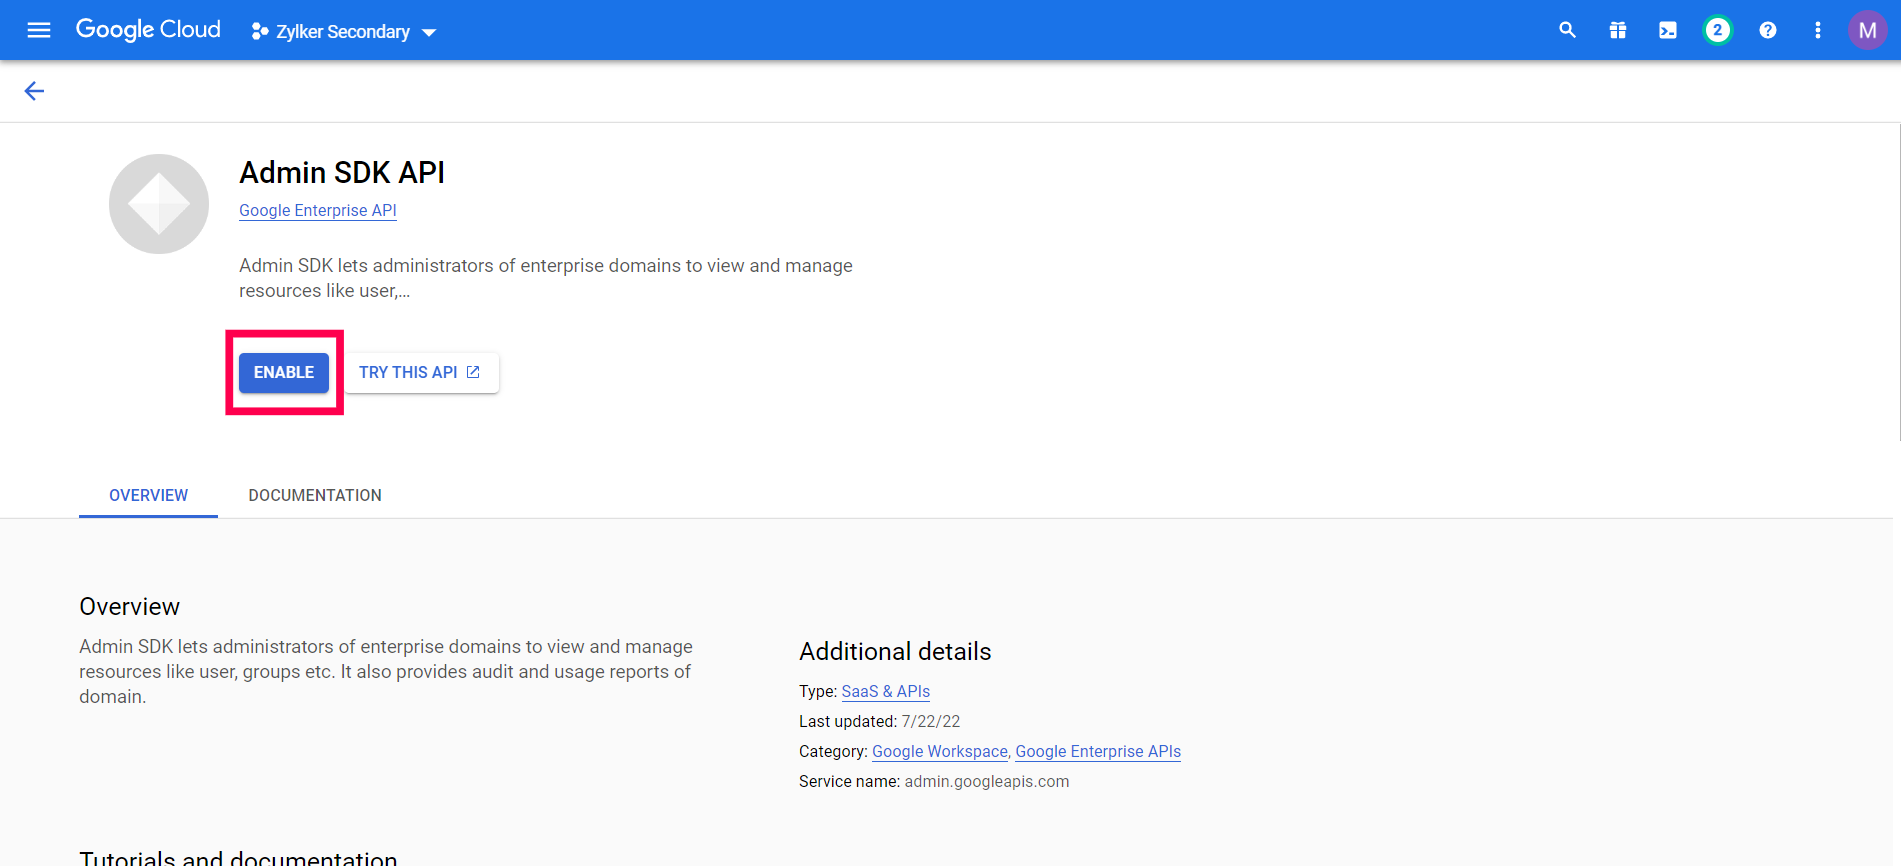
- Similarly, type in Admin SDK on the search bar and Enable Admin SDK from the search results.
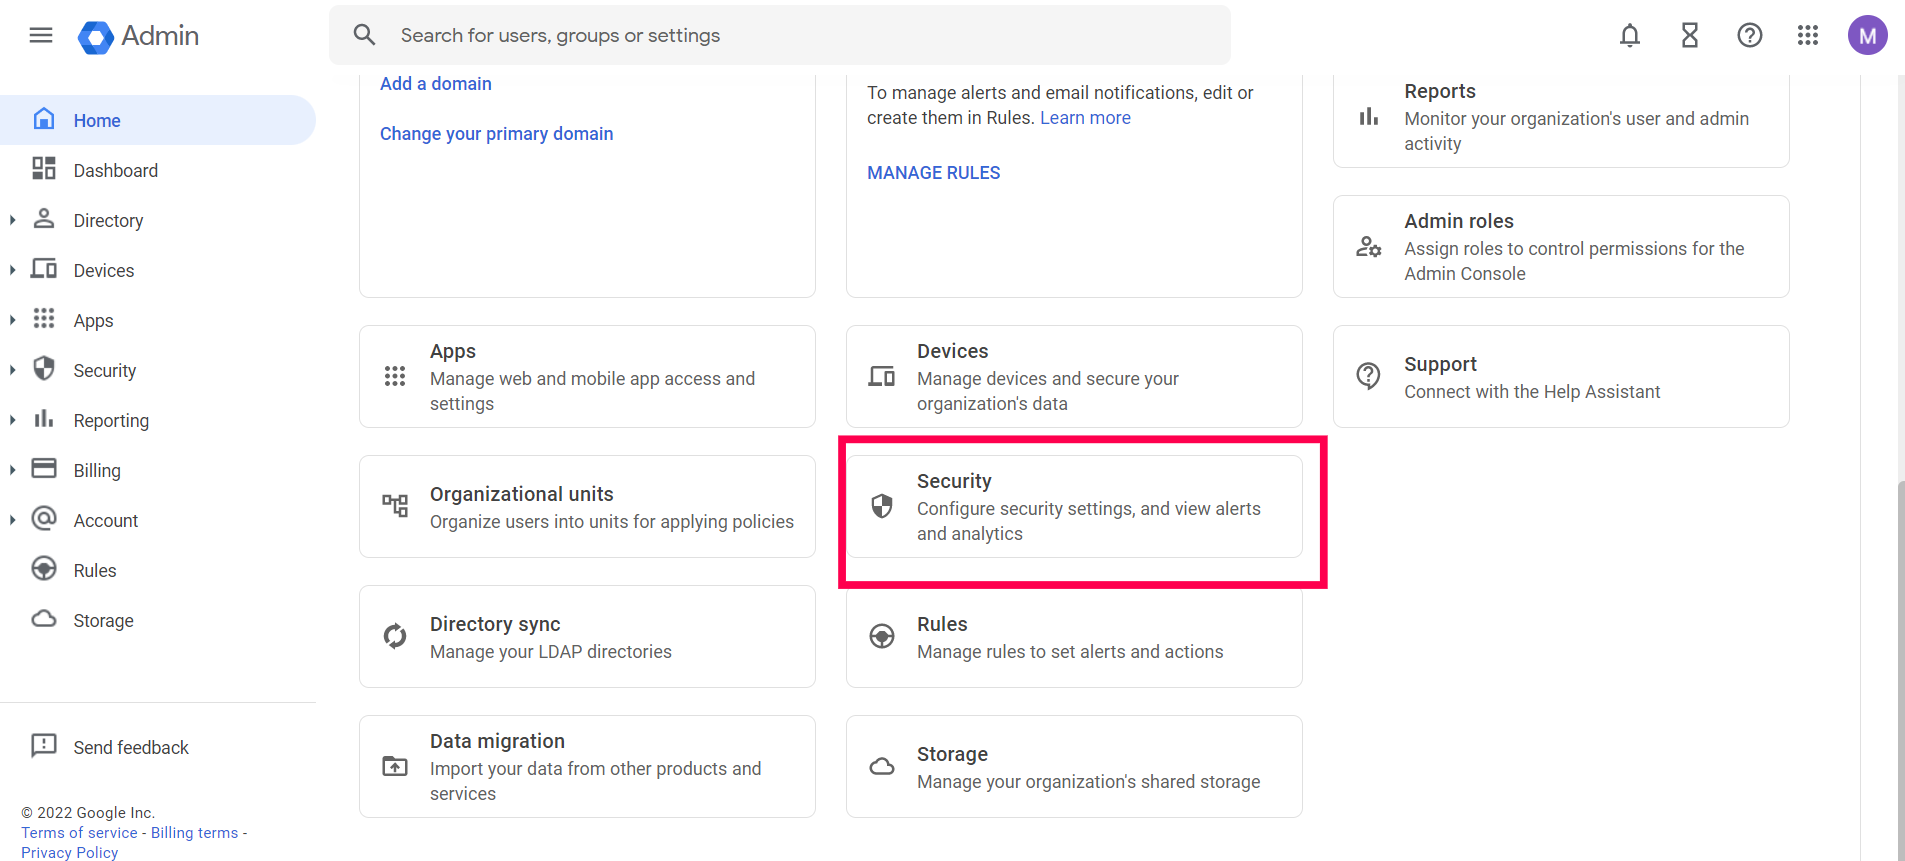
- Now, login to Google Admin Console and click on Security.
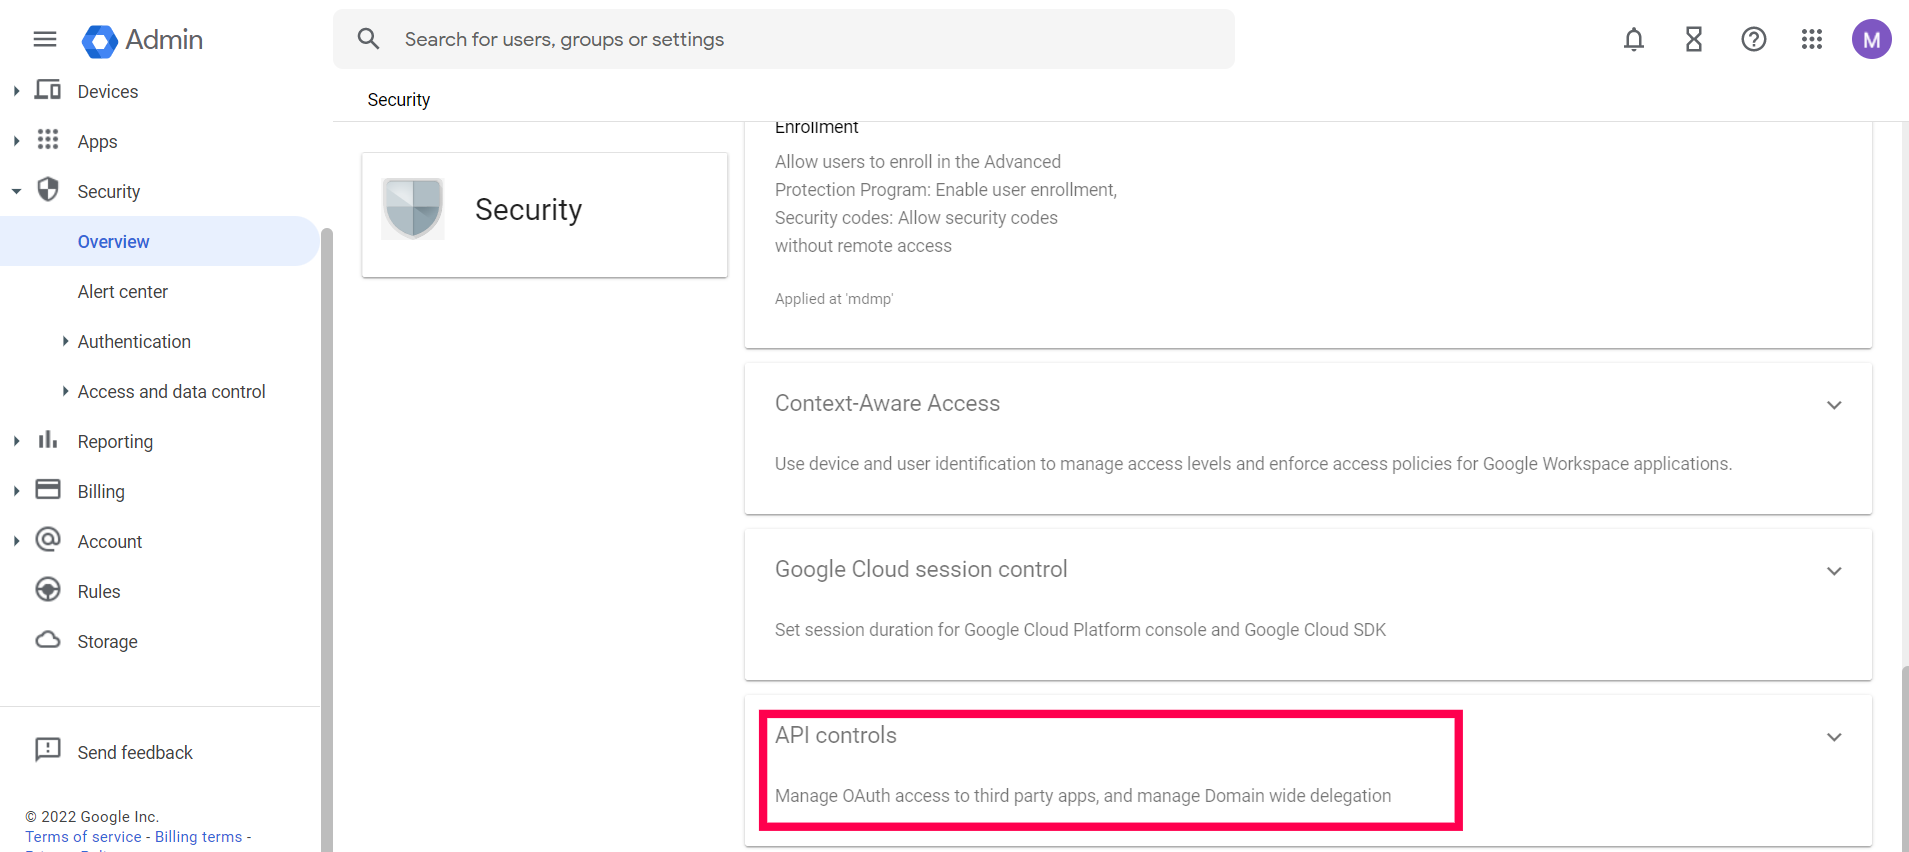
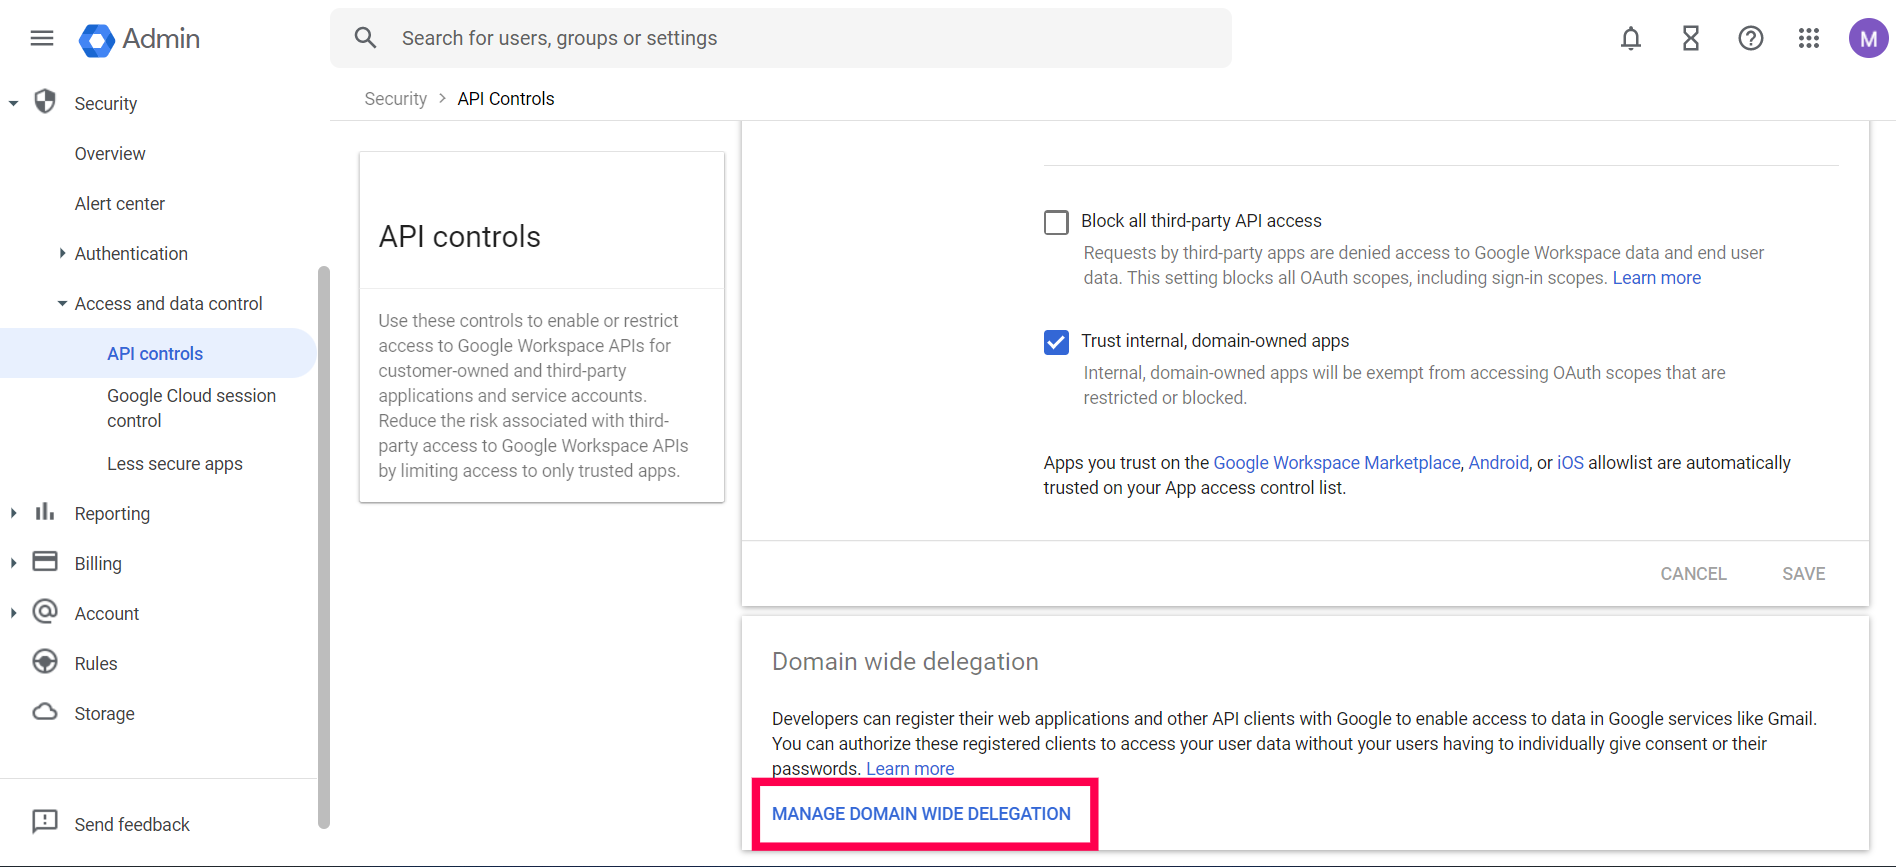
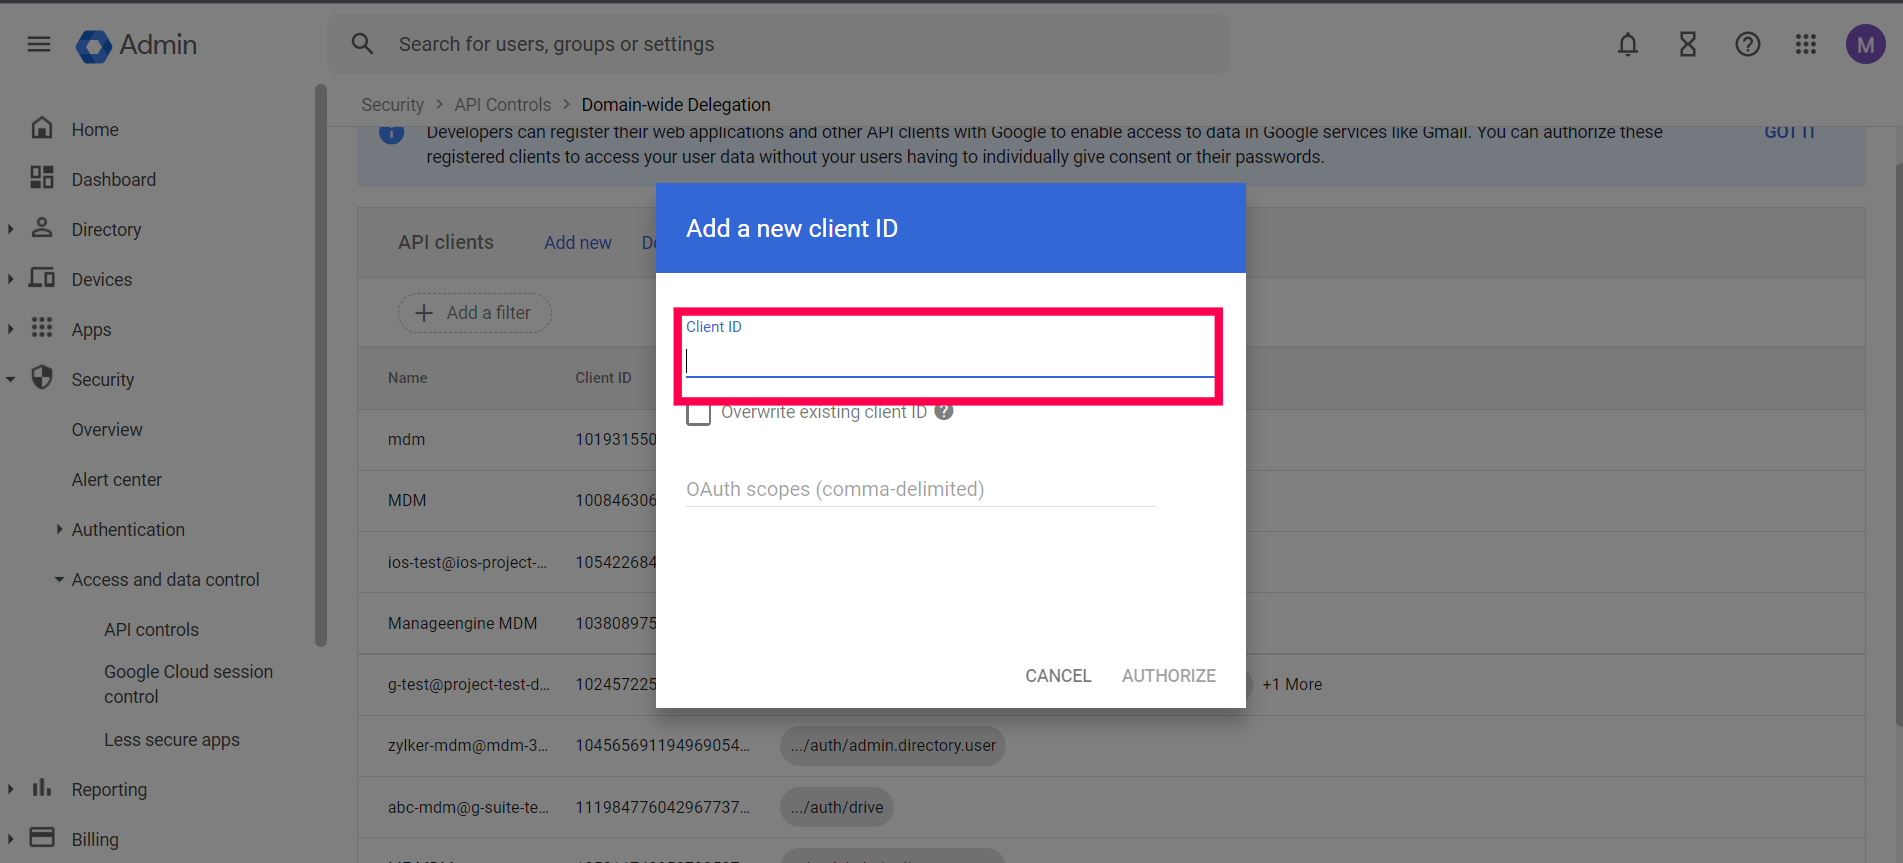
- Scroll down and select API Controls -> Managed Domain Wide Delegation -> Add New.
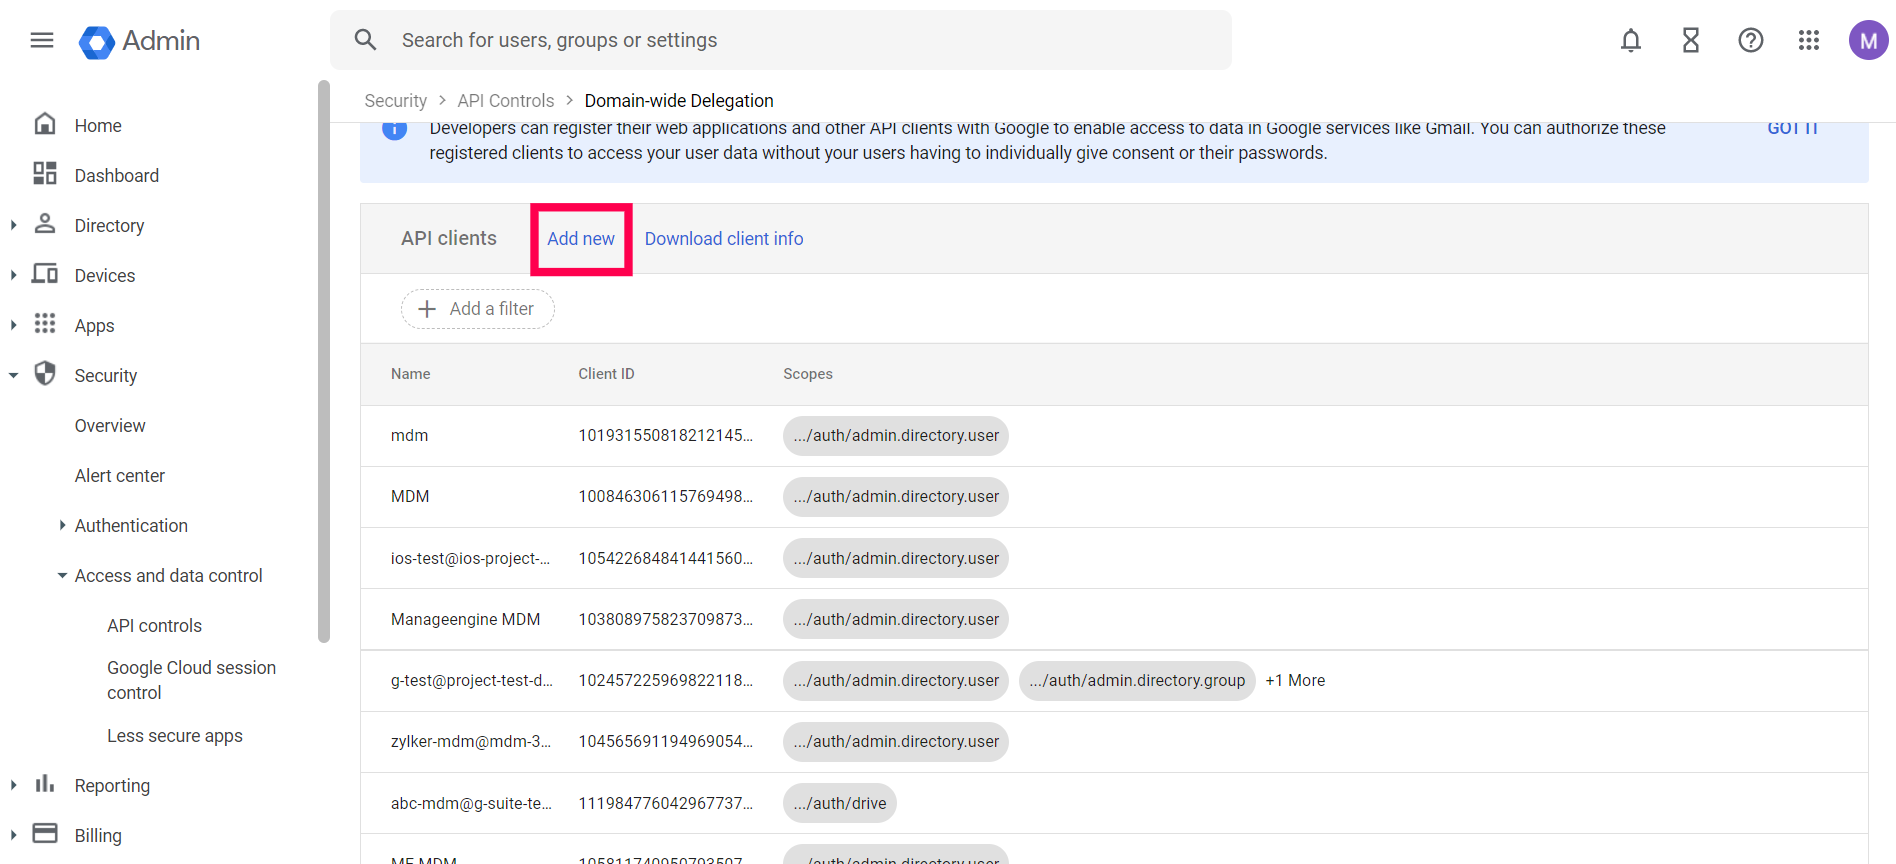
- Paste the Unique ID you copied previously and paste it as Client ID and provide this URL, https://www.googleapis.com/auth/admin.directory.user for the parameter OAuth scopes.
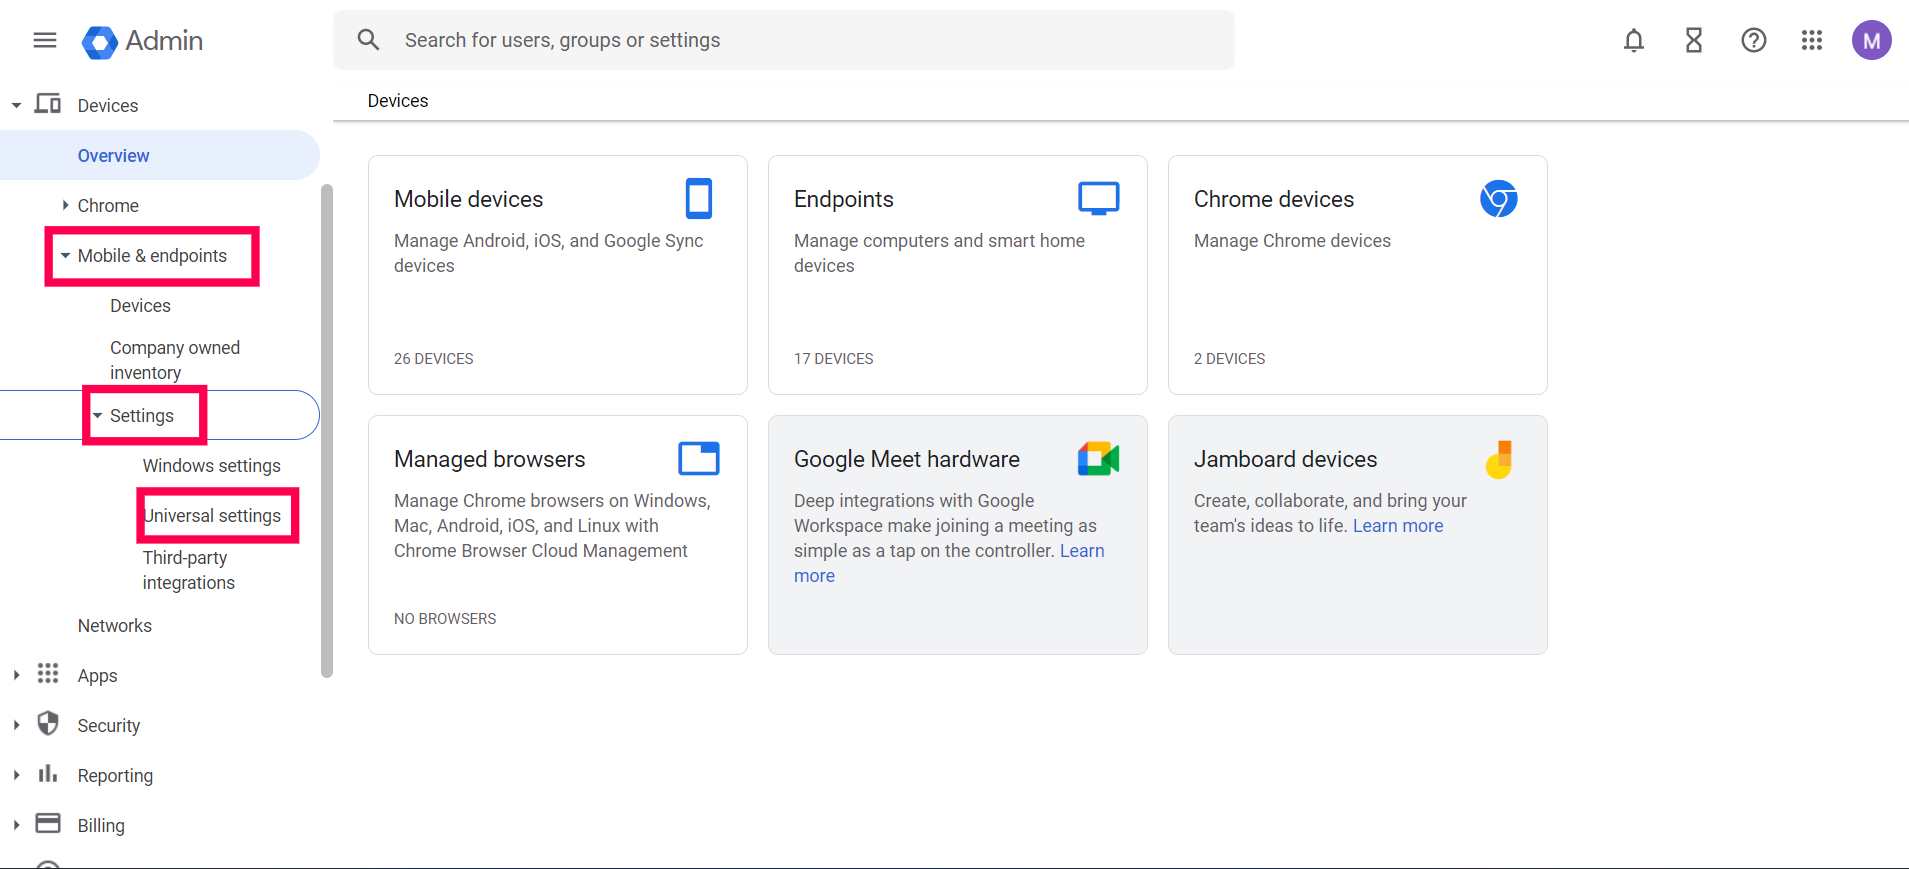
- Now, go back to the home page, and click on Devices.

- Click on Mobile & Endpoints -> Settings -> Universal Settingsfound on the left side of the page.
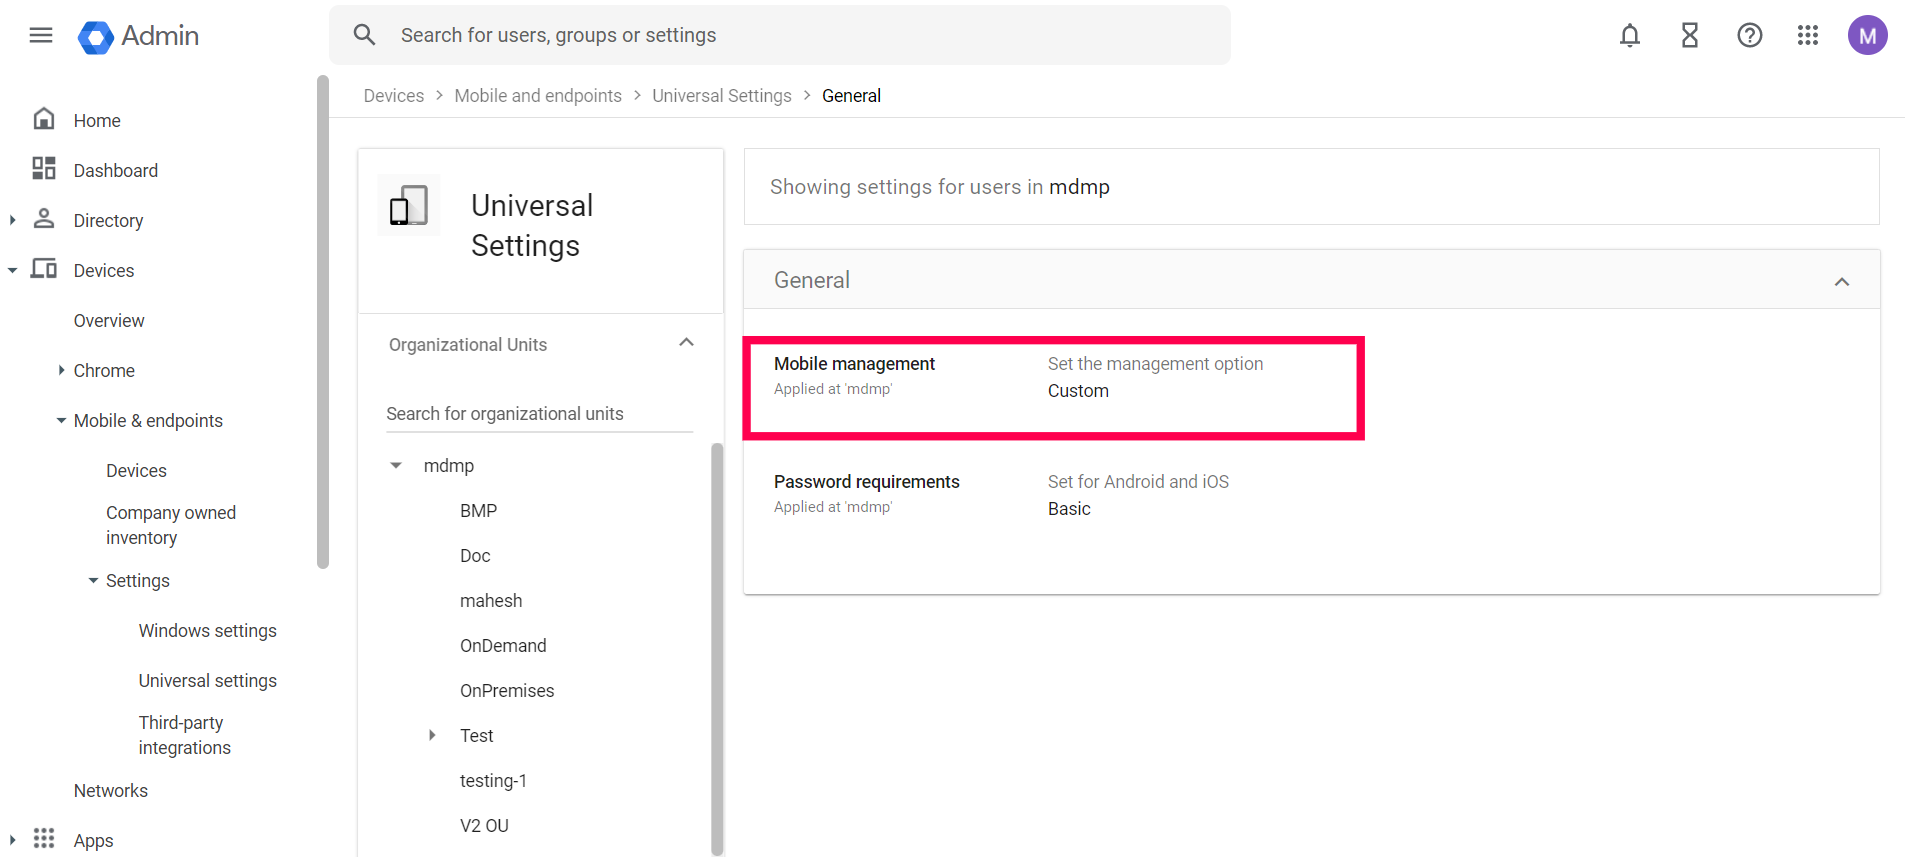
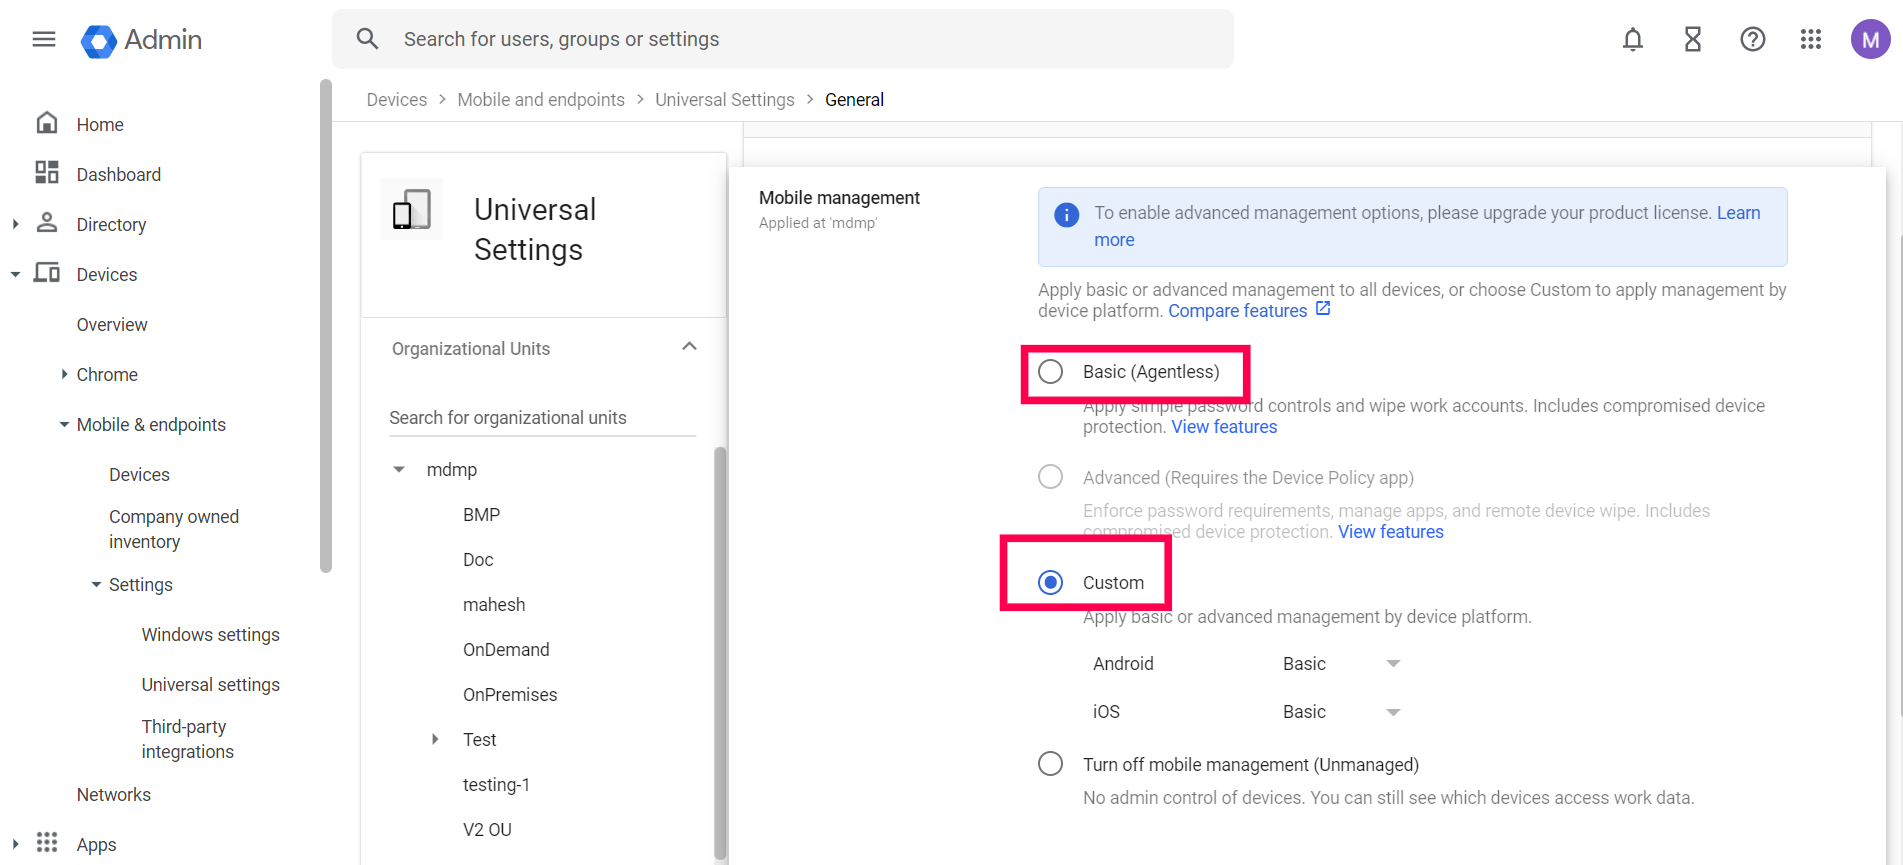
- Click on General -> Mobile management.
- Select the Turn off mobile management(Unmanaged) option.
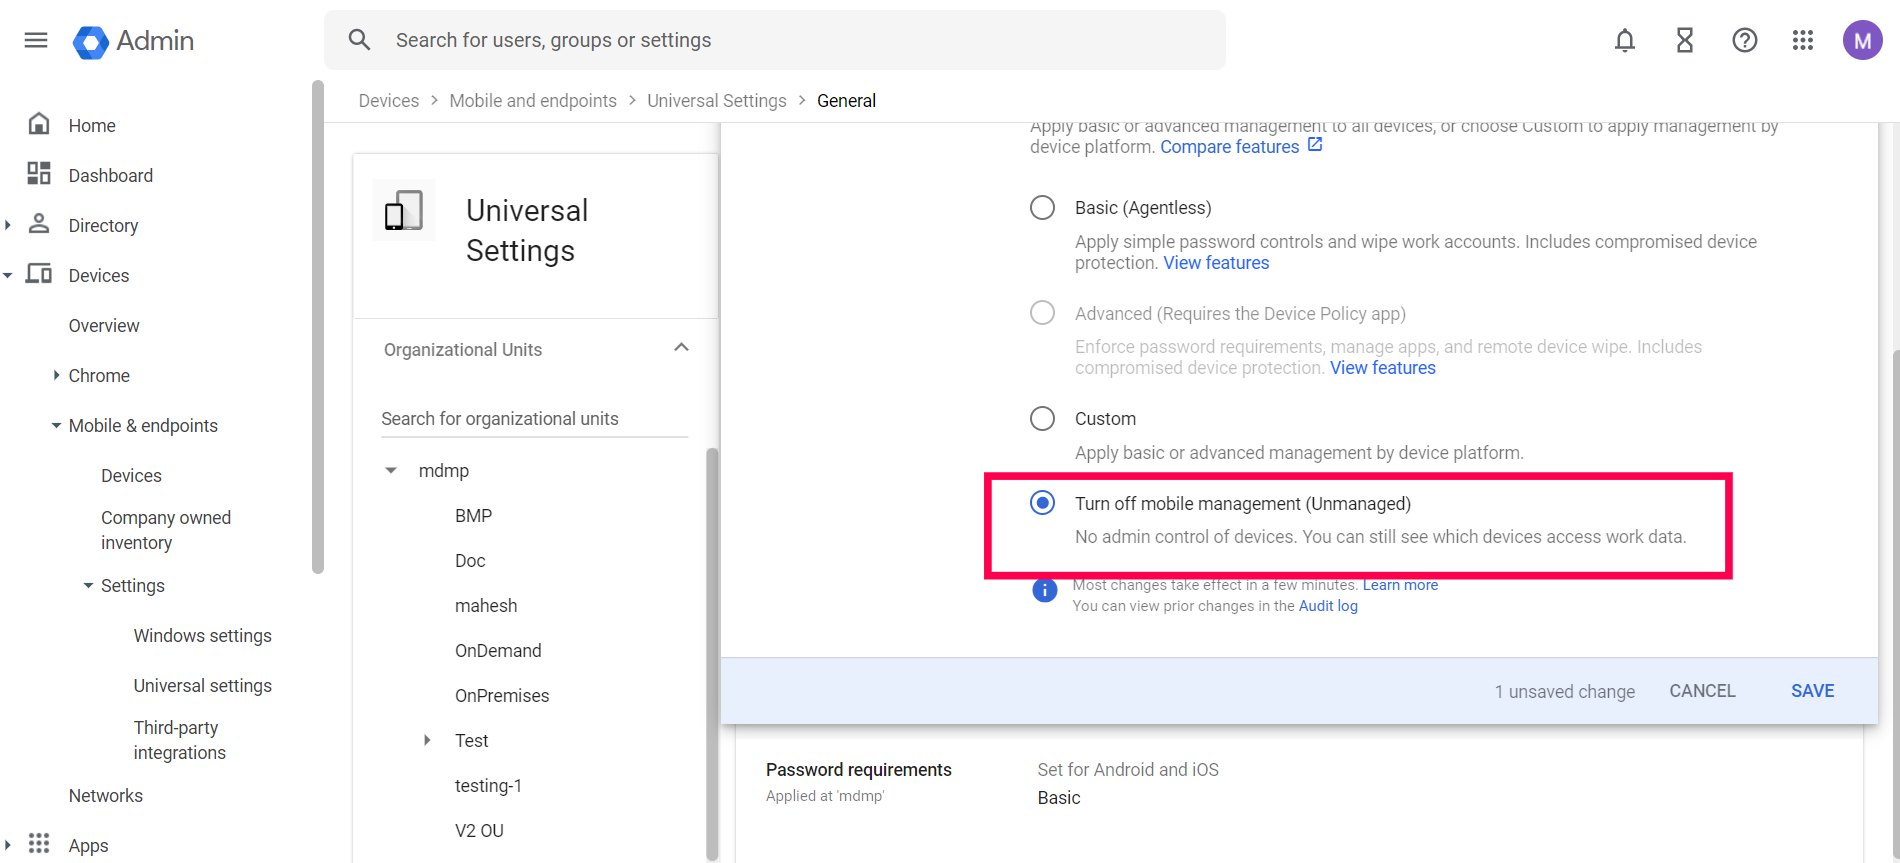
- If you have preferences for which device platforms need to be managed by MDM, then navigate to Custom, select Android and then select Basic from the dropdown menu.
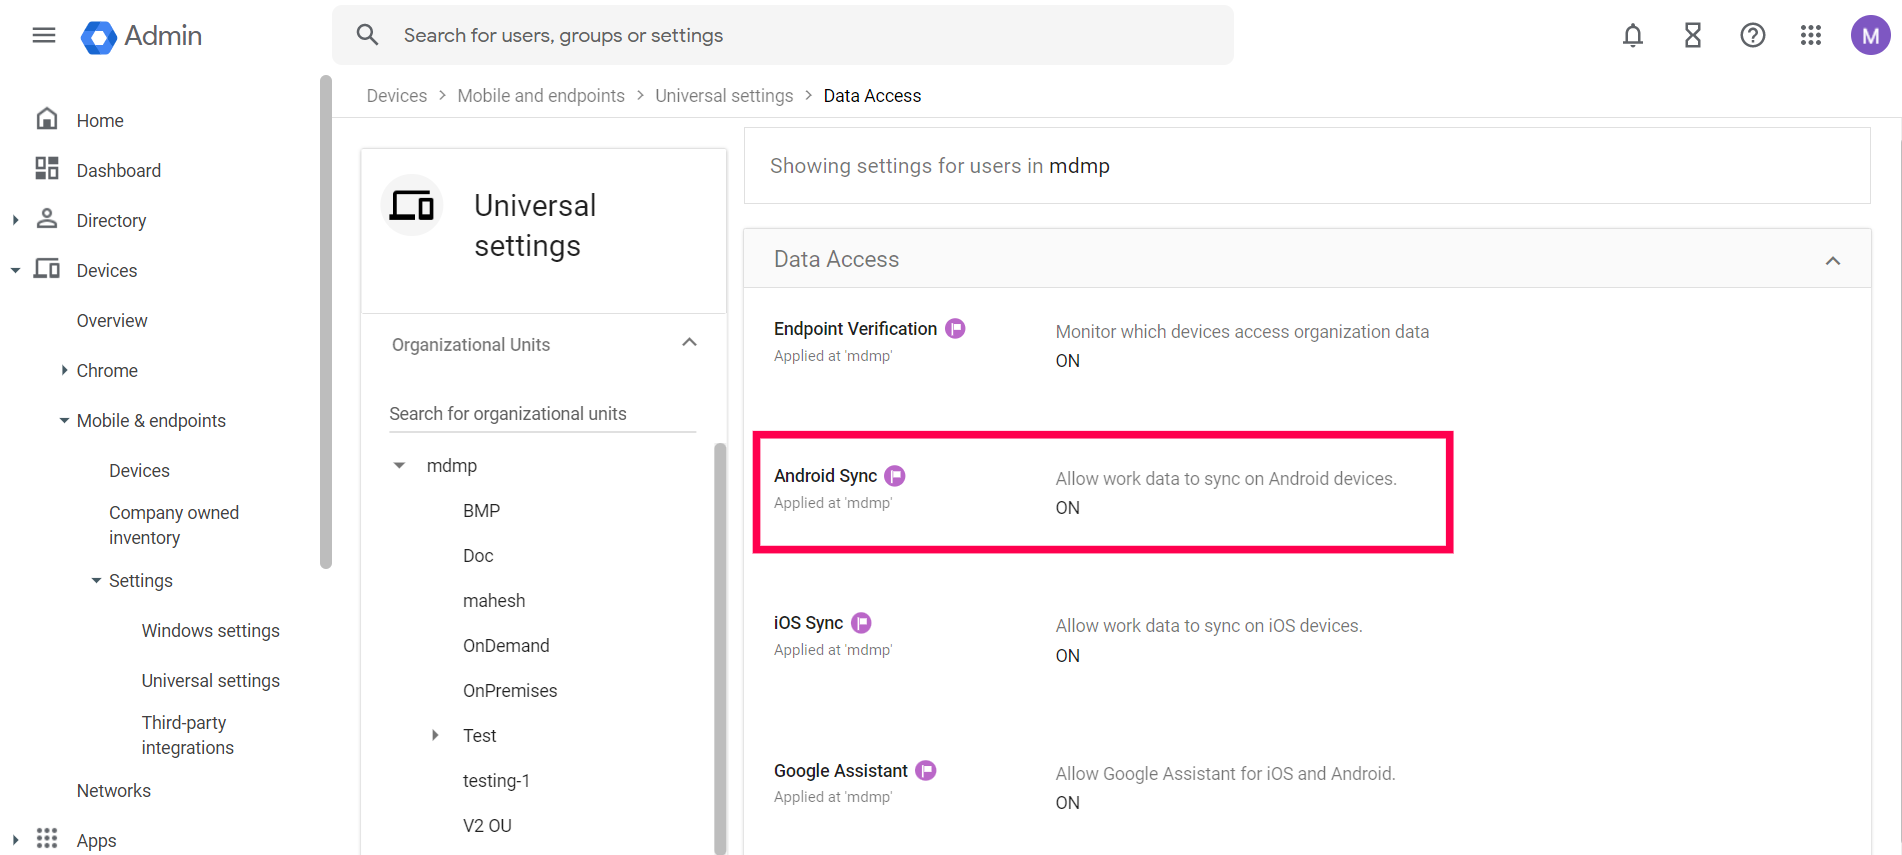
- In the Universal Settings tab, click on Data Access -> Android Sync -> Allow work data to sync on Android devices -> ON -> Save.
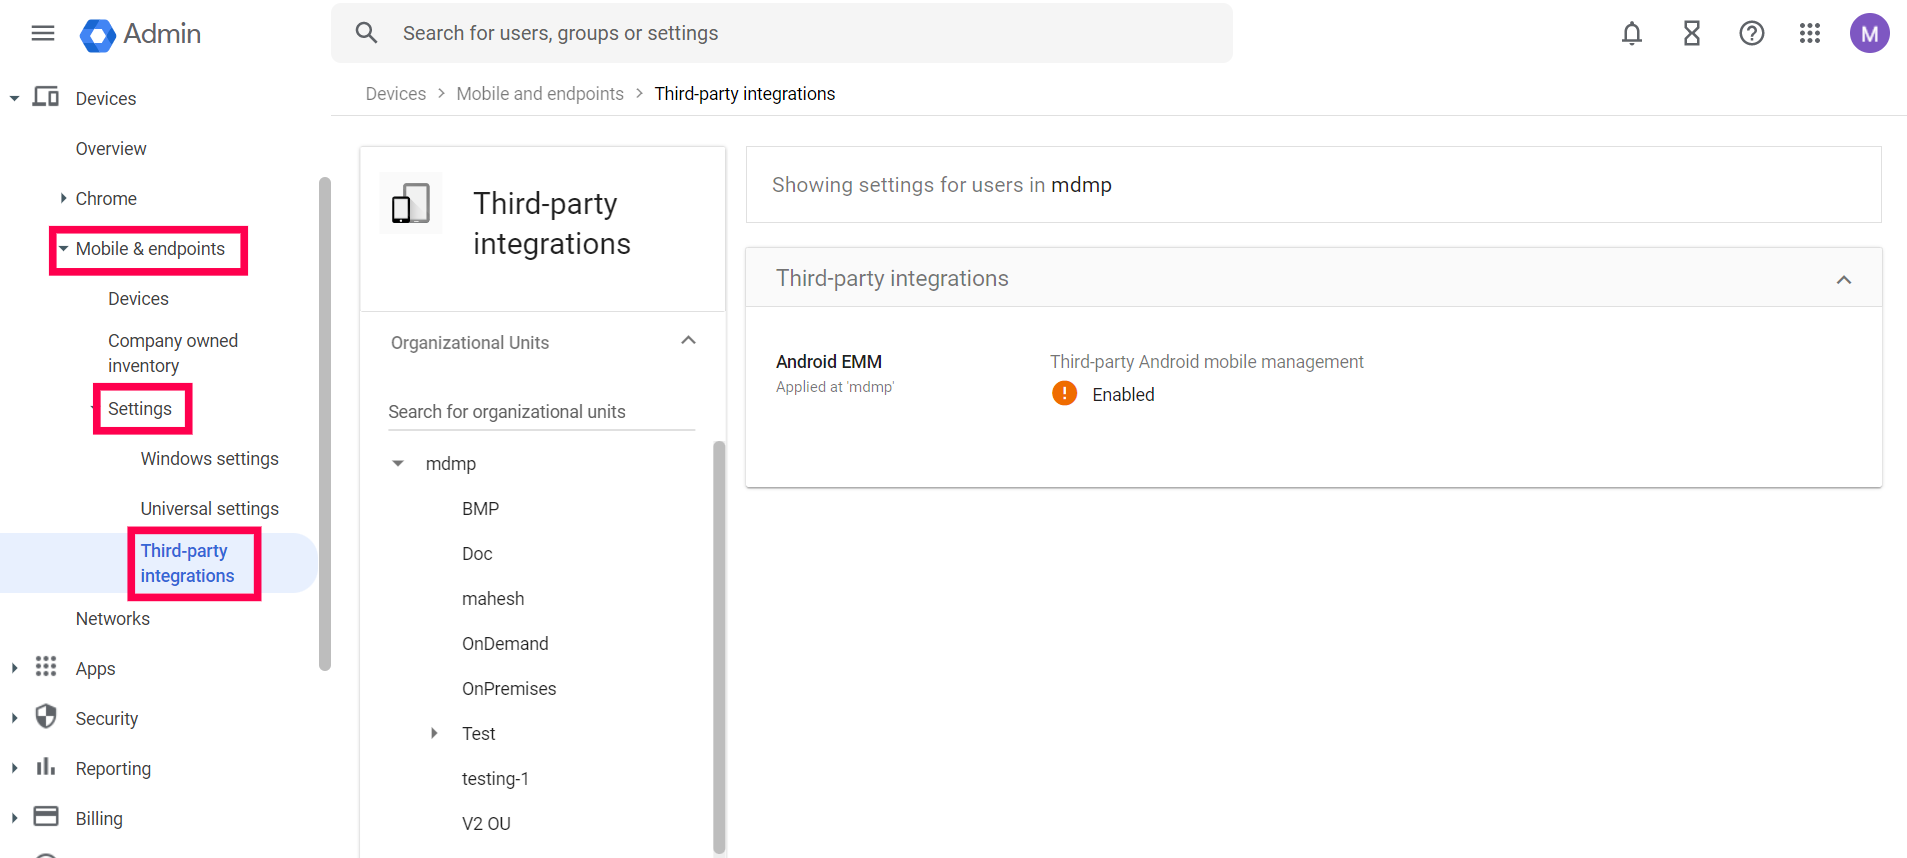
- Click on Mobile & Endpoints -> Settings -> Third Party Integrations.
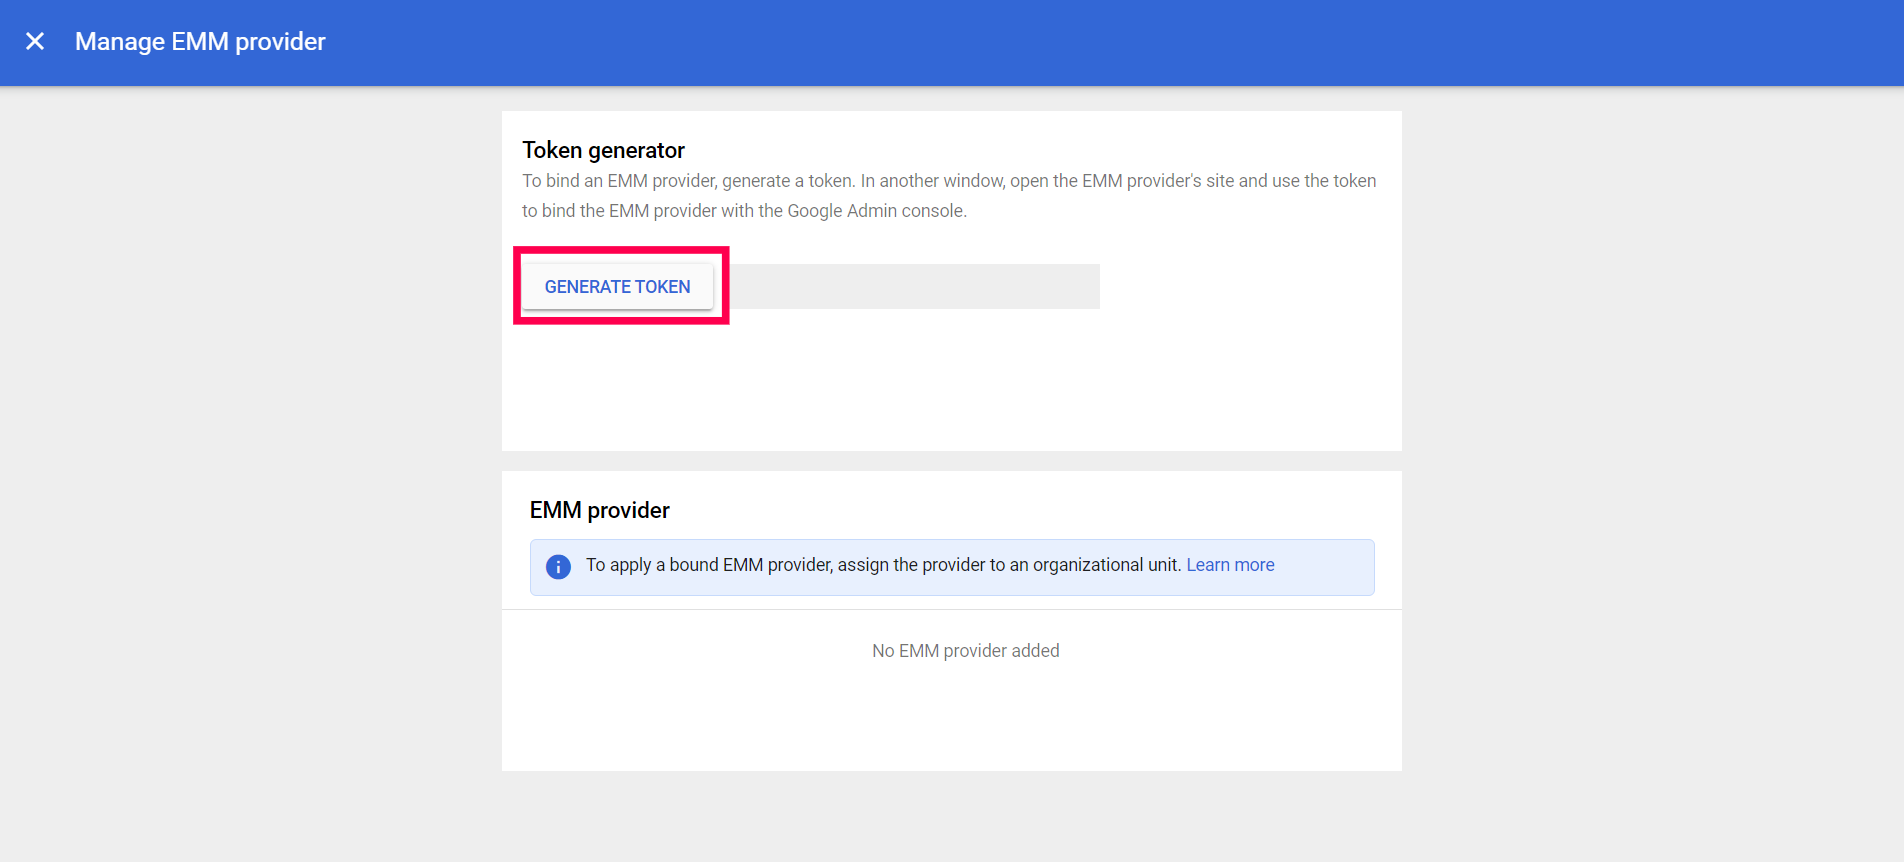
- Click on Android EMM -> Edit icon. Ensure the dialog box Enable third-party Android mobile management is unchecked and click on Add EMM providers.
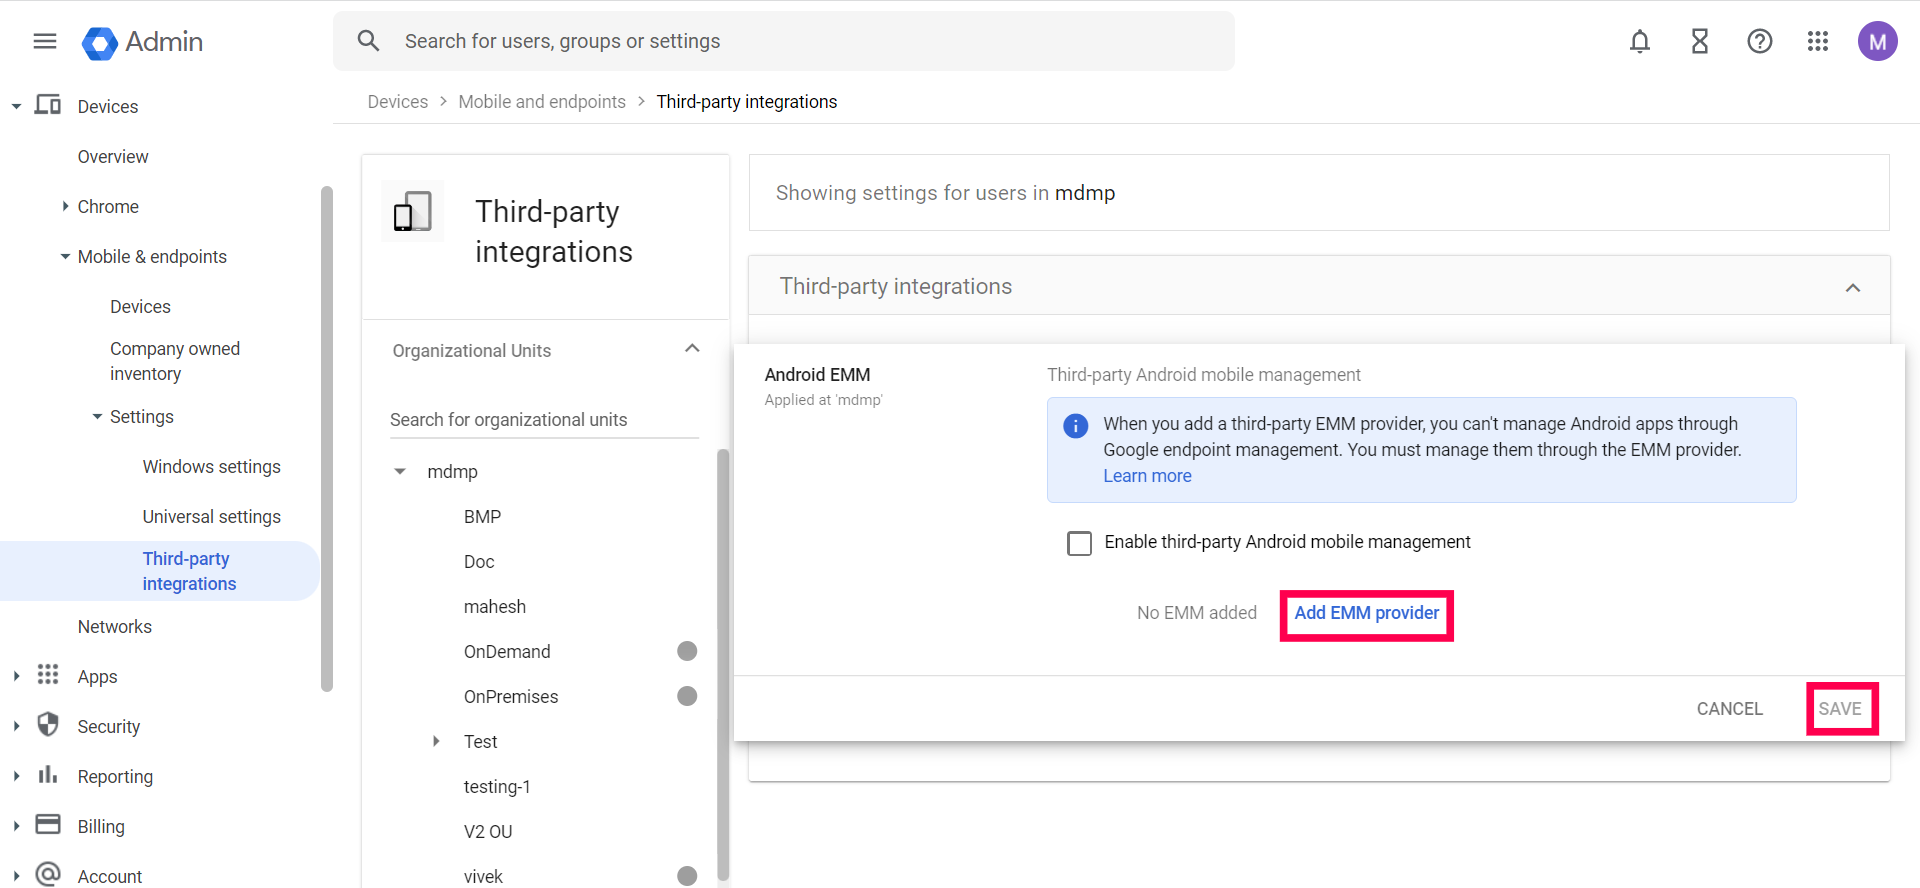
- Choose Generate token, and copy the token that is displayed.
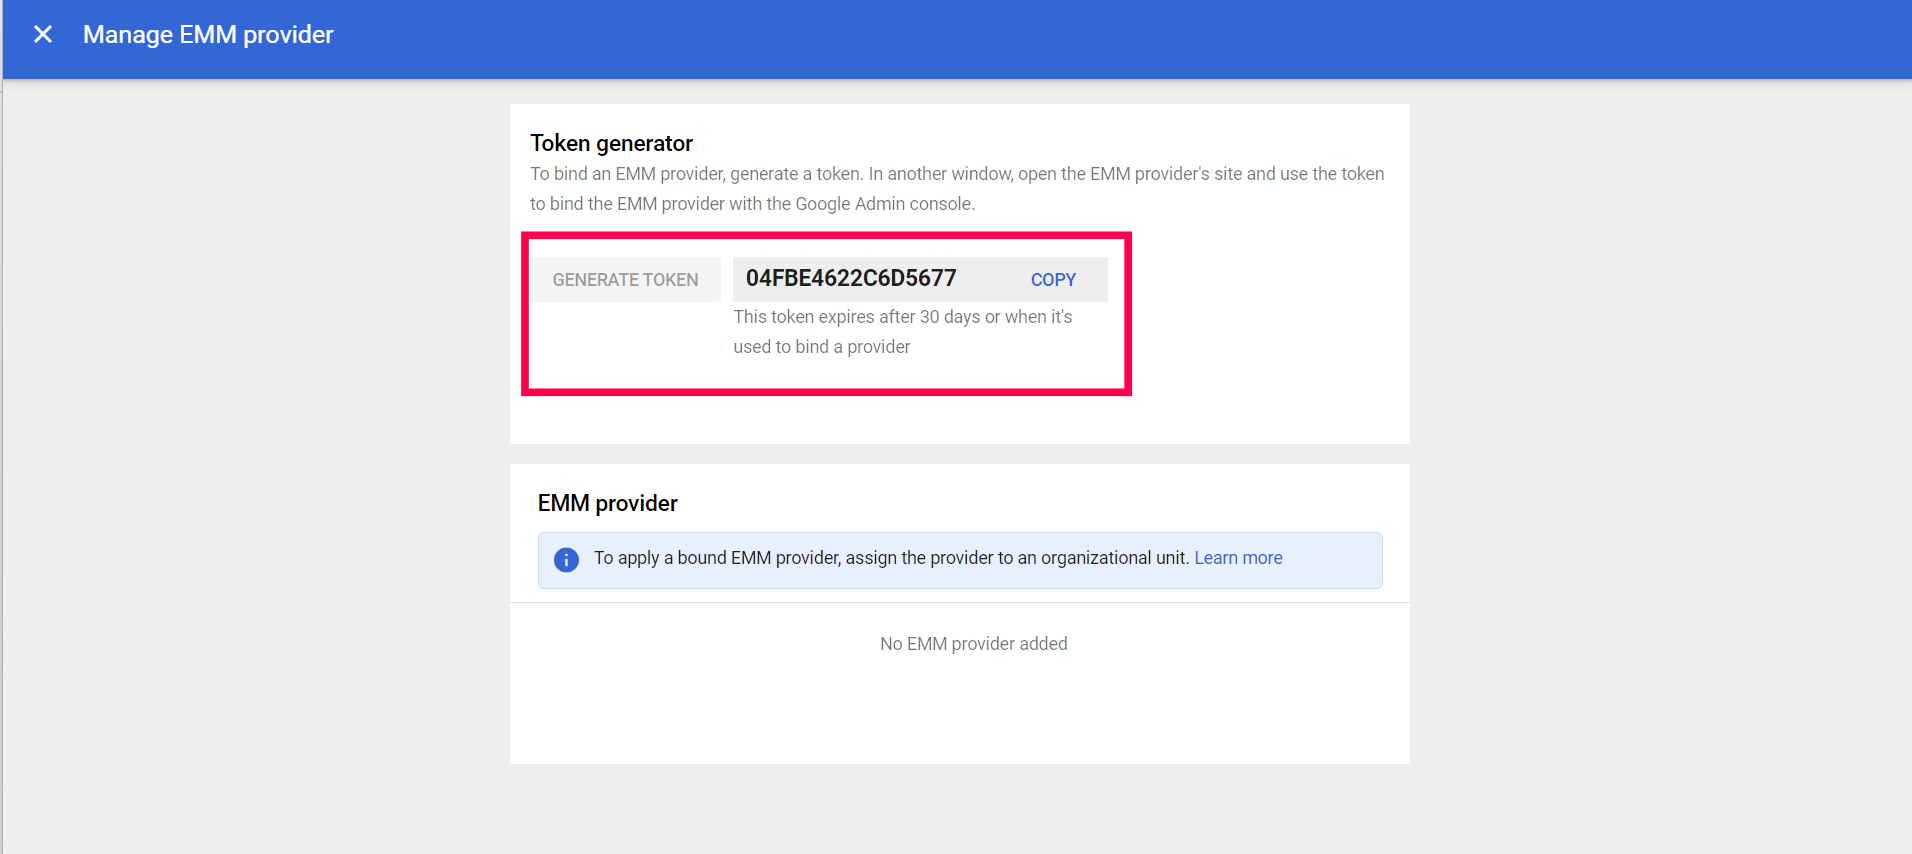
- Now that you have obtained the EMM token and the JSON file, go to the MDM web console, and click on theAdmin tab . Select Configure Managed Google Play present under Managed Google Play Settings. Now, select the option Register with Google Workspace and provide the required details to configure Android for Work.
Creating user accounts
The next step before starting with Android for Work is to create user accounts. This step is required for pushing Managed Google Play-based configurations to devices. The user must login with the created user account in Google Play Store to have all the Android for Work-pushed apps and configurations applied in the managed device. For devices enrolled as Profile Owner, the user must login with the created user account in the Google Play Store present in the Work profile.
- For Google apps users, user accounts can be created by manually adding users or adding users by importing a CSV. (Recommended for small organizations).
- Creating users without a Google apps account can be done using Google Active Directory Sync(GADS). (Recommended for large organizations)
Enrolling the Device using Google Workspace(G Suite) (Optional):
- A device can be Forced-Managed using Google Workspace(G Suite) by registering as shown in the below steps.
- In case the device is already enrolled by other means of enrollment on the MDM and G Suite has to be added, it can be done by navigating to Accounts in Settings, and adding the G Suite account. This enables access and sync of all the G Suite features linked to the account.
To set up the device as Device Owner:
- Factory reset the device.
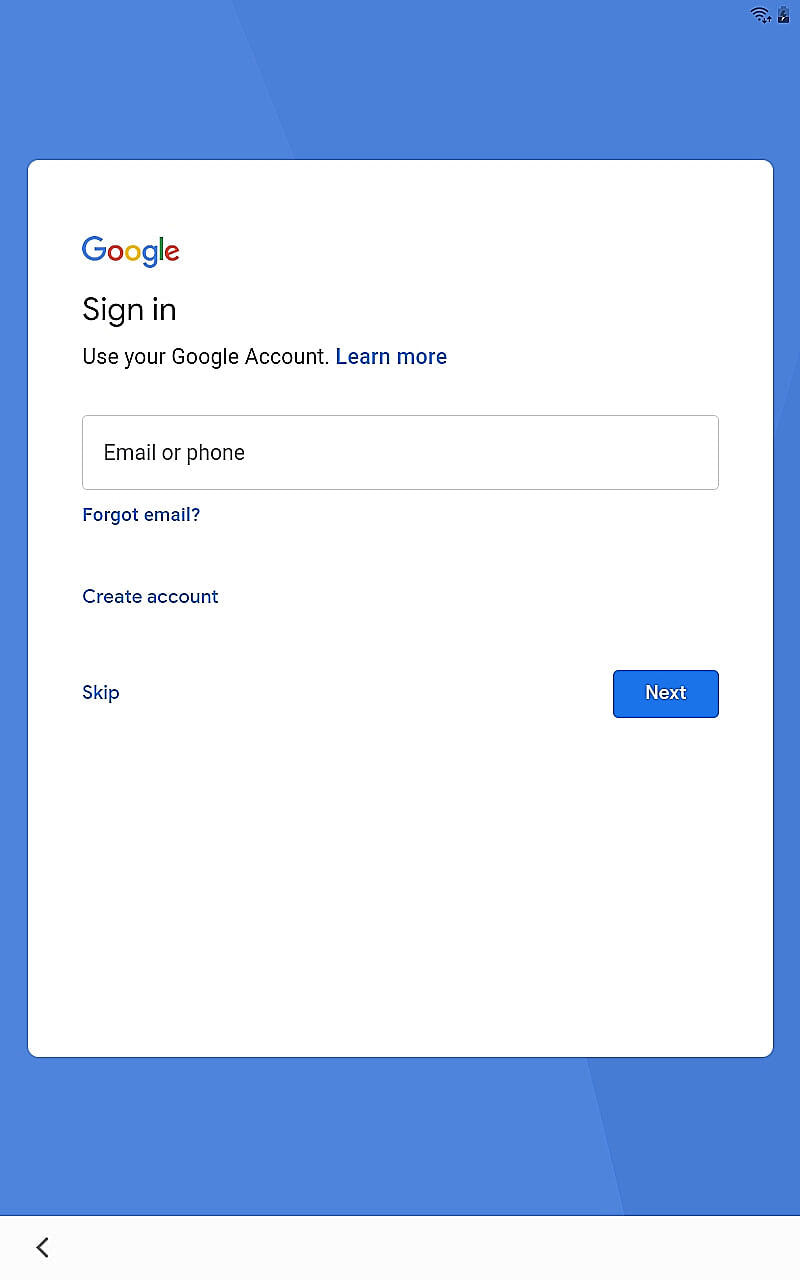
- During the set up, when the device prompts for the user account, enter the G Suite account credentials.
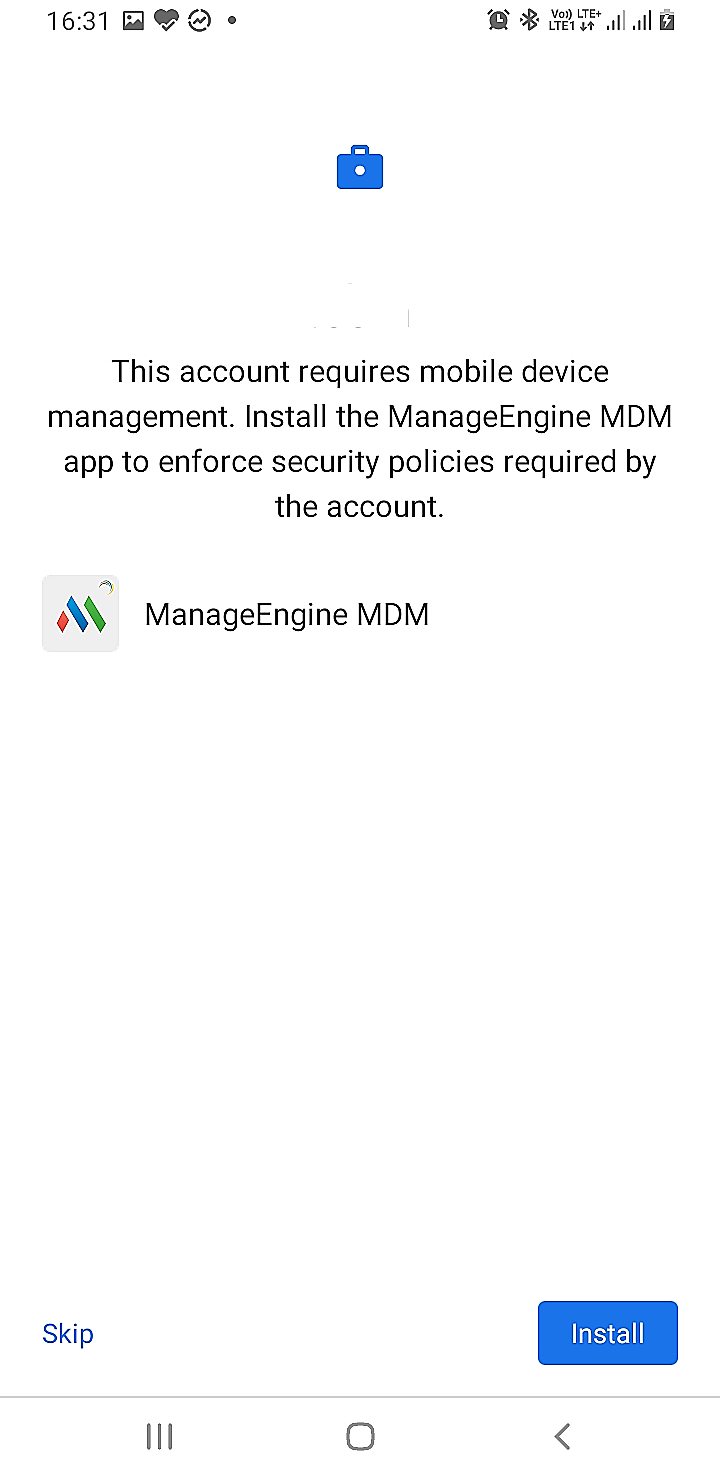
- It will prompt the ManageEngine MDM app to get installed on the device. Click on Install.

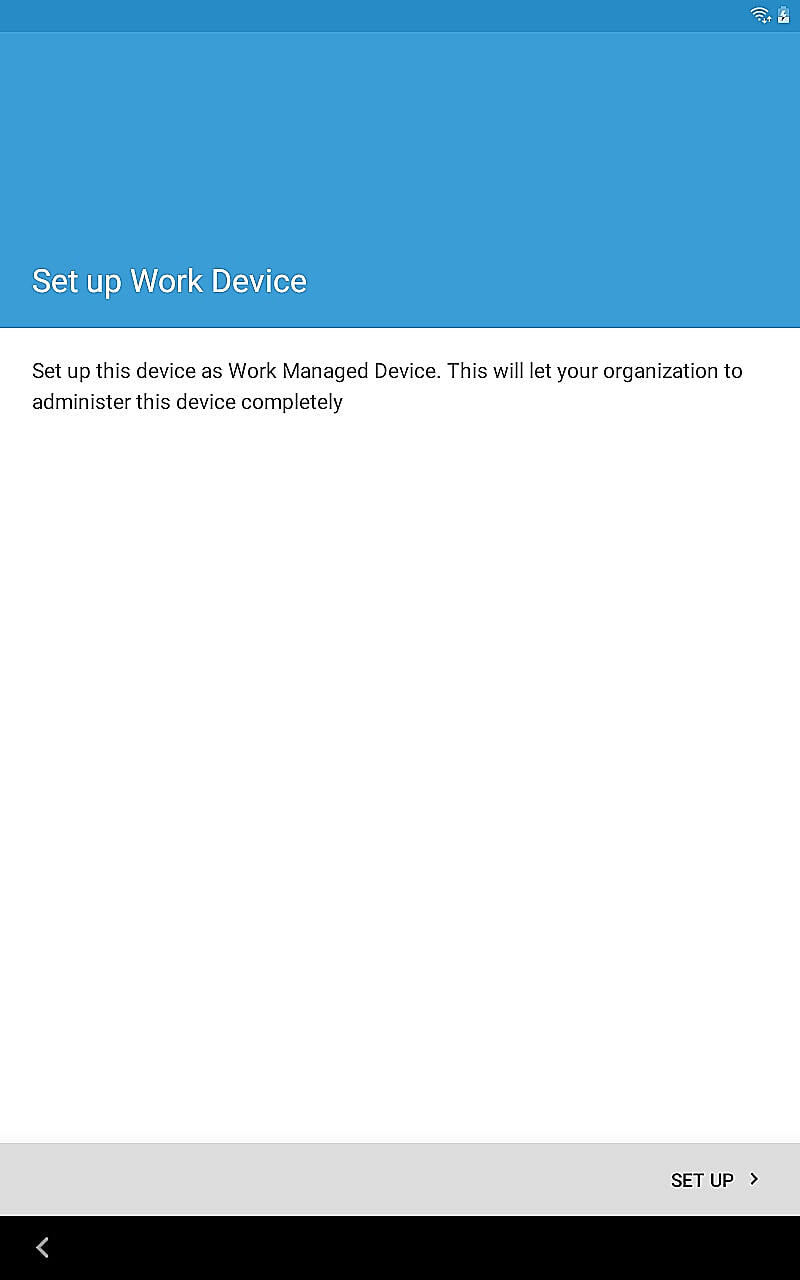
- Next, set up the device as Work Managed Device, after which Device Owner privileges can be used by MDM.
To enroll device as Profile Owner:
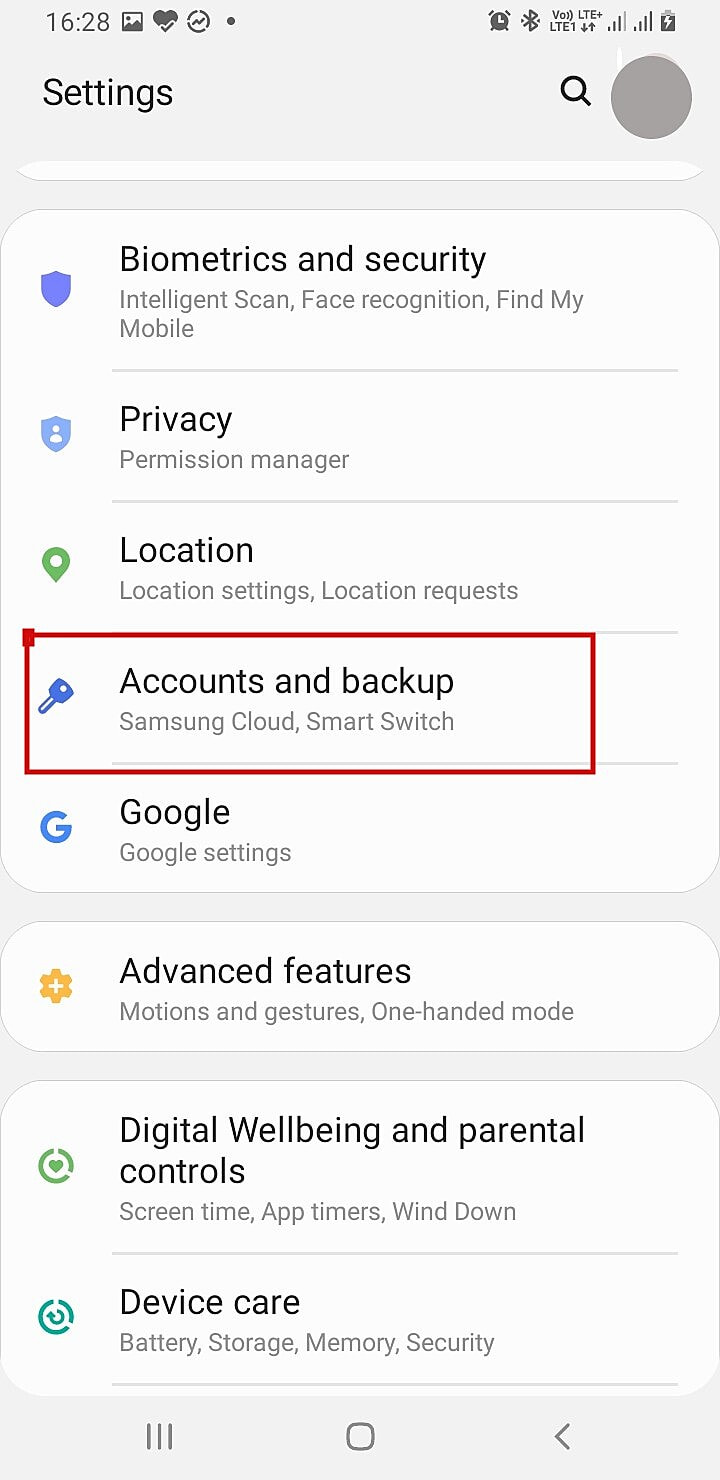
- In the device, navigate to Settings > Accounts & Backup.
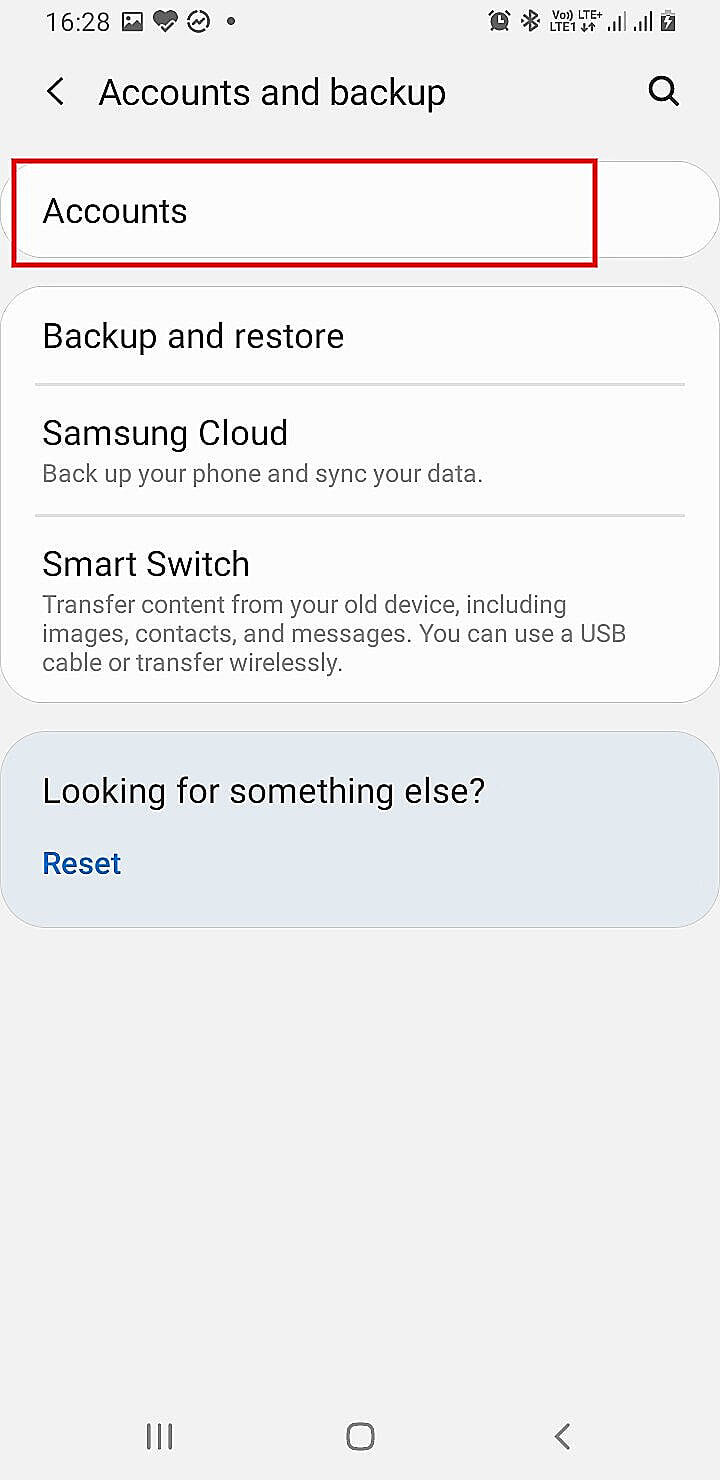
- Next, select Accounts > Google.
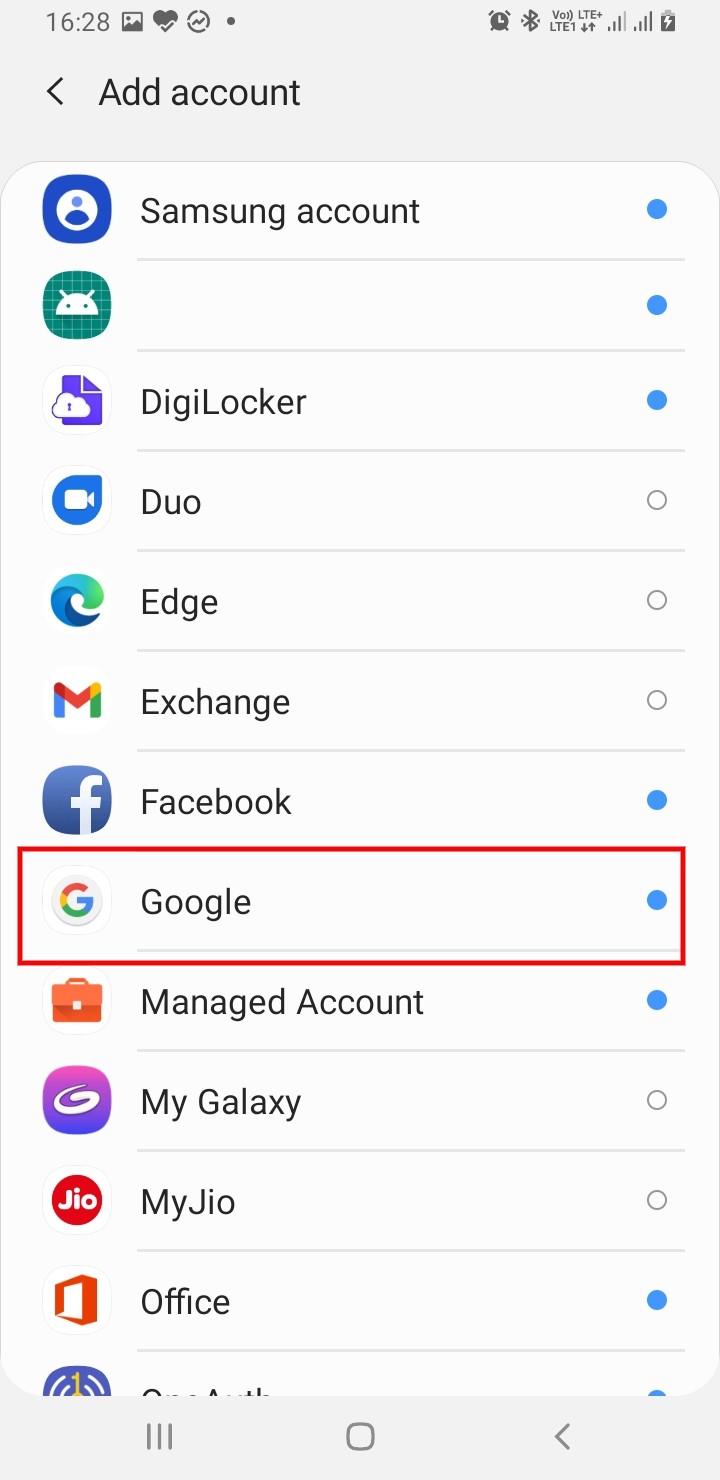
- Add the account registered with G Suite. The device will prompt to install the ManageEngine MDM app. Click on Install.
- Once installed, open the ManageEngine MDM app and enroll the device via Self-Enrollment (or) Enrollment-via-invite.
- Once enrolled, a work profile will be created and the added G Suite account will be applied to the work profile successfully.
Without G Suite (Using Google account)
For organizations without G Suite, Managed Google Play can be configured with any Google Account, which is not associated with any G Suite service or EMM services. It is recommended to use the Google account of the organization, as this account will be used for provisioning all Managed Google Play-based features and configurations to the managed devices. Configuring Managed Google Play without G Suite can be done only if MDM is running in HTTPS. If not, an error message is displayed in the browser which is to be ignored. A major advantage in this method is automatic creation and association of the user accounts to the devices.
- On the MDM Server, click Device Management tab > App Repository and select Configure Managed Google Play under Managed Google Play settings. Click on Register without G Suite and follow the on-screen instructions.
- On being redirected to Google for Play | Work, sign in with a Google account, not associated with any EMM service.
- Provide the name of your organization in less than 50 characters. Verify whether the EMM vendor is specified correctly and click on Confirm to proceed with the registration.
- Click on Complete Registration to finish the registration on which you will be redirected to MDM Server. After the redirection, Managed Google Play is setup in the server, with the specified details.
- Click here to know how to install apps silently on devices without having to manually add accounts in Play Store.
- In case you want the users to add their personal accounts in addition to the arbitrary managed account added when Android for Work is configured using a Google account, you need to create a profile, with the restriction Add Accounts enabled. This ensures the users can add accounts.
- If you are unable to configure Managed Google Play, it could be because the specified domain is already being used in another EMM provider. For this, go to the Google Admin console and navigate to Devices -> Mobile & endpoints -> Third-party integrations -> Android EMM -> Manage EMM providers. In the next step, click on the edit icon, remove the EMM provider and proceed with generating the token as explained earlier.
Removing Managed Play
When managed account is removed from server in MDM console,
- Apps distributed from MDM will not be uninstalled from the device.
- The Managed account will not be removed from the device, but the account becames invalid within 24 hours.
- Admin will not be able to distribute or update apps any further to the device.
- You cannot perform Zero-touch Enrollment
Troubleshooting Tips
- Invalid details added! Specify the correct values as explained here and retry.
The error is shown when the specified domain is already being used in another EMM provider (including Google Mobile Management). To verify, go to the Google Admin console and navigate to Devices -> Mobile & endpoints -> Third-party integrations -> Android EMM. If the EMM provider is not ManageEngine EMM, click on the edit icon, remove the EMM provider and proceed with generating the token as explained earlier. - The message You have already signed up with this enterprise is shown while configuring Managed Google Play.
The particular account might be bound to another EMM provider. In your Play For Work portal, navigate to Admin Settings and click on the ellipses icon next to Organization Information. Choose Delete Organization and confirm by clicking on delete in the next step. On the MDM console, retry configuring Managed Google Play without using Gsuite.
NOTE: Deleting the organization on Play For Work, deletes all the accounts, apps and data associated with MDM. - Device Activation in Progress screen shown in ME MDM App.
On adding a Google Workspace(G Suite) user account in device, Account Activation required notification is shown in device. On clicking the screen, it directs to Device Activation in progress page in ME MDM app and loops continuously. - Navigate to Devices.
- Under Mobile and Endpoints, expand Settings.
- Select Universal settings.
- Click on General and change the Mobile management to Turn off and save.
- Go to Password requirements then uncheck Require users to set a password.
- Navigate to Devices.
- Under Mobile and Endpoints, expand Settings.
- Select Third-party integrations.
- Click Android EMM, uncheck Enable third-party Android mobile management and save.
1.Turn off "Mobile Management" in Gsuite
2.Disable Third-party Android mobile management