How to migrate agents from Patch Manager Plus?
Note: You can seamlessly migrate from Patch Manager Plus On-Premise to Endpoint Central On-Premise by just applying the Endpoint Central On-Premise license to Patch Manager Plus On-Premise. Refer to this page.
- Windows
- Mac
- Linux
Windows Agent Migration
- Download the new agent package
Note: Kindly download the destination agent.
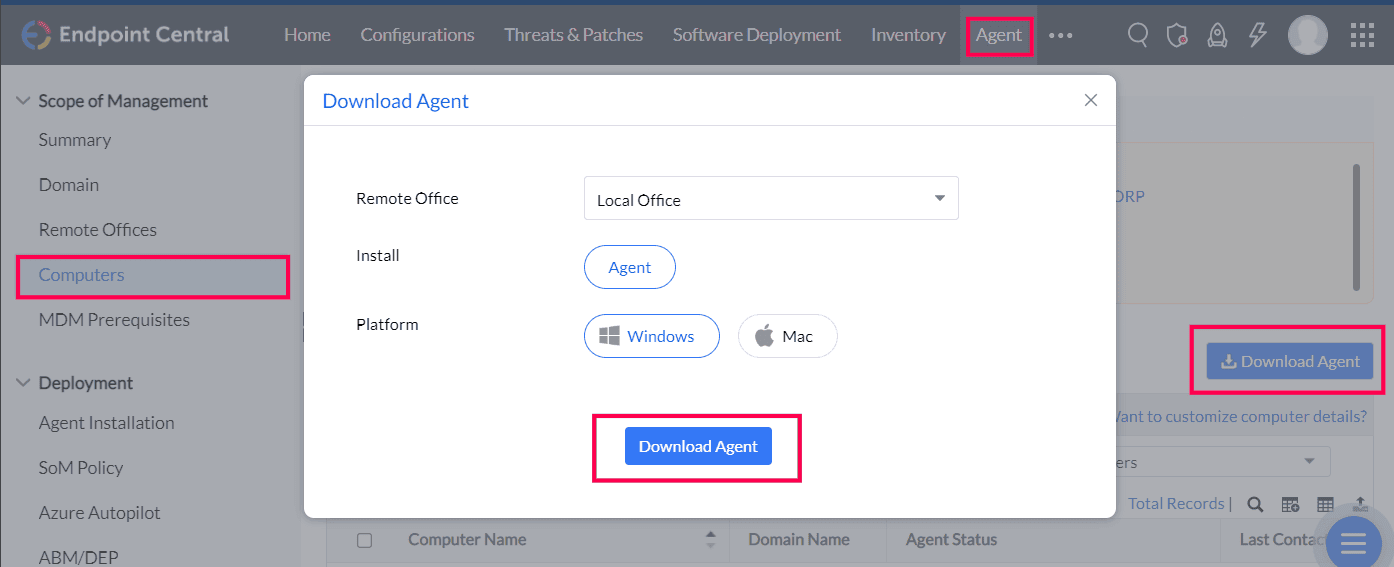
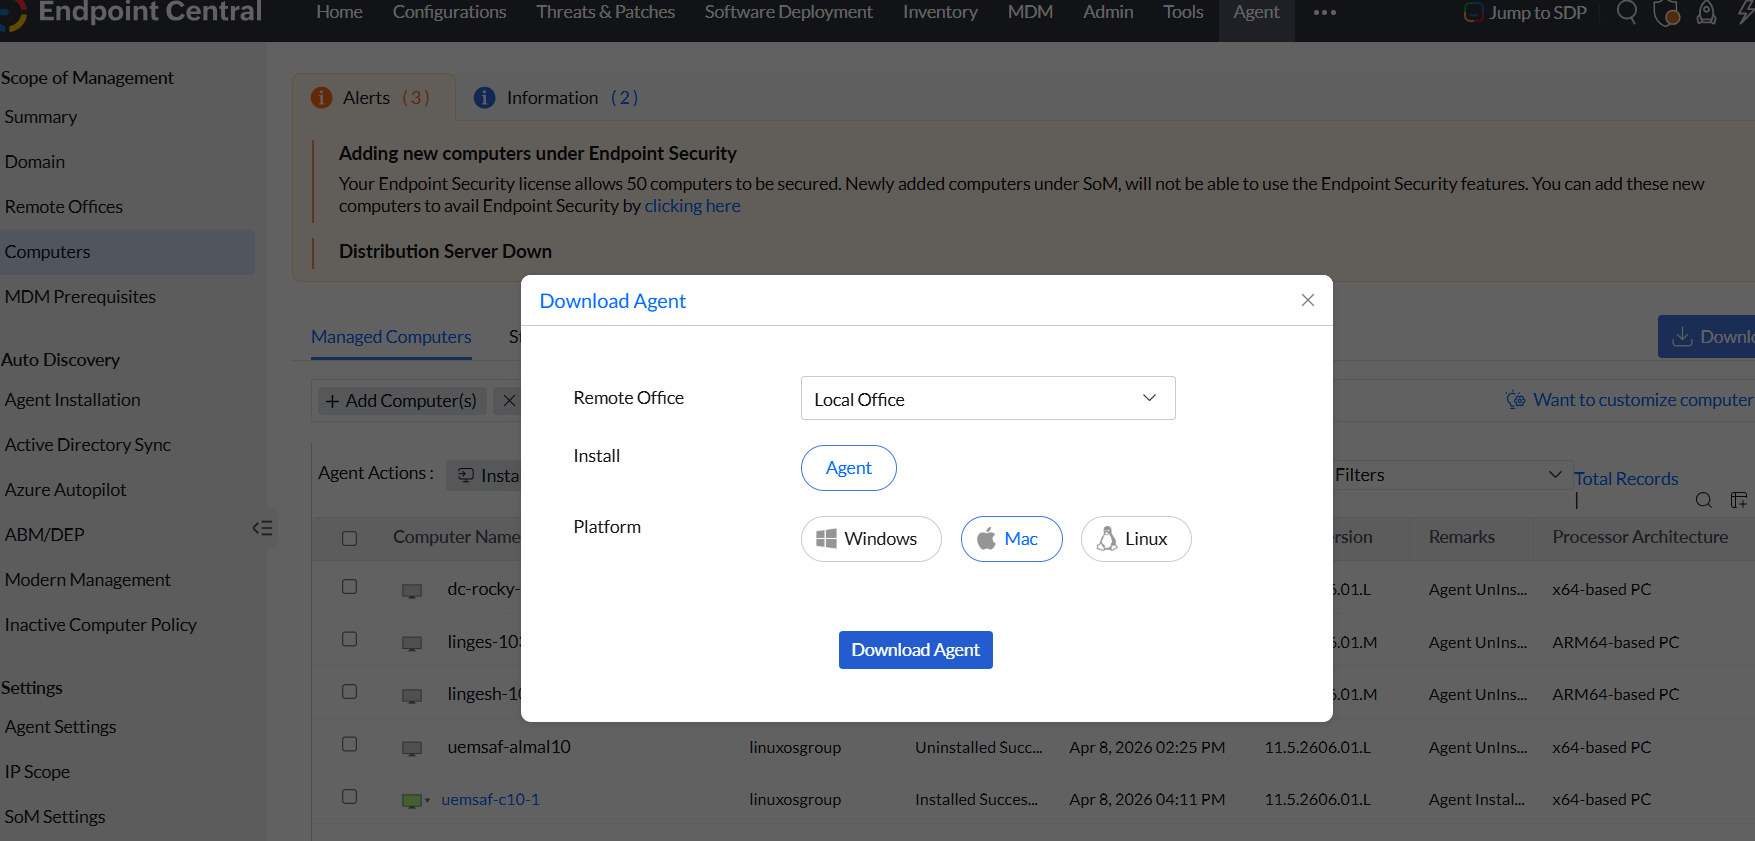
- Open the EndpointCentral web console.
- Navigate to Agent → Computers.
- Select the required remote office.
- Click the Download Agent button.
- Rename the file to
LocalOffice_Agent.exeand save it in a folder.
- Download the zip
Download the zip file, extract and copy the contents to the previously created folder.
- Generate AgentCleanupToolClient
Note: For cloud, please reach out to support with agent registry export to generate the clean-up tool. Refer this page for more.
- Follow the steps in the Patch Manager Plus server machine to which the agent belongs to generate the cleanup tool.
- Copy the generated
AgentCleanupToolClient.exeto the same folder. The folder should contain the below files.
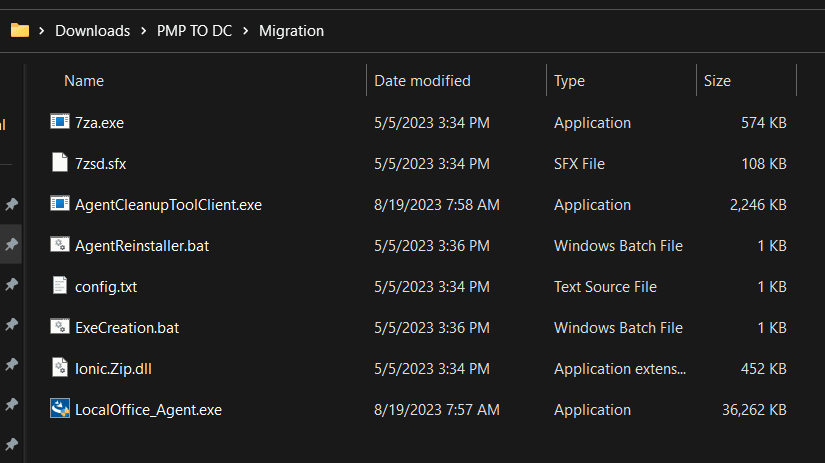
- Open command prompt with Admin rights and run
ExeCreation.bat. This will generateAgent.exe.

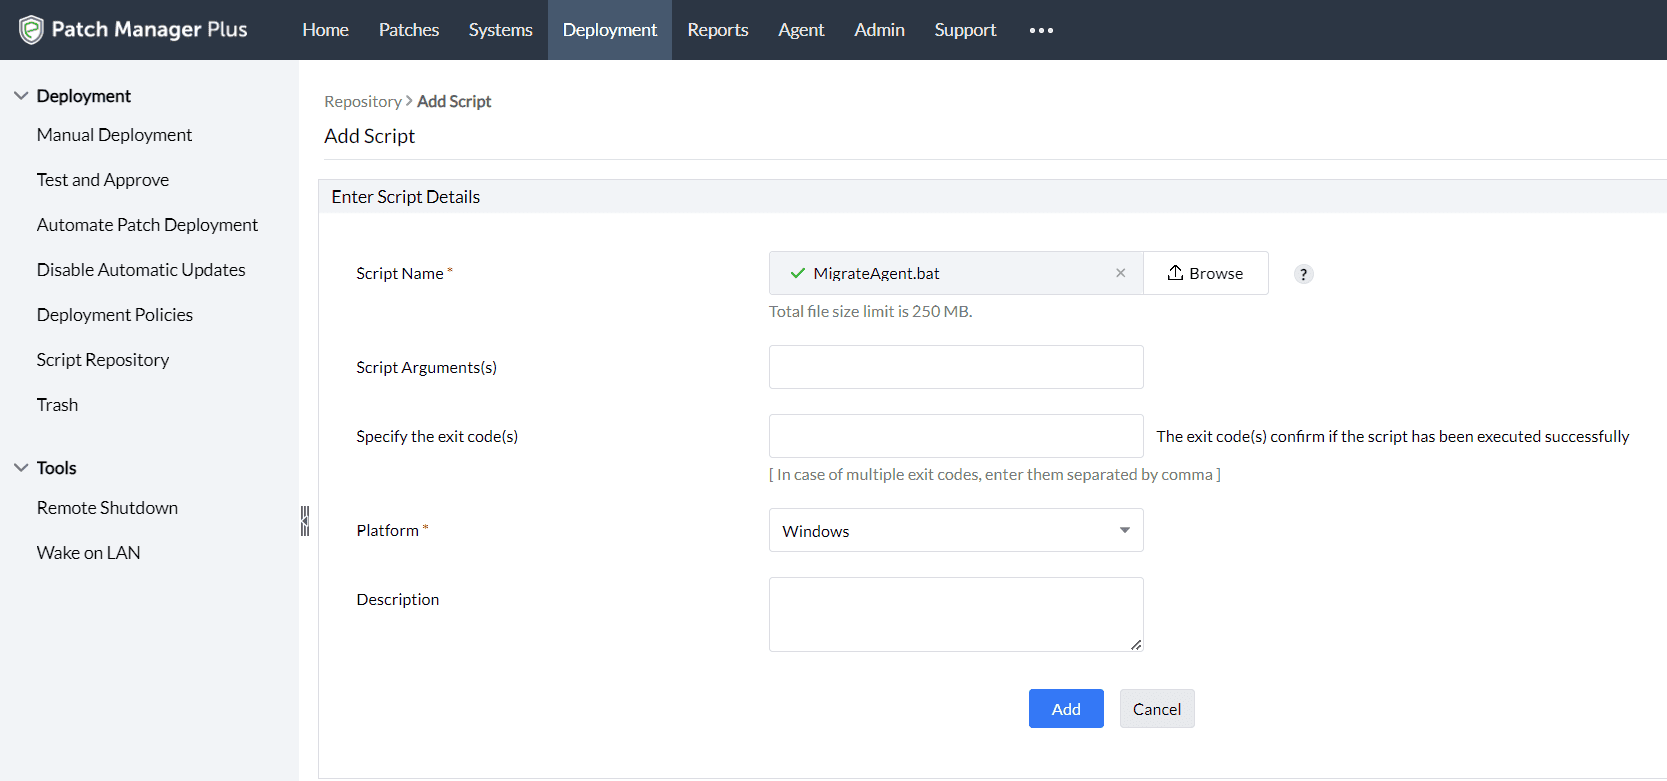
- Add the script to the repository in Patch Manager Plus
- Open Patch Manager Plus console.
- Navigate to Deployment → Script Repository → Add Script.
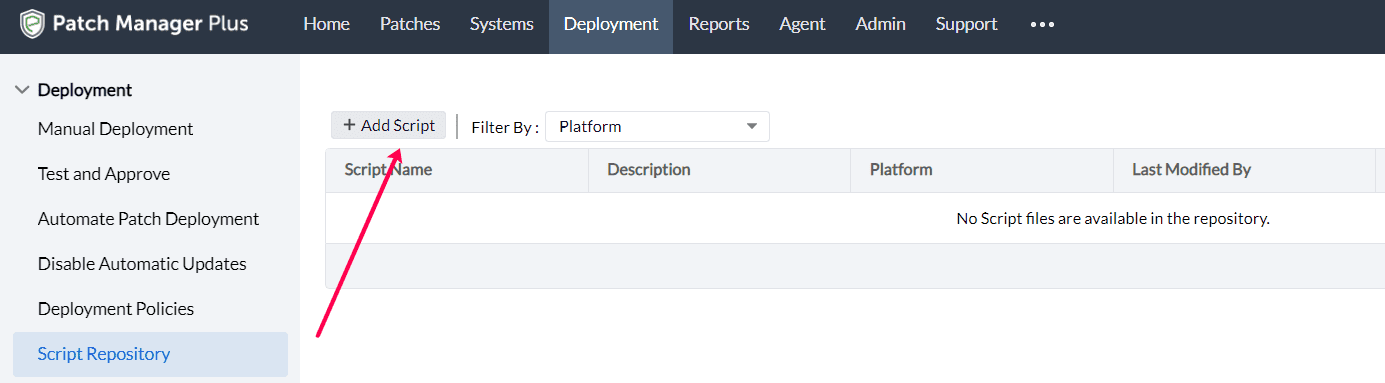
- Download MigrateAgent.bat, upload the script, and click Add.
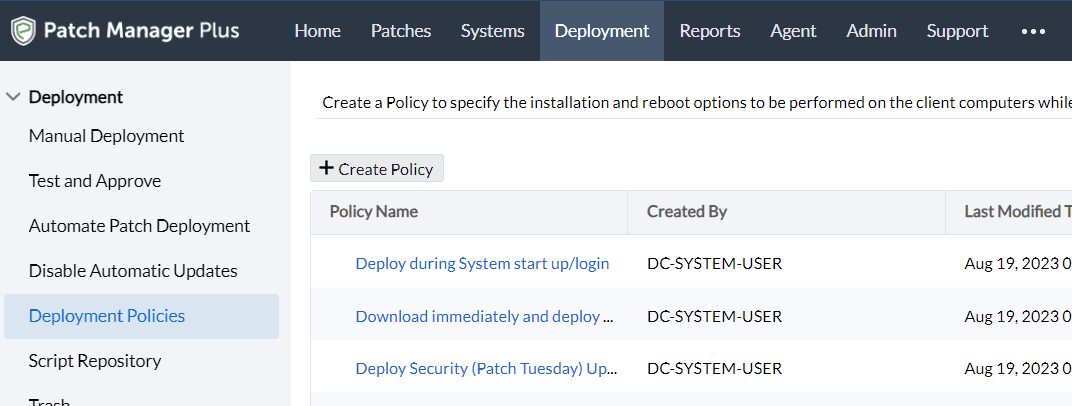
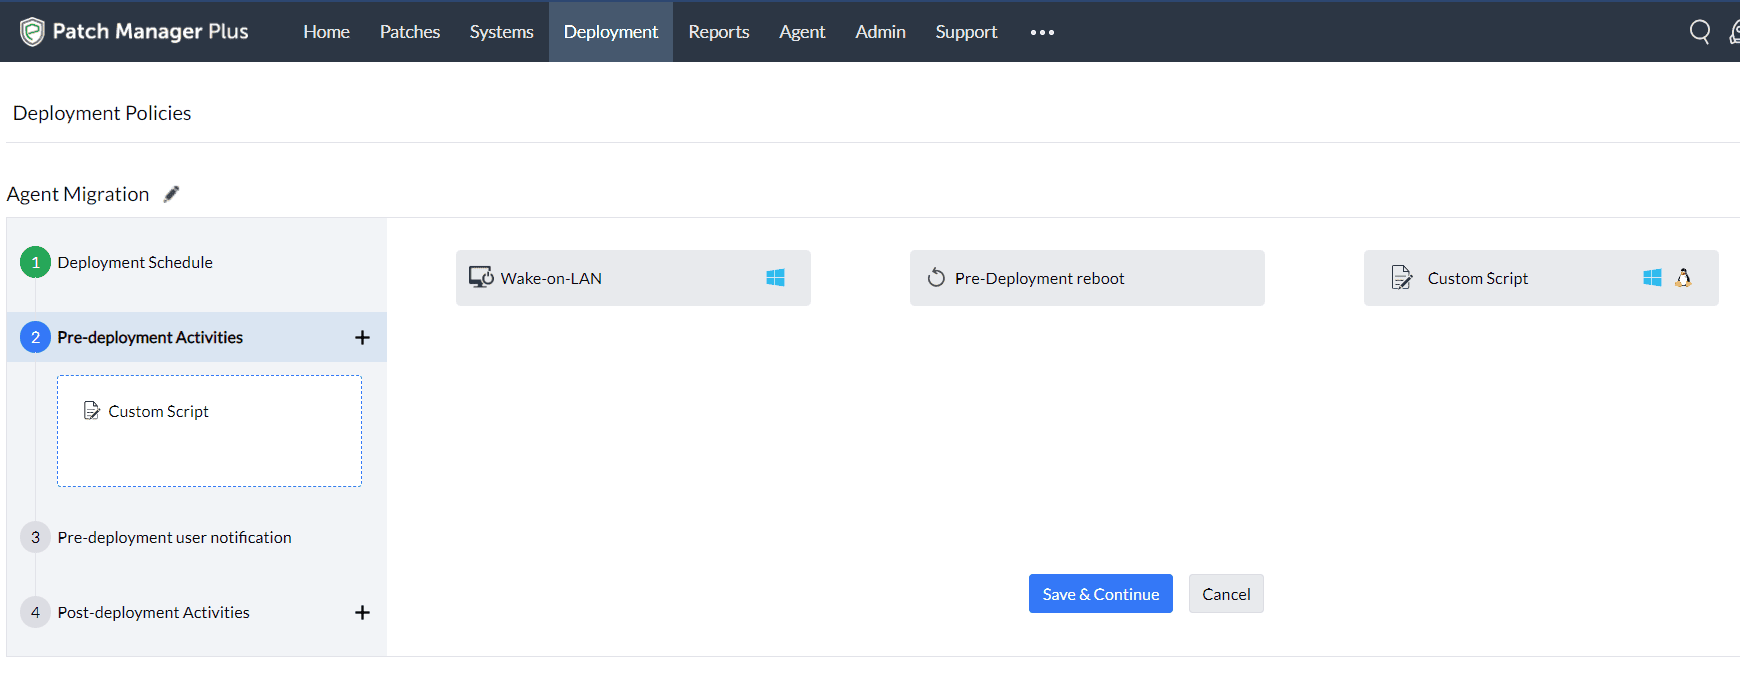
- Navigate to Deployment Policies and click Create Policy.
- Select the required deployment schedule.
- In Pre-deployment Activities, drag and drop the Custom Script.
- In Script Name, select
MigrateAgent.bat. - In Dependency files, upload the previously created
Agent.exefile.
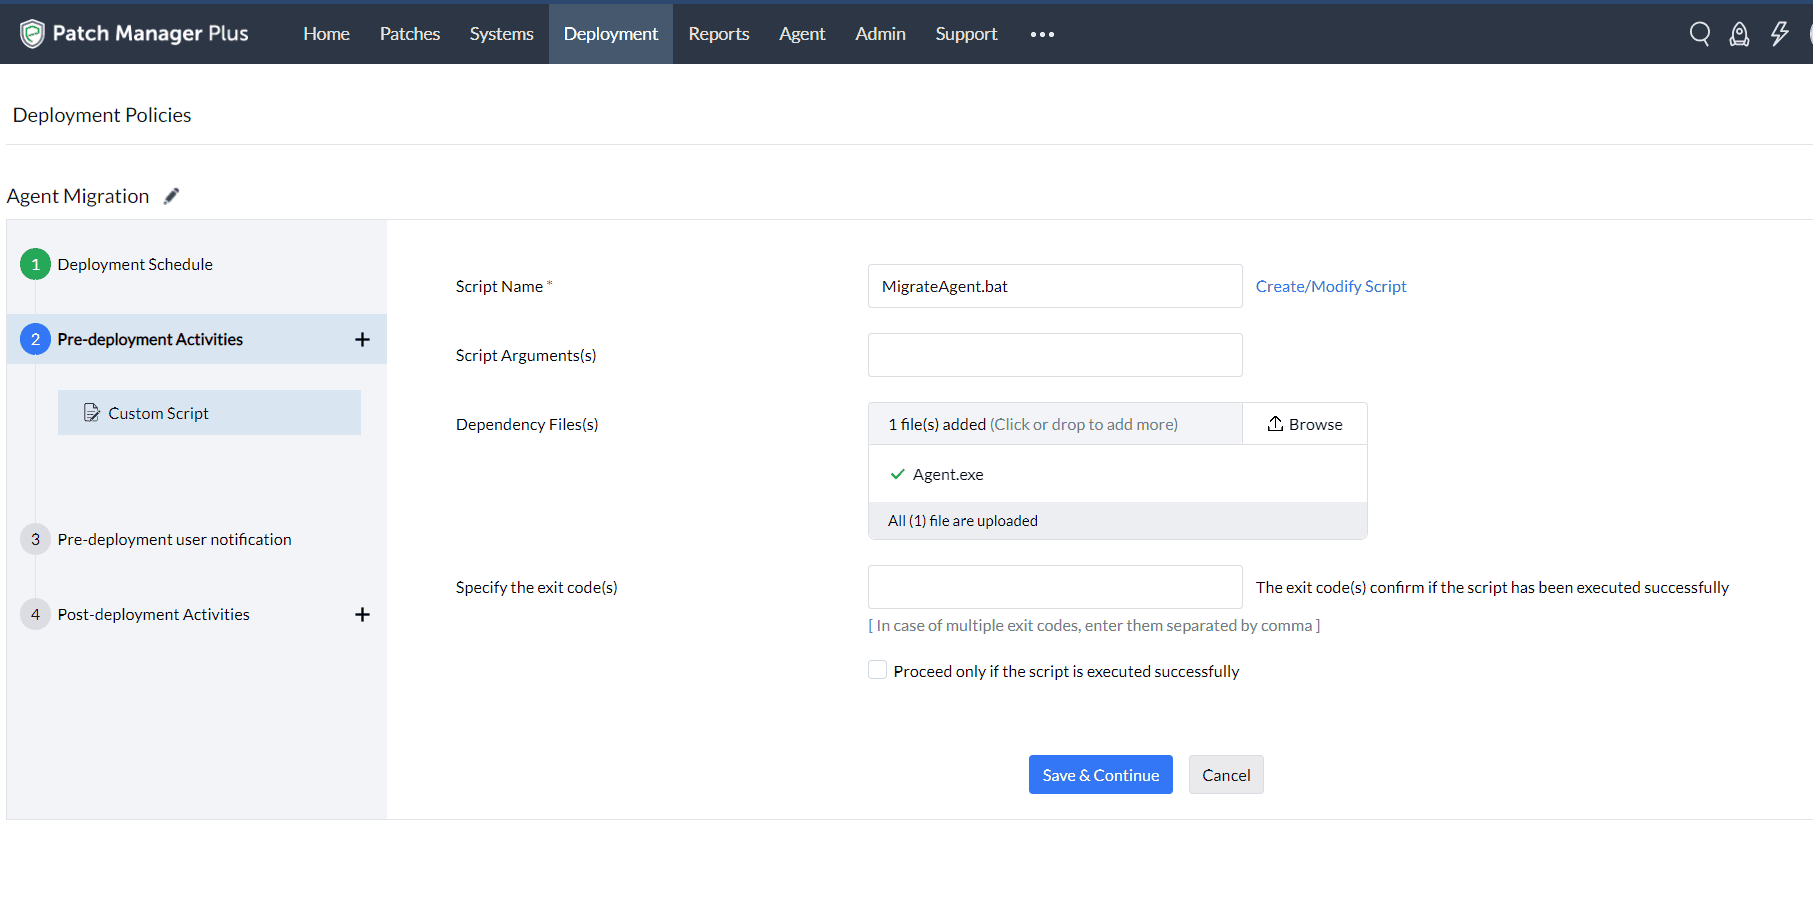
- Once done, Save and Continue, and create the policy.
- After creating a deployment policy
- Create a Manual deployment for patch ID
105979(Fix Component Store Corruption) with the newly created deployment policy as shown below:

- Select the Target and click on Deploy Immediately.
- Check whether the agent is shown in the Endpoint Central console.
- If Devices for Approval is enabled, you can find it under approval section.
- Create a Manual deployment for patch ID
Mac Agent Migration
Follow the steps below to migrate the Mac agent from PMP/VMP to EC/PMP/VMP (Cloud or On-Premise).
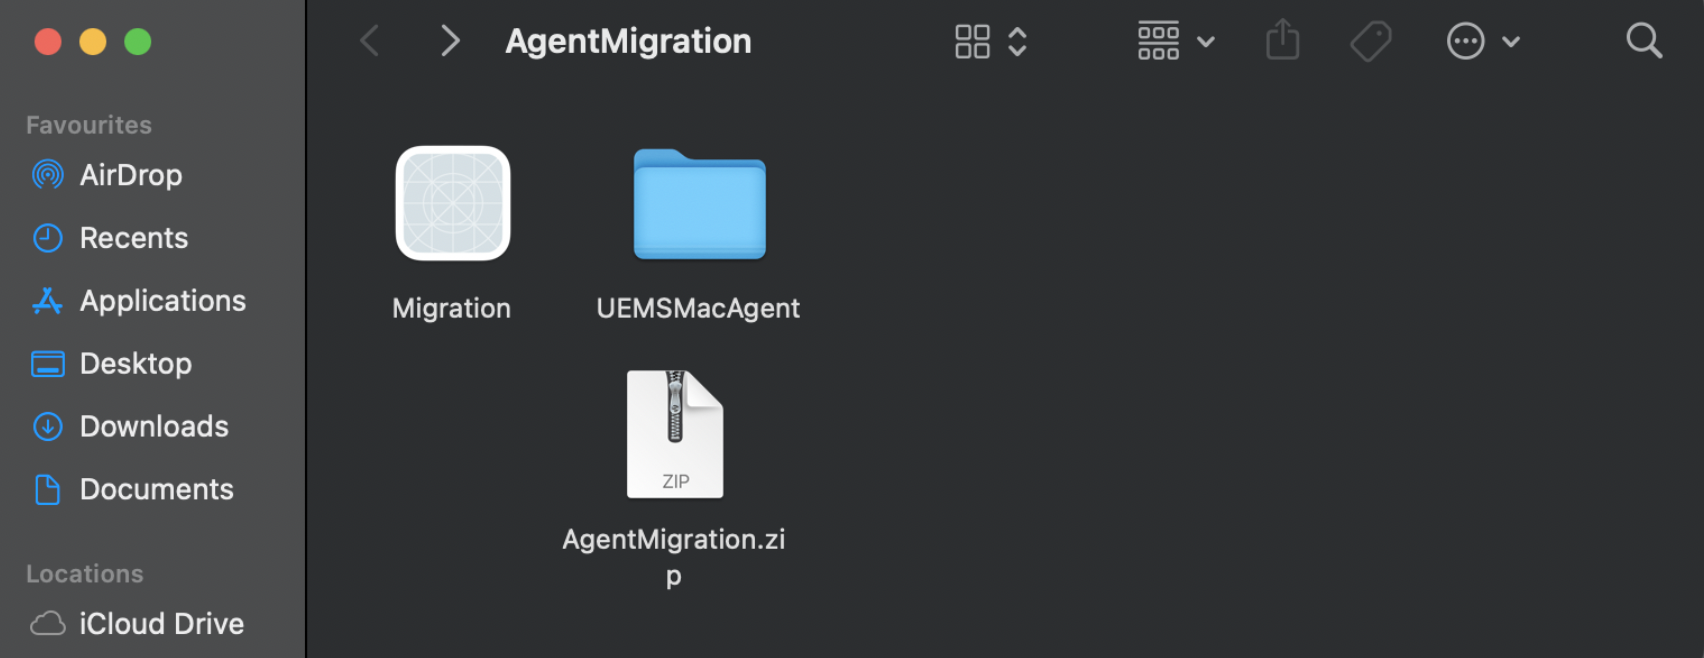
- Set up AgentMigration.zip
- Download AgentMigration.zip and extract its contents.
- Download the Mac Agent zip from the EC/PMP/VMP server.
- Seamless migration can be suggested for On-premise migration.
- These steps are applicable to both On-Premise and Cloud.
- Please disable Agent Uninstallation Restriction (TOTP) if enabled before proceeding.
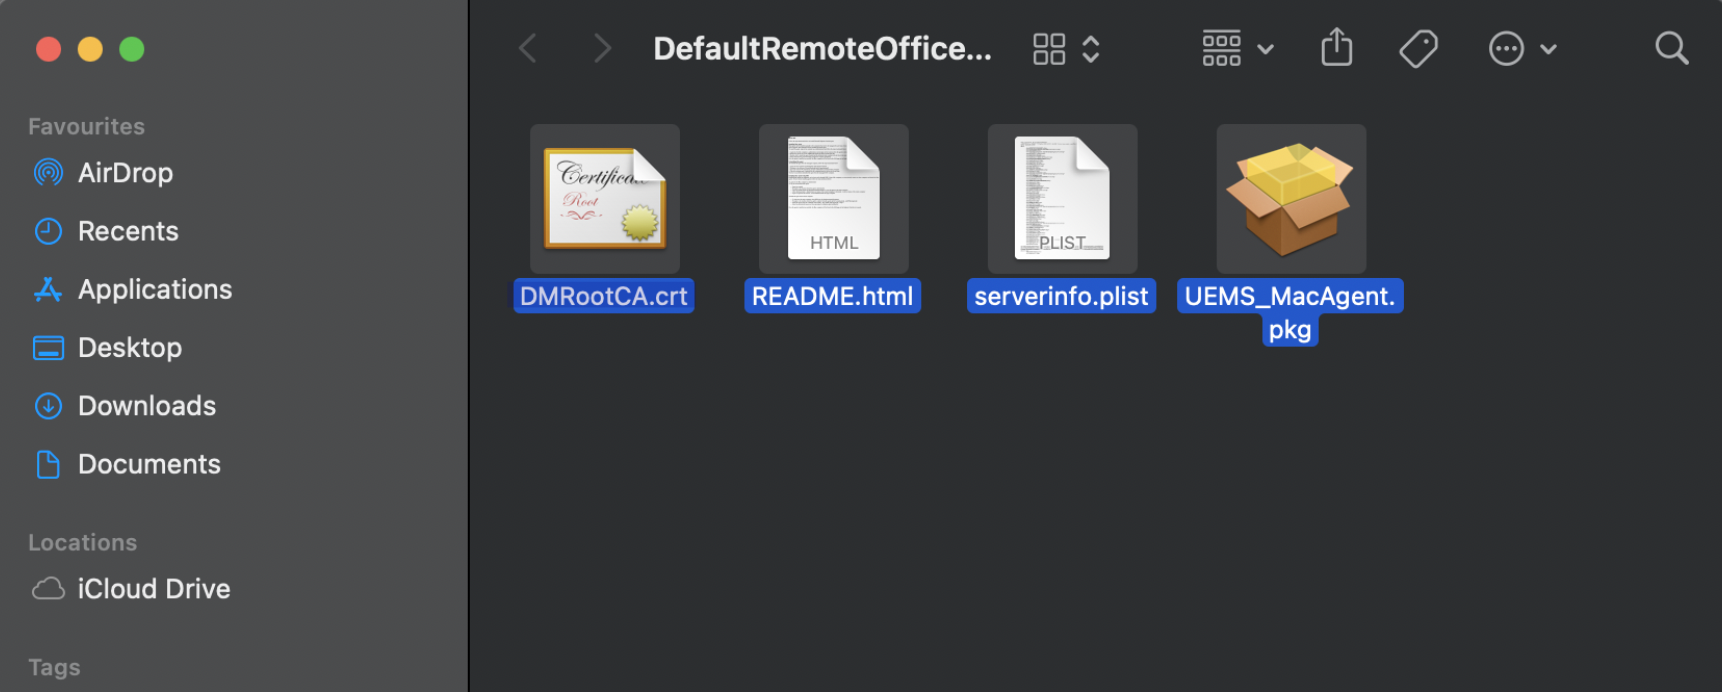
- Extract the Mac Agent zip and copy all the contents from the extracted folder.
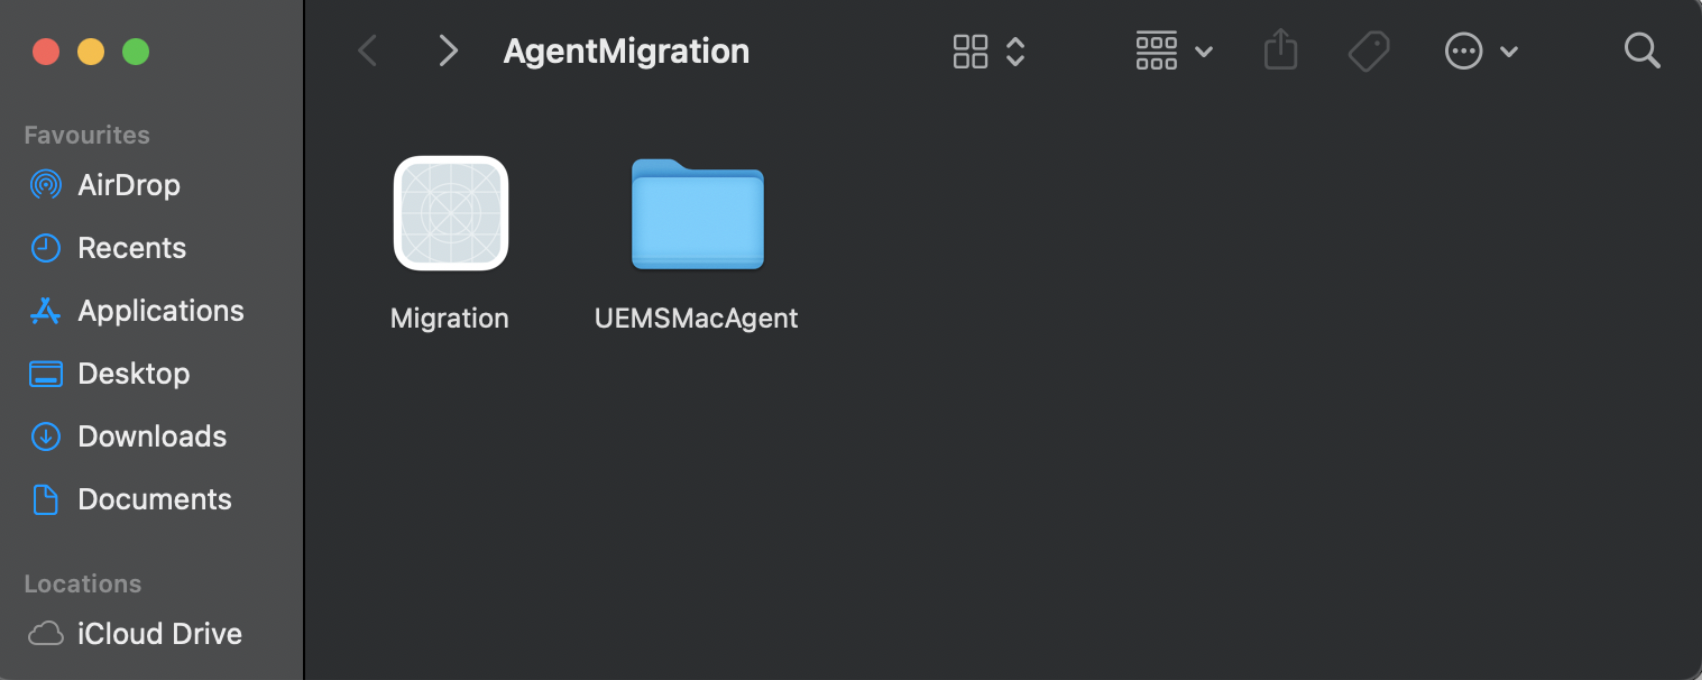
- Place the copied contents into the UEMSMacAgent folder located inside the AgentMigration folder.
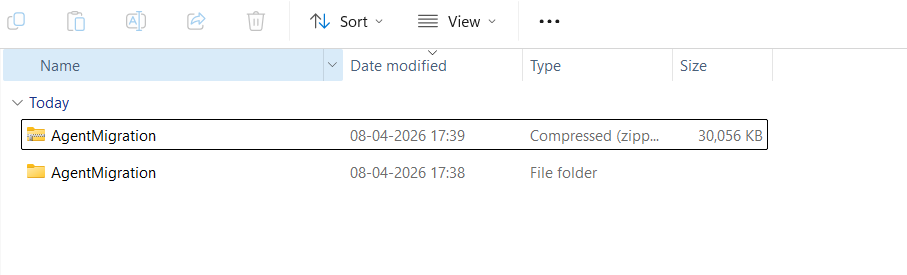
- Compress the Migration.app and UEMSMacAgent folder together and rename the compressed file as AgentMigration.zip.
 Note
Note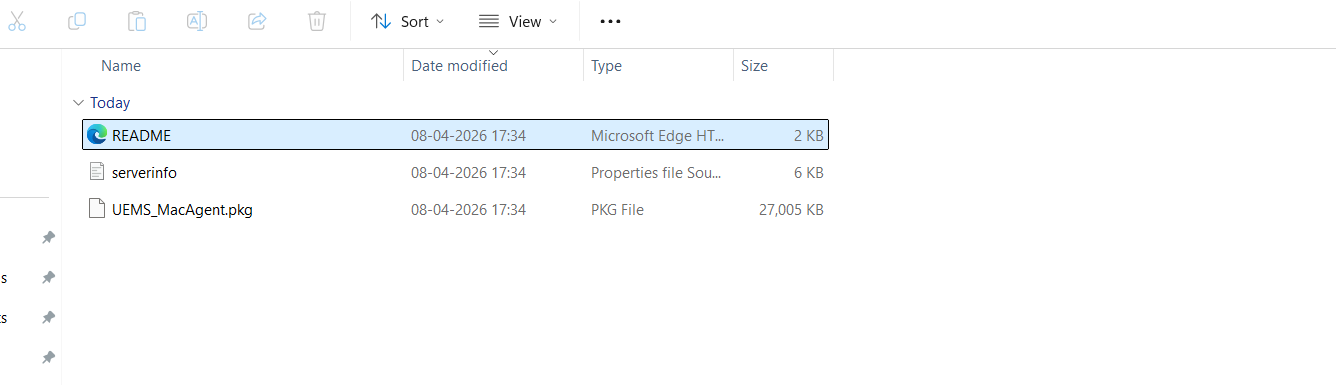
- Host AgentMigration.zip
Host the AgentMigration.zip file in a location accessible to all agents and Distribution Servers, and note the download link.
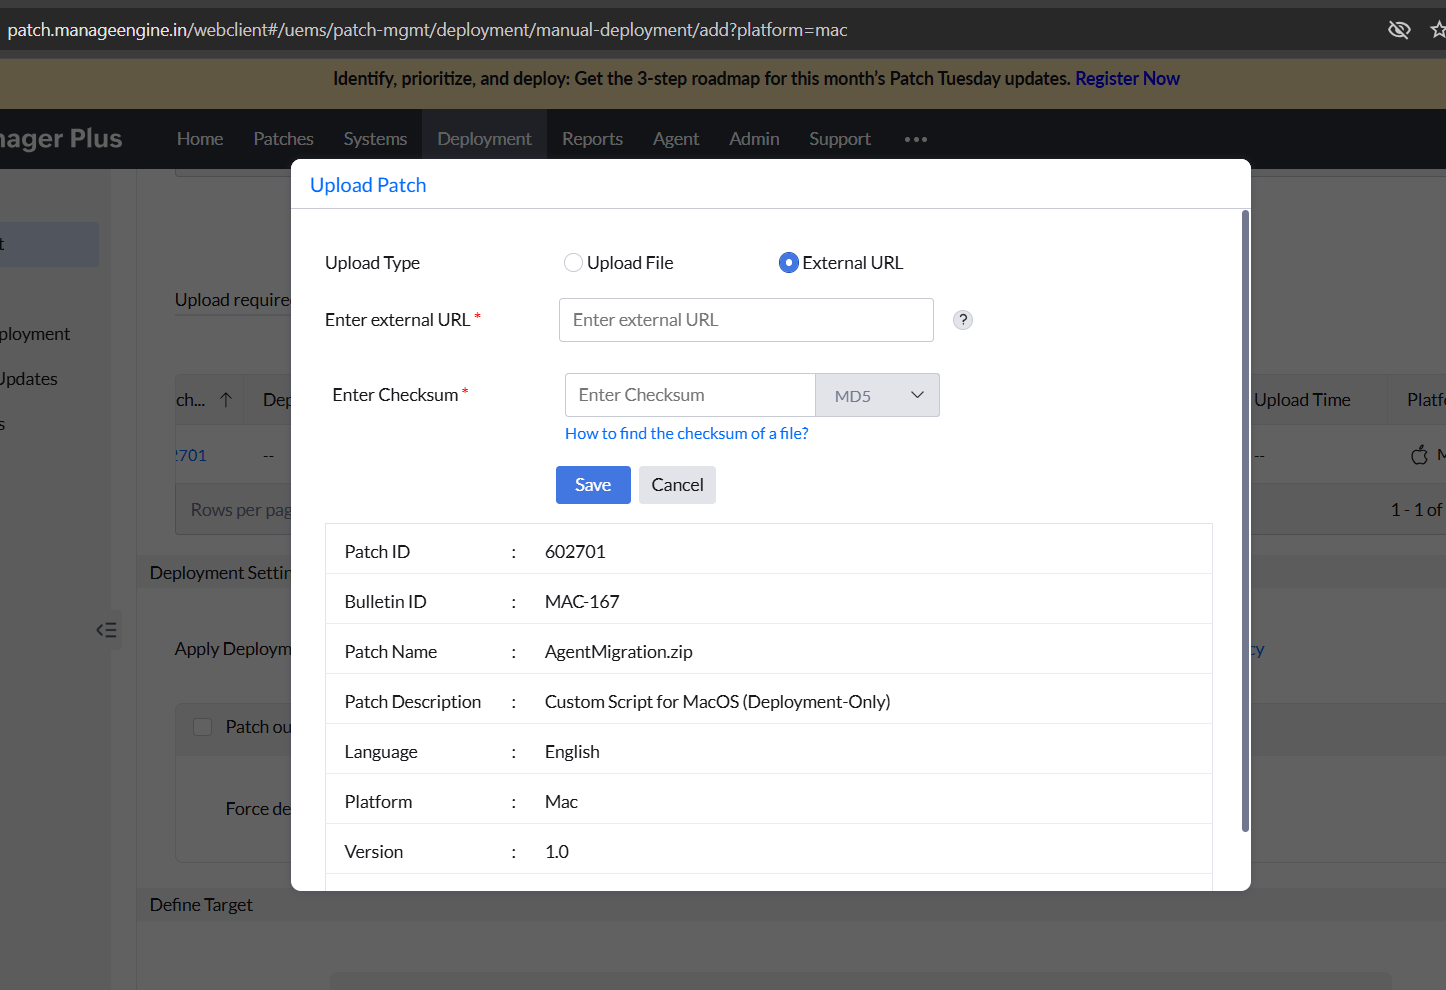
- Upload the patch to the PMP server
- Go to Patches → Downloaded Patches.
- Change the filter from Missing Patches in Network to All Patches.
- Search for patch ID 602701.
- Upload the hosted AgentMigration.zip link and its checksum as an External URL.
- Deploy the patch to the target machines on which migration has to be done.
Note: Test on a few Mac machines before deploying to all. It is recommended to deploy in batches.
Linux Agent Migration
- Download the agent package
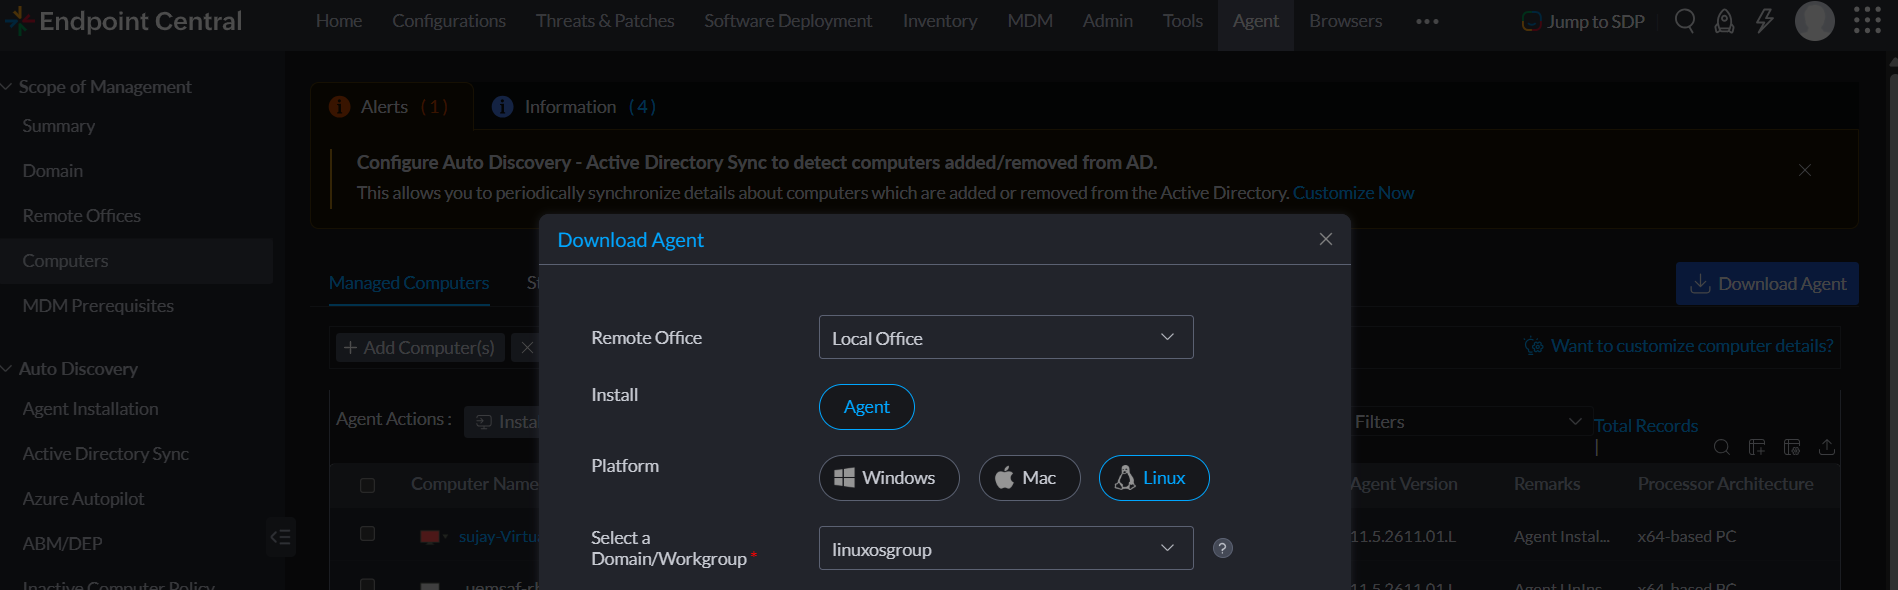
- Open the EndpointCentral web console.
- Navigate to Agent → Computers.
- Select the required remote office and Linux as OS Platform
- Select the relevant Domain or Workgroup and processor.
- Click the Download Agent button.
- Seamless migration can be suggested for On-premise migration.
- These steps are applicable to both On-Premise and Cloud.
- Please disable Agent Uninstallation Restriction (TOTP) if enabled before proceeding.
copyAgentFiles.bashandLinuxAgentInstaller.bashare available at the link.- Add the script to the repository
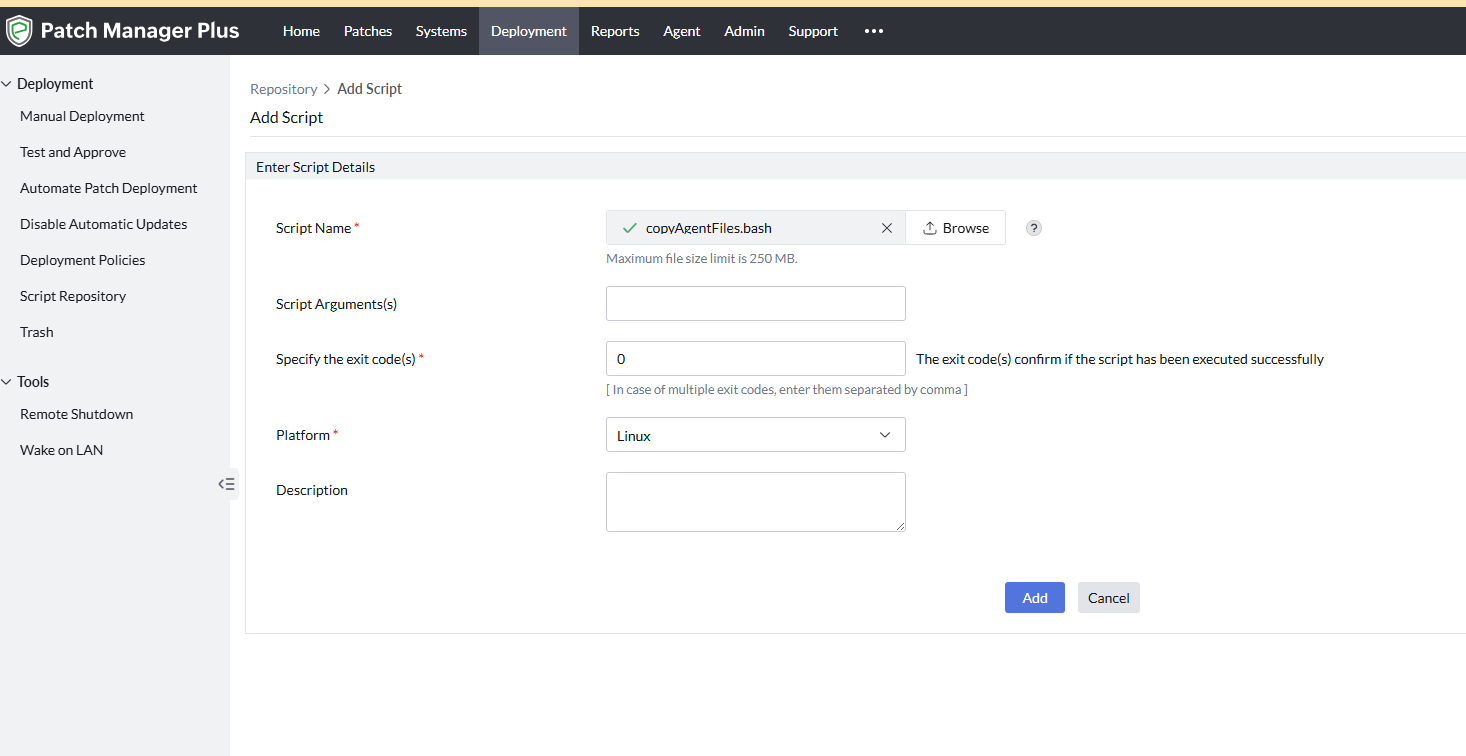
- Navigate to Deployment → Script Repository → Add Script.
- Upload the script copyAgentFiles.bash (available at the link above) to the Script Repository and click Add.
- Create a Deployment Policy
- Navigate to Deployment → Deployment Policies → Create Policy and configure the deployment window based on your preferred schedule.
- In Pre-deployment Activities, add Custom Script and click Save and Continue.
- In Script Name, select copyAgentFiles.bash.
- In Dependency Files, add the following files:
- DesktopCentral_LinuxAgent.bin / UEMS_LinuxAgent.bin — available in the zip file downloaded from the Cloud console.
- serverinfo.json — available in the zip file downloaded from the Cloud console.
- LinuxAgentInstaller.bash
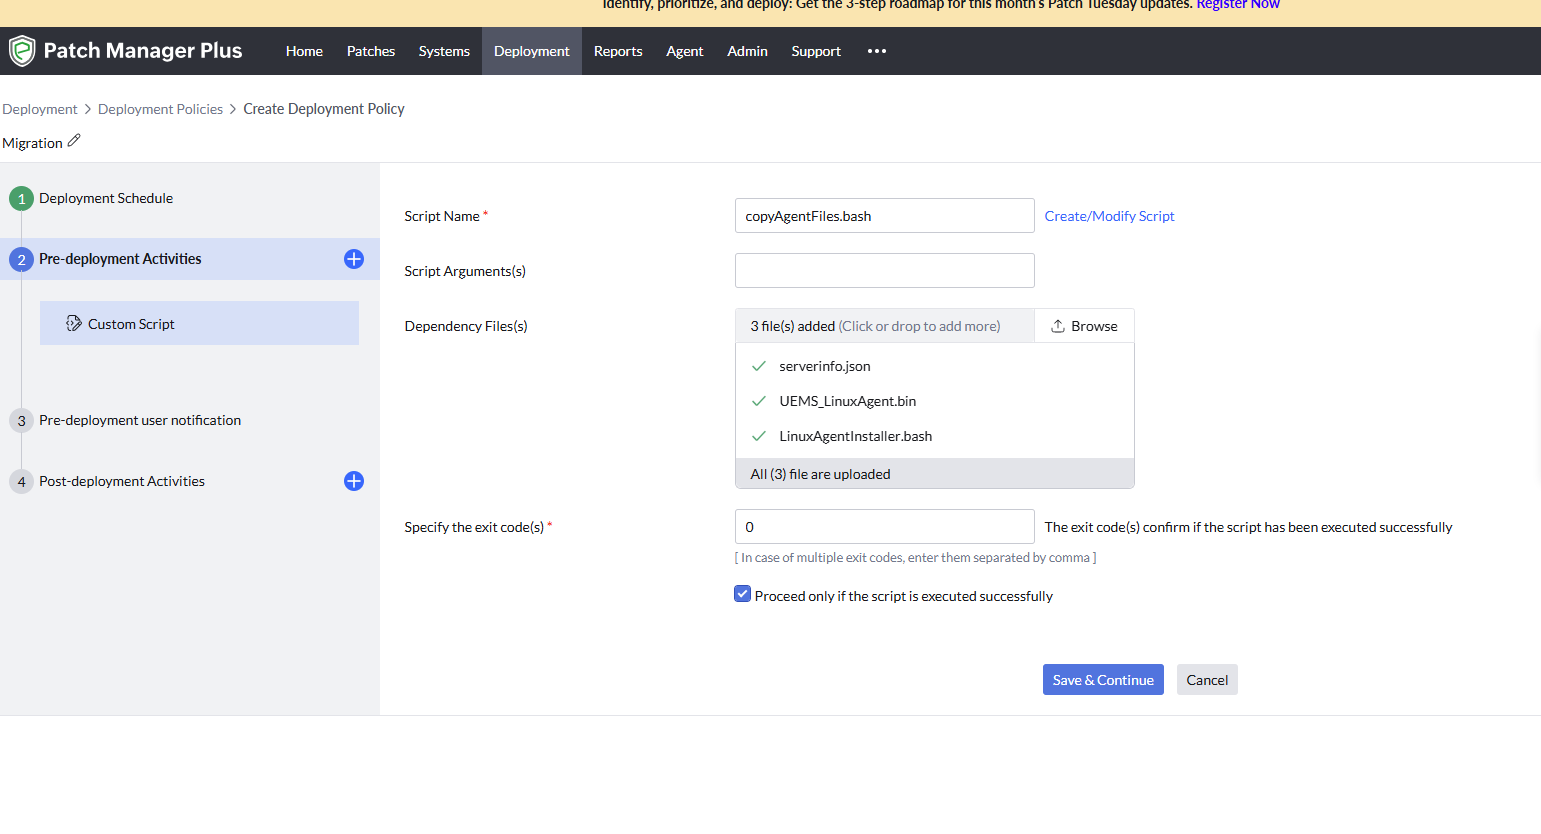
- Click Save and Continue through the remaining pages and save the deployment policy.
- Deploy to Linux machines
- Navigate to Deployment → Manual Deployment → Install/Uninstall Patch → Linux.
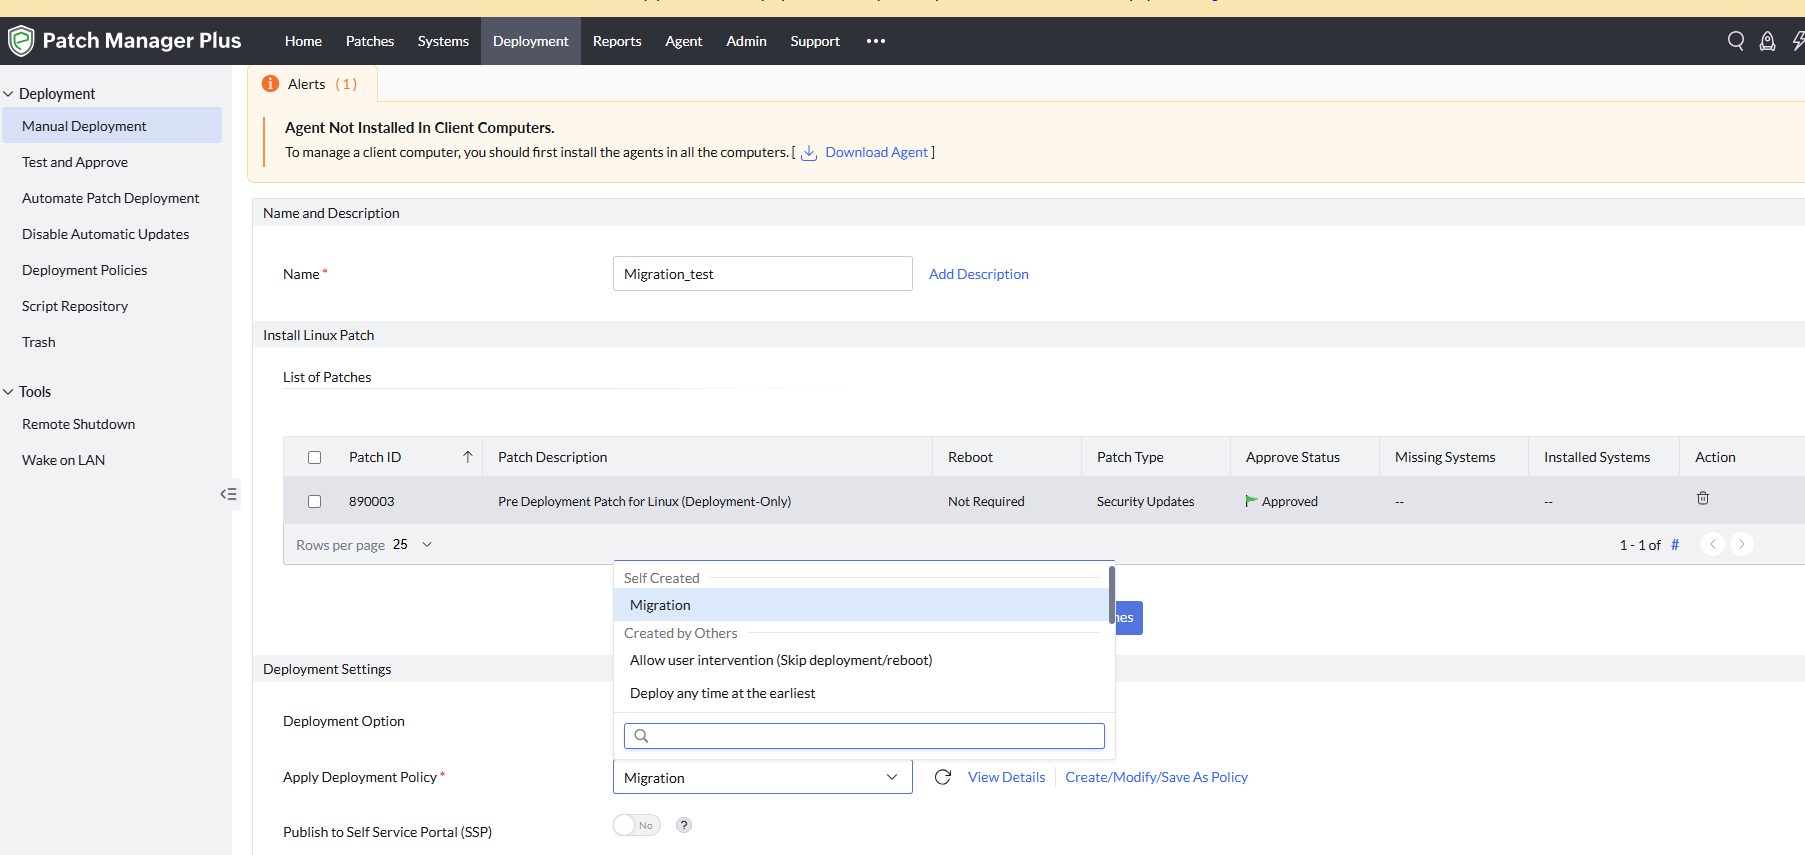
- Under Install Linux Patch, click Add Patches, search for patch ID 890003 and click Add.
- In Apply Deployment Policy, select the deployment policy created above.
- Set the target as the Linux machines on which migration has to be done.
- Select Deploy Immediately.