How to enable SSL port in Exchange Reporter Plus
The purpose of this document is to help you configure SSL certification in Exchange Reporter Plus. SSL certification protects all the sensitive information sent between users’ browsers and the Exchange Reporter Plus server by encrypting and transmitting the information through a secure channel.
Exchange Reporter Plus is web-based software, so it's important to secure the communication between the browser and the solution's server. SSL is standard security technology for establishing an encrypted secure channel for communication between browsers and servers, and is used to secure Exchange Reporter Plus' communication, too. This document explains in detail about:
Step 1: Enabling SSL in Exchange Reporter Plus
- Log in to Exchange Reporter Plus with admin credentials.
- Go to Settings > Admin > General Settings > Product Settings.
- Under Connection Settings, check the Enable SSL Port [https] box.
- Enter a different port number (only if required).
- Click Save.
- Restart Exchange Reporter Plus.

Step 2: Creating a CSR file and submitting it to a certificate authority
Exchange Reporter Plus uses Tomcat server for which specific Keystore and CSR files need to be created before requesting certificates from a certifying authority. Follow the steps below:
A. Creating a KEYSTORE file
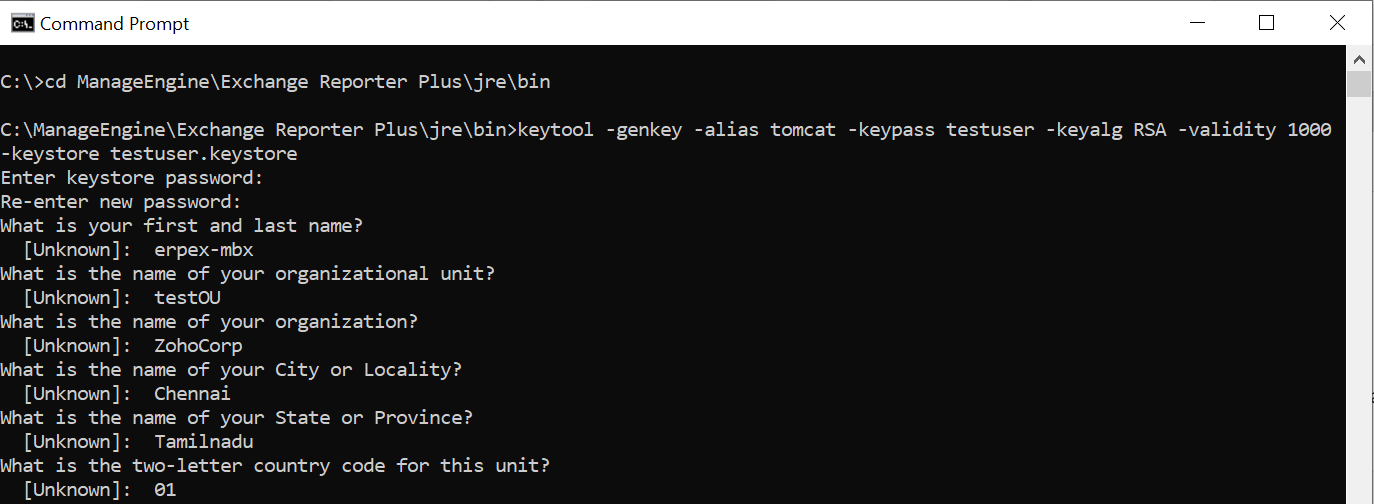
- Open Command Prompt.
- Navigate to the <installation directory> \jre\bin folder, and execute the following command:keytool -genkey -alias tomcat -keypass <your key password> -keyalg RSA -validity 1000 -keystore <keystore_name>.keystore
- After executing the above command, you will be prompted to answer the following questions:
- Enter the keystore password. (Enter the key password you used in the above command or use plain characters like changeit instead.)
- What is your first and last name? (You can either provide the machine name or the fully qualified domain name (FQDN) of the server hosting Exchange Reporter Plus here.)
- What is the name of your organizational unit?
- What is the name of your organization?
- What is the name of your City or Locality?
- What is the name of your State or Province?
- What is the two-letter country code for this unit?
Once you have answered these questions, acknowledge that the entered information is correct for the keystore file to be created.
B. Creating a CSR (certificate signing request) file
- Open Command Prompt.
- Navigate to the <installation directory>\jre\bin folder, and execute the following command:
keytool -certreq -alias tomcat -keyalg RSA -keystore < keystore_name >.keystore -file <csr_name>.csr
Note: The CSR file should be submitted to the certifying authority (CA) to receive CA-signed certificate files. Refer to the steps given in Appendix A to request a certificate from an internal CA.
C. Adding a certificate authority-signed certificate to the keystore
Note: To add the CA-signed SSL certificates to the keystore, use the instructions listed for the specific vendors below. These instructions might change depending on the certificate issued by the CA. Please ensure you replace the example values given inside <>.
- Download and unzip the certificate files provided by your CA.
- Open an elevated Command Prompt and navigate to the <installation directory>\jre\bin folder.(By default: C:\ManageEngine\Exchange Reporter Plus\jre\bin.)
- To import the certificate into a .keystore ile, run the commands from the list given below (as applicable to your CA):
Adding signed certificate for certifying authority: GoDaddy
- keytool -import -alias root -keystore <Keystore_Name>.keystore-trustcacerts -file gd_bundle.crt
- keytool -import -alias cross -keystore <Keystore_Name>.keystore-trustcacerts -file gd_cross_intermediate.crt
- keytool -import -alias intermediate -keystore<Keystore_Name>.keystore-trustcacerts -file gd_intermediate.crt
- keytool -import -alias <Alias Specified when creating the Keystore>-keystore <Keystore_Name>.keystore-trustcacerts -file<CertificateName>.crt
Adding signed certificate for certifying authority: Verisign
- keytool -import -alias intermediateCA -keystore <Keystore_Name>.keystore -trustcacerts -file<your_intermediate_certificate_name>.cer
- keytool -import -alias <Alias Specified when creating the Keystore> -keystore<Keystore_Name>.keystore-trustcacerts -file<CertificateName>.cer
Adding signed certificate for certifying authority: Comodo
- keytool -import -trustcacerts -alias root -file AddTrustExternalCARoot.crt -keystore <Keystore_Name>.keystore
- keytool -import -trustcacerts -alias addtrust -file UTNAddTrustServerCA.crt -keystore <Keystore_Name>.keystore
- keytool -import -trustcacerts -alias ComtodoUTNServer -file ComodoUTNServerCA.crt -keystore <Keystore_Name>.keystore
- keytool -import -trustcacerts -alias essentialSSL -file essentialSSLCA.crt -keystore <Keystore_Name>.keystore
- keytool -import -trustcacerts -alias <Alias Specified when creating the Keystore>-file <Certificate-Name>.crt-keystore<Keystore_Name>.keystore
Step 3: Associating Exchange Reporter Plus with the signed certificate
Based on whether the certificate is for a single domain or a multi-domain/wildcard certificate, the steps may vary.
A. For a single-domain SSL certificate
Note: If your certificate is in CER, CRT, PEM, or any other format, convert it to the P7B format first, and then proceed with installation. Refer to Appendix B to learn how to convert certificates to P7B format.
Steps to install the P7B certificate in Exchange Reporter Plus
- Place the P7B file in<installation directory>\jre\bin. (By default: C:\ManageEngine\Exchange Reporter Plus\jre\bin.)
- Open an elevated Command Prompt and navigate to <installation directory>\jre\bin.
- Execute the following command: Keytool -import -alias tomcat -trustcacerts -file cert.p7b -keystore <certificate_file_name>.keystore
- Copy the keystore file to: <installation directory>\conf(by default: C:\ManageEngine\Exchange Reporter Plus\conf).
- Back up the server.xml file at<installation directory>\conf.
- Edit the server.xml file by replacing the value of the following SSL connector tags at the bottom of the page:
- keystoreFile with ./conf/.keystore and
- keystorePasspassword with whatever password you entered during the CSR generation.
For example: <Connector SSLEnabled="true"acceptcount="100" clientauth="false" connectiontimeout="20000" debug="0" disableuploadtimeout="true" enablelookups="false" keystorefile="./conf/<certificate_file_name>.keystore" keystorepass="<password>"maxsparethreads="75" maxthreads="150" minsparethreads="25" name="SSL" port="9251" scheme="https" secure="true" sslprotocol="TLS" sslprotocols="TLSv1,TLSv1.1,TLSv1.2"><connector>
- Save the changes.
- Restart Exchange Reporter Plus. If you are able to view the Exchange Reporter Plus login console without any warning from the browser, you have successfully installed your SSL certificate in Exchange Reporter Plus.
B. For a multi-domain or wildcard certificate
- Copy the PFX/PKCS12 certificate file and paste it under the path<installation directory>\conf.(By default: C:\ManageEngine\Exchange Reporter Plus\conf.)
- Open the server.xml file (present in<installation directory>\conf)in a text editor of your choice. Go to the end of the XML file, and search for the Connector tag that starts with <Connector SSLEnabled=”true” ……/>
- Now, edit the following values inside that connector ttag:
keystoreFile=”./conf/<certificate_file_name.pfx>”
keystorePass=”<password>”
keystoreType=”PKCS12”
eg. <Connector SSLEnabled="true" acceptCount="100" clientAuth="false" connectionTimeout="20000" debug="0" disableUploadTimeout="true" enableLookups="false"
keystoreFile="./conf/<certificate_file_name>.pfx" keystorePass="PASSWORD" keystoreType="PKCS12"
maxSpareThreads="75" maxThreads="150" minSpareThreads="25" name="SSL" port="443" scheme="https" secure="true" sslProtocol="TLS"/>
- Restart ExchangeReporter Plus. If you are able to view the Exchange Reporter Plus login console without any warning from the browser, you have successfully installed your SSL certificate in Exchange Reporter Plus.
Appendix A
Request a certificate from Microsoft Certificate Services (internal CA)
- Connect to Microsoft Certificate Services,and click the Request a certificatelink.
- Click Advanced Certificate Request.
- Submit a certificate request by using a base-64-encoded CMC or PKCS #10 file, or submit a renewal request by using a base-64-encoded PKCS #7 file.
- Open the CSR file using an editor, copy the content, and paste it under Saved Request.
- Select Web Server as Certificate Template.
- Click the Submit button.
- The certificate will be issued when you click the Download certificate chain link and select the PKCS #7 Certificates types. The downloaded file name should be certnew.p7b.
Note:Copy and paste the certificate file to the<installation directory>\jre\binfolder.
- Click the Hometab in the top-right corner, and click the Download a CA certificate, chain certificate,or CRL link to download the CA root certificate.
- Click the Download CA certificatelink and save the root certificate. The downloaded file name should be certnew.cer.
Note:Copy and paste the certificate fileto the <installation directory>\jre\binfolder.
- Navigate to <installation directory>\jre\bin using Command Prompt to import the internal CA certificate into the .keystore file by executing the following command:keytool –import –trustcacerts –alias tomcat –file certnew.p7b –keystore <keystore_name >.keystore
- Add your internal CA's root certificate to the list of trusted CAs in the Java cacerts file by executing the following command: keytool -import -alias <internal CA_name> -keystore ..\lib\security\cacerts -file certnew.cer
Note:Open the certnew.cer file to get the internal CA name, and provide a suitable password when prompted.
Appendix B
Steps to convert CER, CRT, and PEM certificates to P7B format
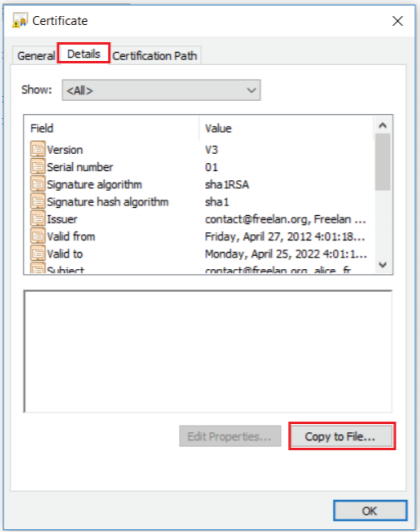
- Double-click the domain certificate to open it in the Certificate Window.
- In the Details tab, click Copy to File.