Bulk actions for Agents in Log360 Cloud
For the bulk installation of agents in Log360 Cloud, the following methods can be employed.
For bulk update of access key in Log360 Cloud, the following methods can be employed.
Installing agents using GPOs.
Prior to installing the Log360 Cloud agent using GPOs, place the following files in a network-shared folder on the server:
Step 1: Creating a GPO
Here's how you can create a new GPO. (This for Windows Server 2003, 2008 and above versions):
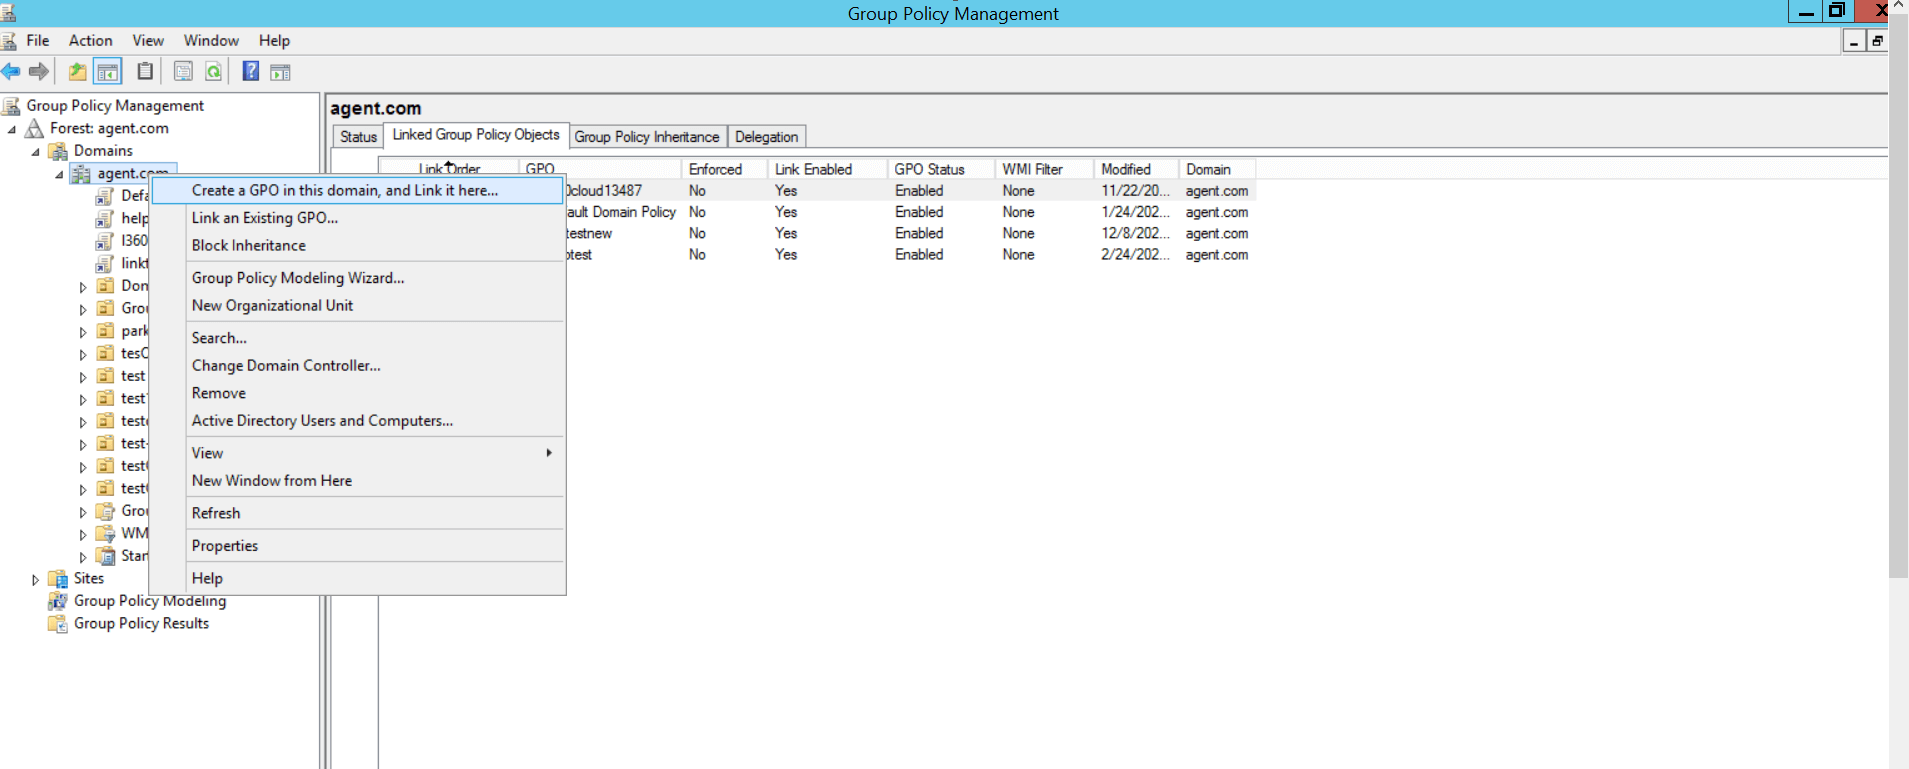
- Open Group Policy Management.
- In the left pane, right click <Domain name> and select Create a GPO in this domain, and Link it here...
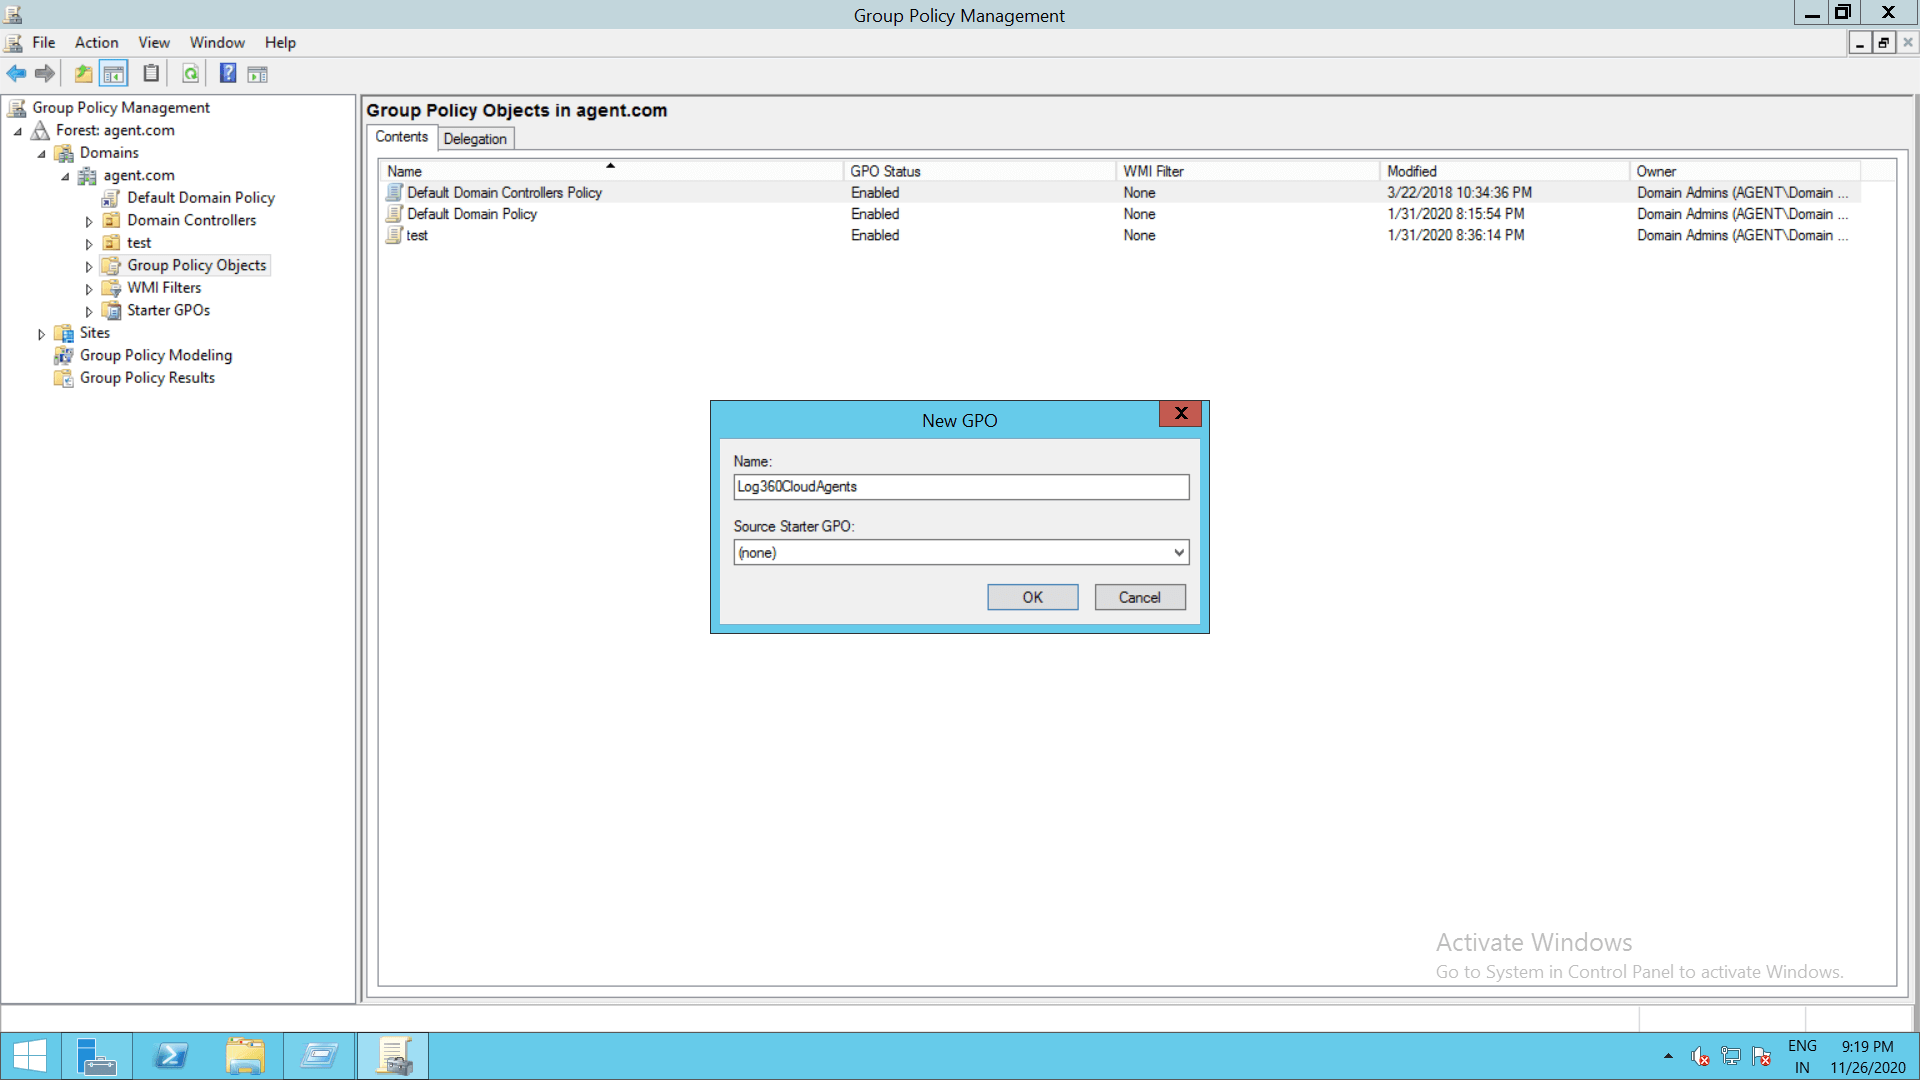
- Give the GPO a suitable name and click OK.
Step 2: Configuring script settings
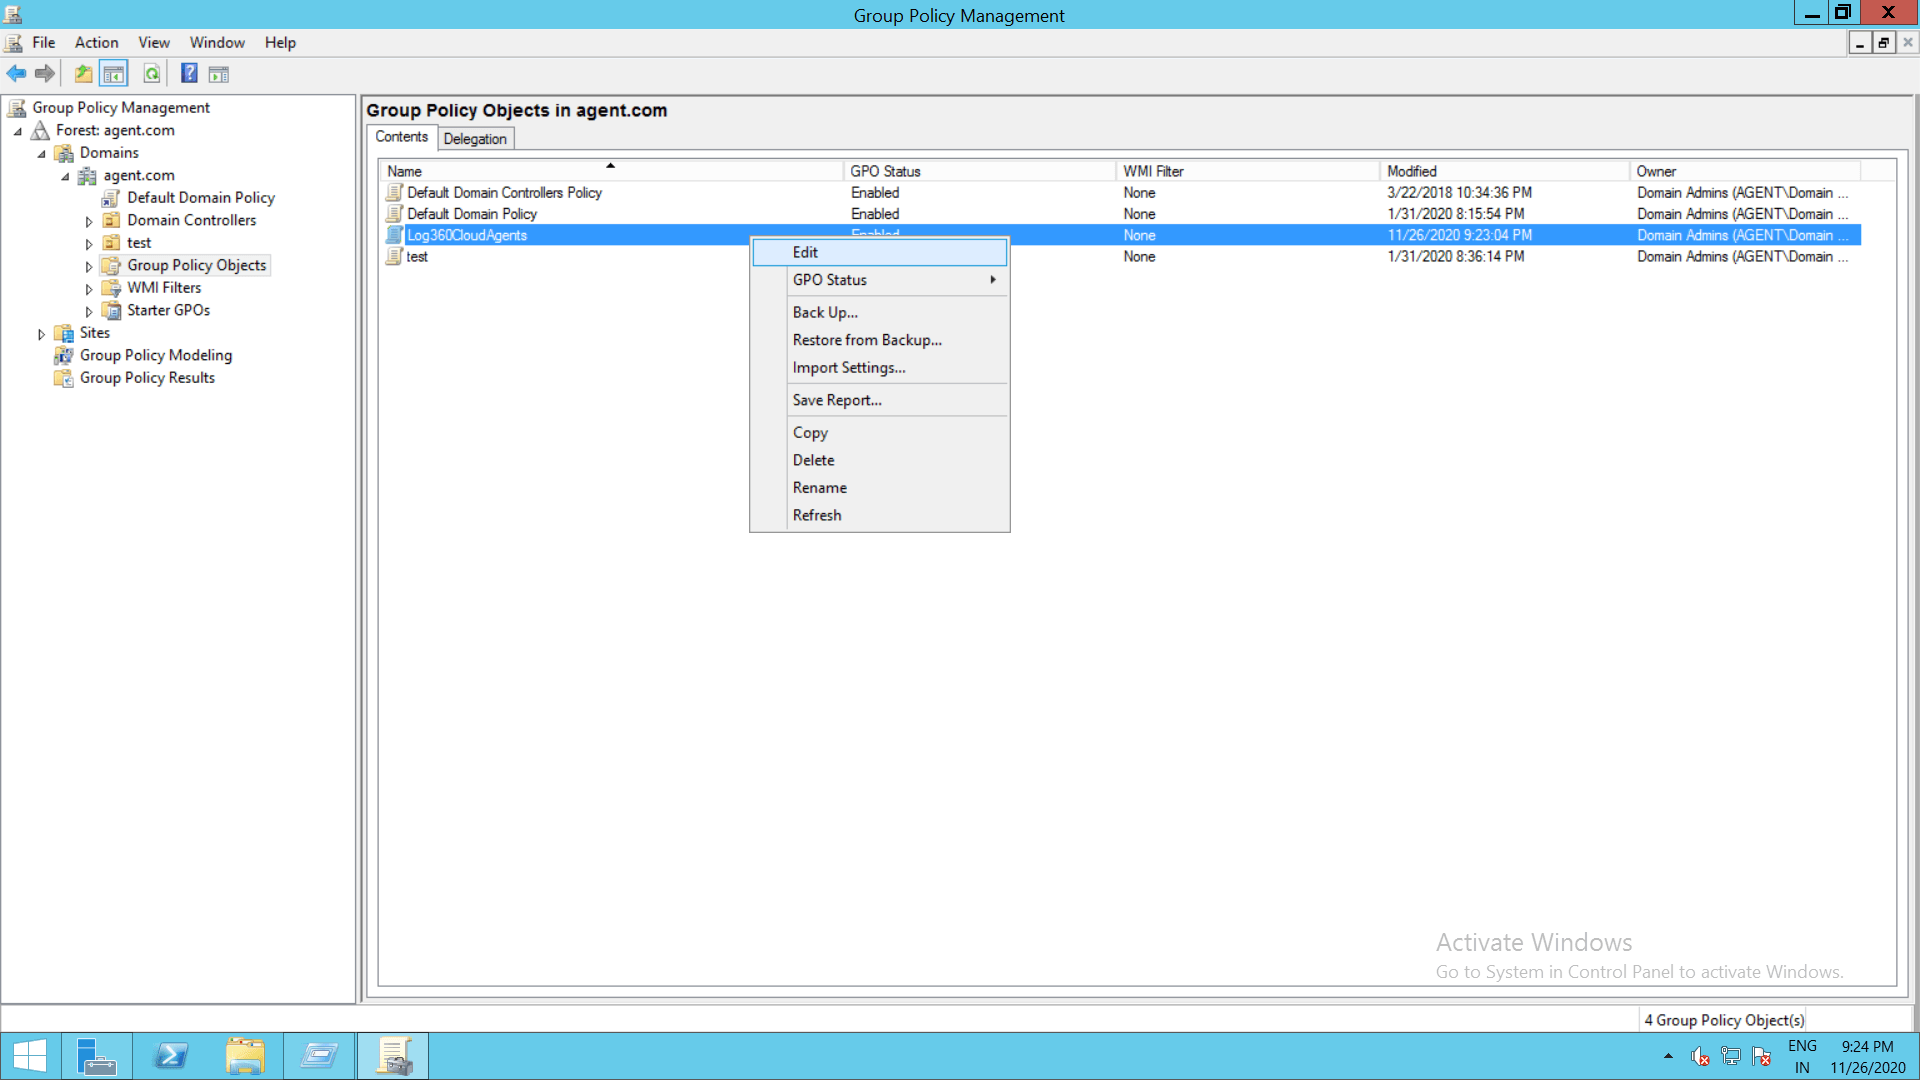
- Right-click the newly created GPO and click Edit.
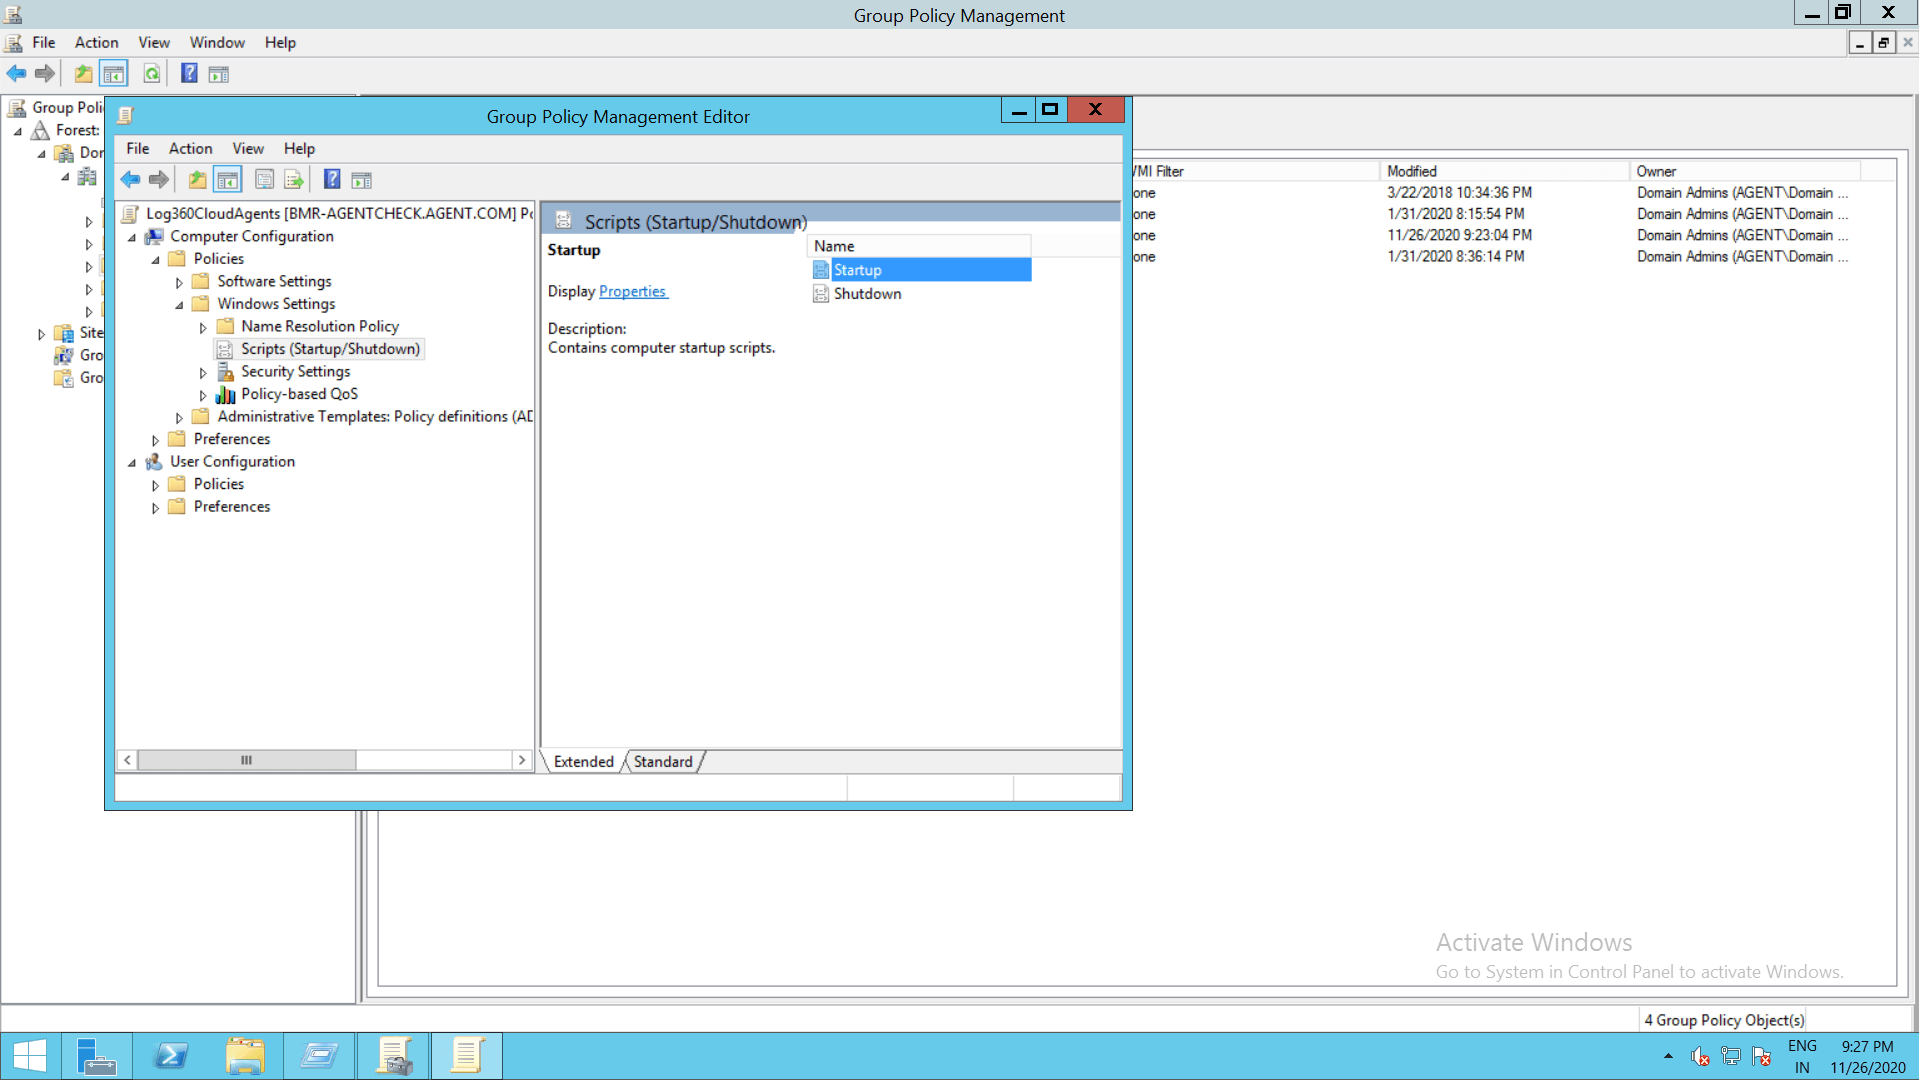
- For Windows Server 2003, in the right pane of the GPO editor, double click Computer Configuration and navigate to Windows Settings → Scripts (Startup/Shutdown) → Startup.
- For Windows Server 2008 and later, navigate to Computer Configuration → Policies → Windows Settings → Scripts (Startup/Shutdown) → Startup
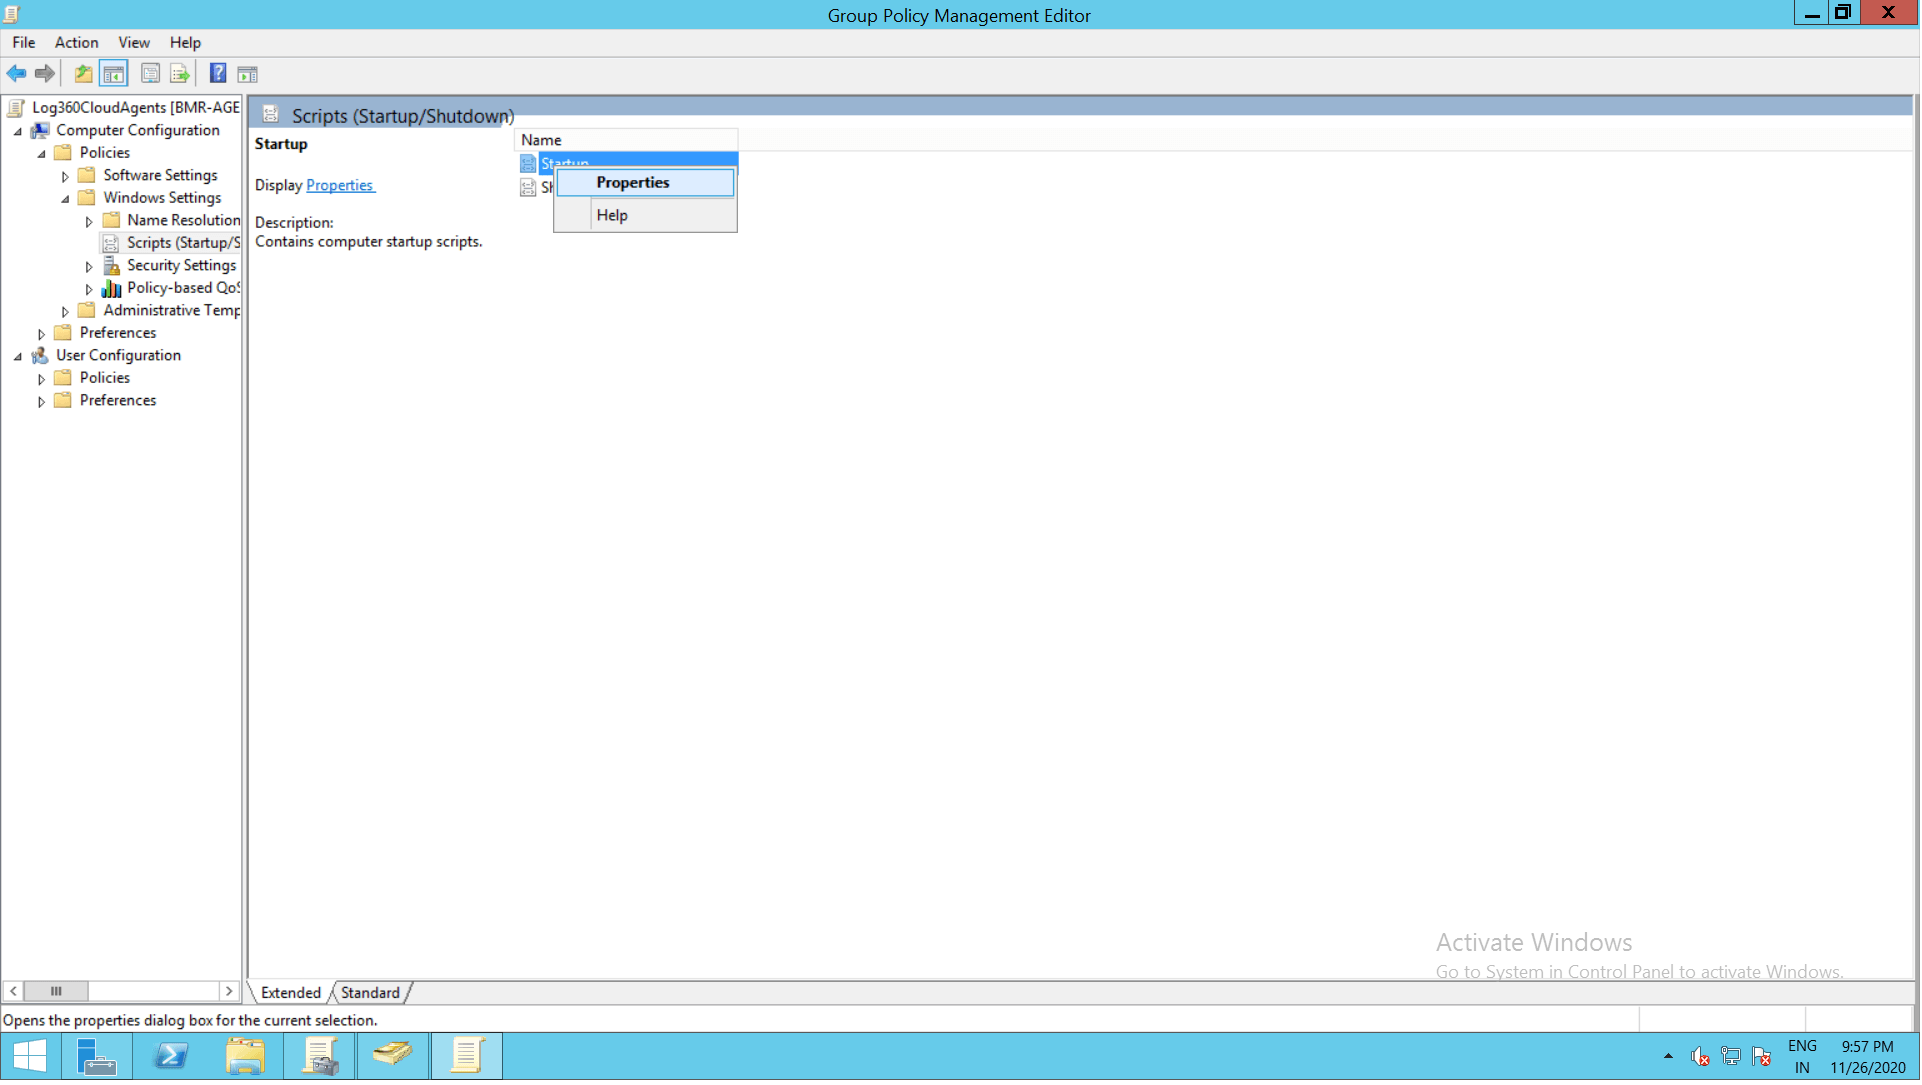
- Right-click Startup and select Properties.
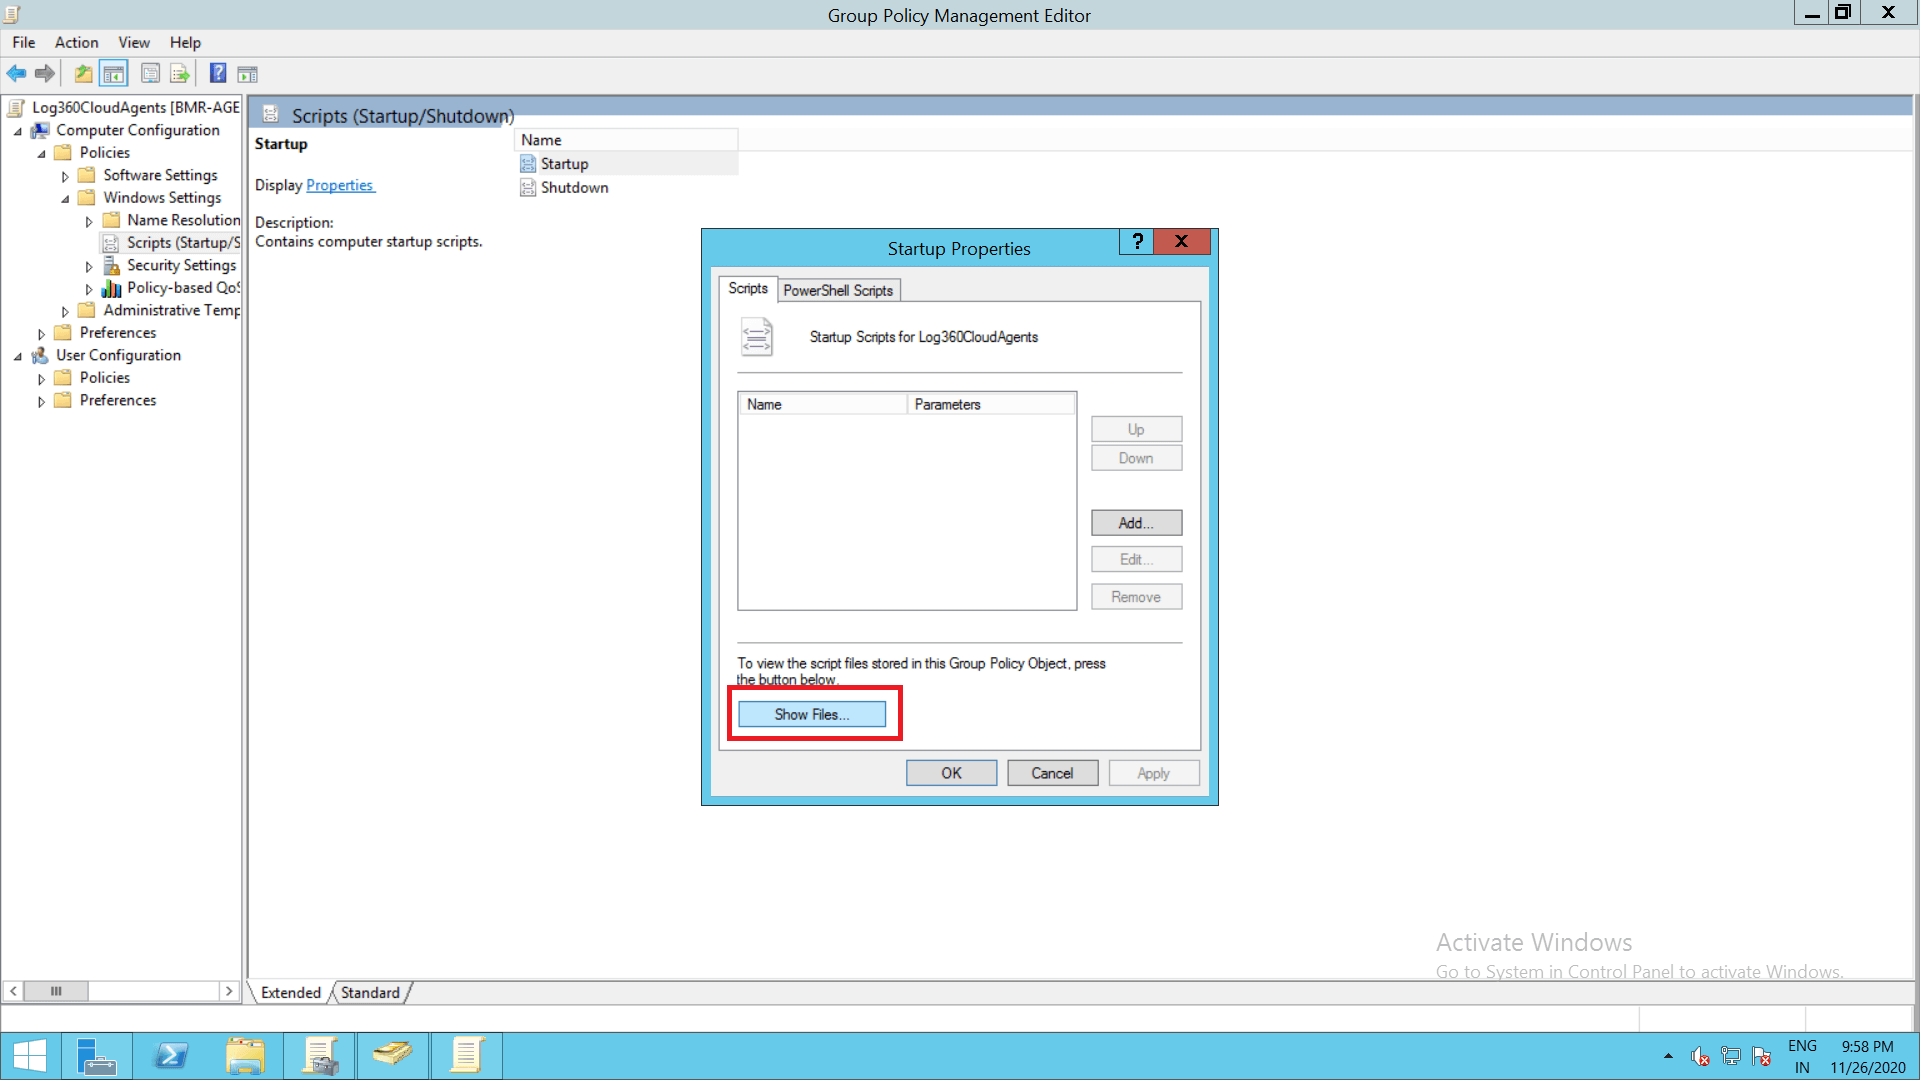
In the Startup Properties dialog box, click on Show Files.
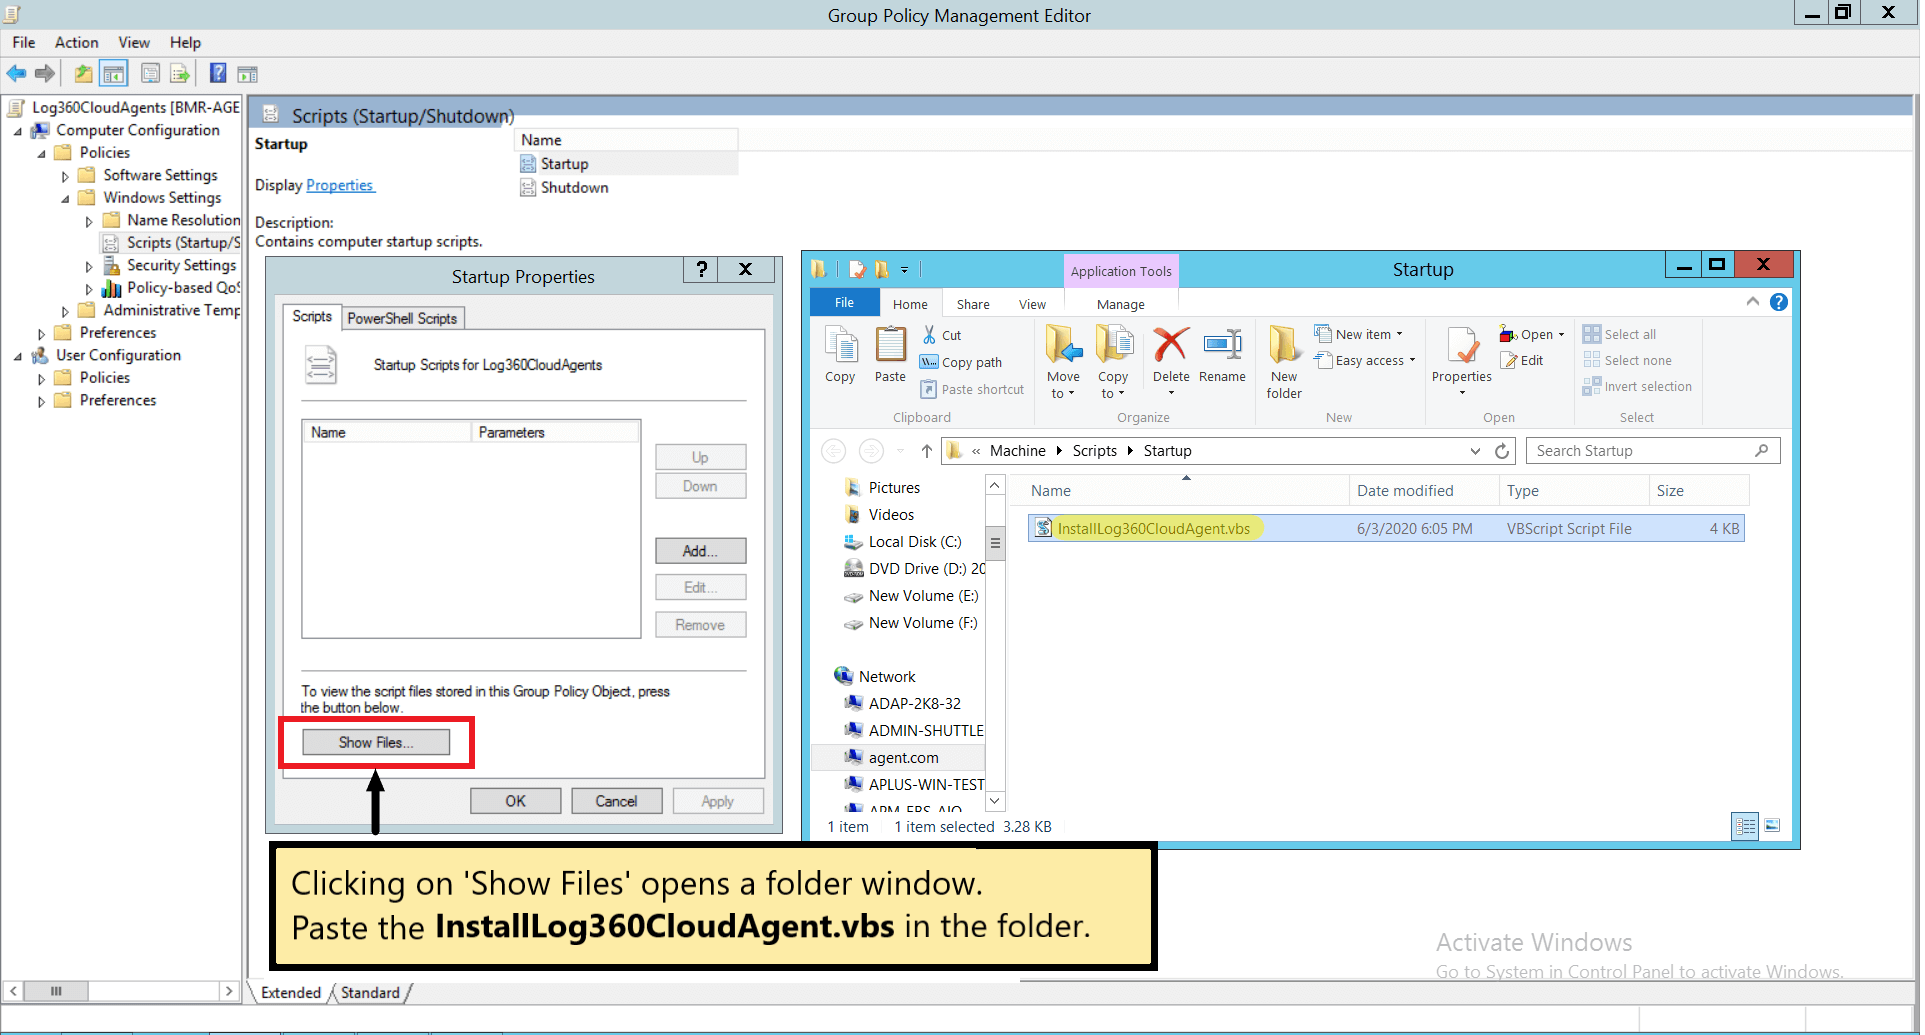
Paste the InstallLog360CloudAgent.vbs (script) file in the ‘Startup folder’ window that opens, and then close the window.
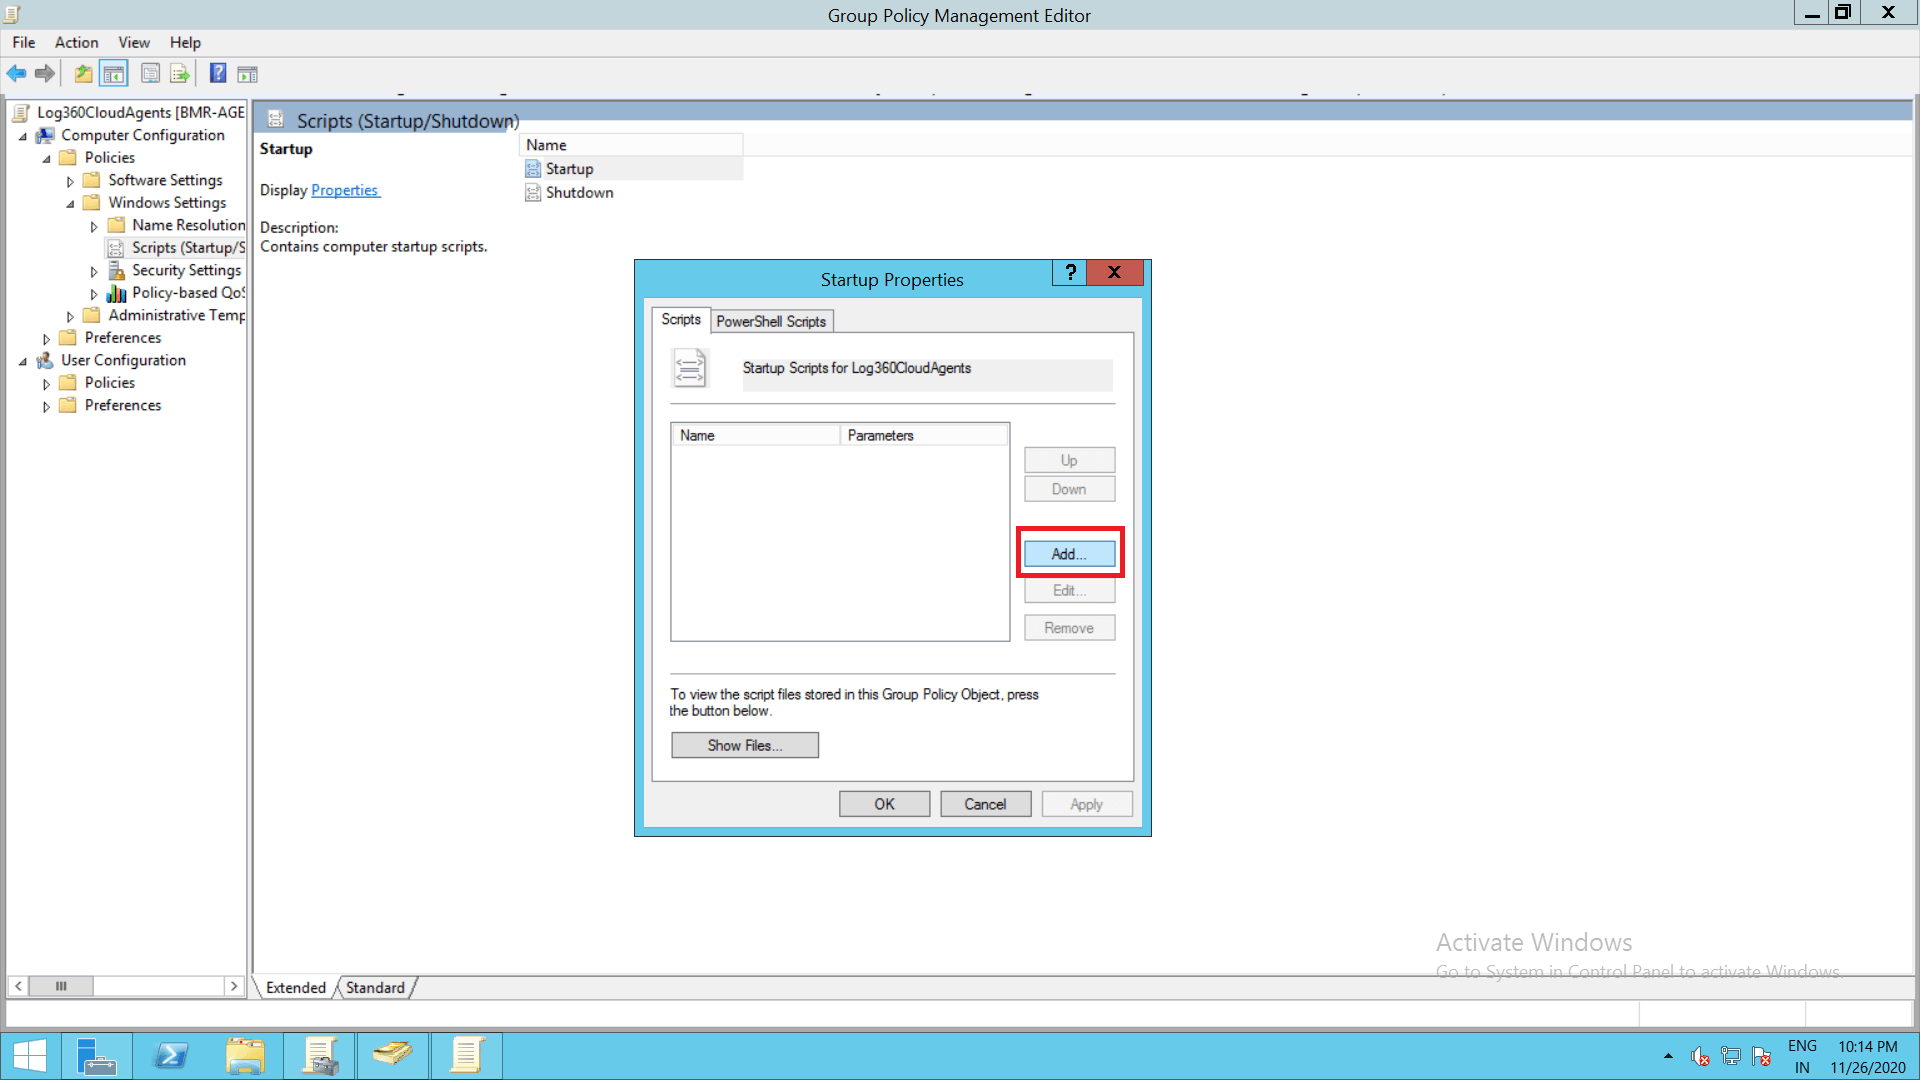
Click Add in the Startup Properties dialog box.
In the Add a Script dialog box do the following:
- Under Script Name, click Browse and select InstallLog360CloudAgent.vbs script.
- Under Script Parameters, enter the parameters given below the image and click OK.
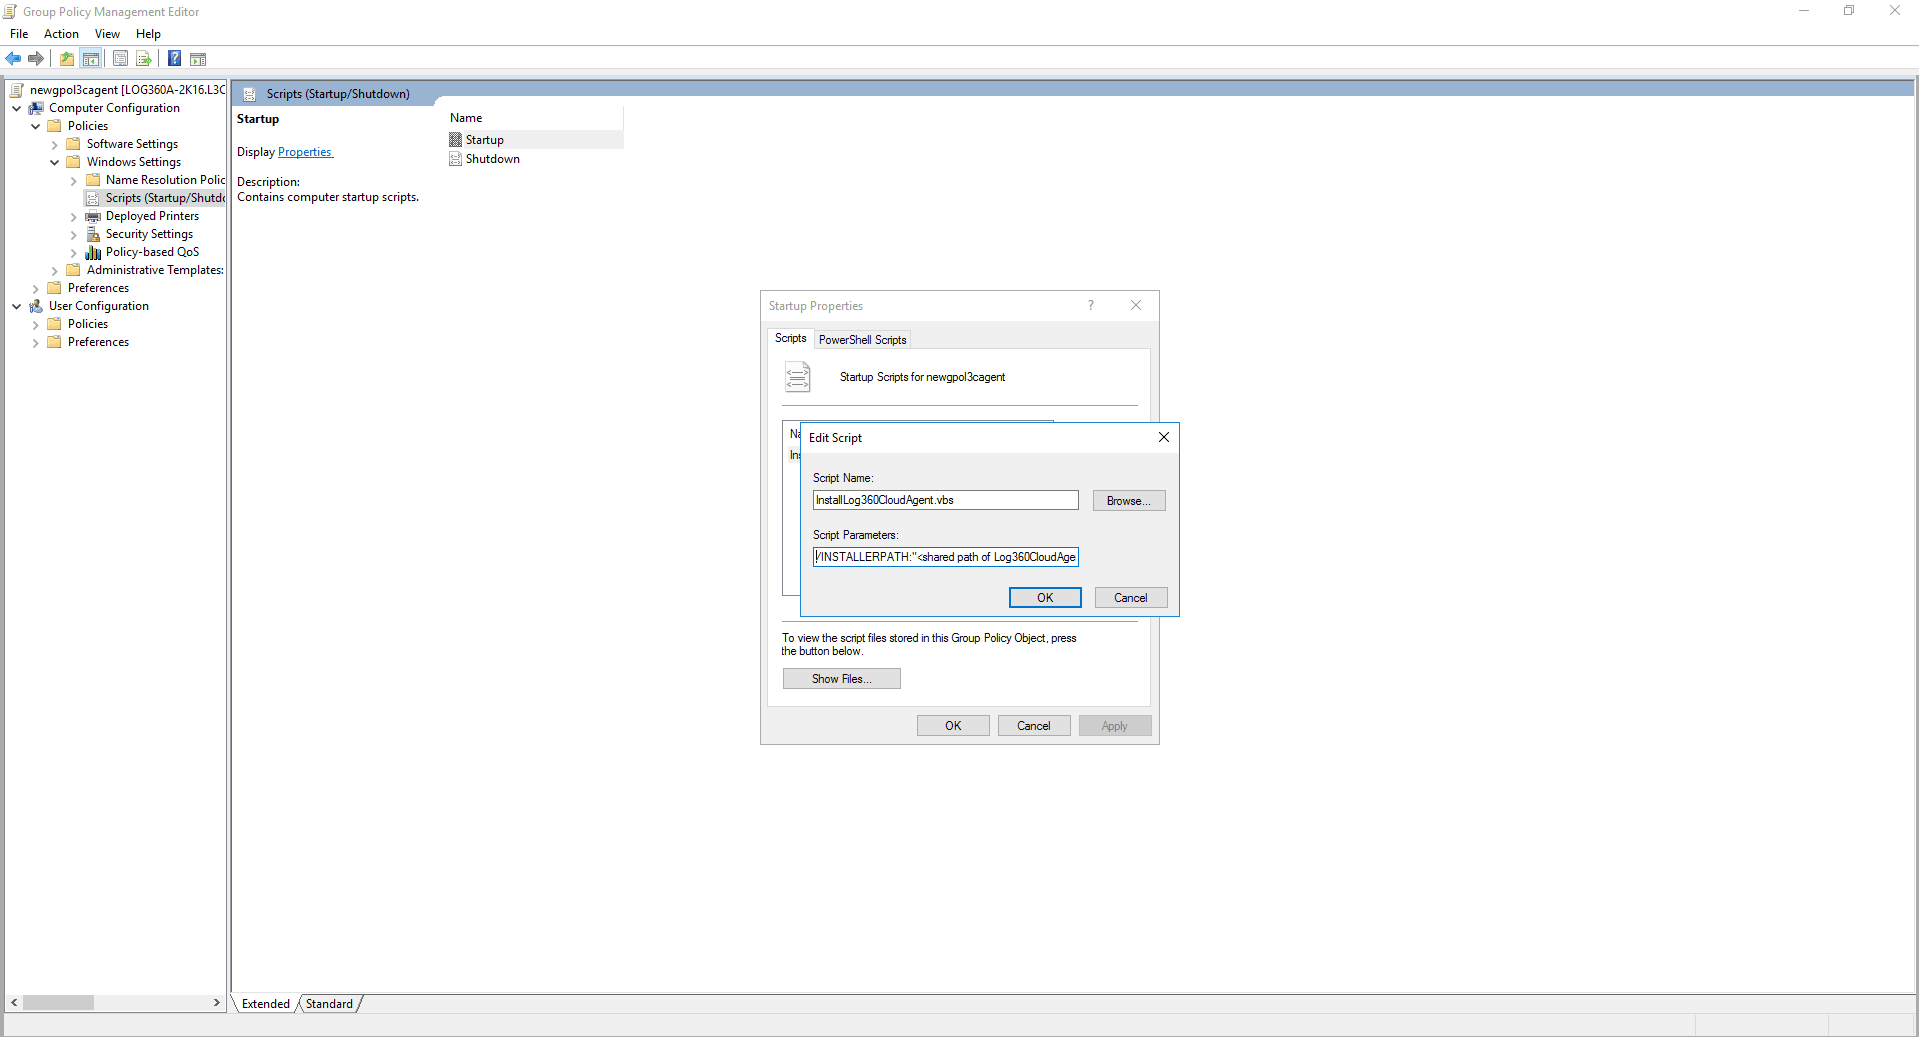
- In the Script Parameters field, enter the following parameters:
- /INSTALLERPATH:"<share path of Log360CloudAgent.exe"
- Click OK to return to the Startup Properties dialog box.
- Click Apply and then OK.
Example: .\InstallLog360CloudAgent.vbs /INSTALLERPATH:"<shared path of Log360CloudAgent.exe file>\Log360CloudAgent.exe"
Step 3: Configuring Administrative Template Settings
- In the left pane of the Group Policy Management Editor, navigate to Computer Configuration → Administrator Templates → System.
- Under System, select Scripts.
- In the right pane of the GPO Editor, double-click Run logon scripts synchronously and enable it.
- Click on OK and followed by Apply.

- Similarly, enable Maximum wait time for Group Policy scripts.
- Then, navigate to Logon under System.
- In the right pane, double-click Always wait for the network at startup and logon and enable it.
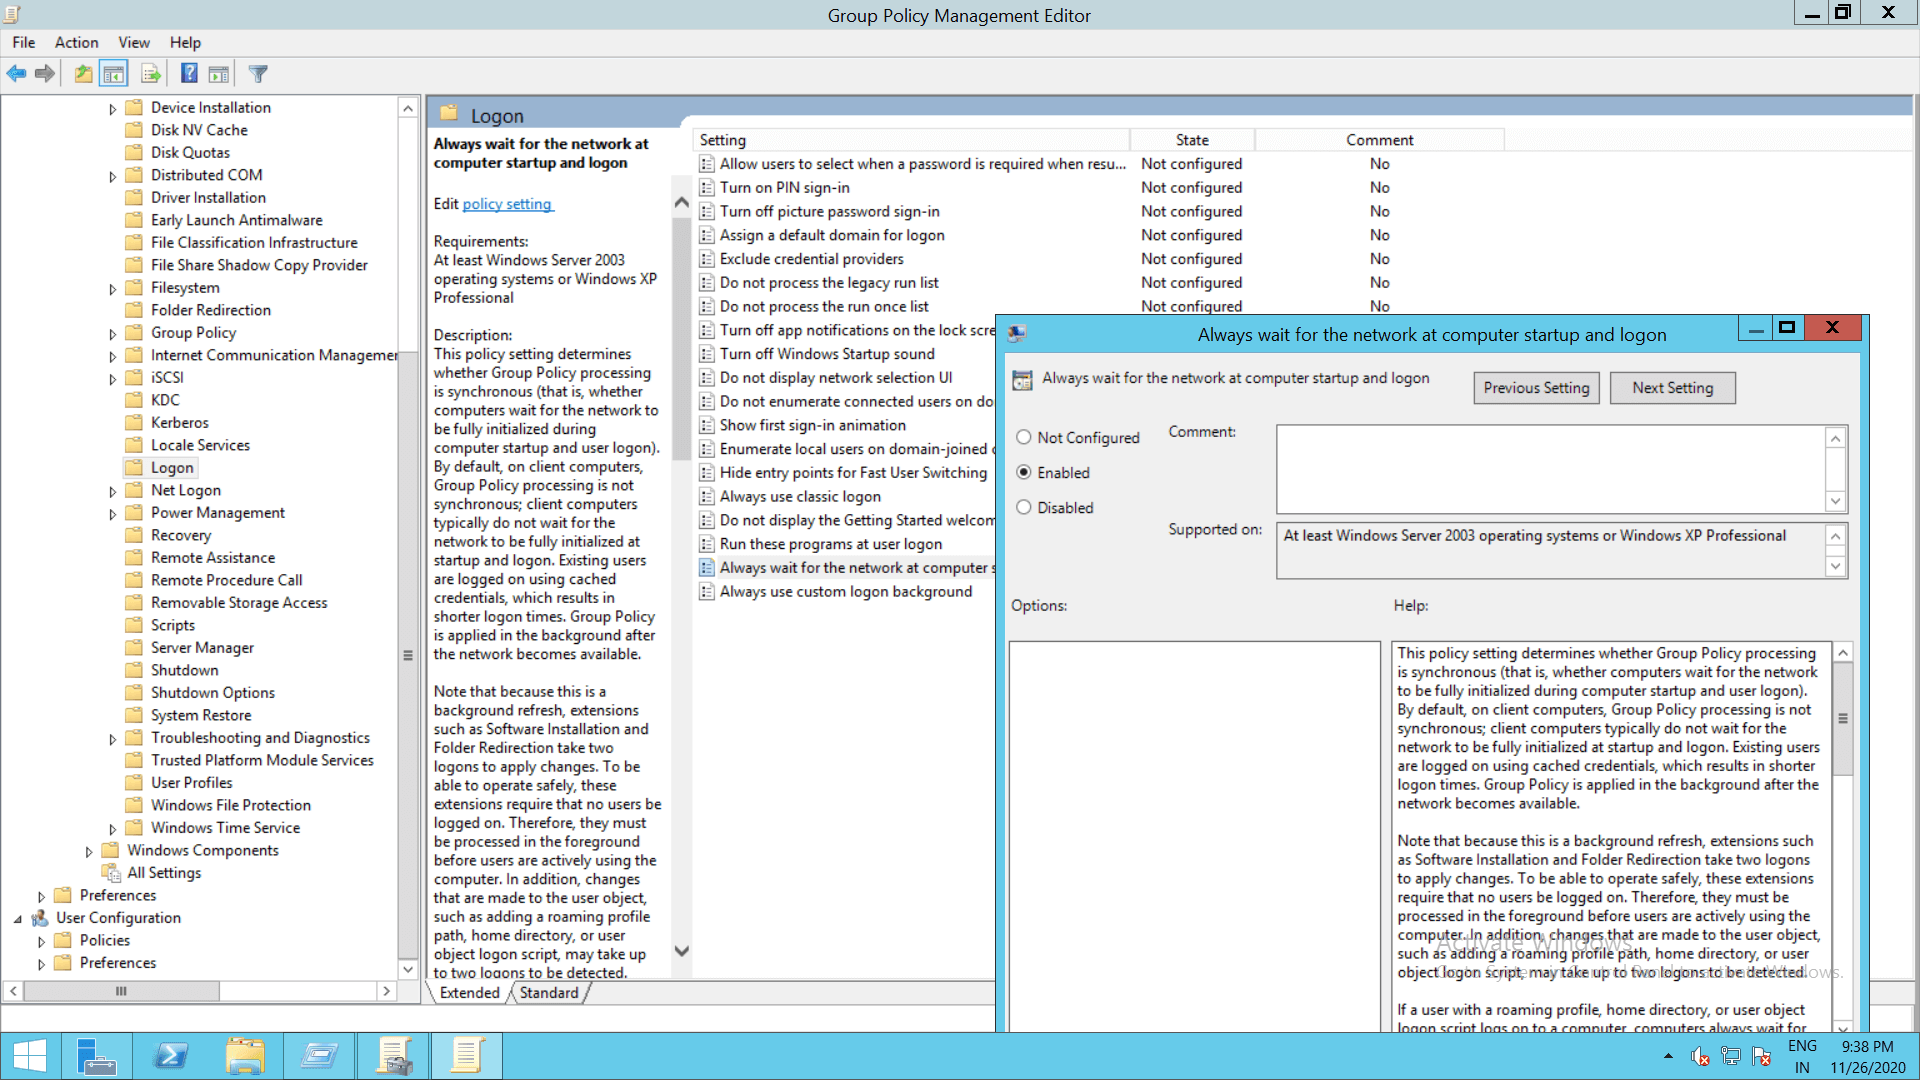
- Click Apply and then OK.
- Then, navigate to Group Policy under System.
- In the right pane, double-click Group Policy slow link detection and enable it.
- Click Apply and then OK.

Step 4: Applying the GPO
Tip: For installing the agent on multiple computers at one go, create an AD group and add all the computers on which the agent needs to be installed to the group. Then, apply the GPO to that group.
- On the left pane of the Group Policy Management Editor, right-click the GPO you are working on and select Properties.
- Navigate to the Security tab and unselect the Apply Group Policy permissions for Authenticated Users.
- Click Add and in the dialog box that appears, click Object Types.
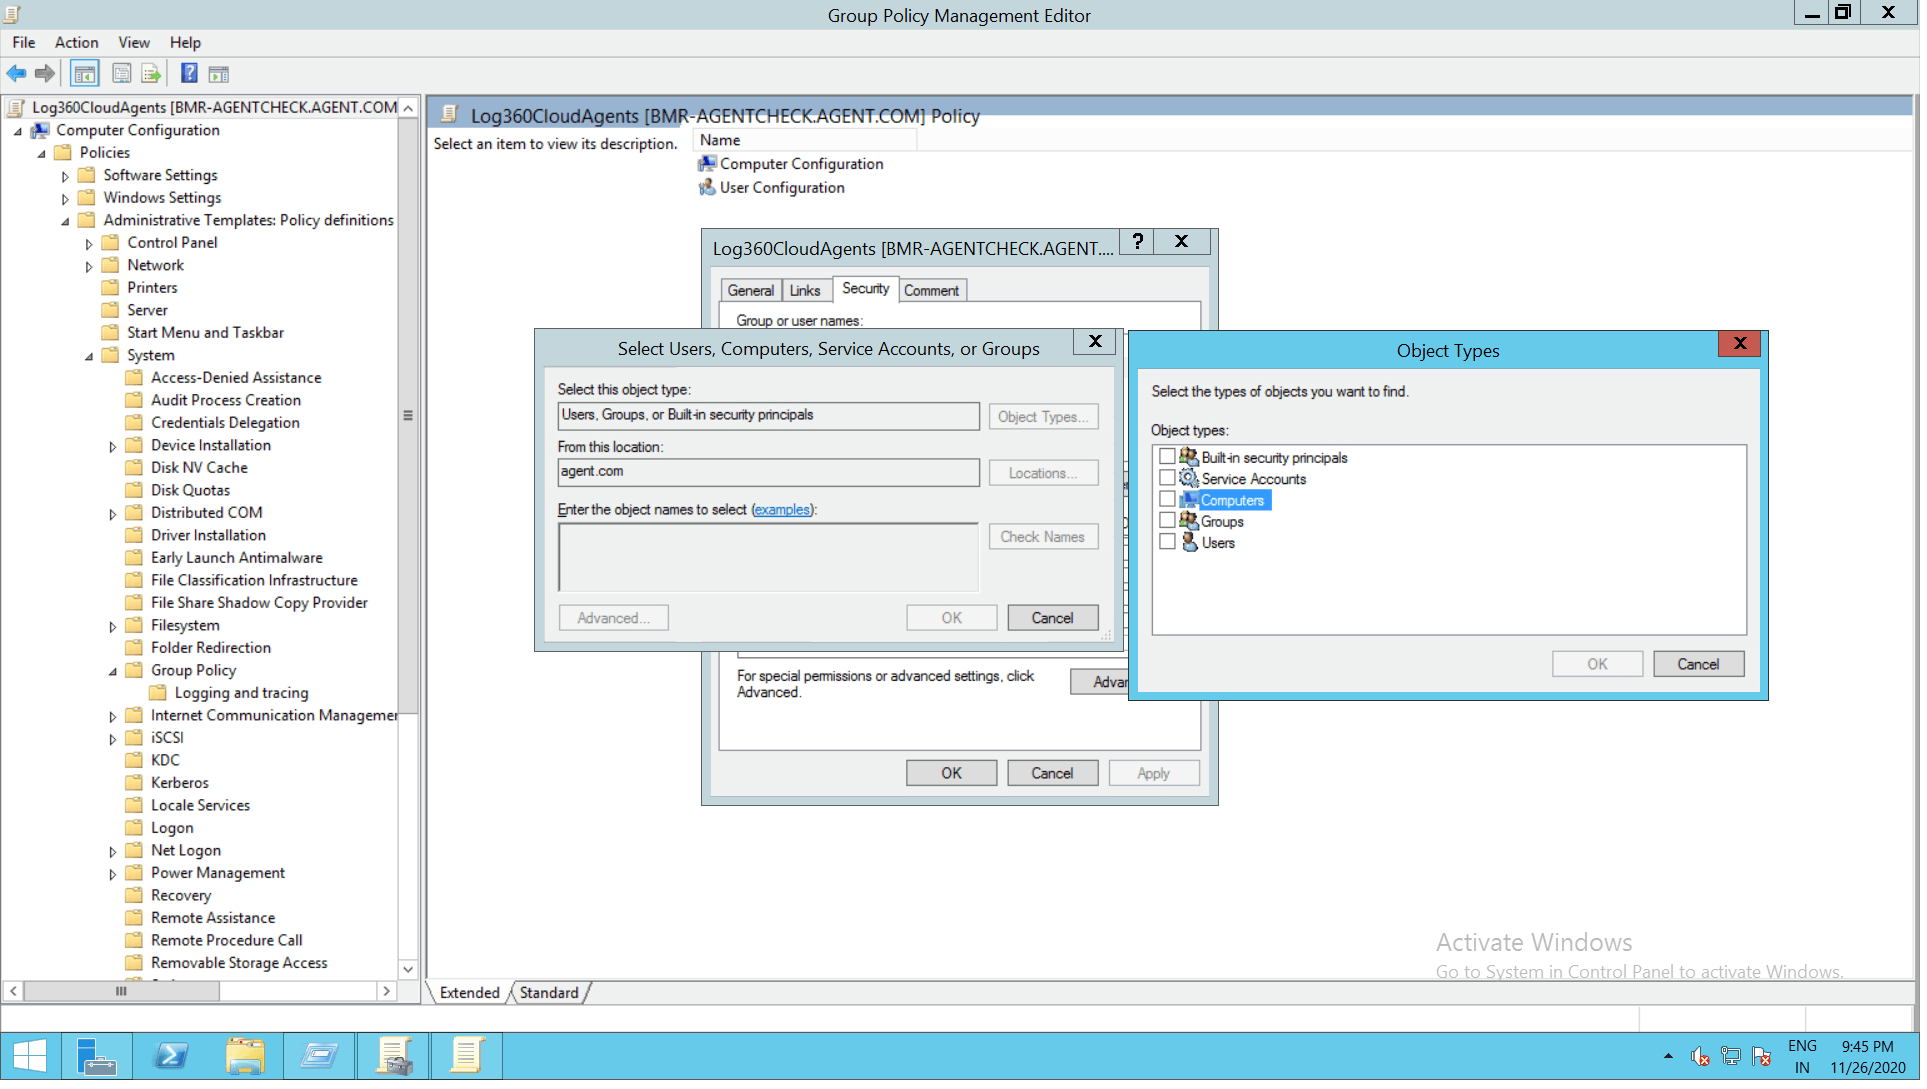
- If you want to apply the GPO to computers directly, ensure Computers is selected and then click OK. For applying it to a group, ensure Groups is selected and then click OK.
- Enter the name of the desired computer(s) and/or group(s) and click Check Names.
- Select the desired computer(s) and/or group(s) and click OK to return to the properties dialog box.

- In the Security tab, apply the following permissions to the selected group(s) and/or computer(s):
- Read → Allow
- Apply Group Policy → Allow

- Click Apply and then OK.
- Restart the computers associated with the GPO to fully apply the settings.
Using Microsoft System Center Configuration Manager (SCCM) or a similar software deployment tool:
Agent installation via Endpoint Central:
EXE (Executable Installer) is a vital file format in the Windows environment, primarily used for software installation and management.
To create an EXE package:
- Log in to the Endpoint Central console as an administrator.
- Navigate to Software Deployment > Packages > Add Package and select Windows from the drop-down menu.

Fill out the details in the fields available as follows:
- Package Name: Choose a name, such as Log360 Cloud Agent.
- Package Type: Select EXE / APPX / MSIEXEC / MSU
- License Type: Select Commercial from the drop-down menu.
- Location installable: To install "Log360CloudAgent.exe," choose the "Local Computer" option to upload the file directly or opt for the "Shared Folder" option and ensure the Log360CloudAgent.exe file is placed in the shared location.
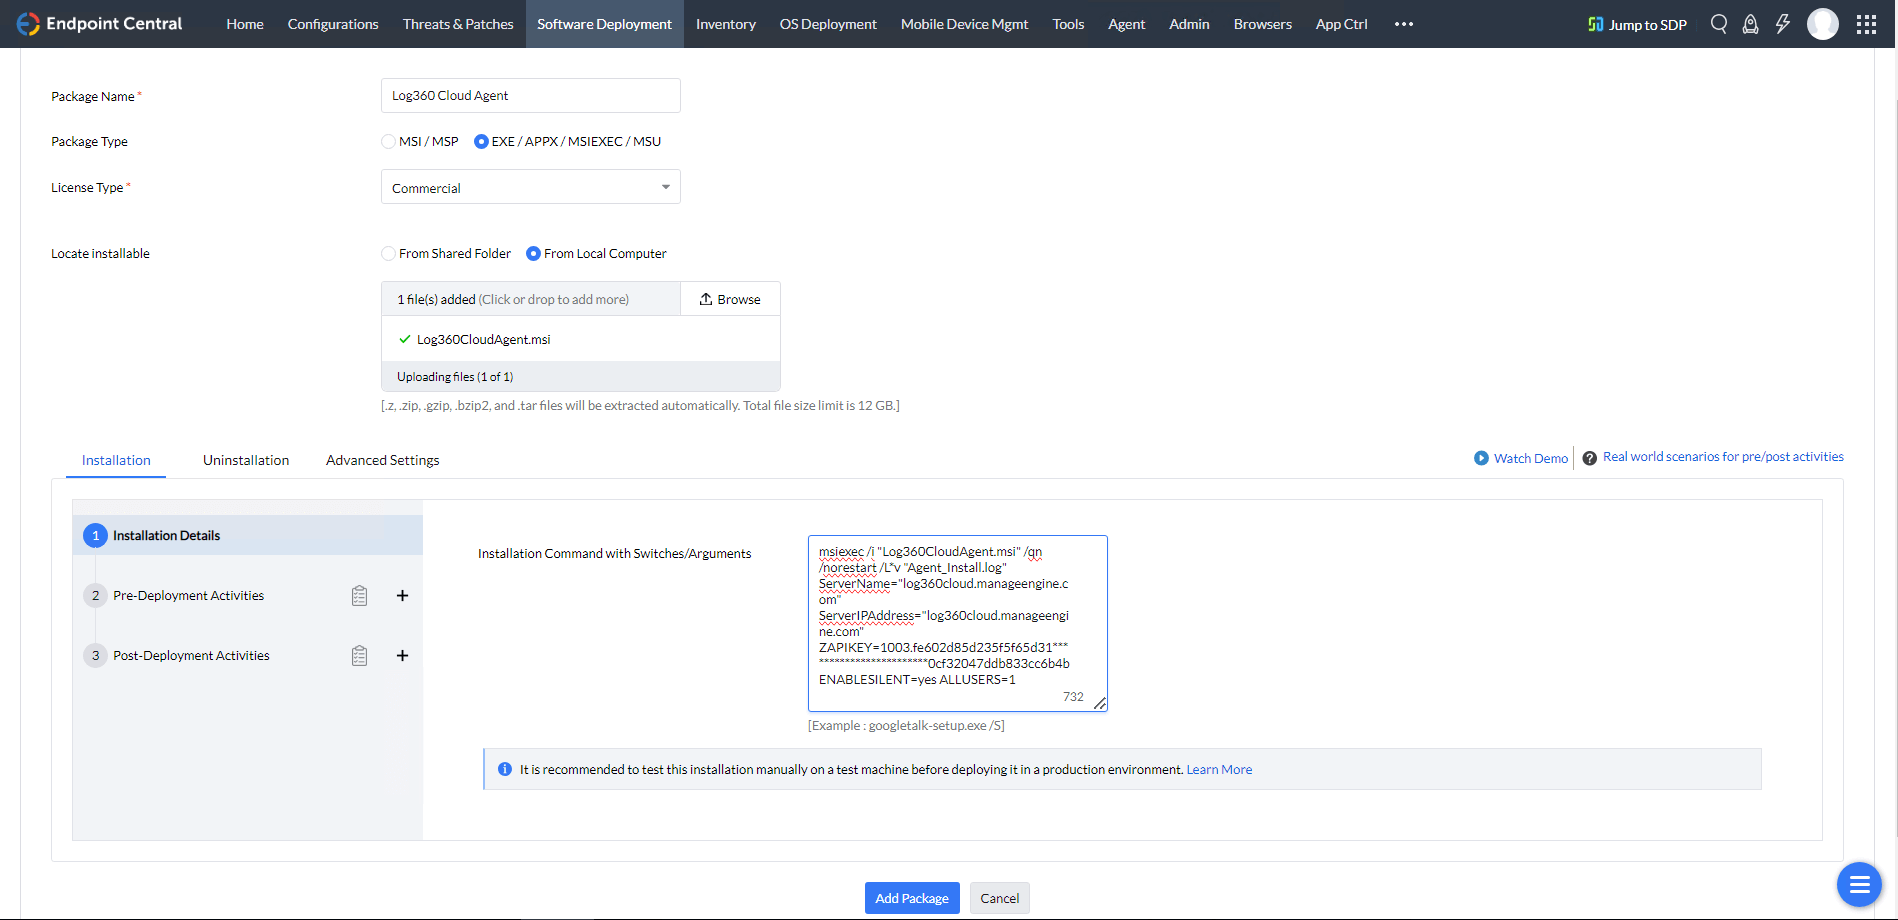
- Update and enter the following text in the Installation Command with Switches/Arguments field.
- Click on Add Package to save.
After creating EXE package follow these steps to install Log360 Cloud Agent using Software Deployment:
- Go to Software Deployment > Deployment > Install/Uninstall Software in the Endpoint Central.
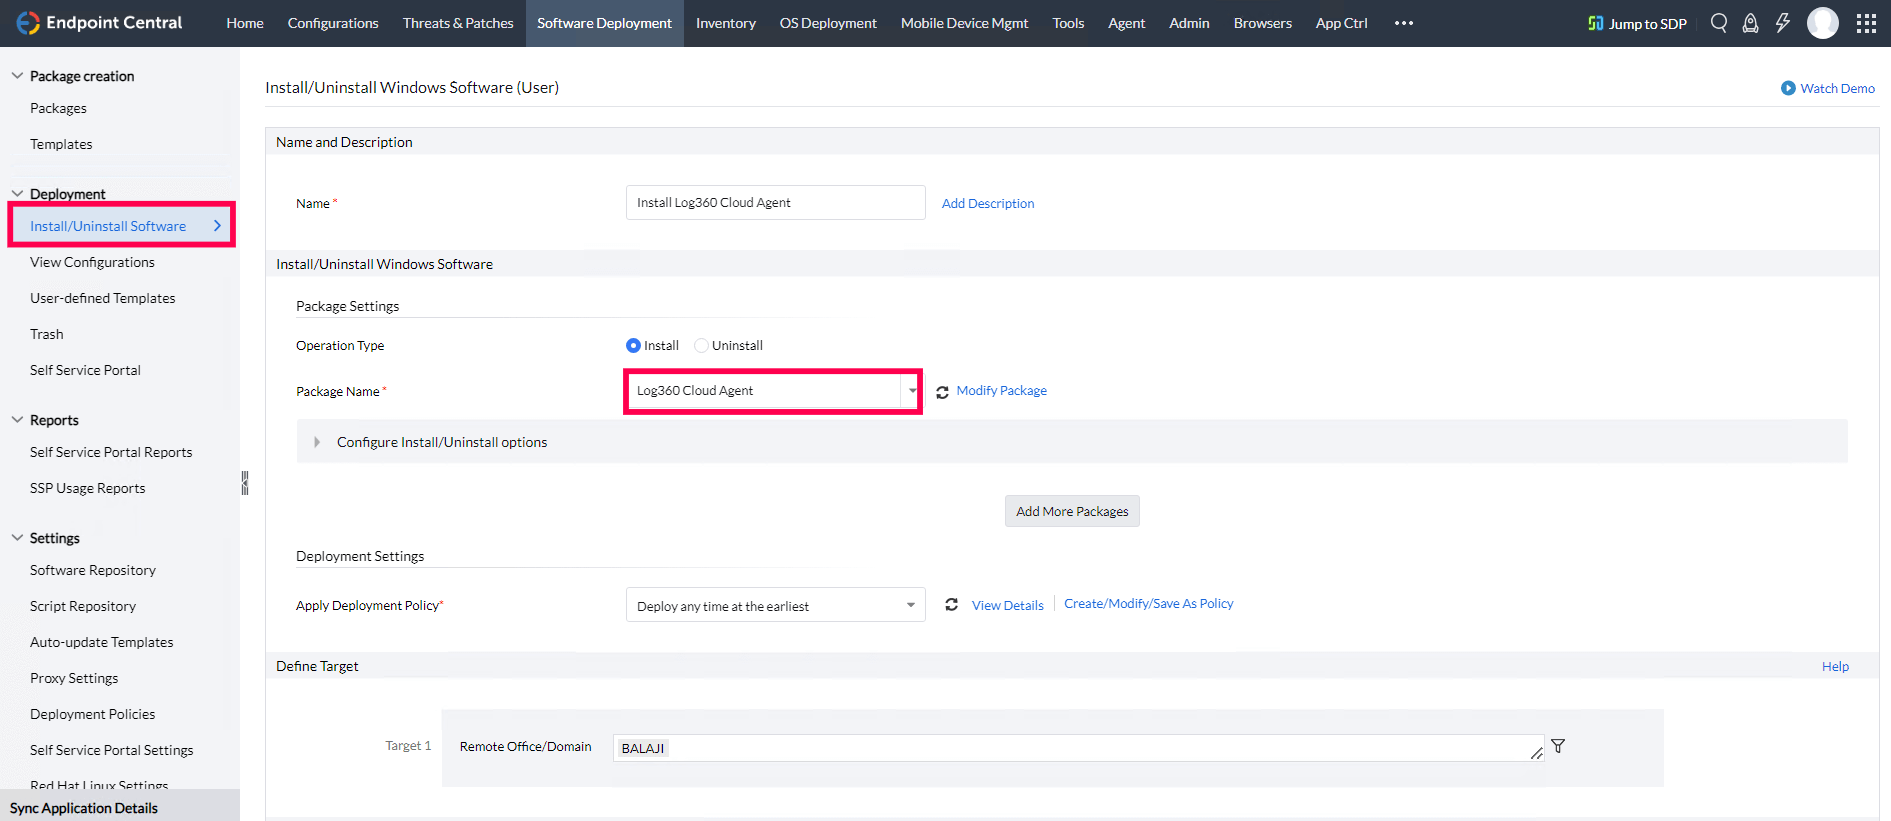
- Give your installation a name, like "Install Log360 Cloud Agent," and provide an optional description for clarity.
- Select "Install" as the Operation Type, and from the Package Name dropdown, choose the package we previously created( "Log360 Cloud Agent" in our case)
- Set up how you want the installation to happen in Deployment Settings.
- Decide the target machines where you want to install the package under Define Target.
- If needed, set up Retry options in Execution Settings for any hiccups during installation.
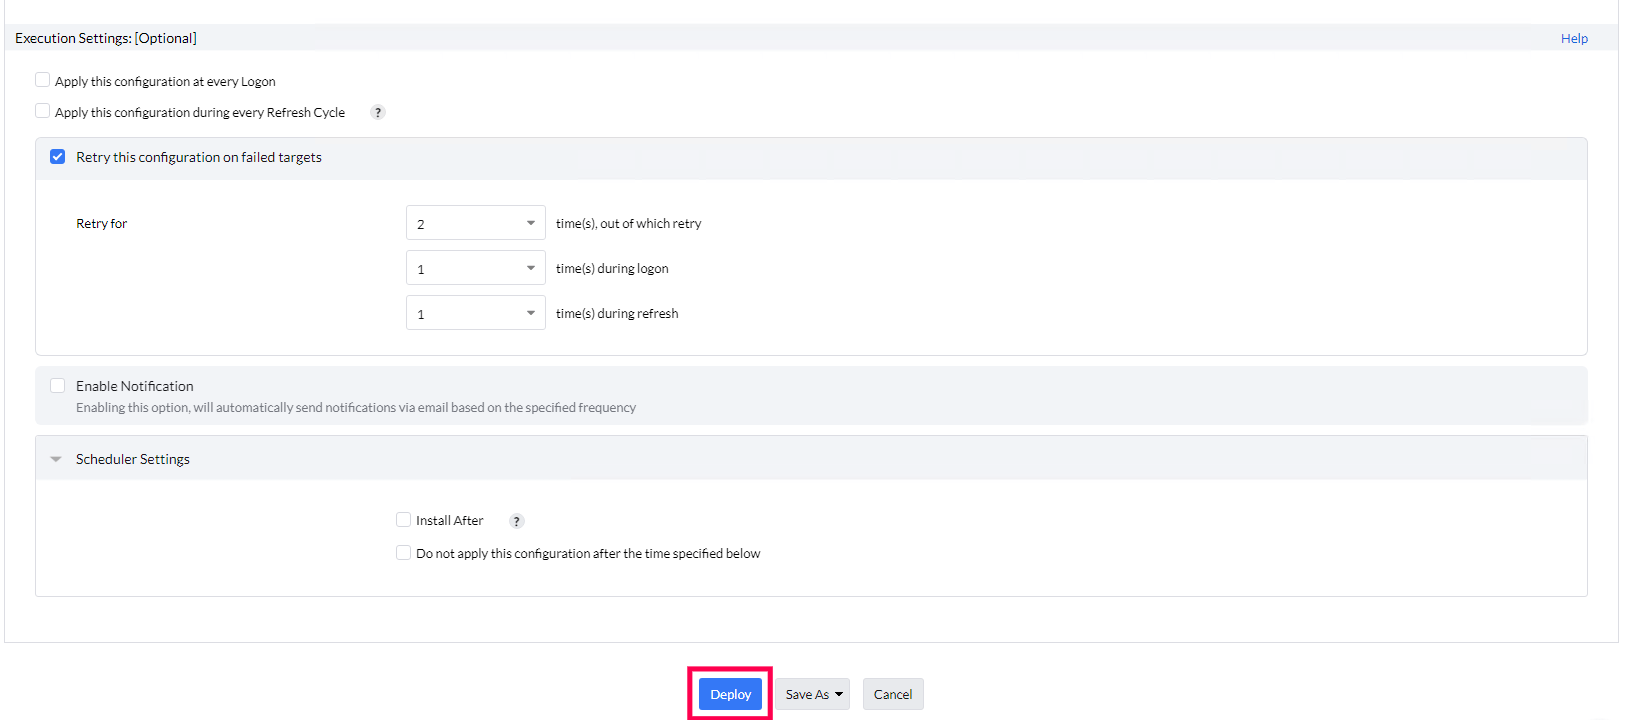
- Click Deploy to start the installation.
- Check the status of your deployment at Deployment > View Configurations to make sure everything went well.

Manual installation:
For Windows devices:
- In the Windows device, download the Log360CloudAgent.exe from server.
- Double-click Log360CloudAgent.exe to start installation.
NOTE: When the access key is regenerated, the old Log360CloudAgent.exe will still contain the outdated key, leading to communication failures during installation. To prevent this, download the latest Log360CloudAgent.exe, which will include the updated access key.
Updating access key using GPOs.
Prior to updating the access key for agents using GPOs, place the UpdateAccessKey.vbs files in a network-shared folder on the server.
Step 1: Creating a GPO
Here's how you can create a new GPO. (This for Windows Server 2003, 2008 and above versions):
- Open Group Policy Management.
- In the left pane, right click <Domain name> and select Create a GPO in this domain, and Link it here...
- Give the GPO a suitable name and click OK.
Step 2: Configuring script settings
- Right-click the newly created GPO and click Edit.
- For Windows Server 2003, in the right pane of the GPO editor, double click Computer Configuration and navigate to Windows Settings → Scripts (Startup/Shutdown) → Startup.
- For Windows Server 2008 and later, navigate to Computer Configuration → Policies → Windows Settings → Scripts (Startup/Shutdown) → Startup
- Right-click Startup and select Properties.
In the Startup Properties dialog box, click on Show Files.
Paste the UpdateAccessKey.vbs (script) file in the ‘Startup folder’ window that opens, and then close the window.

Click Add in the Startup Properties dialog box.
In the Add a Script dialog box do the following:
- Under Script Name, click Browse and select UpdateAccessKey.vbs script.
- Under Script Parameters, enter the parameters given below the image and click OK.

- In the Script Parameters field, enter the following parameters:
- /ZAPIKEY:"< Access key copied from UI >
Example: /ZAPIKEY:"1003.75e3118b3702b4b*****************************552ab1c7d2d9faccf"
- Click OK to return to the Startup Properties dialog box.
- Click Apply and then OK.
Step 3: Configuring Administrative Template Settings
- In the left pane of the Group Policy Management Editor, navigate to Computer Configuration → Administrator Templates → System.
- Under System, select Scripts.
- In the right pane of the GPO Editor, double-click Run logon scripts synchronously and enable it.
- Click on OK and followed by Apply.
- Similarly, enable Maximum wait time for Group Policy scripts.
- Then, navigate to Logon under System.
- In the right pane, double-click Always wait for the network at startup and logon and enable it.
- Click Apply and then OK.
- Then, navigate to Group Policy under System.
- In the right pane, double-click Group Policy slow link detection and enable it.
- Click Apply and then OK.
Step 4: Applying the GPO
Tip: For updating access keys in agents on multiple computers at one go, create an AD group and add all the computers on which the access key needs to be updated to the group. Then, apply the GPO to that group.
- On the left pane of the Group Policy Management Editor, right-click the GPO you are working on and select Properties.
- Navigate to the Security tab and unselect the Apply Group Policy permissions for Authenticated Users.
- Click Add and in the dialog box that appears, click Object Types.
- If you want to apply the GPO to computers directly, ensure Computers is selected and then click OK. For applying it to a group, ensure Groups is selected and then click OK.
- Enter the name of the desired computer(s) and/or group(s) and click Check Names.
- Select the desired computer(s) and/or group(s) and click OK to return to the properties dialog box.
- In the Security tab, apply the following permissions to the selected group(s) and/or computer(s):
- Read → Allow
- Apply Group Policy → Allow
- Click Apply and then OK.
- Restart the computers associated with the GPO to fully apply the settings.