Manual Microsoft 365 tenant configuration
- Sign in to the Microsoft Entra admin center using the credentials of a Global Administrator account.
- In the left pane, select Identity > Applications.
- Select App registrations.
- Click New registration.
- Provide a Name for the Log360 cloud application to be created.
- Select a supported account type based on your organizational needs.
Note: It is recommended to select the "Single Tenant" option.
- Leave Redirect URI (optional) blank; you will configure it in the next few steps.
- Click Register to complete the initial app registration.
- You will now see the Overview page of the registered application.
- Click Add a Redirect URI or go to Manage > Authentication
- Click Add a platform under Platform configurations.
- In the Configure platforms pop-up, click Web under Web applications.
- In the Redirect URI field, enter https://identitymanager.manageengine.com/api/public/v1/oauth/redirect
- You can leave the Logout URL and Implicit grant fields empty. Click Configure.

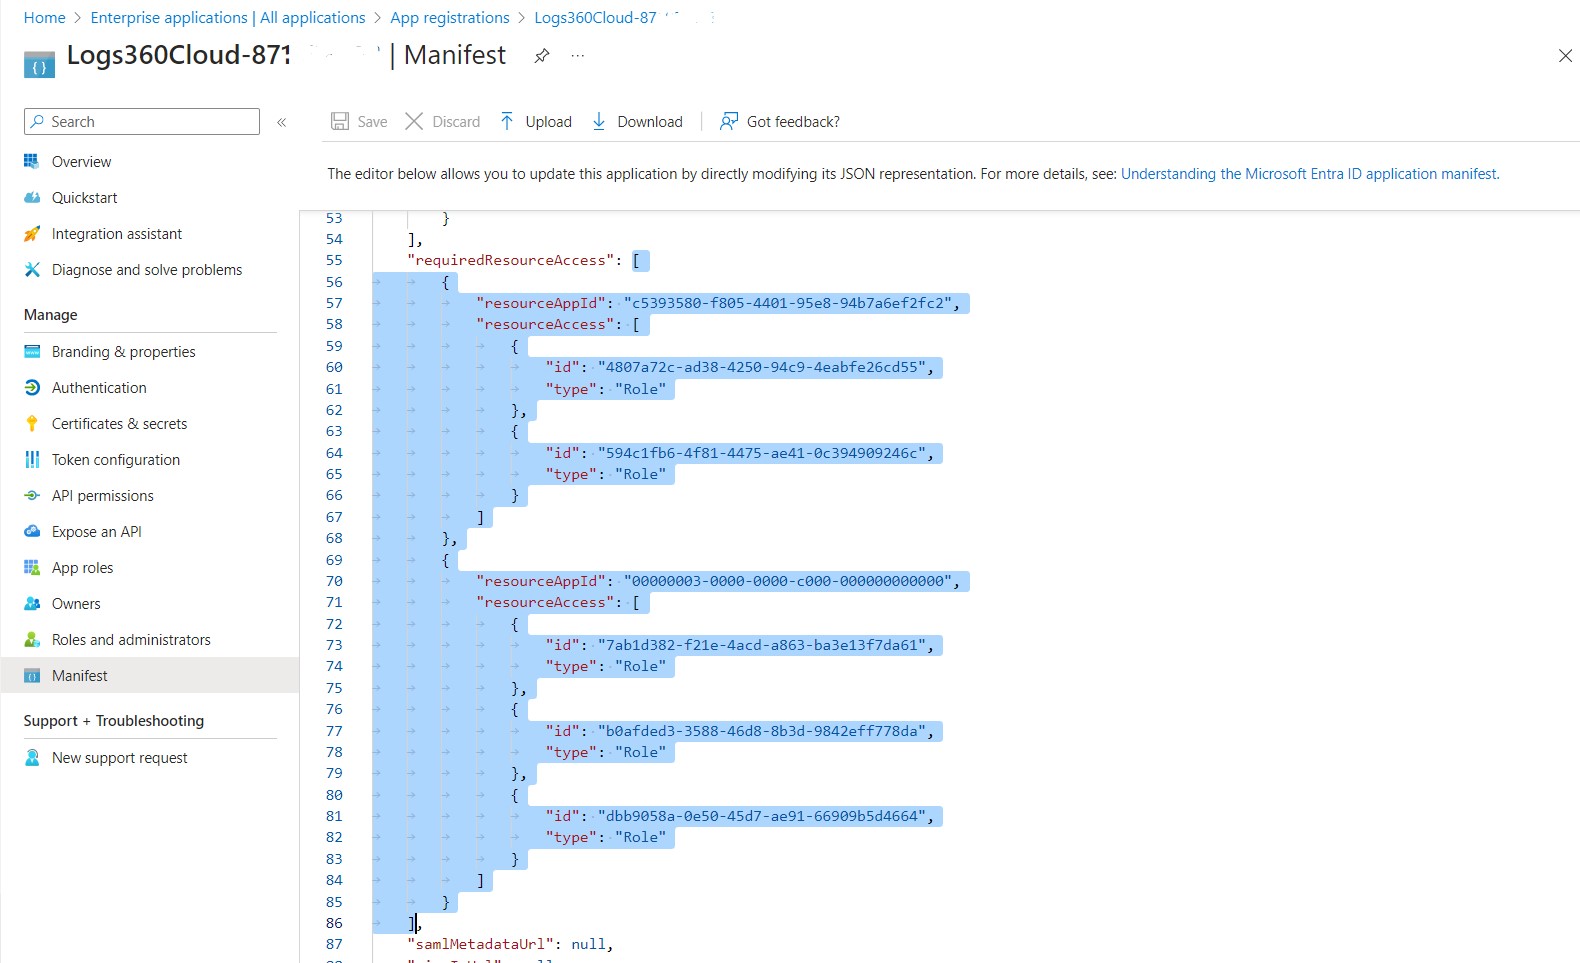
- Click Manifest from the left pane.
- Look for requiredResourceAccess array in the code.
- Copy the entire contents from this file and paste them into the section highlighted in the image below. If you want to modify the permissions to be provided, skip this step and follow the steps mentioned in this section.
Note: Application scopes mentioned in the file
Microsoft Graph scopes:
Directory.Read.All
AuditLog.Read.All
ActivityFeed.ReadDlp
ActivityFeed.Read
Domain.Read.All
To know more about minimum scopes, click here.
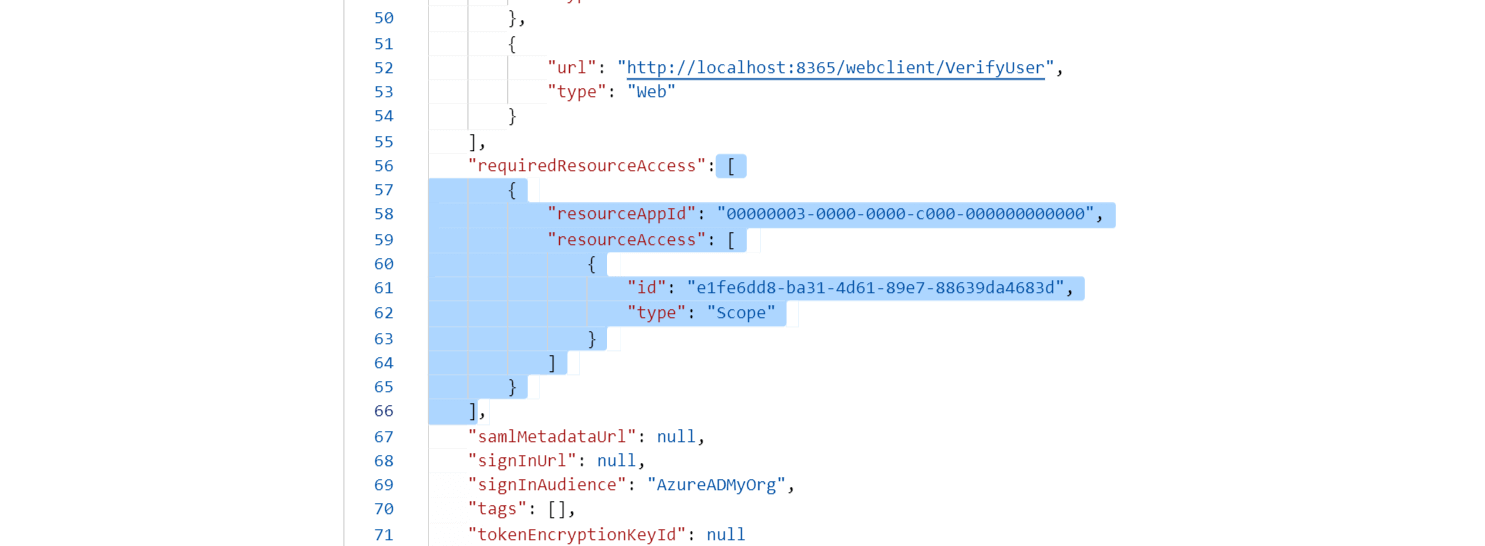
Note: Copy-paste content only from the open square bracket to the closed square bracket. Ensure that all punctuation marks are retained correctly. Once you have pasted the file, it should look like the image below.
- Click Save.
- Click API permissions from the left pane.
- In the Configured permissions section, click ✓ Grant admin consent for <your_company_name>.
- Click Yes in the pop-up that appears.
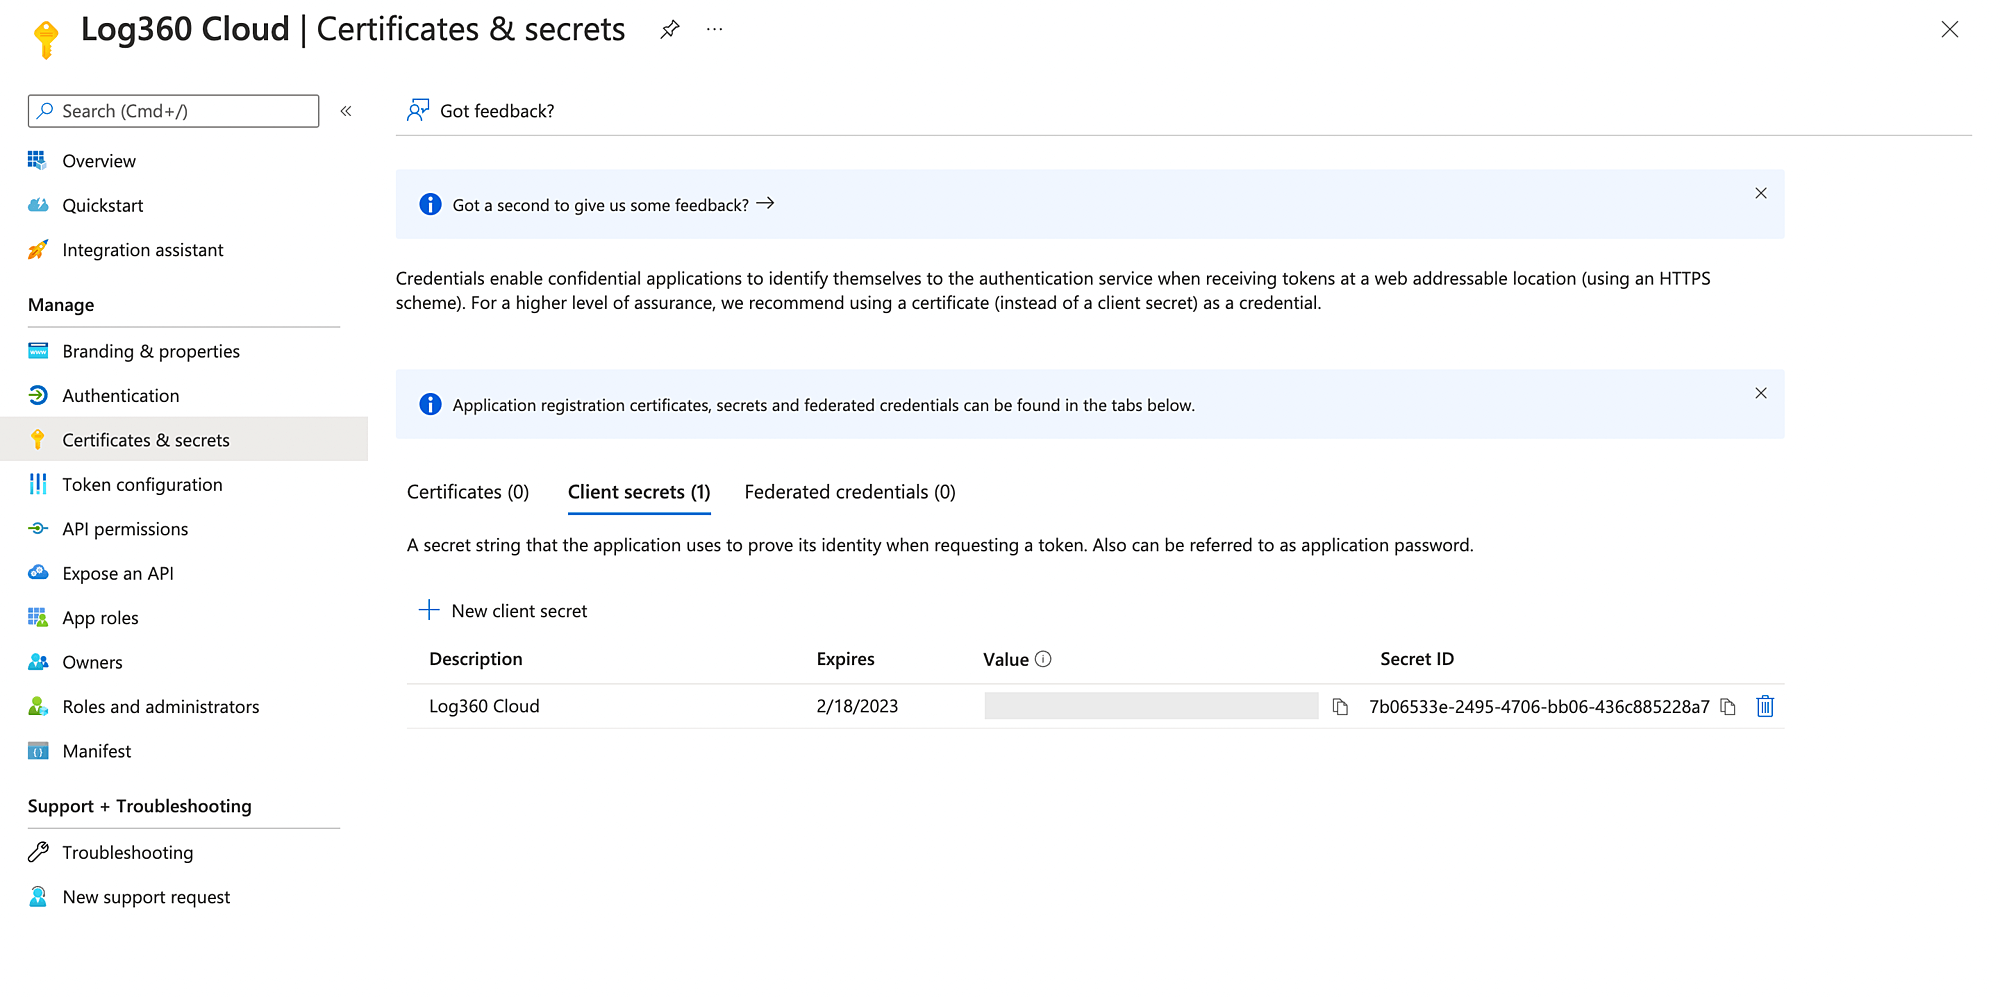
- Click Certificates & secrets from the left pane.
- Under the Client secrets section, click New client secret.
- This section generates an app password for Log360 Cloud. In the Description field of the pop-up, provide a name to identify the app to which the password belongs.
- Choose when the password should expire.
- Click Add.
- Copy the string under Value and save it. This is the Application Secret, which you will require later.
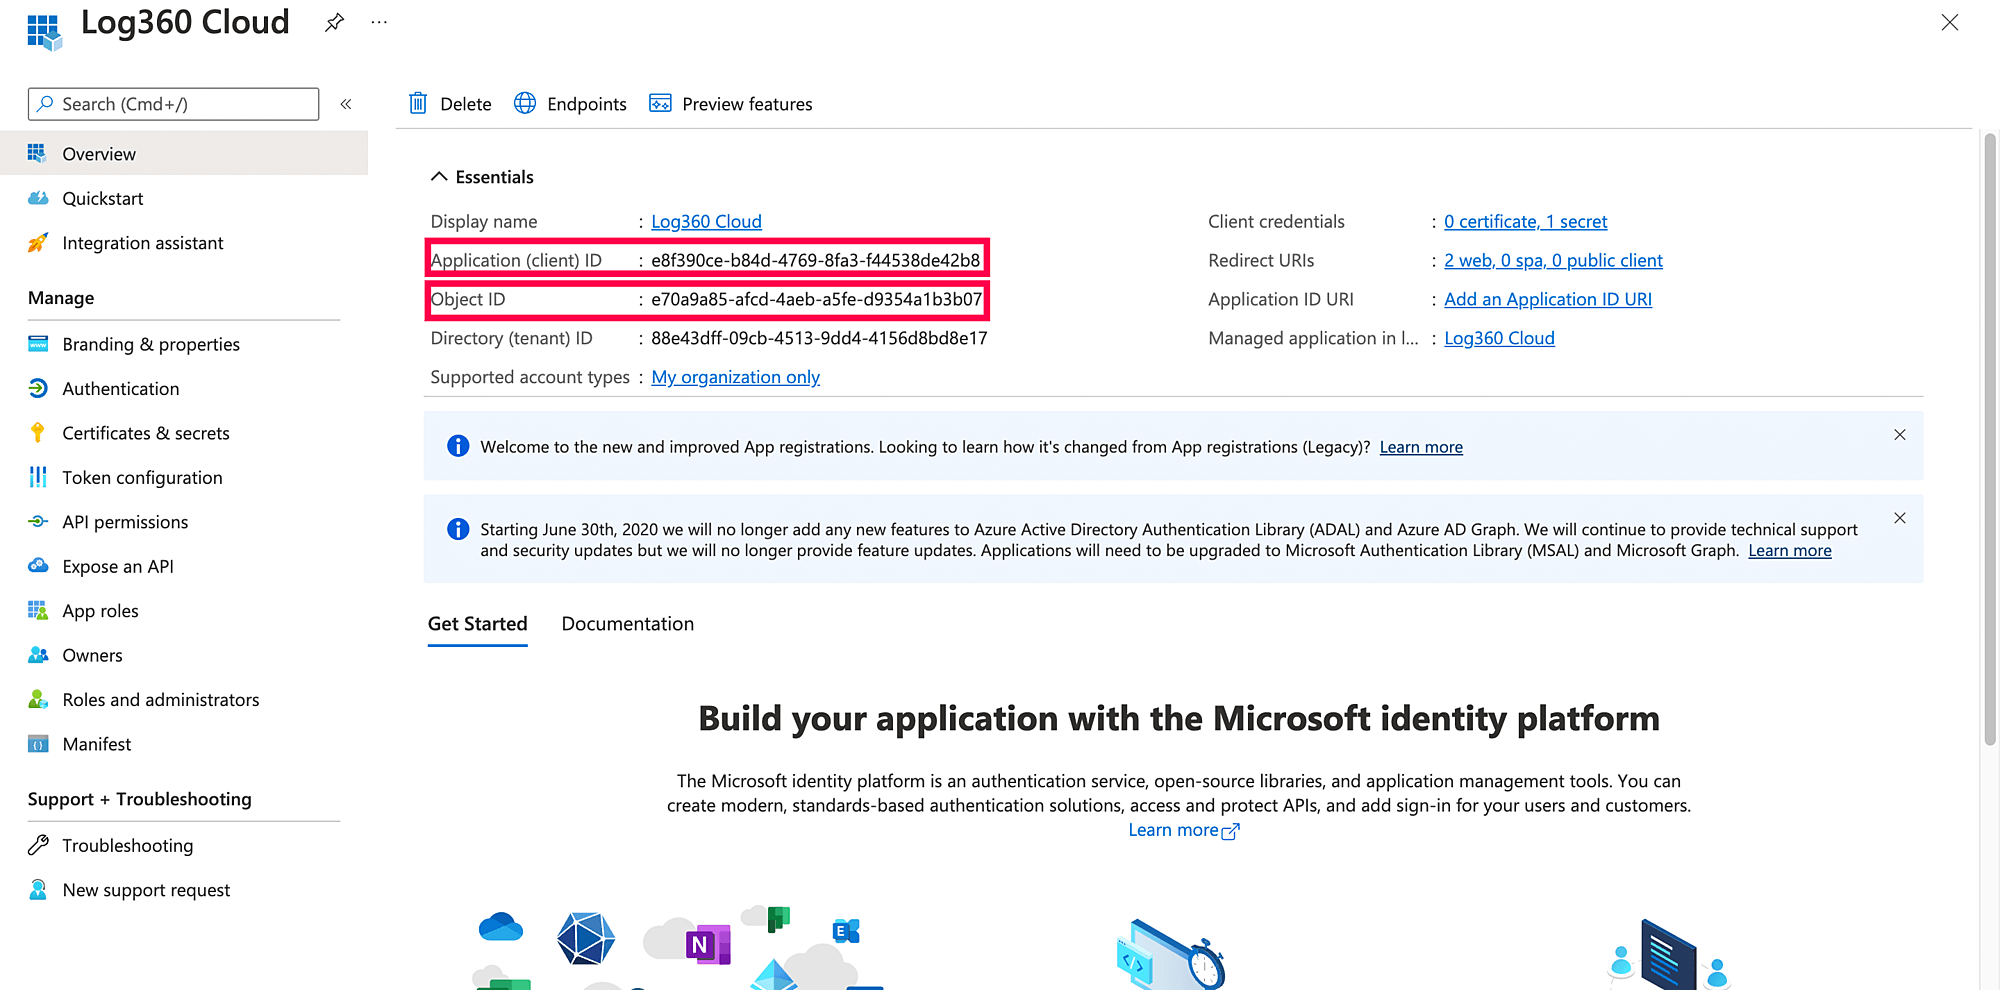
- Now go to the Overview section in the left pane.
- Copy the Application (client) ID and Object ID values and save them. You will need these values to configure your tenant in the Log360 Cloud portal.
- Refer to this table to learn about the roles that must be assigned to the application.
Steps to configure an Azure application in Log360 Cloud
- Return to the Log360 Cloud console where you have the following screen.
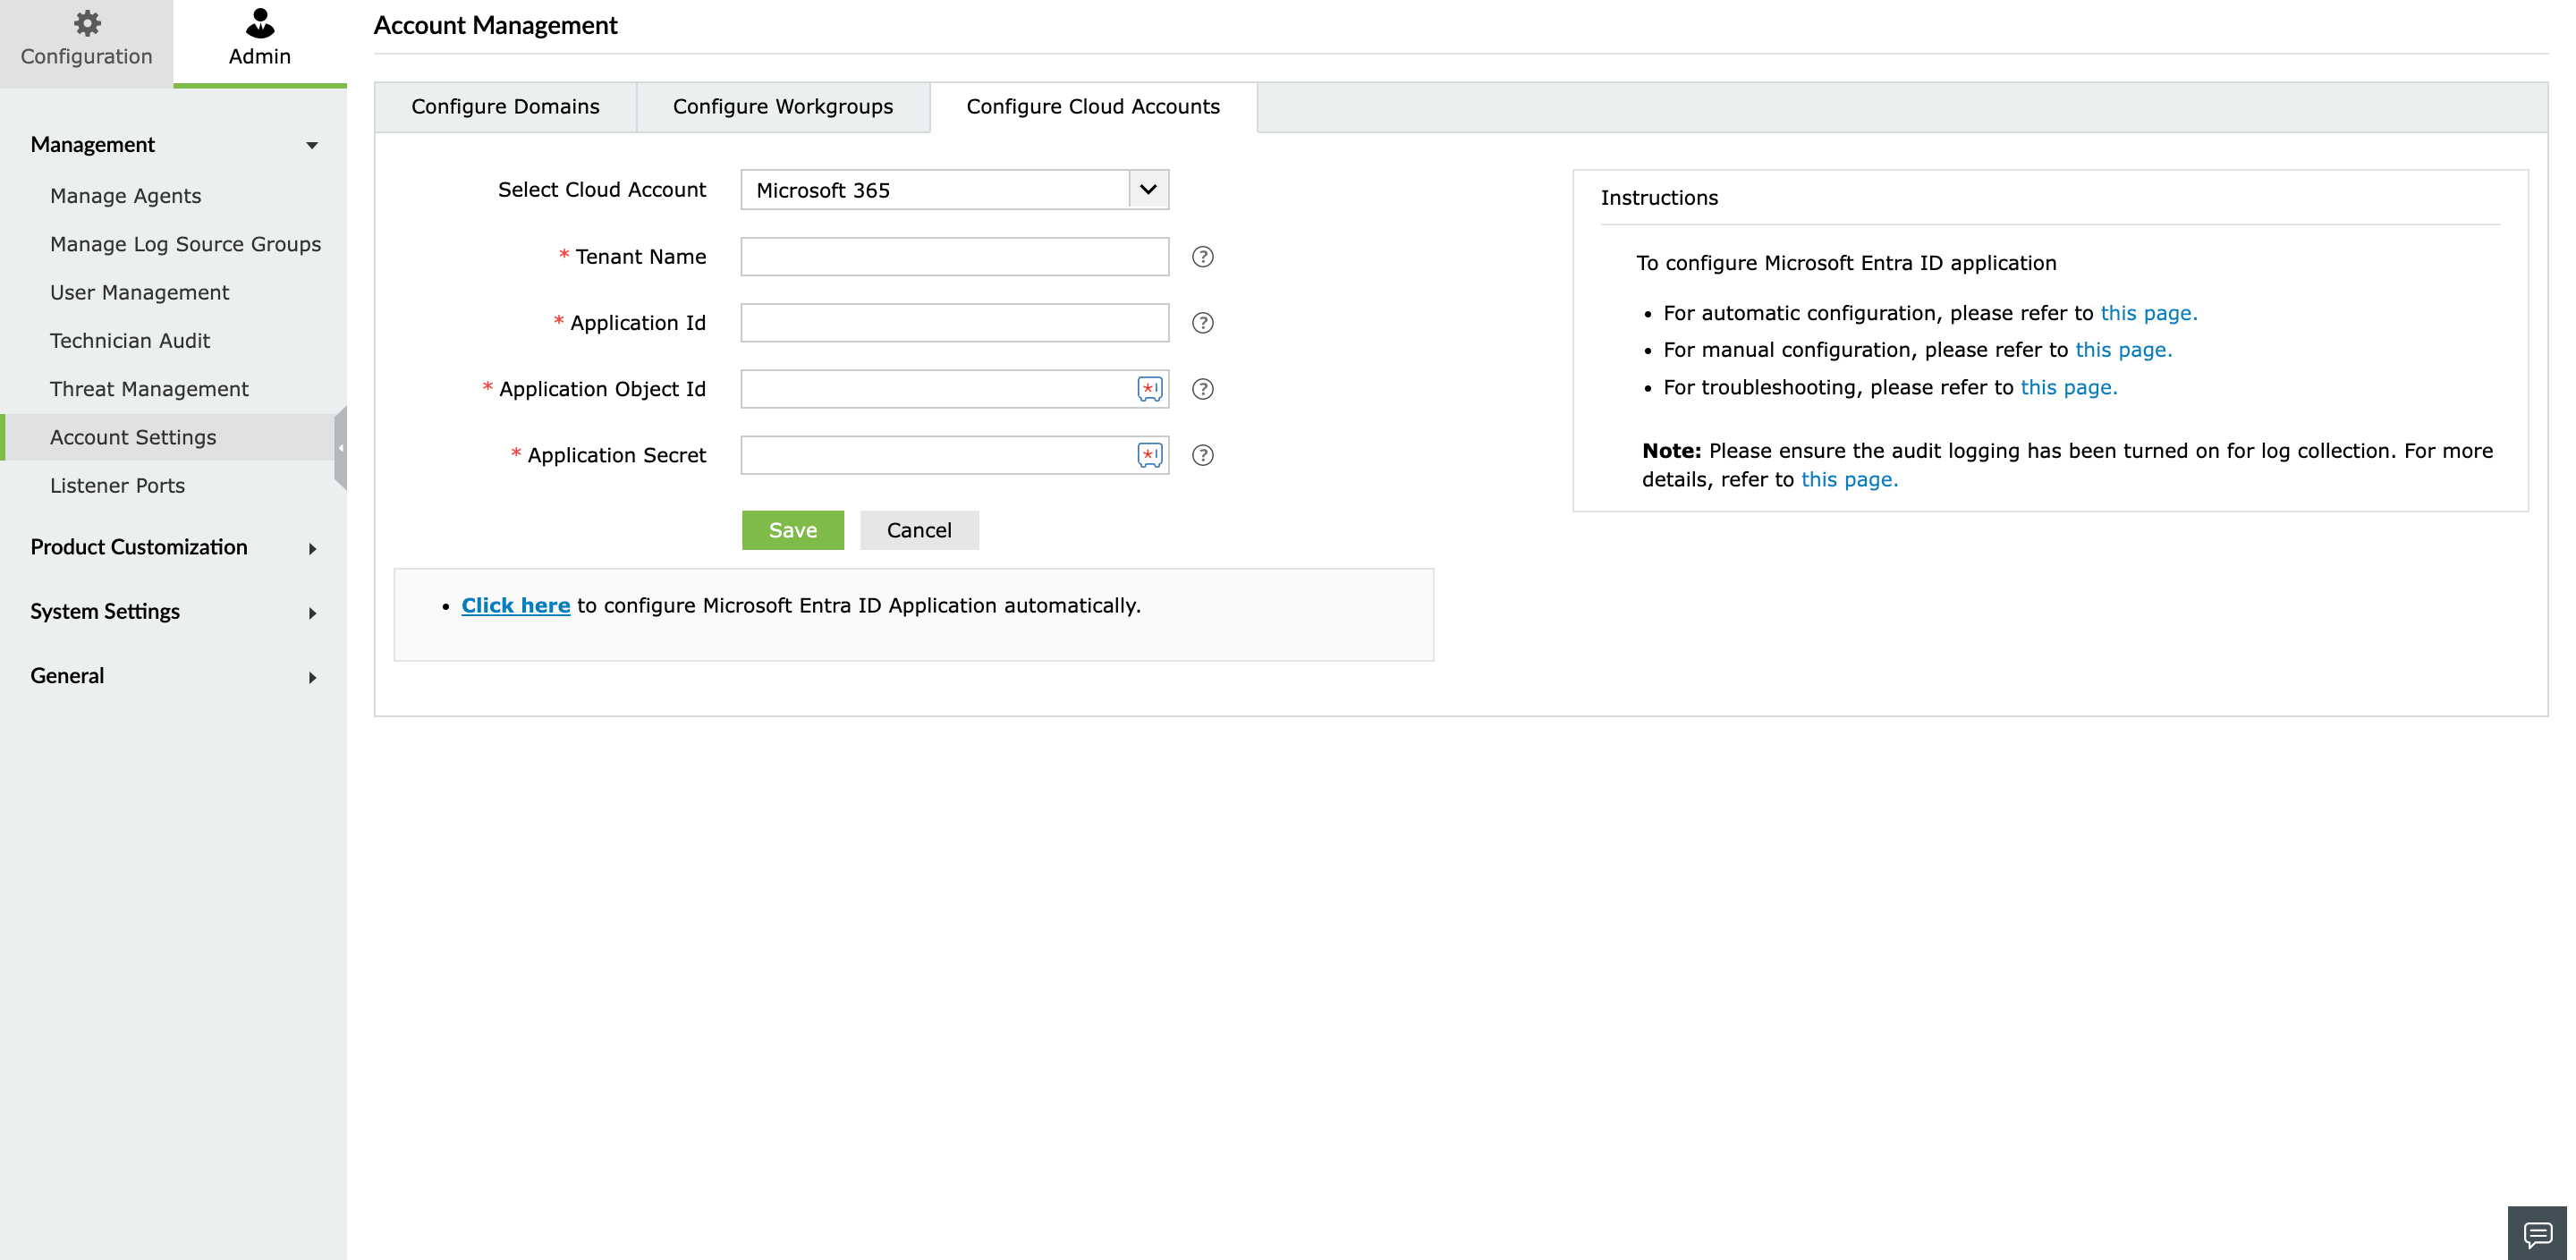
- Select the Cloud Type as Microsoft 365, and enter your Tenant Name, for example, test.onmicrosoft.com.
- Paste the Application ID and Application Object ID values copied in Step 29 into the respective fields.
- For the Application Secret, paste the value copied in Step 27.
- Click Save.