Schedule exports
Create a new schedule
To create a new export schedule,
- Go to Reports.
- Click Scheduled Reports at the bottom left of the page.
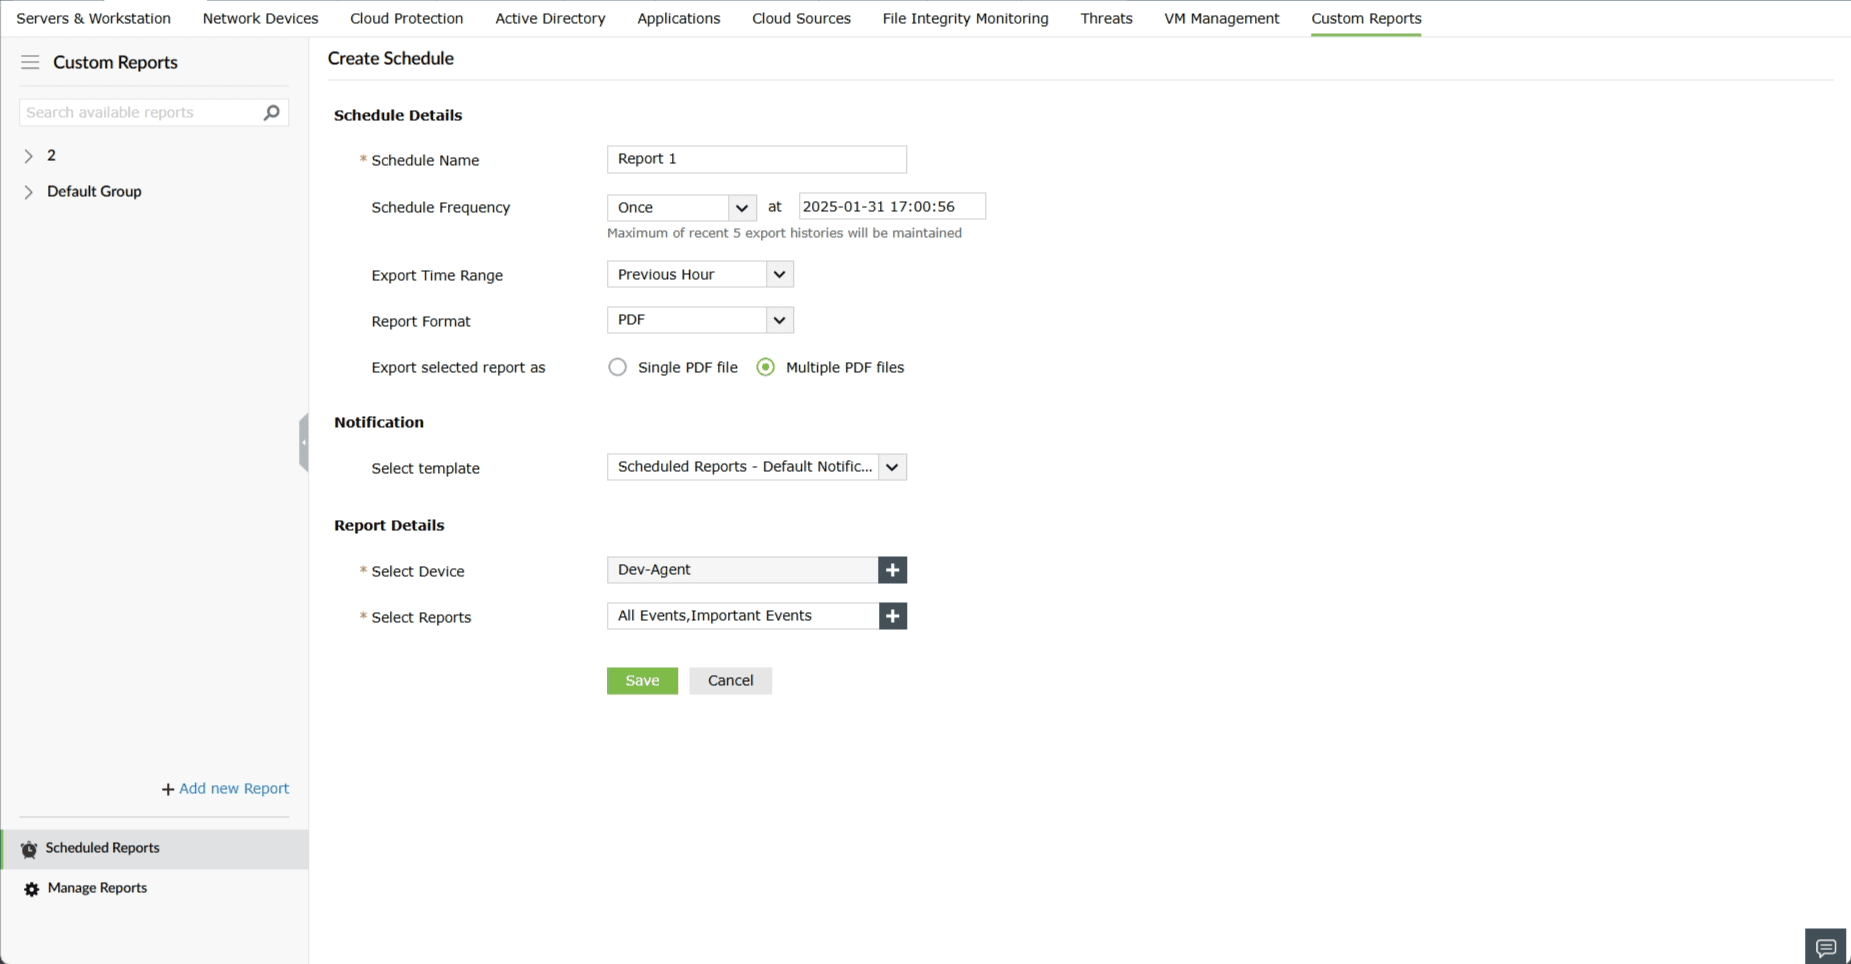
- Create New Schedule page will be displayed
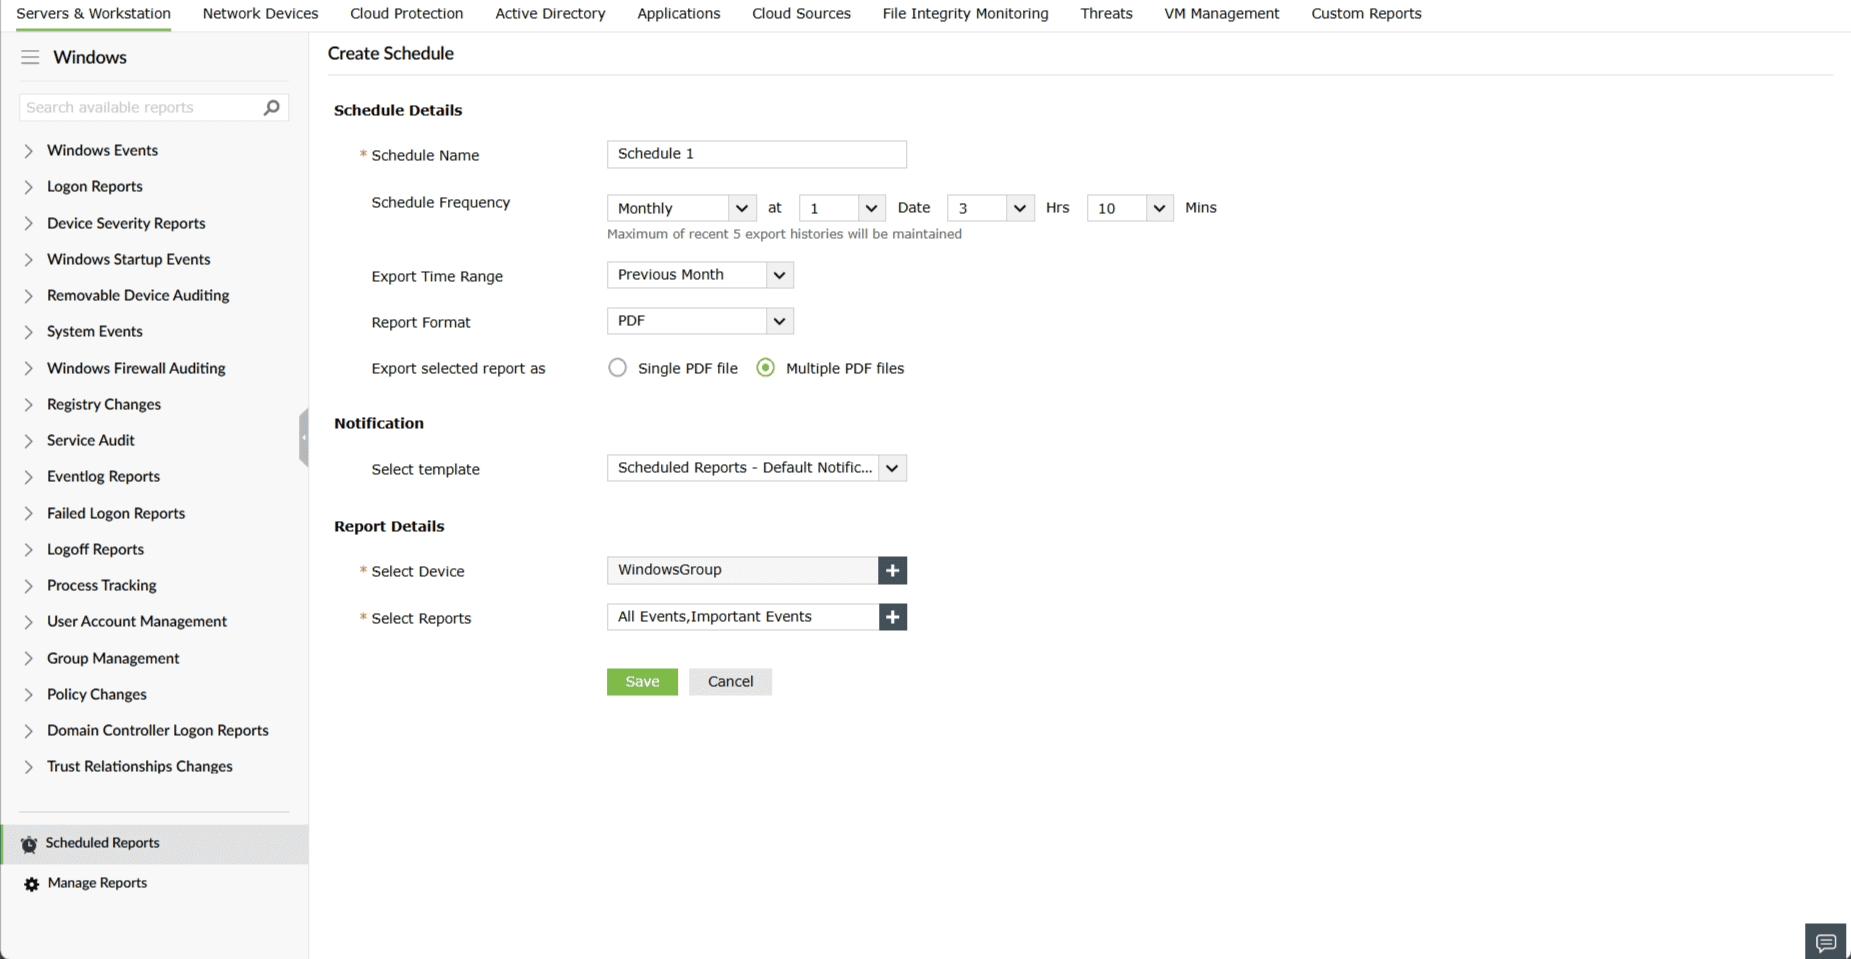
Under Schedule Details, enter the name of the schedule, frequency of the schedule, time range of the report export, and the format of the report.
- Schedule Frequency: Determine how often you want the report to be exported. Options include: 'Only Once', 'Hourly', 'Daily', 'Weekly', and 'Monthly'.
- Export Time Range: Choose the specific time range for which the report will be generated and later exported.
- Report Format: Choose the file format in which the report needs to be exported, i.e., PDF, CSV, HTML or XLSX.
- Export selected report as: Configure whether to export the reports as an individual PDF for each report or as a single PDF containing multiple reports. (Note : This option is currently supported only for PDF )
Under the Notification section, choose your preferred template for report export from the dropdown menu. For detailed information on customization options for these templates, refer to the notification template help documentation.
Note: When a template is deleted, the schedules return to the default template.
Under the Report Details section, you will be selecting the devices and the specific reports you want to be exported.
- Select Device:
- Click the (
 ) icon next to Select Device.
- A list of available devices will be displayed.
- From this list, choose the device(s) you want to include in your report. This selection will determine which device data is included in the report.
- Select Report:
- After selecting the device, utilize the dropdown menu at the top to view the available reports for the chosen device.
- Depending on the device selected, a list of corresponding reports will be shown.
- From this list, choose the reports you wish to export.
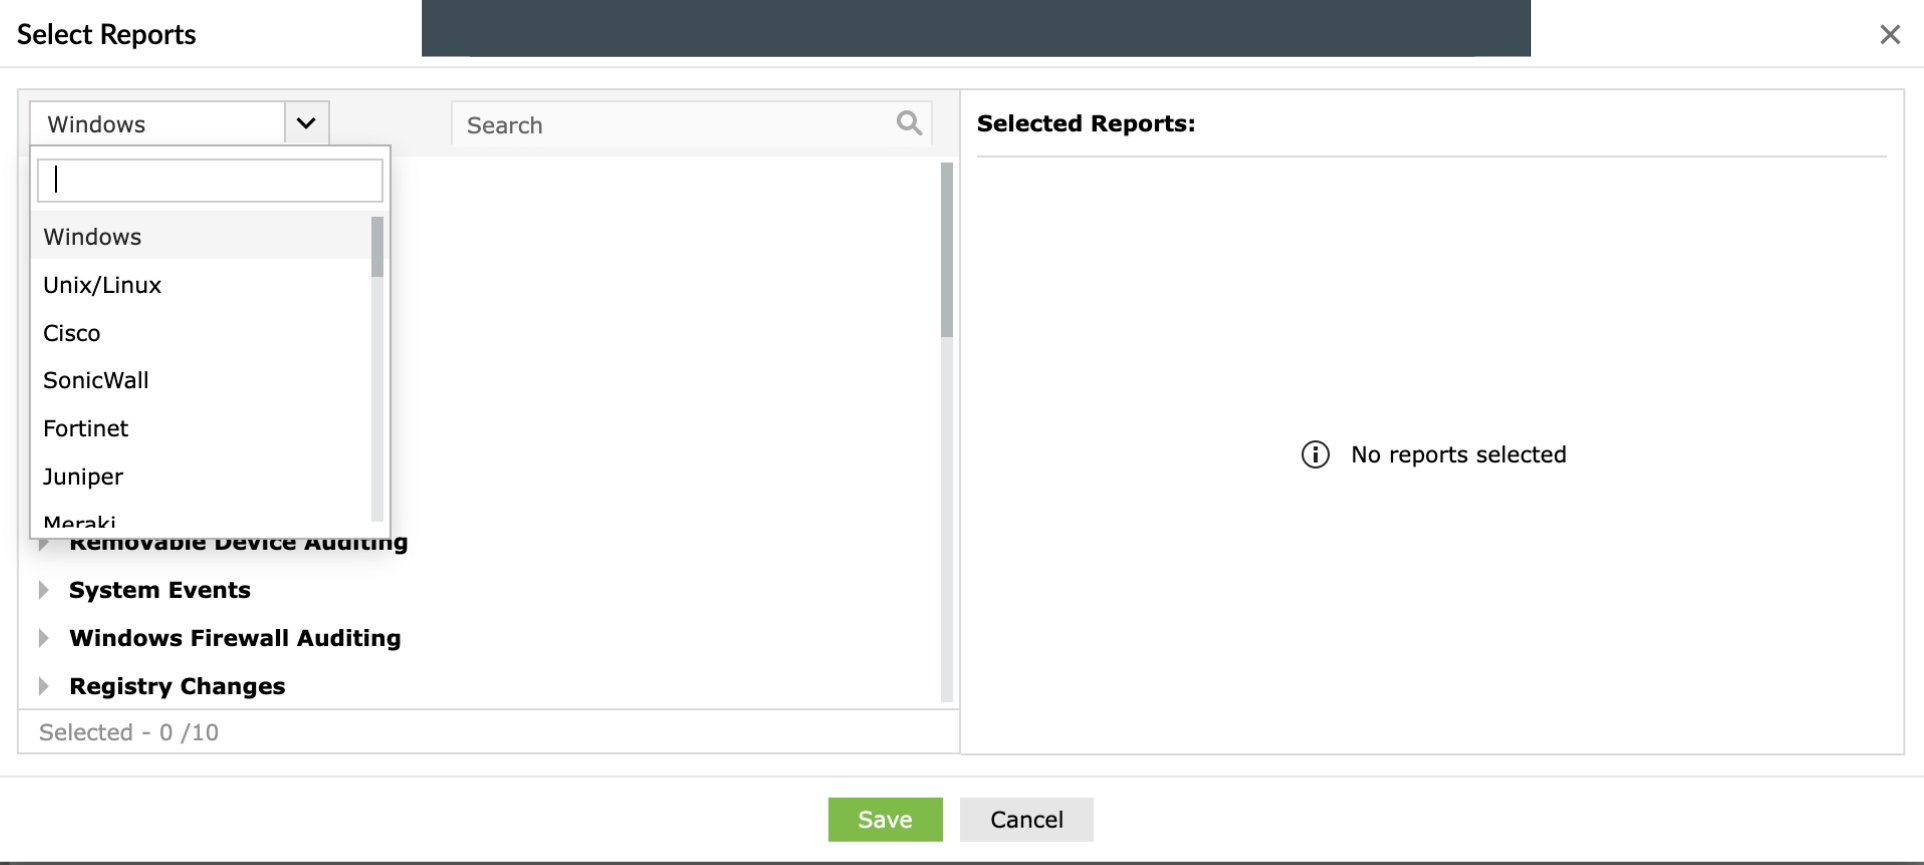
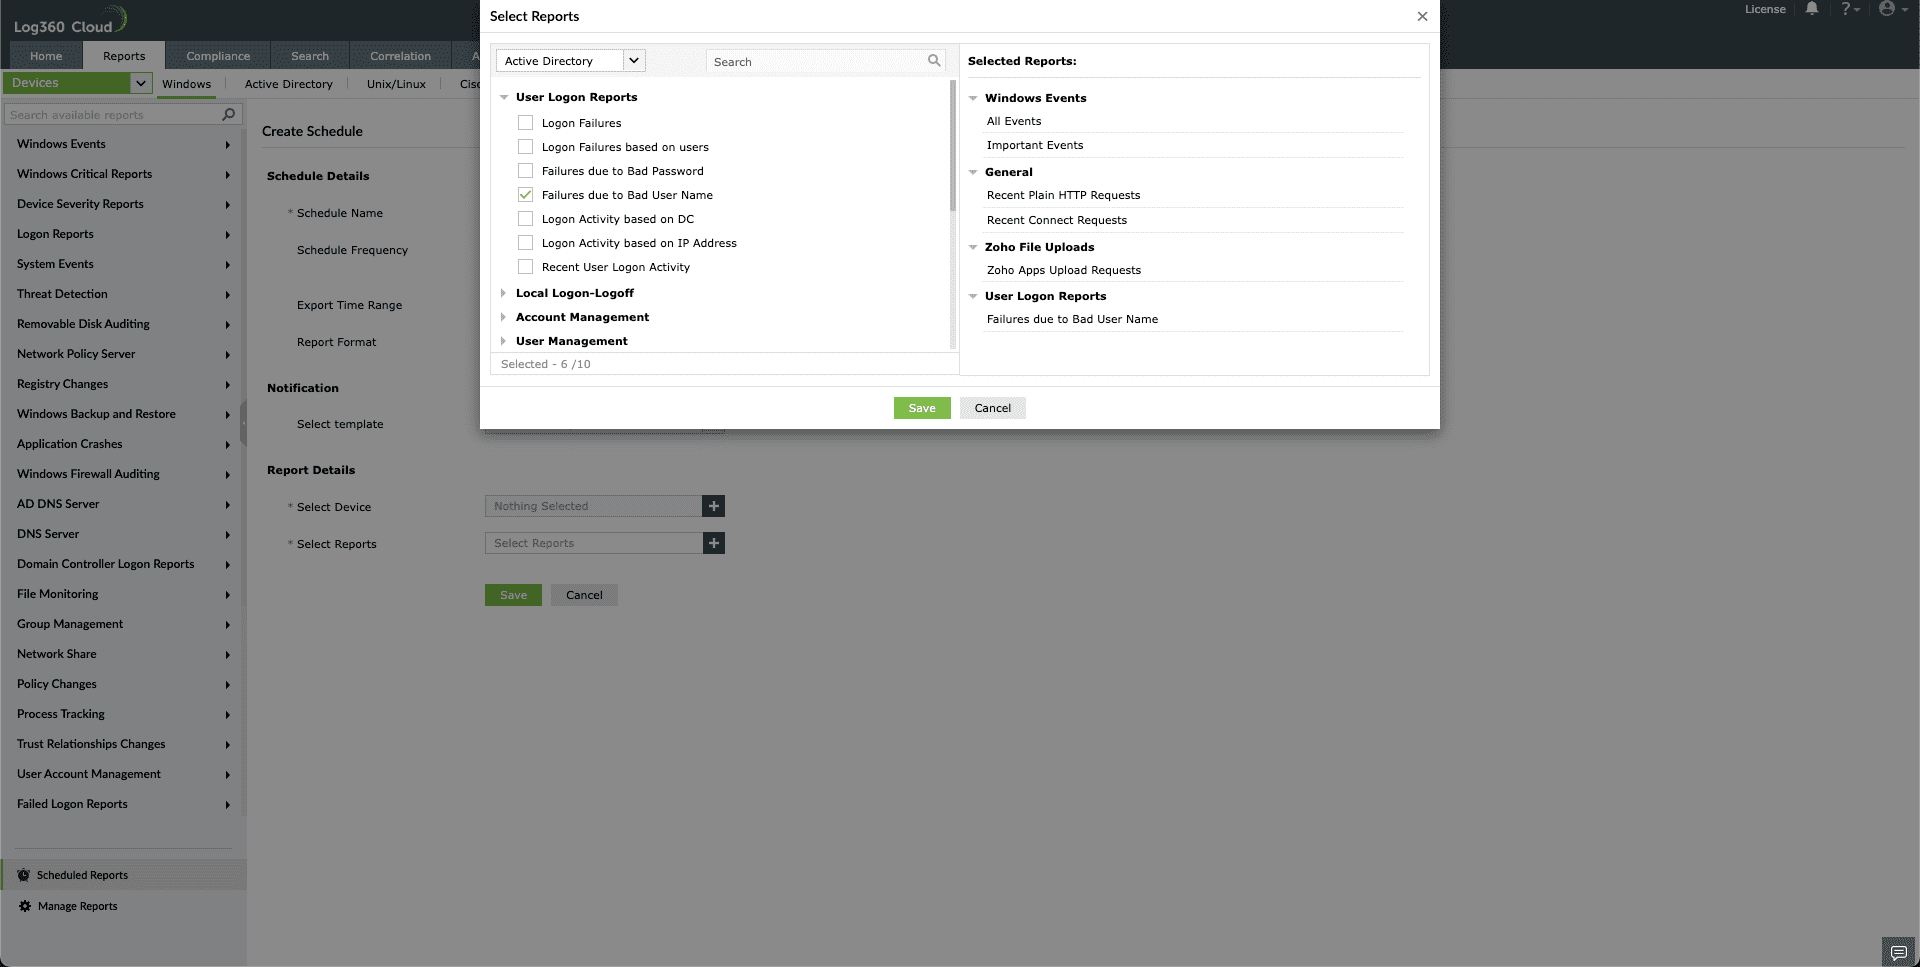
- Saving Your Selections:
- After making your choices, click the Save button.
Once back on the main page, confirm your settings by clicking the Save button. This action completes the creation of your report schedule.
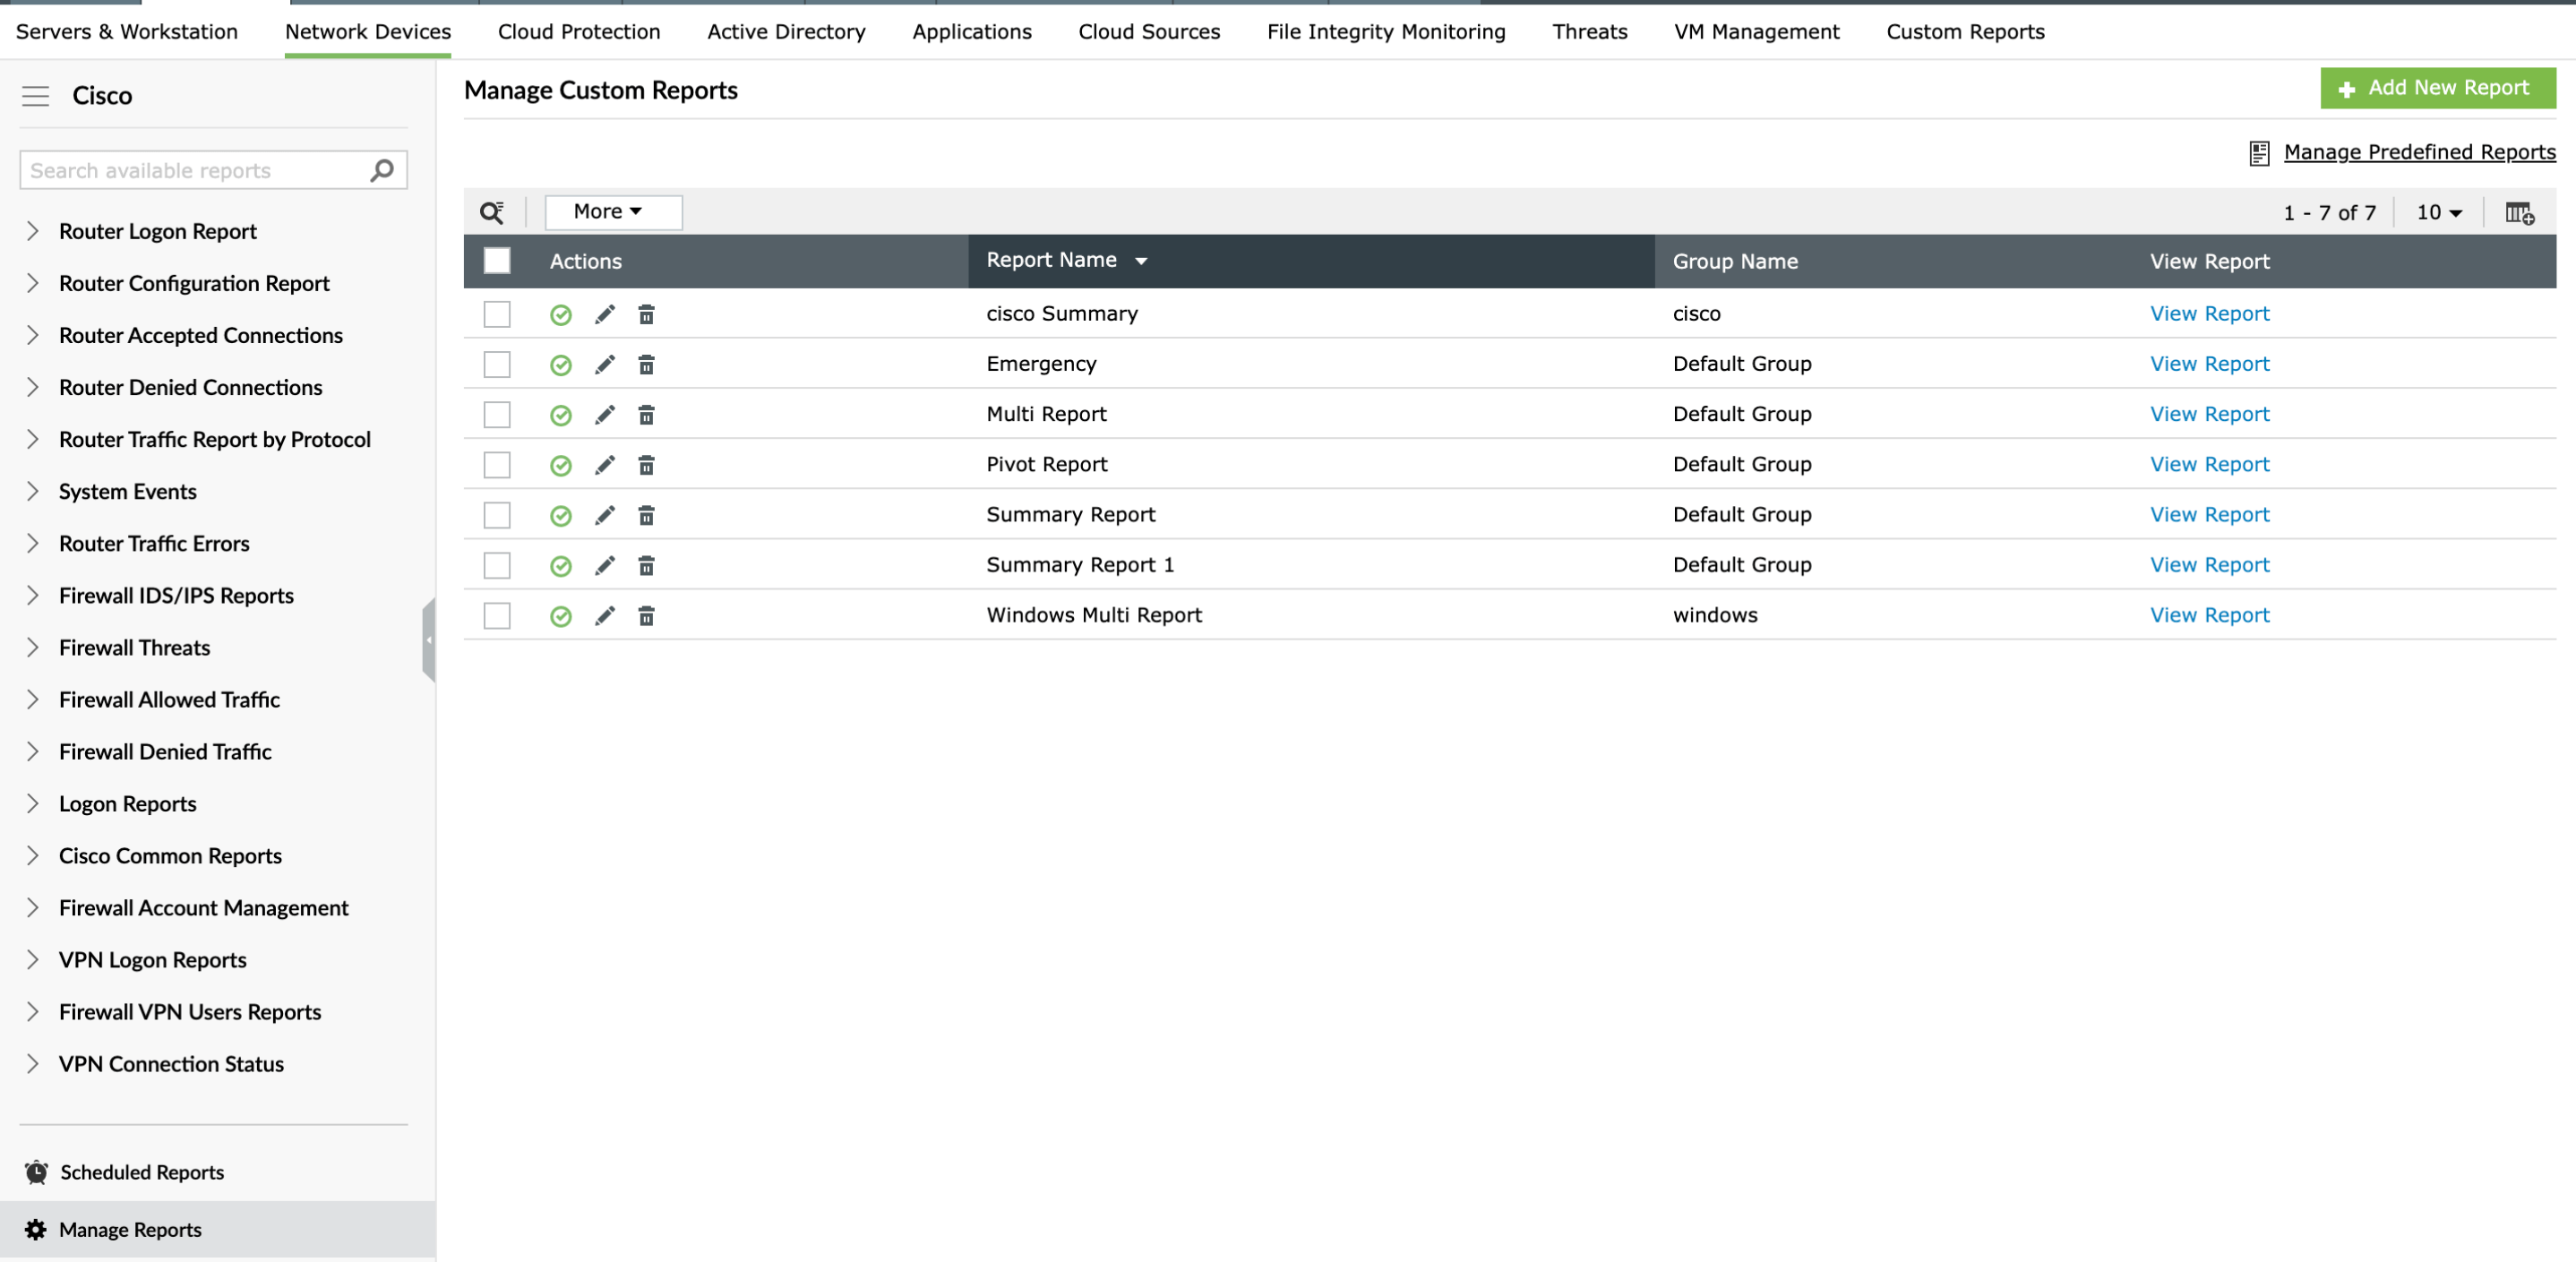
Managing Your Report Schedules
Under the Actions menu, you can:
- Enable/disable the current schedule.
- Edit the configuration of the schedule.
- Delete the schedule altogether.
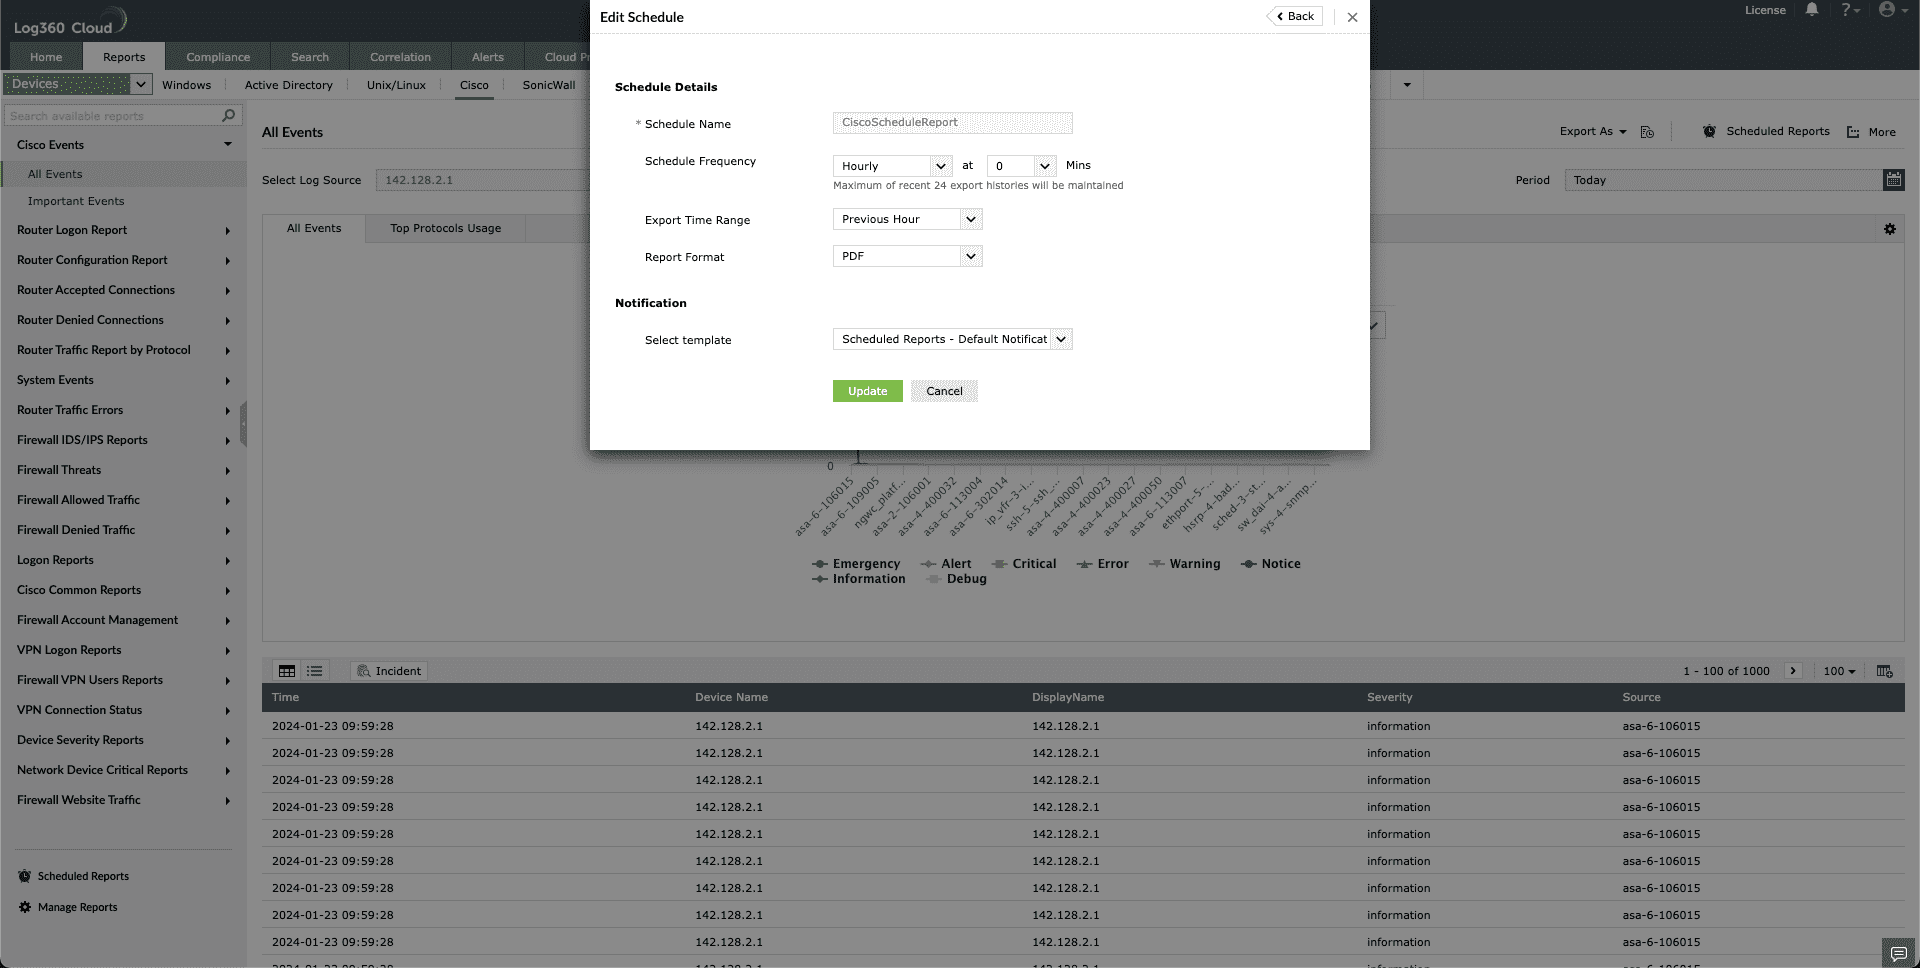
To edit a configured scheduled,
- Navigate to the Reports page.
- On the left pane of the Reports page, scroll to the bottom to find 'Scheduled Reports'.
- From the list of configured schedules, select the edit icon (
 ) next to the schedule you wish to modify.
- Make the desired changes.
- Click 'Update' to save your changes.
- When a specific report is accessed, you will be able to:
- Set up a new schedule for the selected report.
- Alter the existing schedule linked with that report.
Changes to a schedule will not only affect the initial report but will also extend its impact on other reports contained within the same schedule.
Alternatively, to create a new report schedule,
- Click on the + Create New Schedule button on the top-right corner of the Scheduled Reports page.
- Schedule Reports pop-up will be displayed.
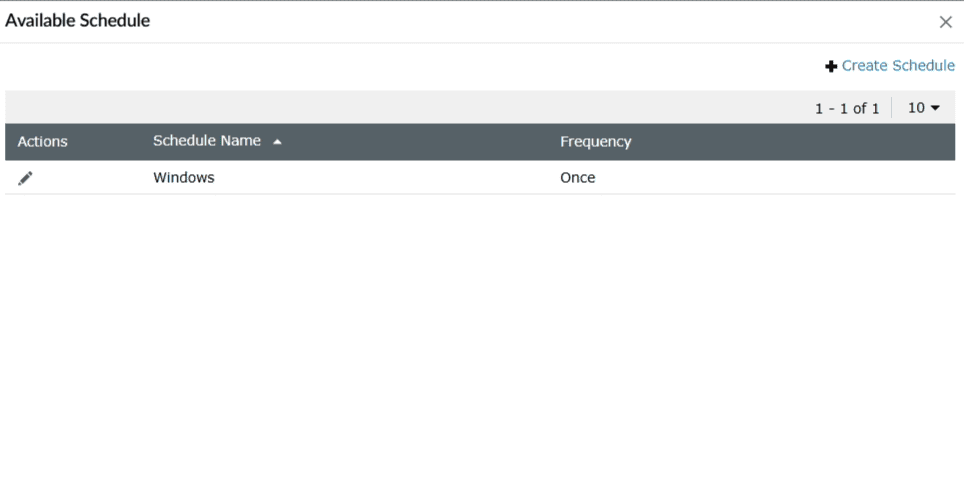
- Select + Create Schedule on the top right on the pop-up.
- Create Schedule pop-up will be displayed.
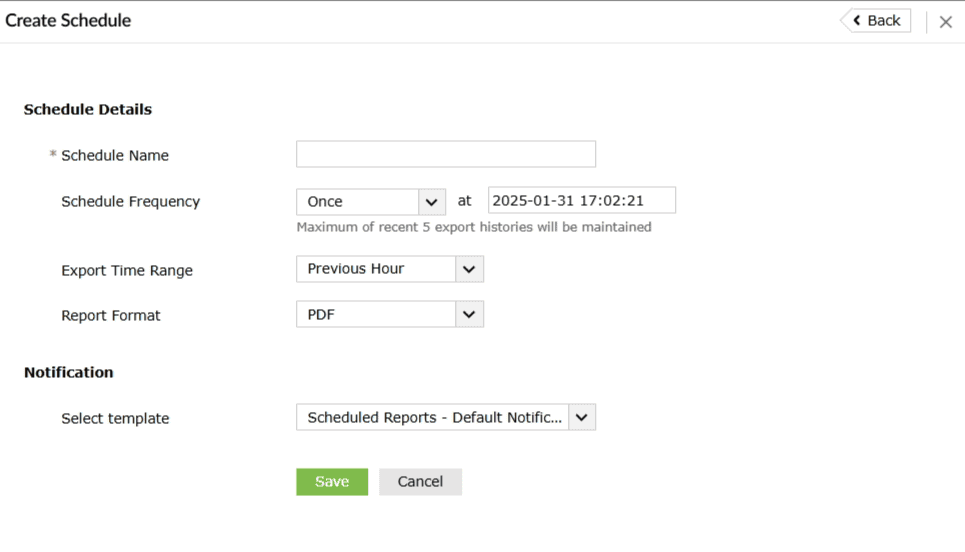
- Schedule details: Enter the schedule's name, select the export frequency (options: 'Only Once', 'Hourly', 'Daily', 'Weekly', 'Monthly'), choose the time range for the report, and decide on the report's format (PDF or CSV).
- Notification: Select the template for the report's export.
- Saving and viewing: After configuration, click 'Save'. Configured reports will be displayed in a subsequent pop-up.
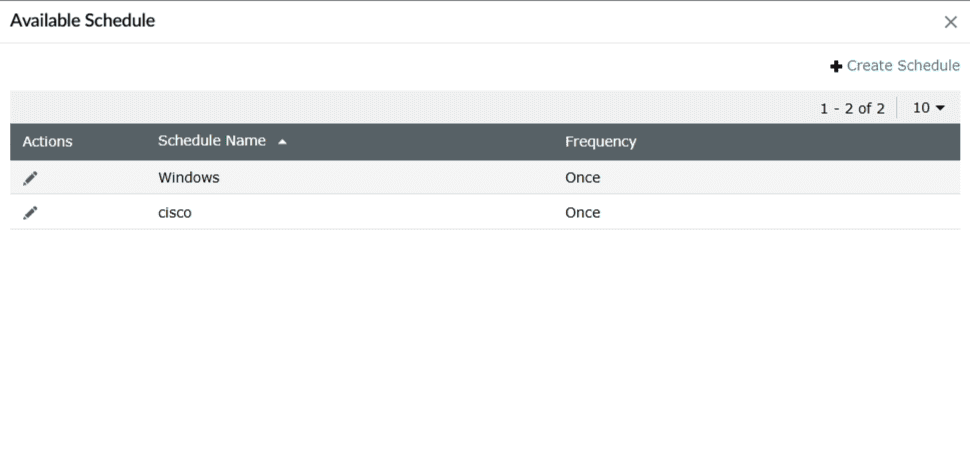
- The configured reports will be displayed in the pop-up like this.
To edit a schedule,
- Click () next to the configured schedule.
- Edit Schedule pop-up will be displayed.
- Make changes as needed.
- Click Update.
Scheduled reports history
To view schedule history,
- Hover next to the Next Schedule of a configured schedule.
- Click
 icon to open the pop-up.
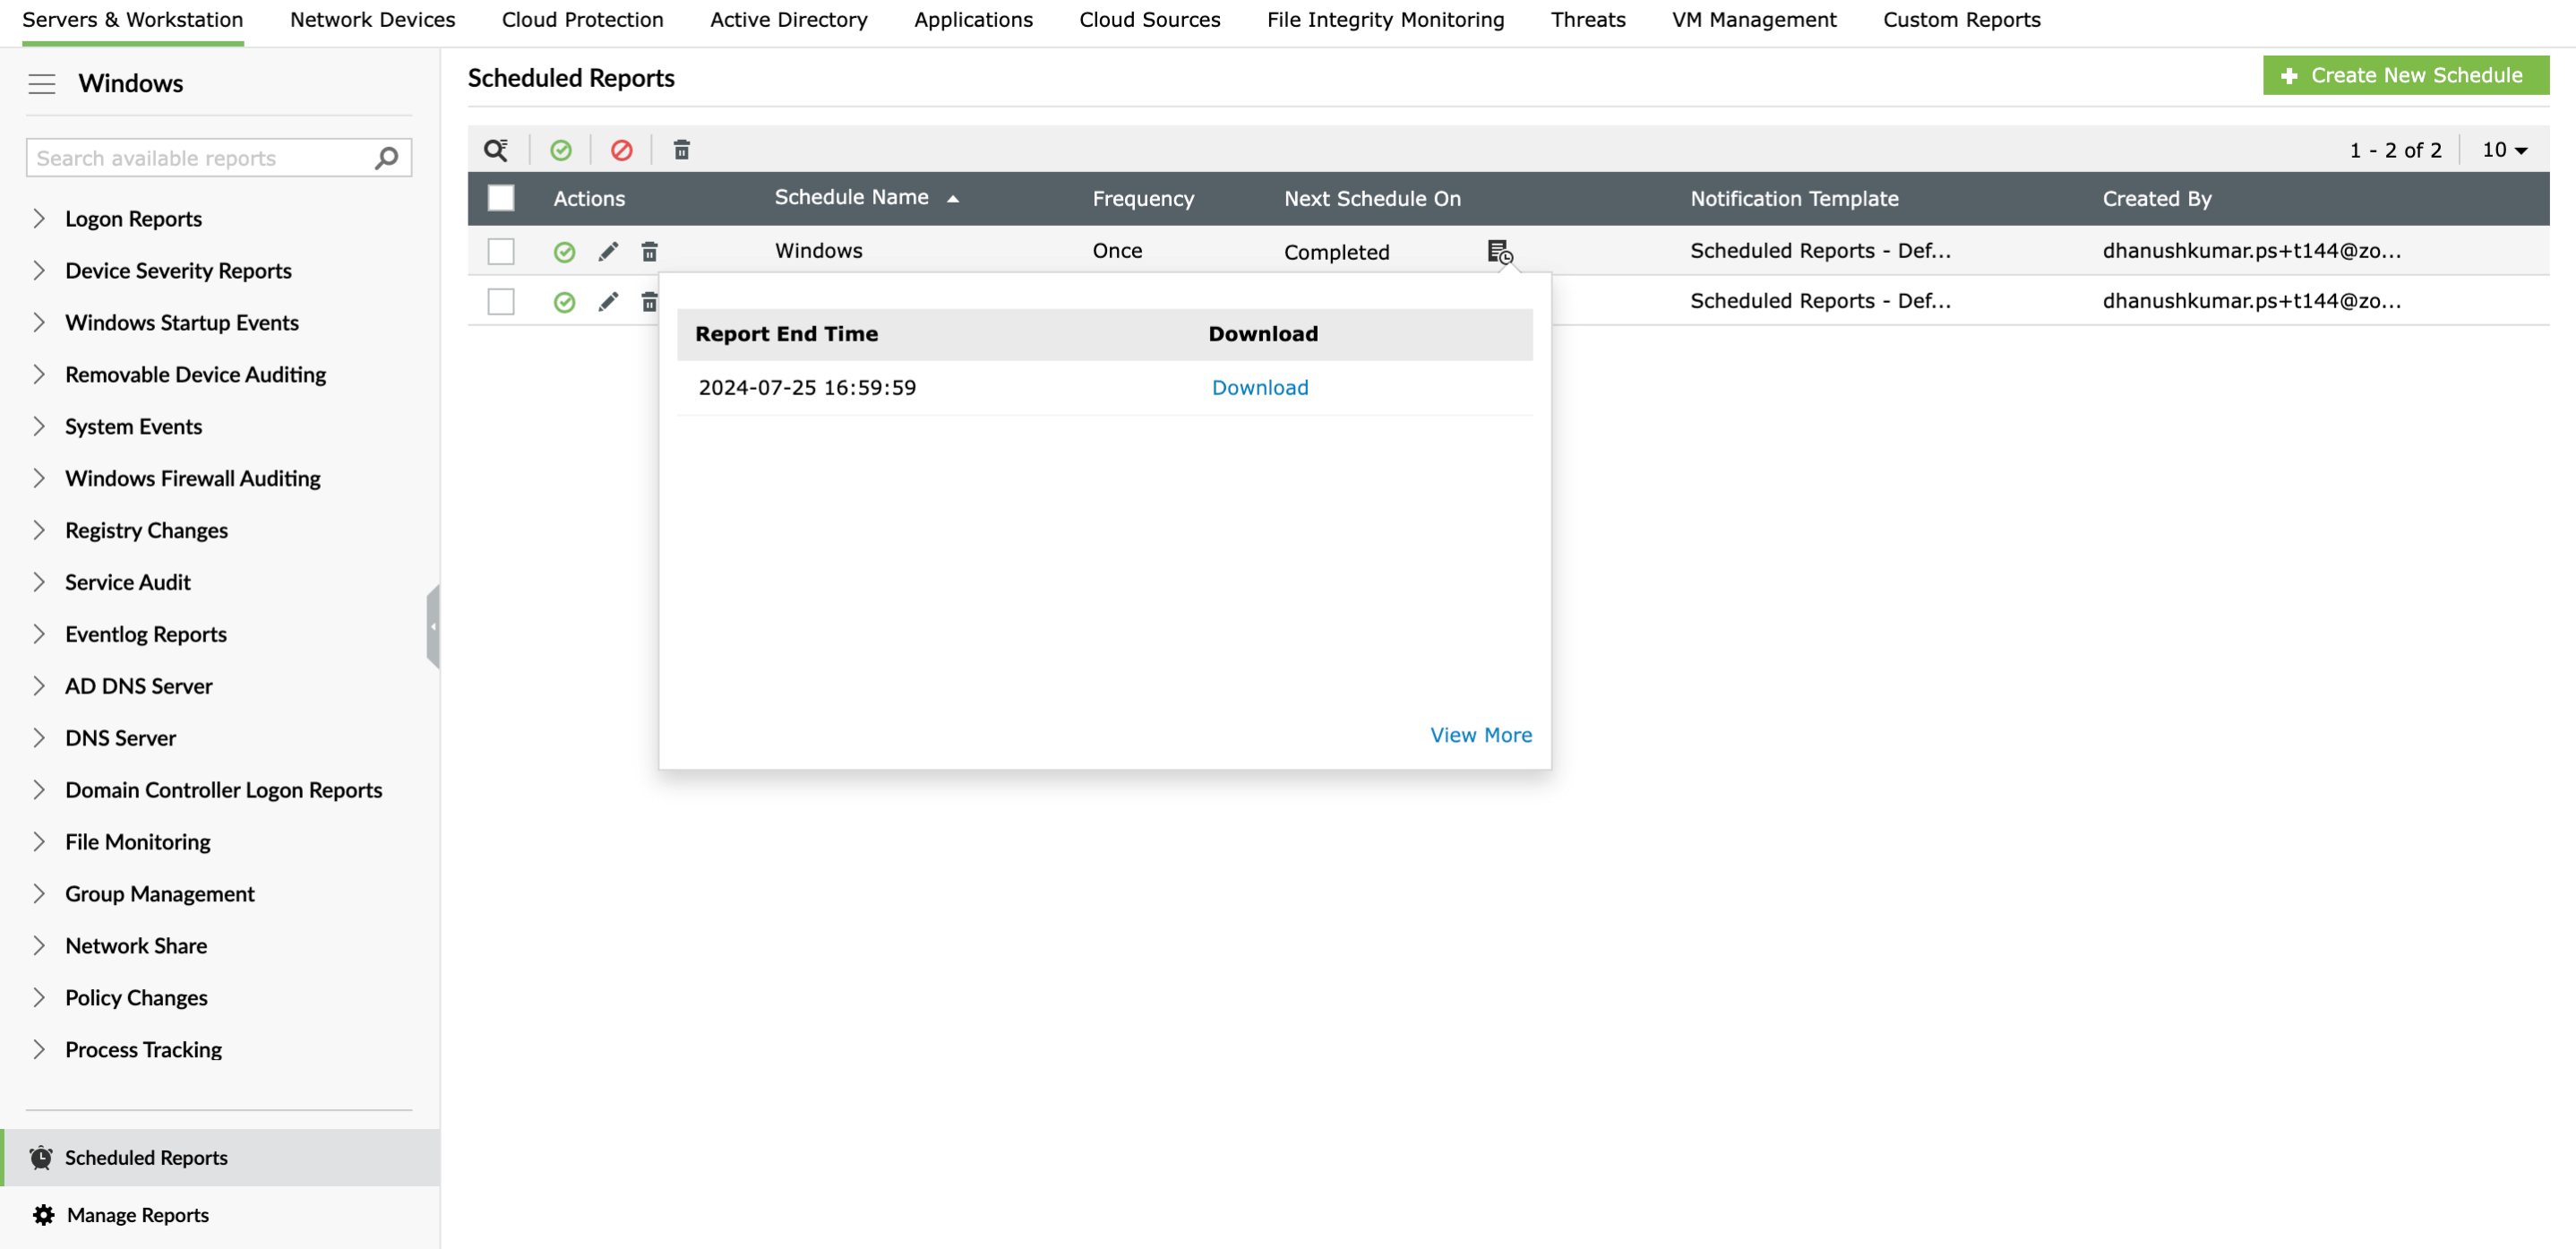
- Click View More.
- Schedule History pop-up will be displayed.
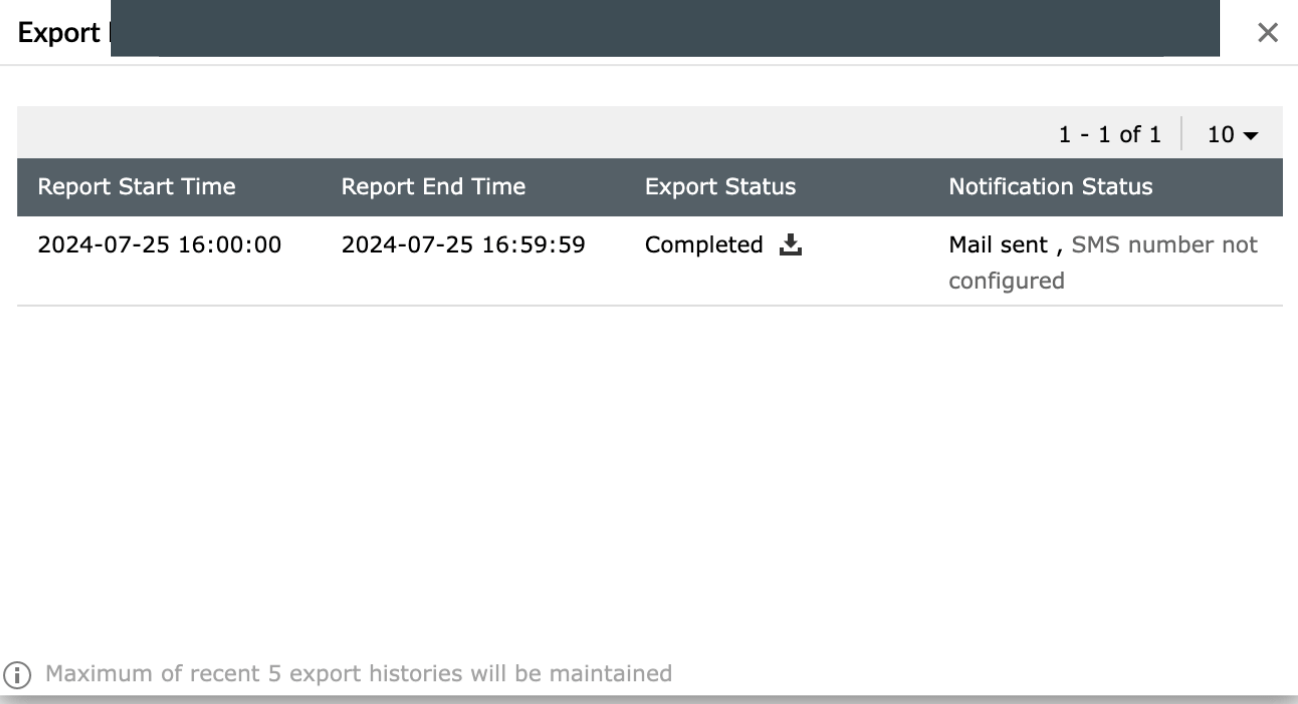
- You can find the details regarding export status success and failure here.