Reload Archive Logs
In this page:
Overview
ManageEngine Log360 Cloud allows reloading log data from archives for analysis. Archived log data often plays a crucial role in forensic analysis by allowing administrators to review past events and identify discrepancies that may indicate security issues. They also serve as evidence in case of data breaches.This page explains how to reload archival logs.
Steps to reload archive logs
- Log in to your Log360 Cloud account.
- Navigate to the Settings tab.
- In the left pane, select Admin.
- Under Data Storage, click Reload Archive Logs.
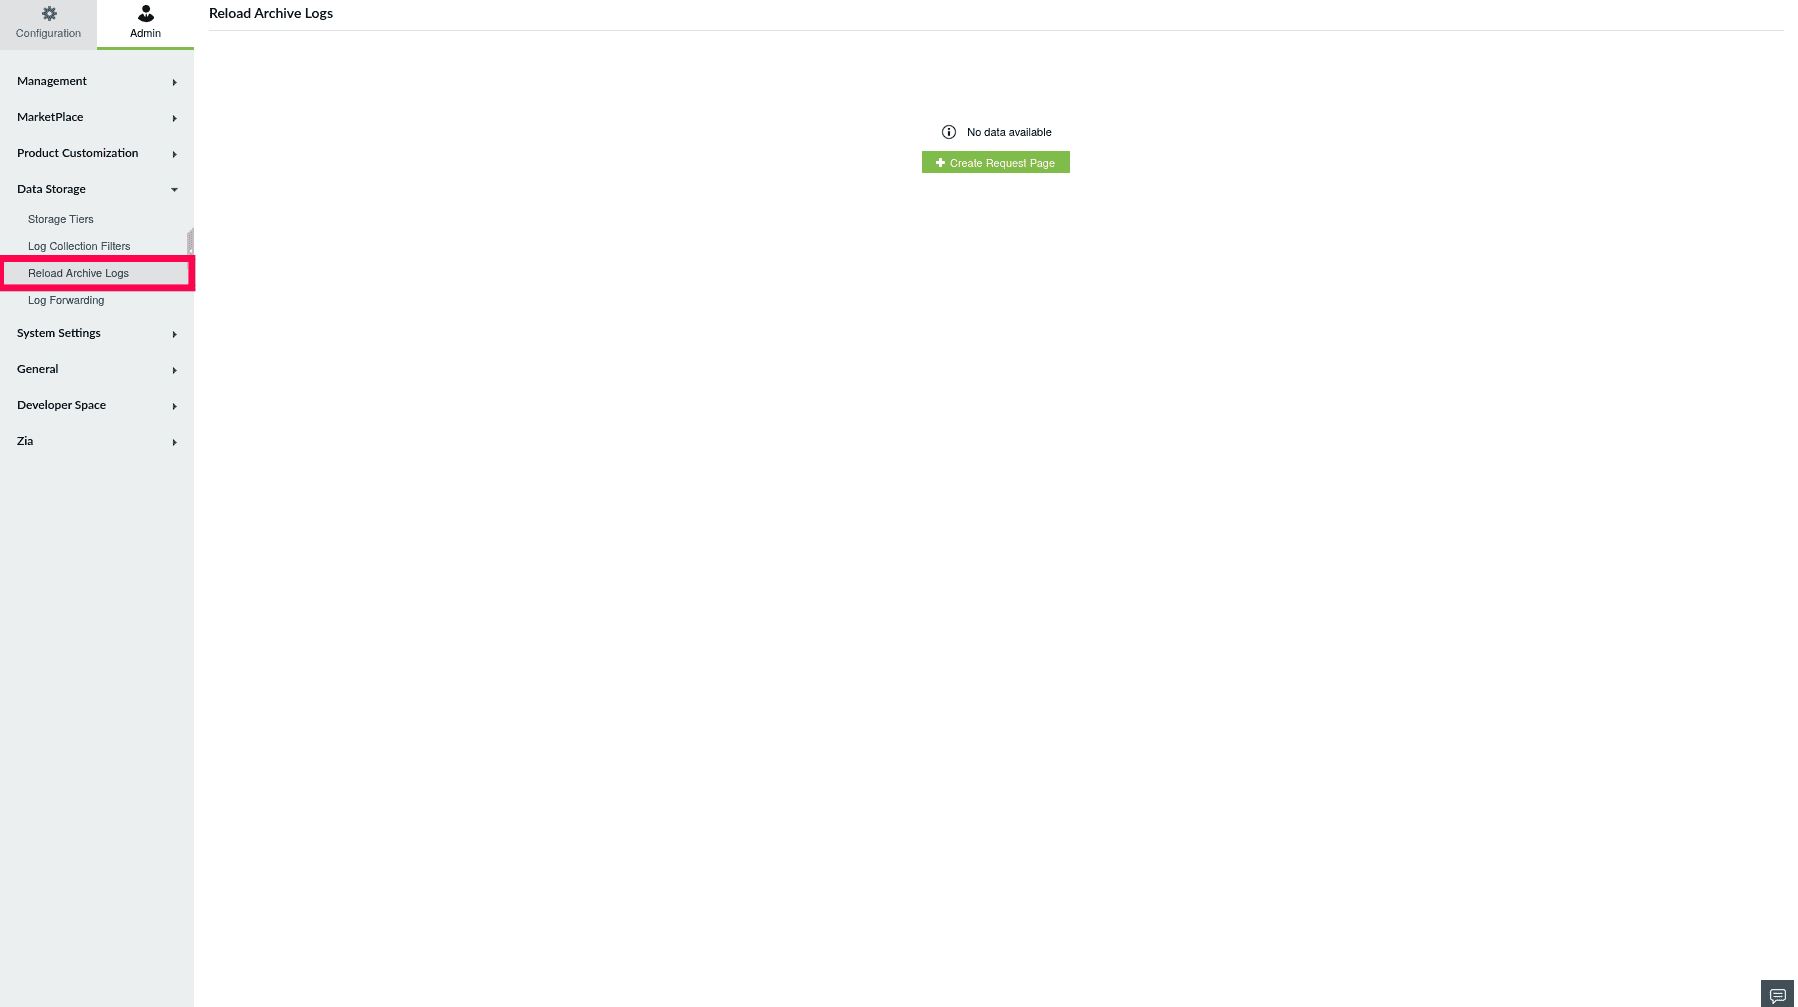
Figure 1: Navigating to Reload Archive Logs
- In the Reload Archive Logs page, click Create Request Page.
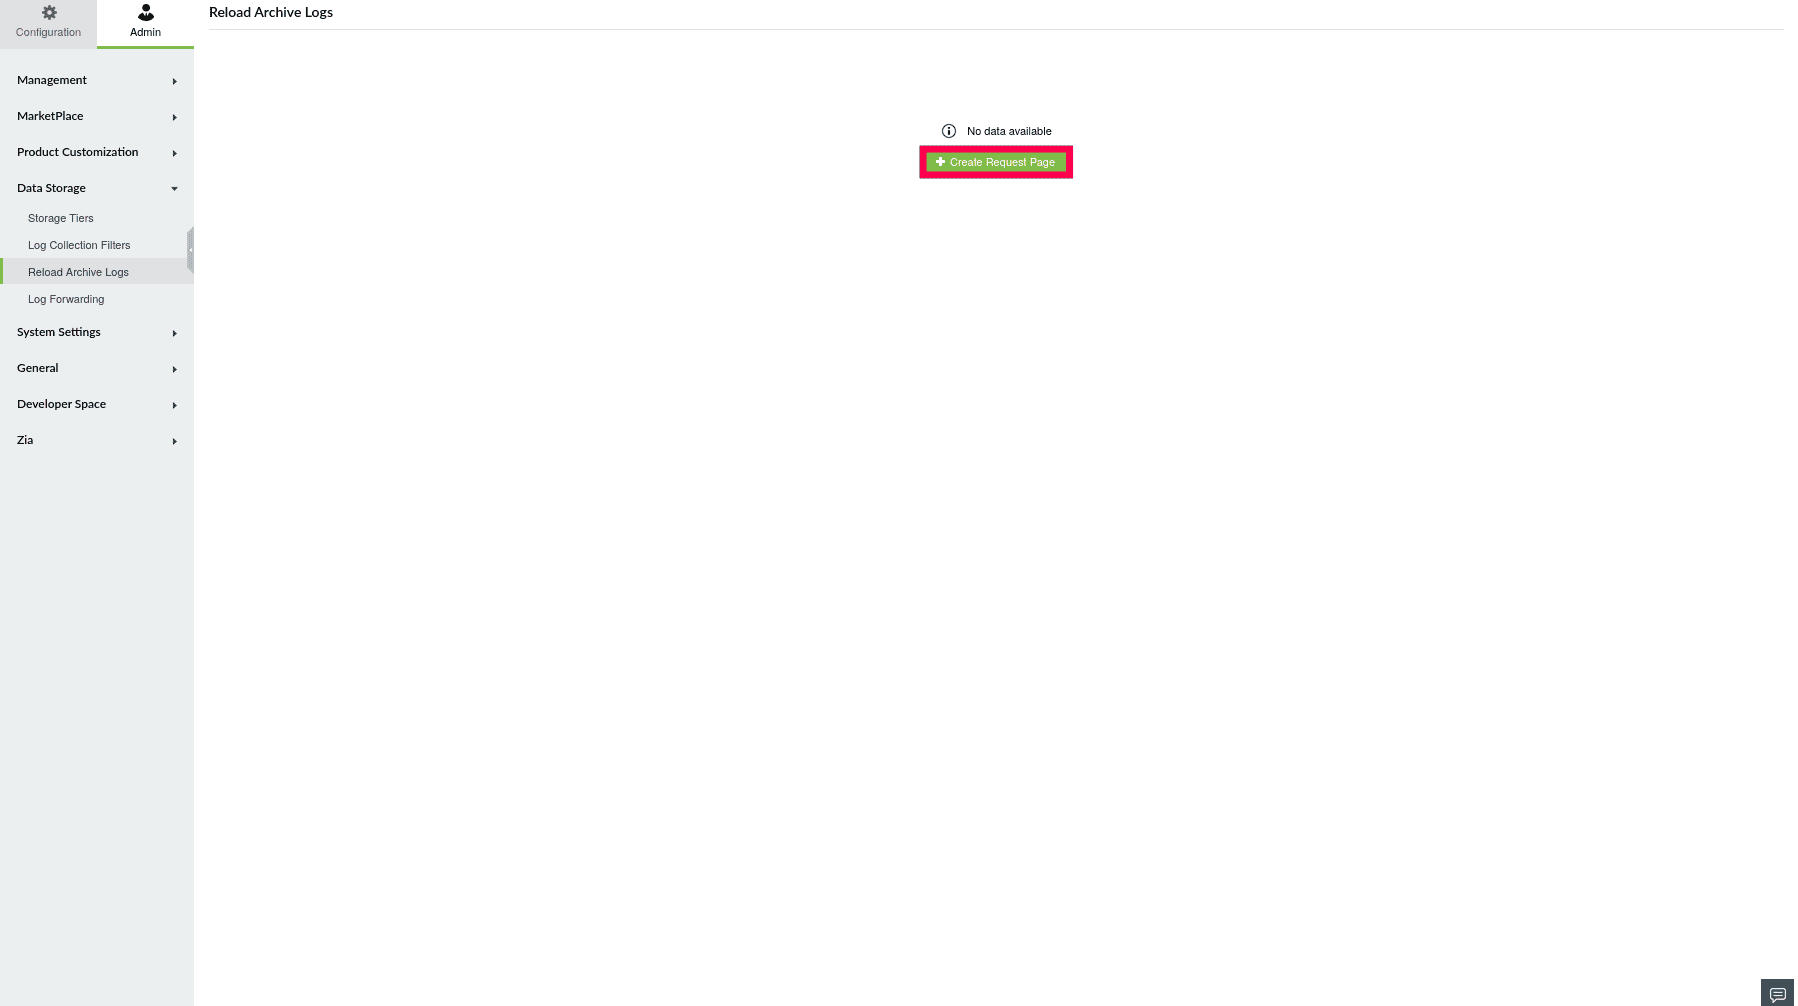
Figure 2: Creating a new request page
- In the Create Reload Request page, fill in the following fields.
- Name: Enter a name for the reload request.
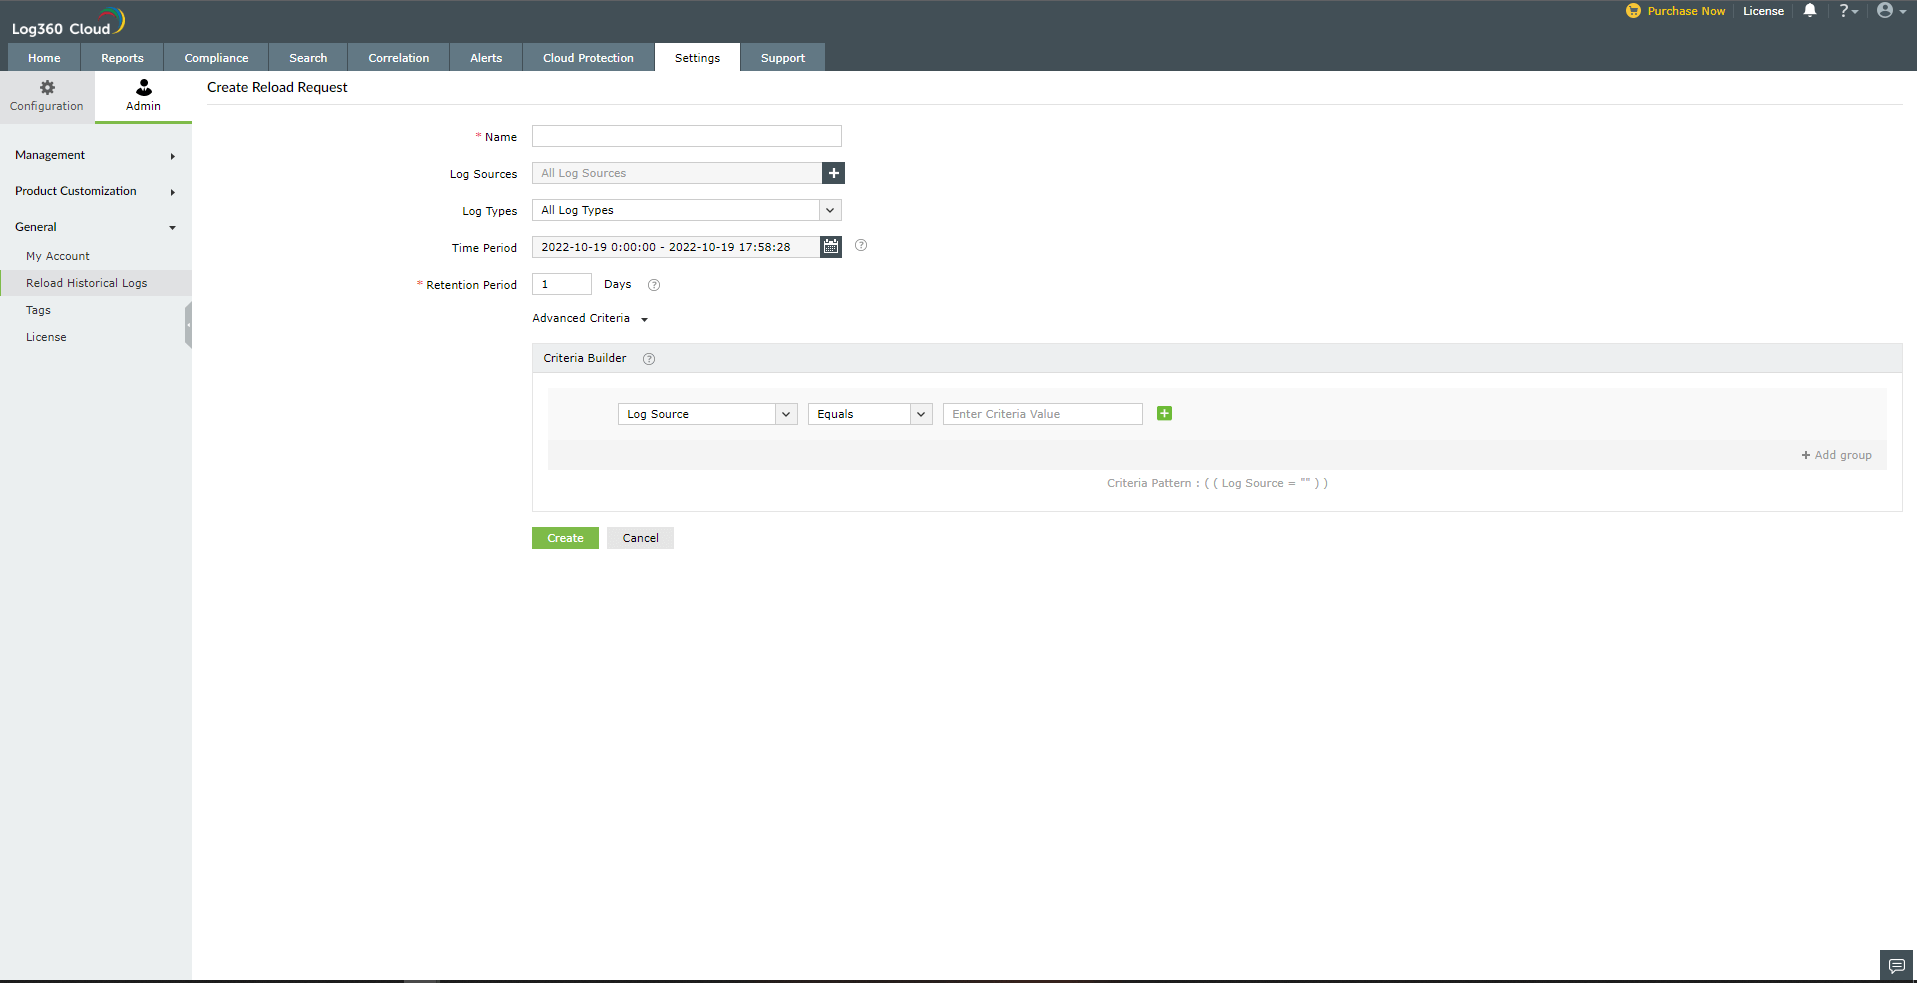
Figure 3: Entering a name
- Storage Tier: Choose the appropriate storage tier from the drop -down
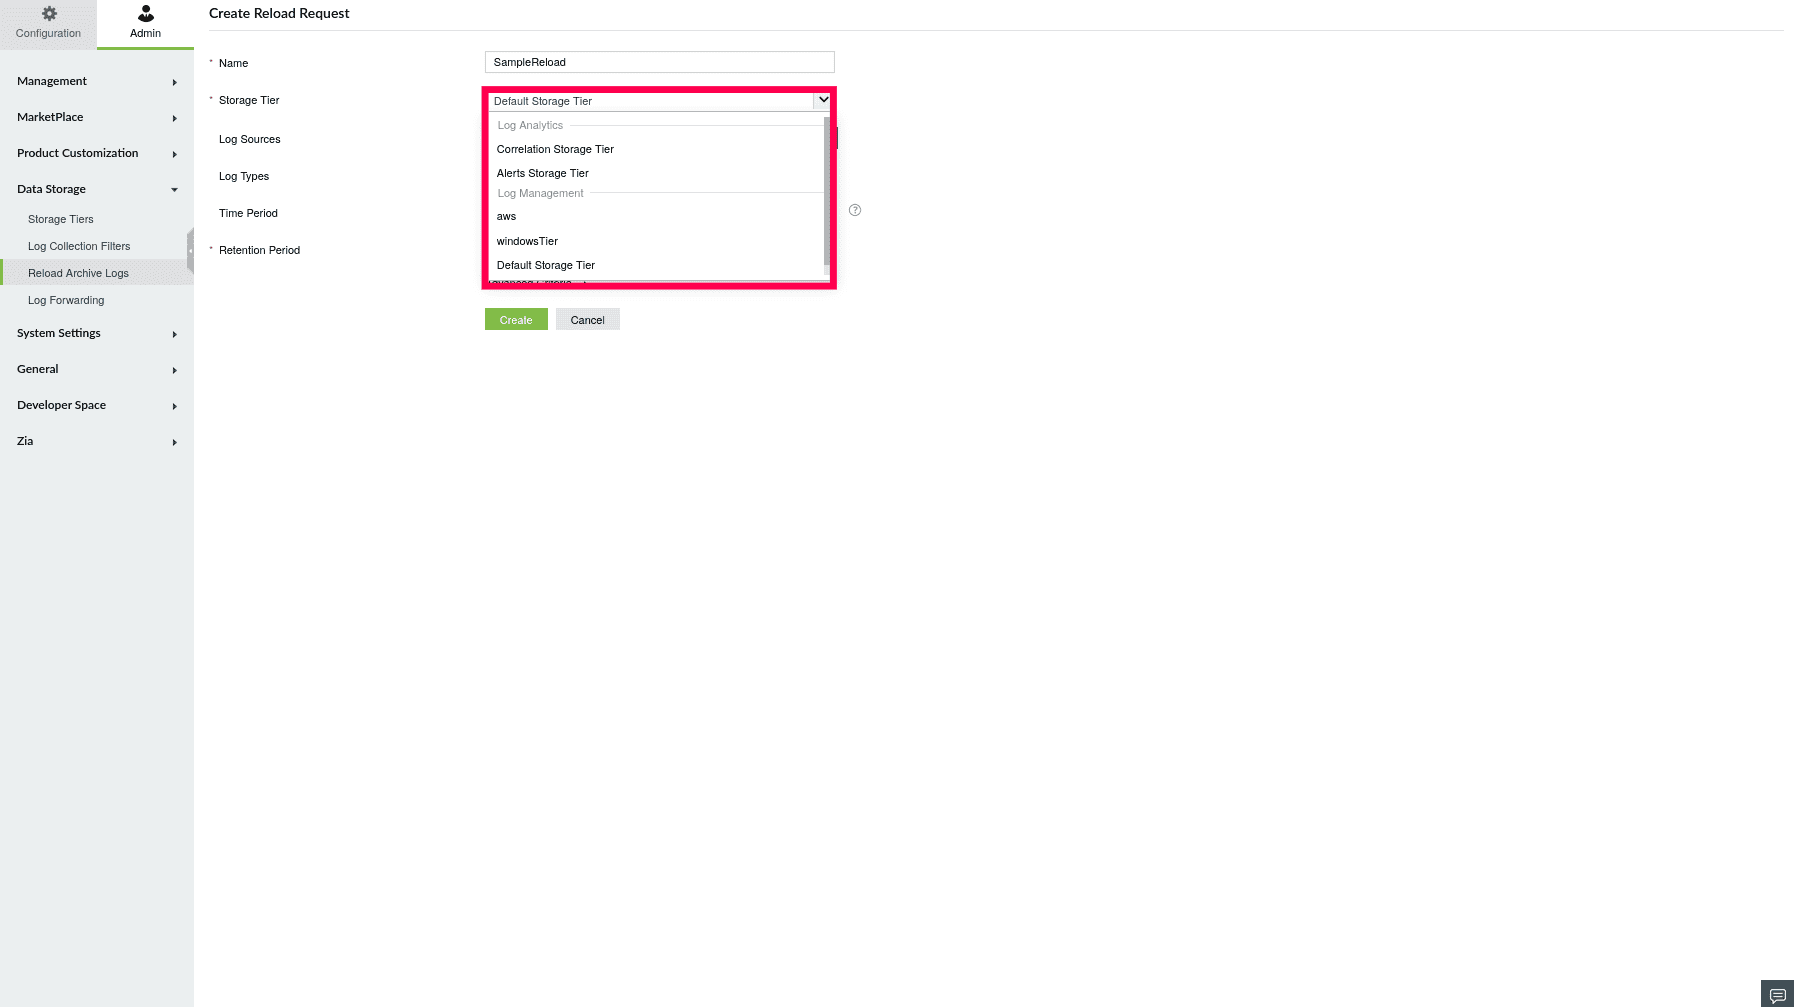
Figure 4: Selecting a Storage Tier
NOTE: Reloading includes both archive logs and
overwritten logs from search storage.
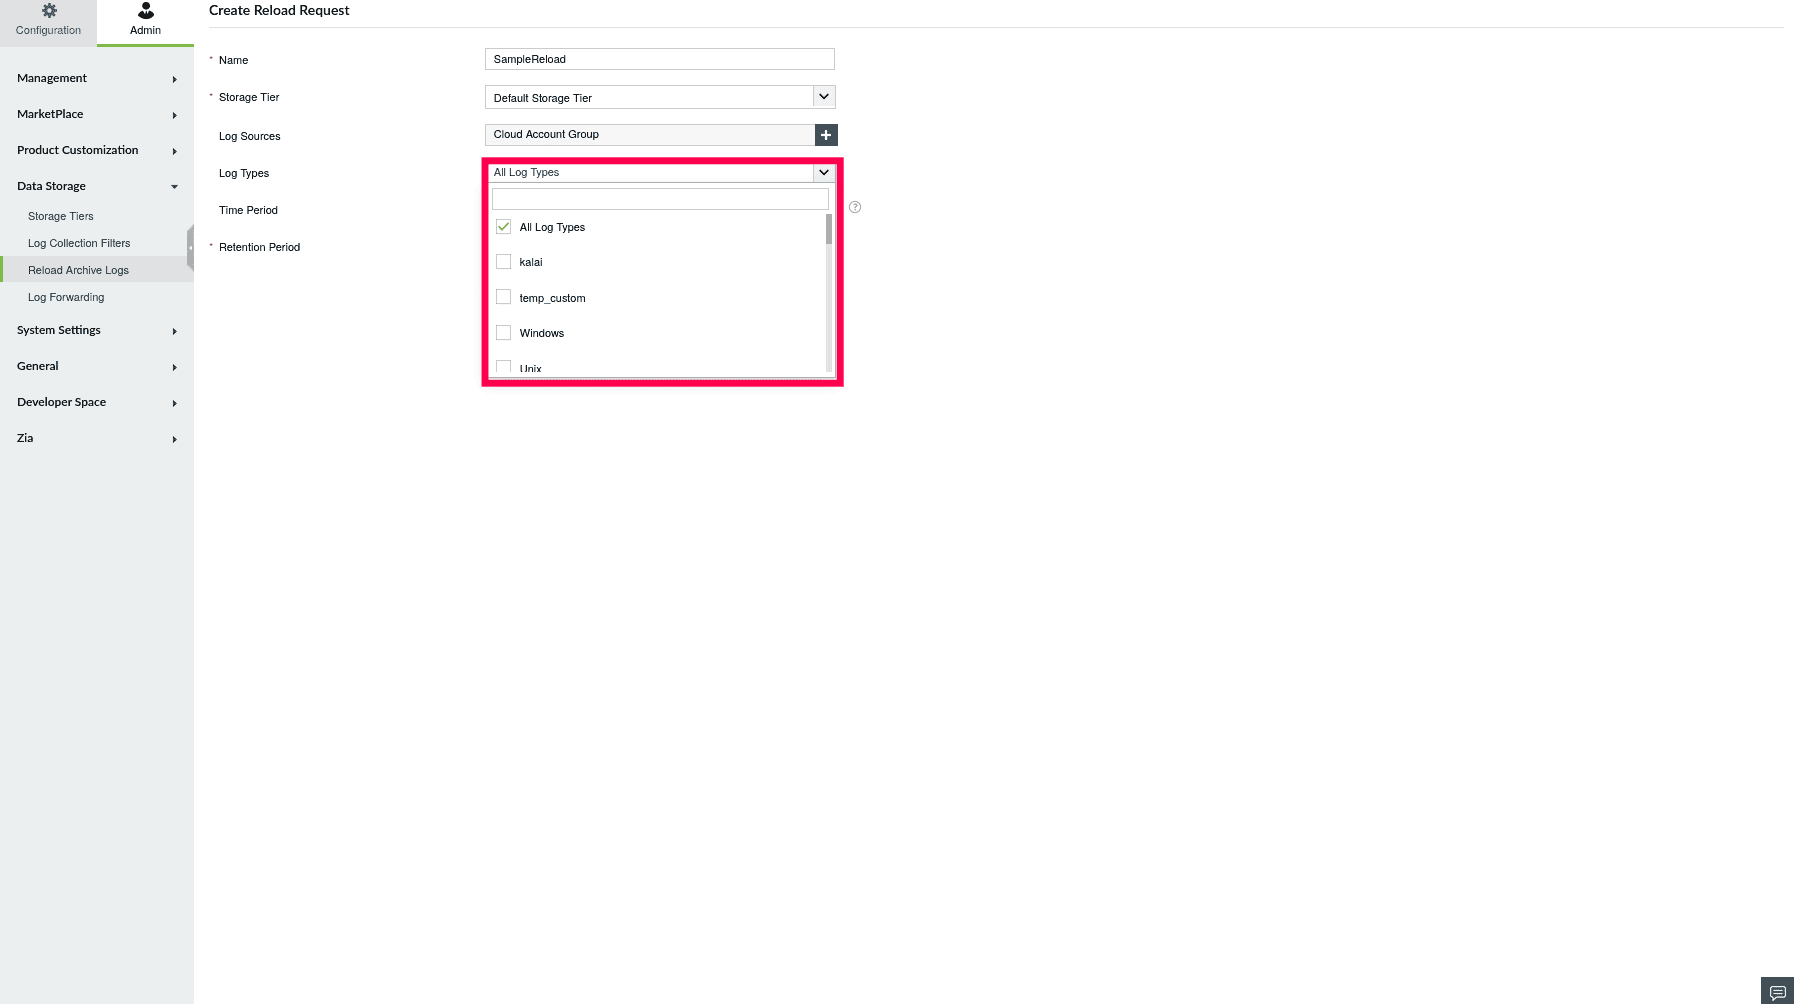
- Default and Custom Storage Tier: By default, all log sources and types are selected.
- Alert Storage Tier: By default, all alert profiles are selected.
- To choose specific profiles, click the
 icon.
icon.
- In the Select Alert Profile page, select the desired profiles and click Apply.
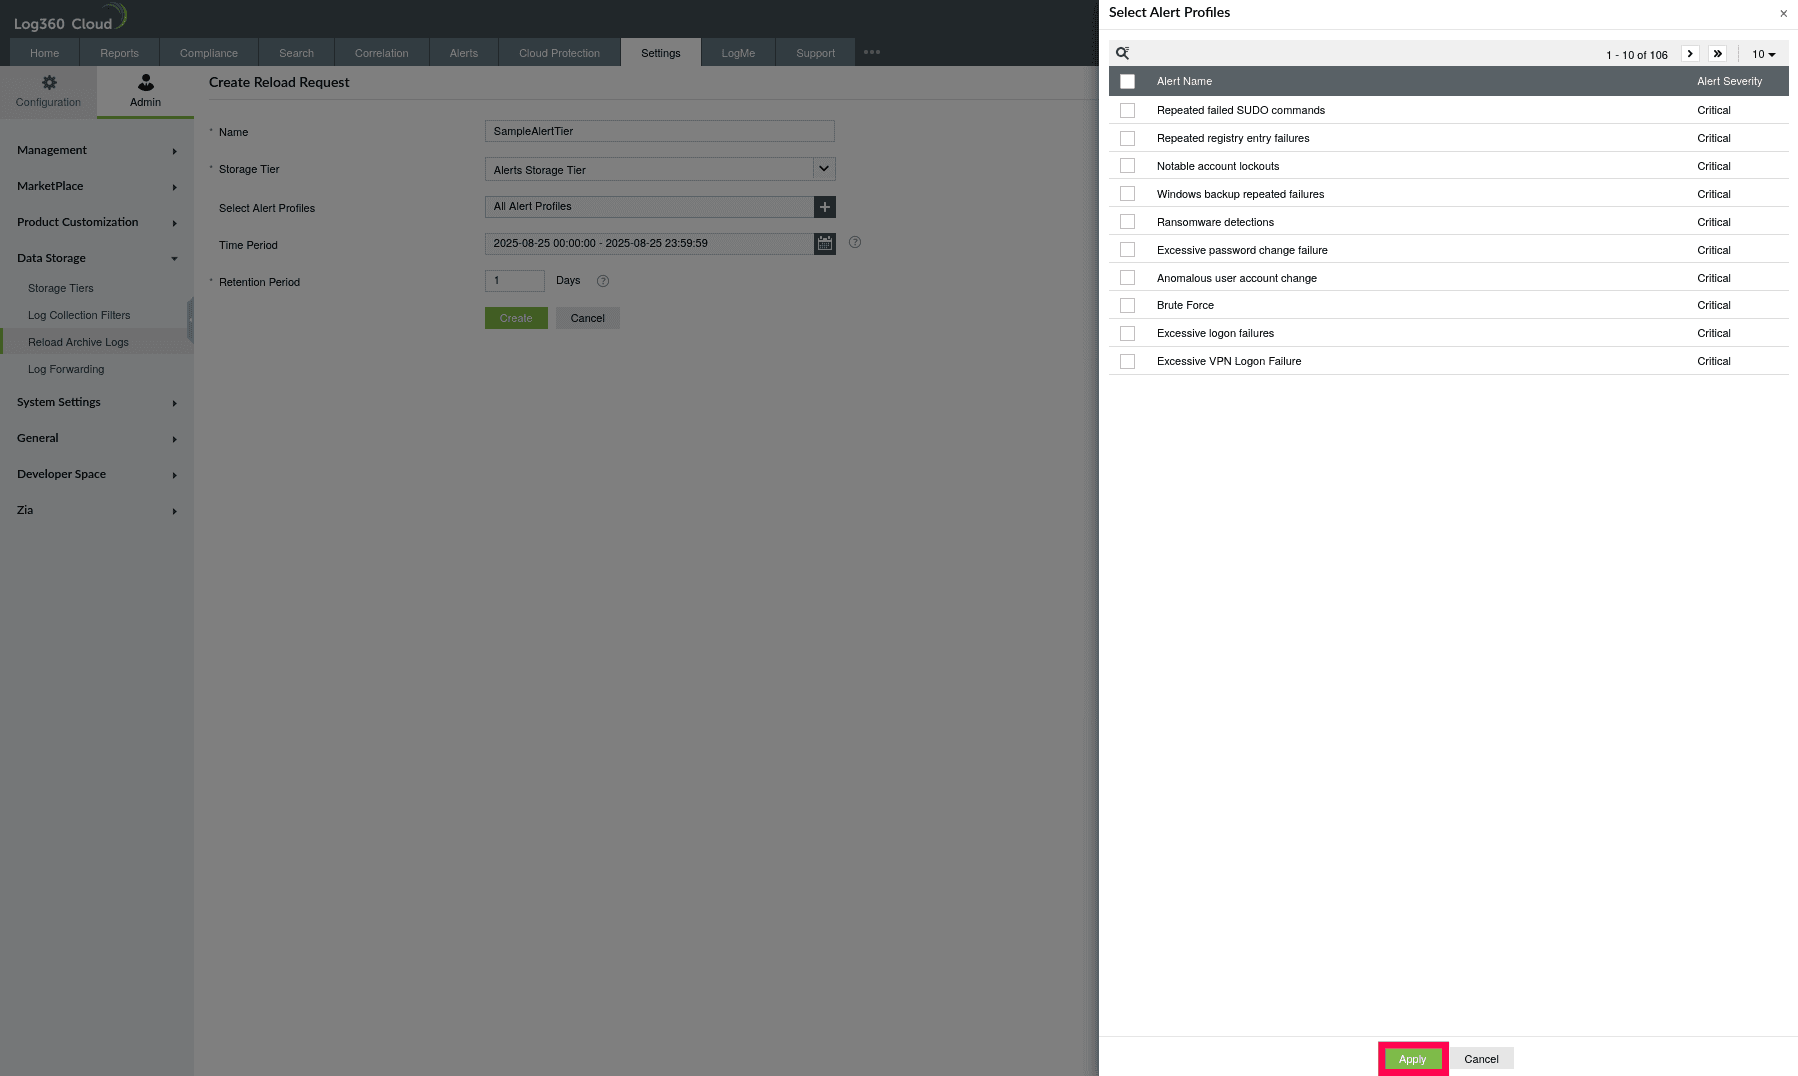
Figure 7: Selecting Alert Profiles
- Correlation Storage Tier: By default, all correlation rules are selected.
- To choose specific rules, click the icon.
- In the Select Rules page, pick the rules you need and click Apply.
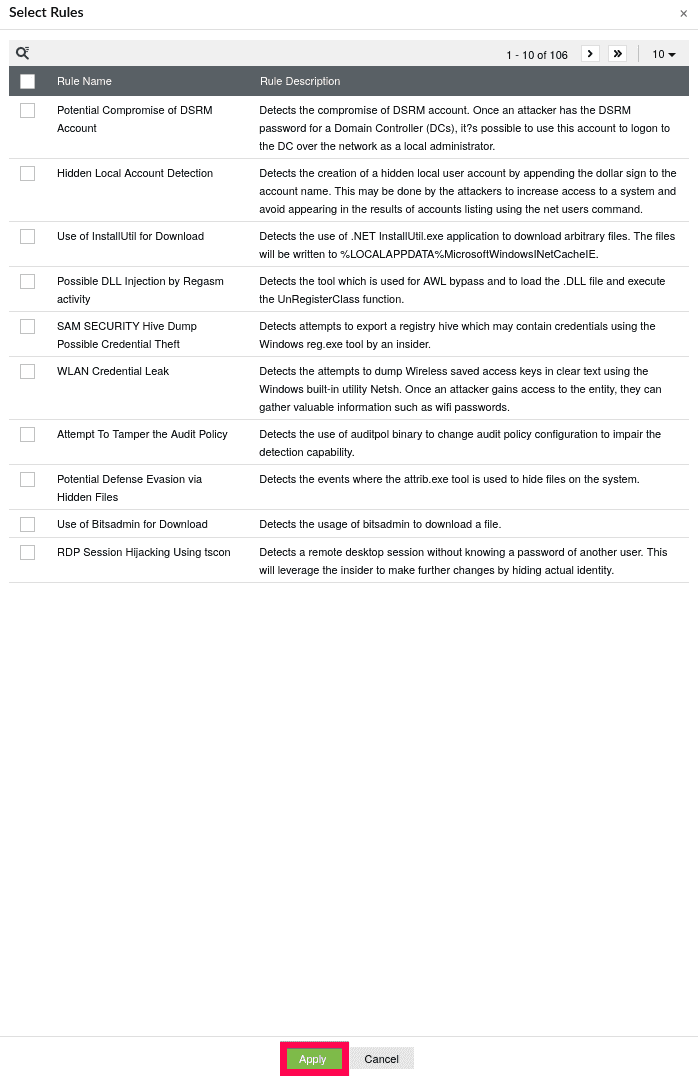
Figure 8: Selecting rules
- Time Period: Specify the time range for which logs need to be reloaded and click Apply.
NOTE: By default, the time range picker is limited by the archival retention period or the overwrite duration of search storage logs.
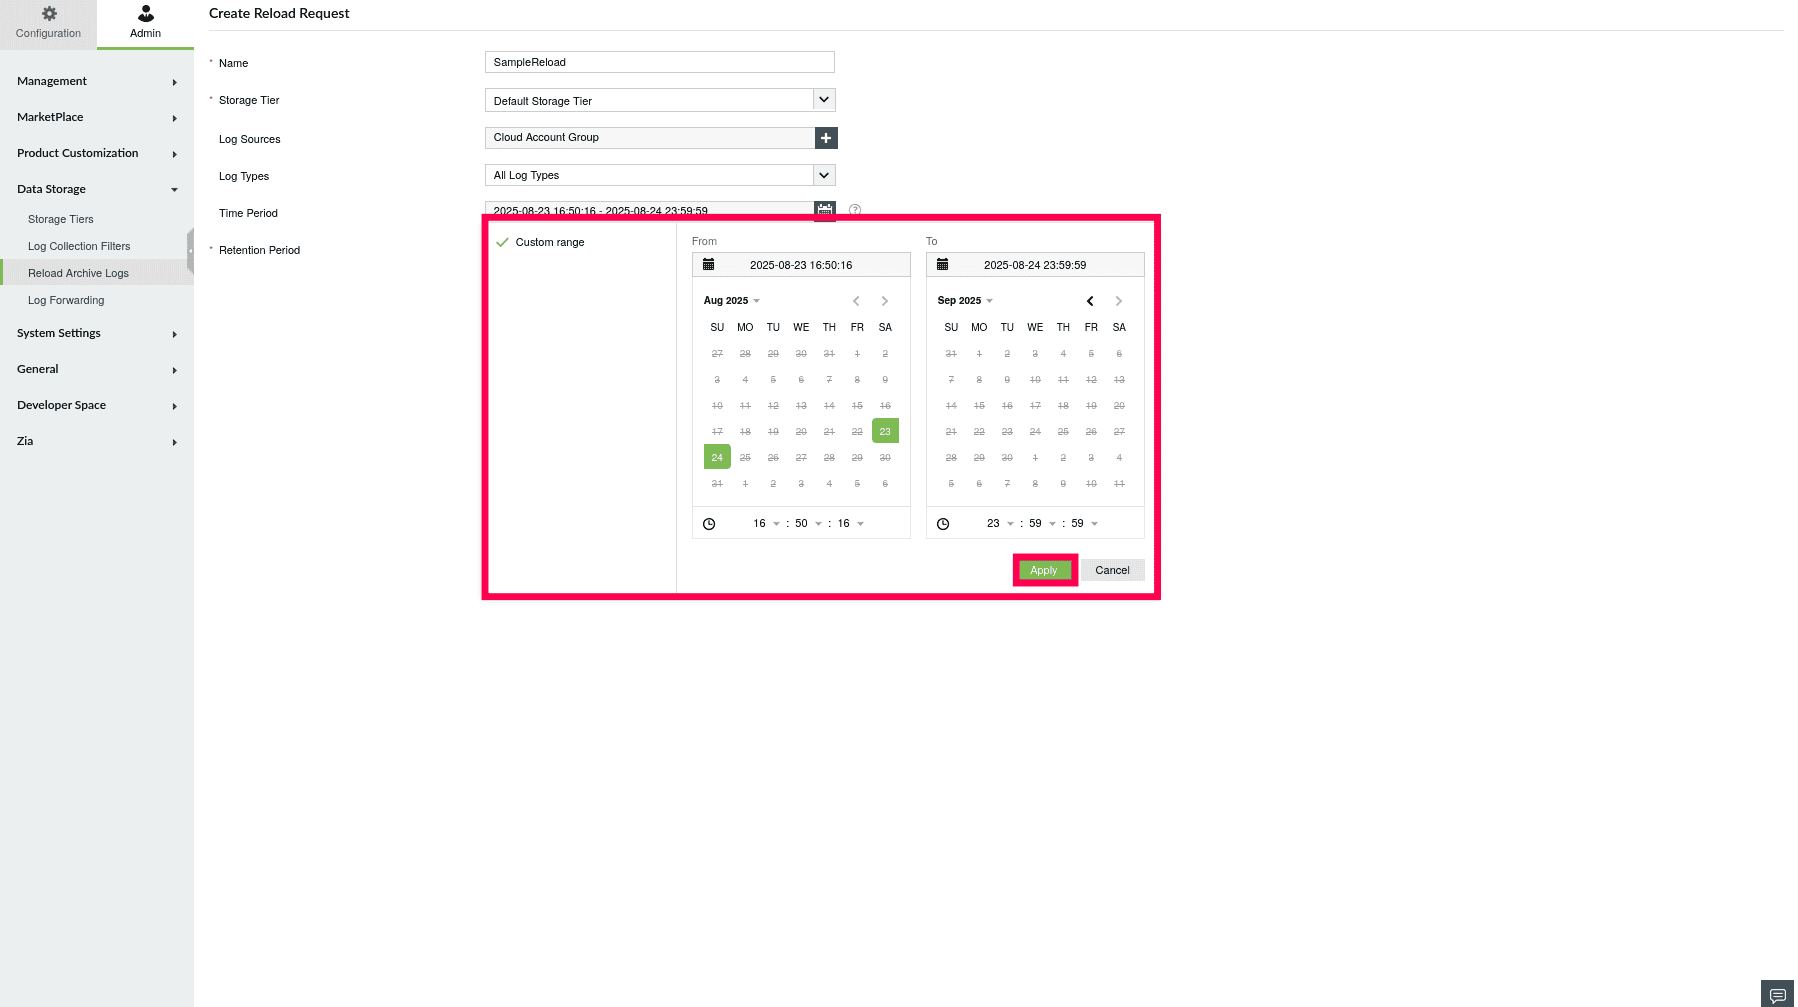
Figure 9: Specifying a time period
- Retention Period: Set the number of days for which the reloaded logs should be retained.
NOTE: You can select a maximum storage retention period of 5 days only.
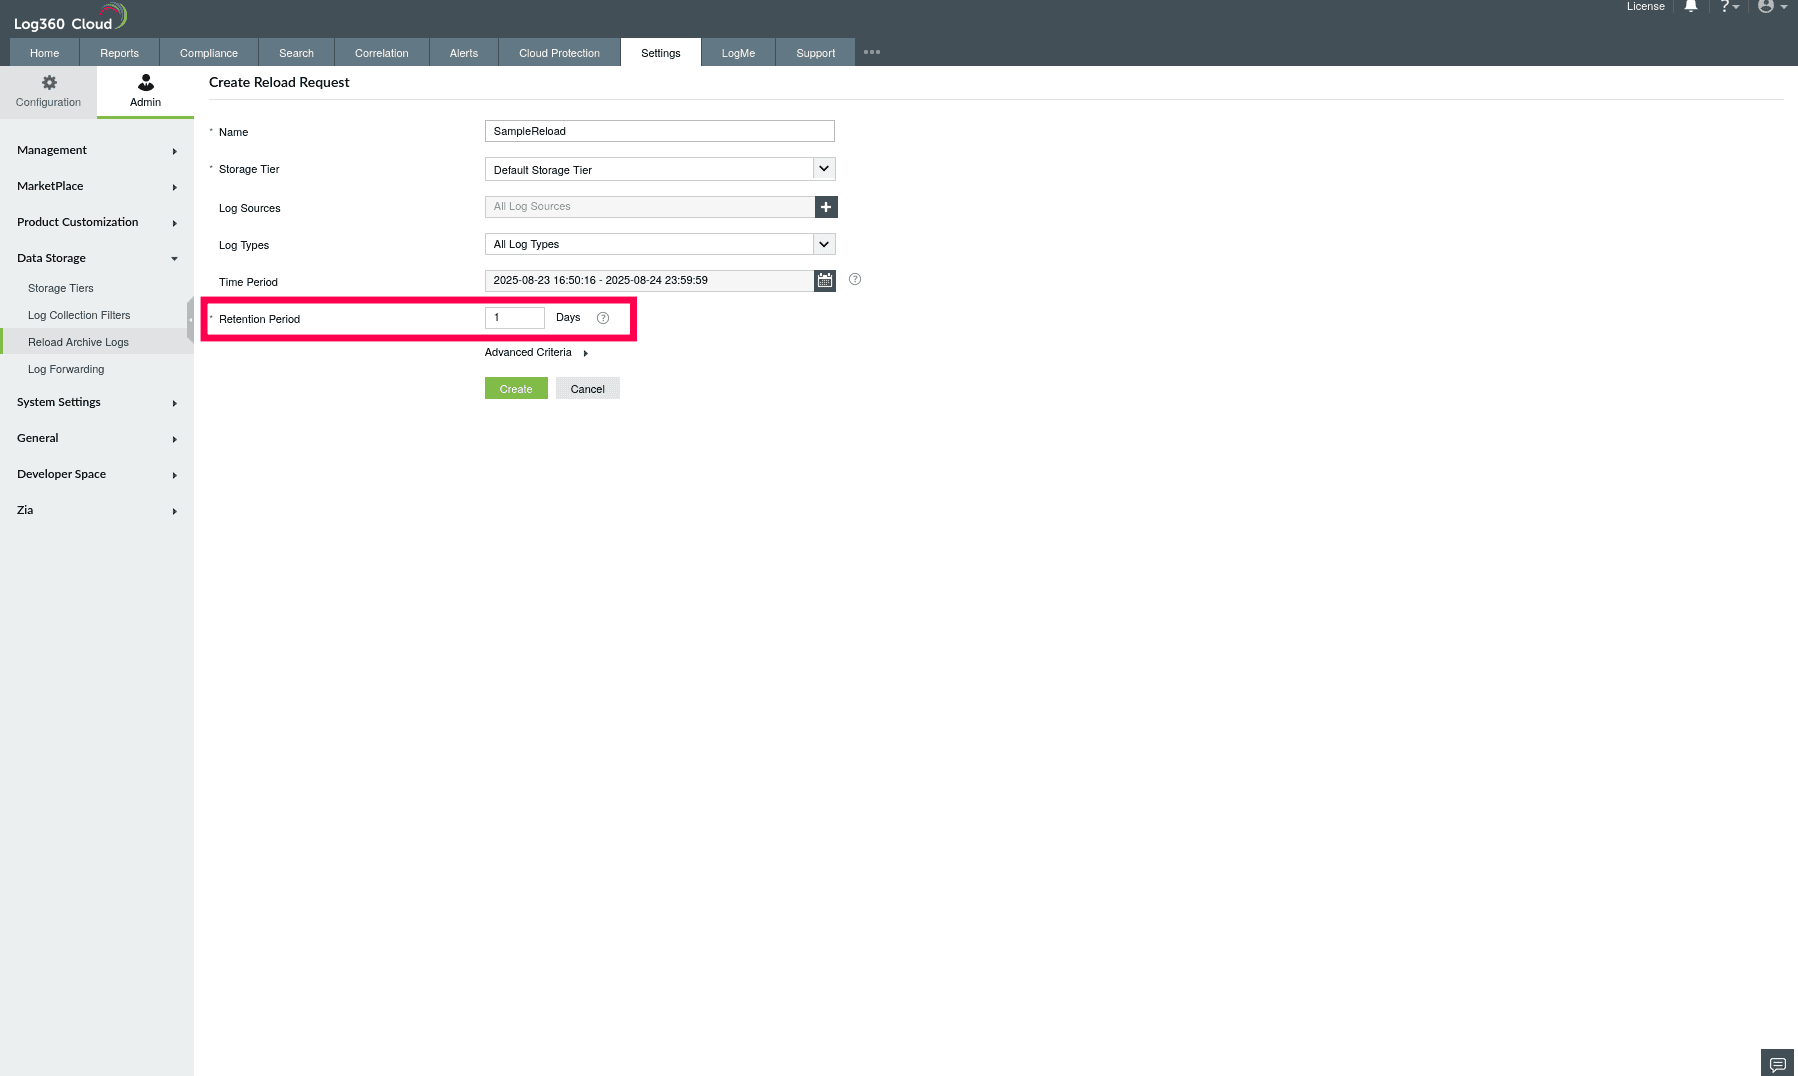
Figure 10: Setting a retention period
- Click the Advanced Criteria section to apply filters.
NOTE: Advanced criteria can only be configured for the default and custom storage tier.
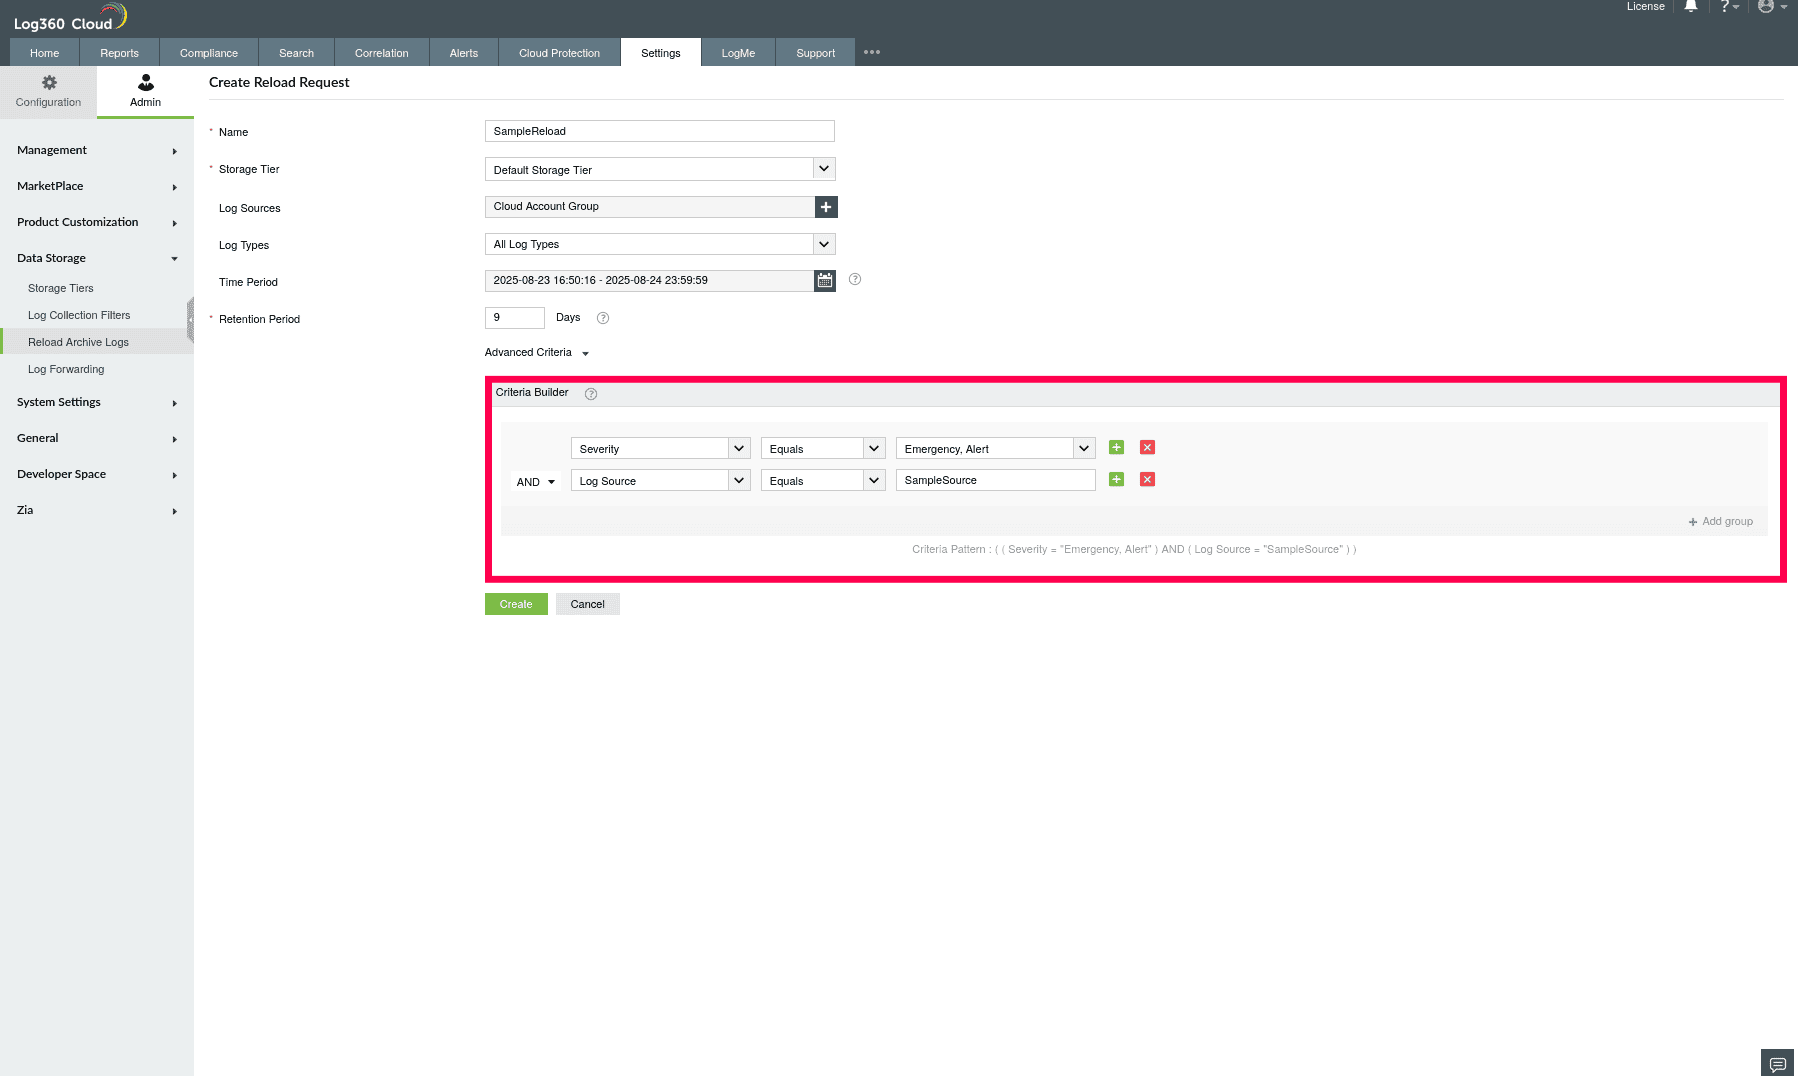
Figure 11: Configuring advanced criteria
- Click the
 icon to add additional filter criteria. Use AND when all conditions must be true. Use OR when at least one condition should be true.
- To add multiple conditions, click + Add Group and define each group with its own criteria and logical operators.
- Click Create to submit the request.
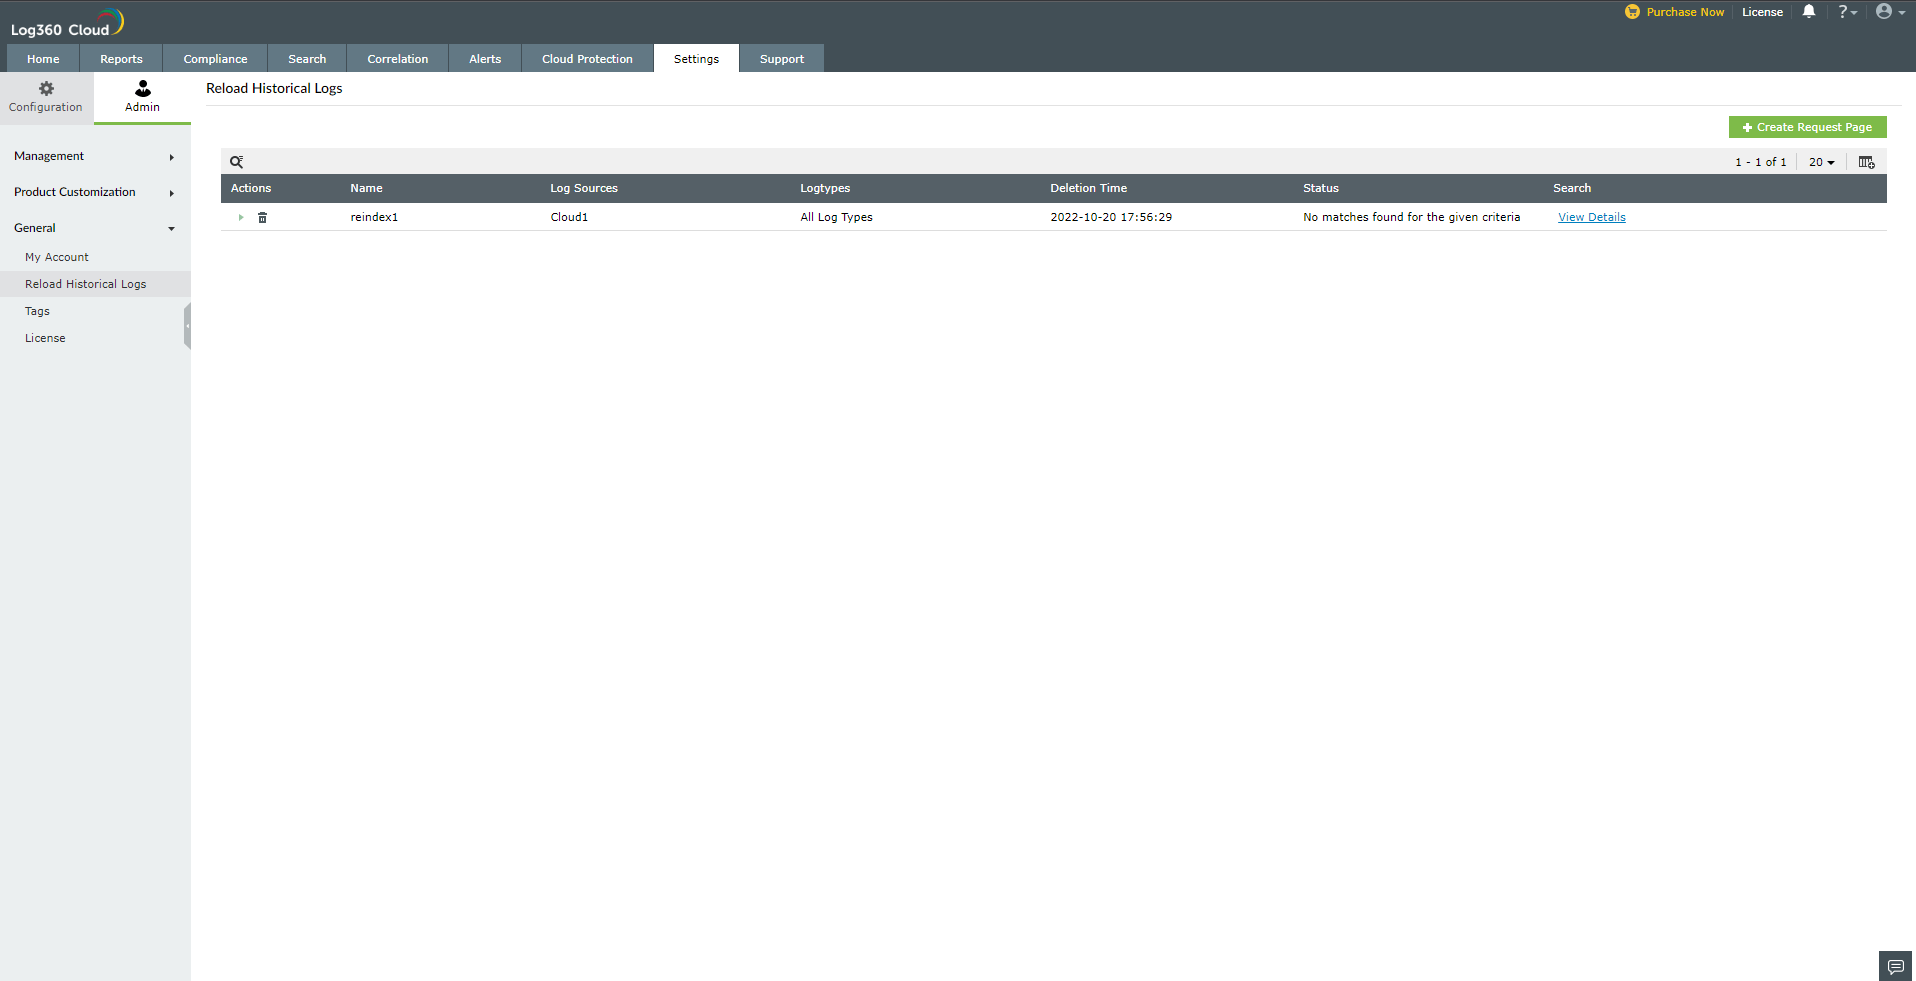
- Once created, you will be redirected to the Reload Archive Logs page. From here, you can manage and monitor your requests.
NOTE: Only a maximum of 50 live indexes can be held at one time. If you would still like to create a new request, either delete an existing request or wait for its expiration.
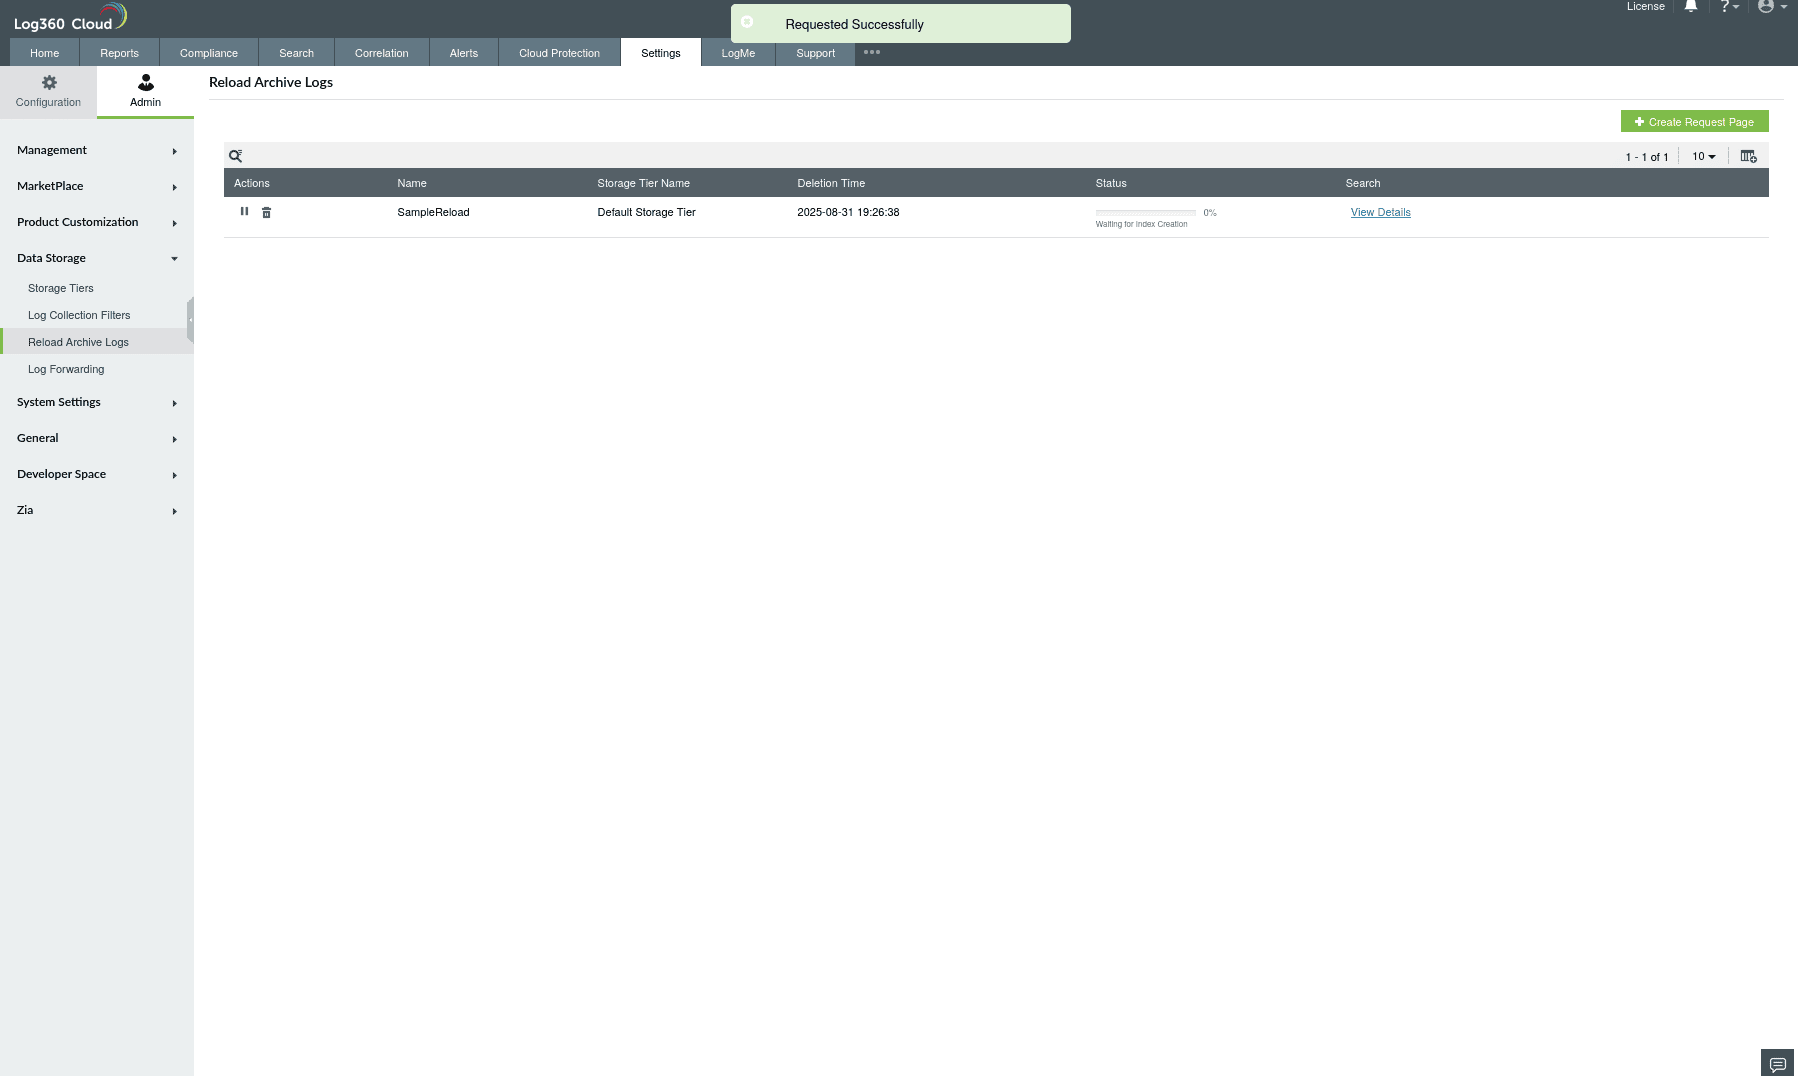
Figure 12: Viewing reload requests
- You can click the
 icon to stop indexing temporarily and click
  icon to resume indexing.
- Hover over a request and click View Reports to see reports for the specific storage tier
NOTE: For the Correlation Storage Tier, when archive logs are reloaded, the timeline view in reports will not be available.
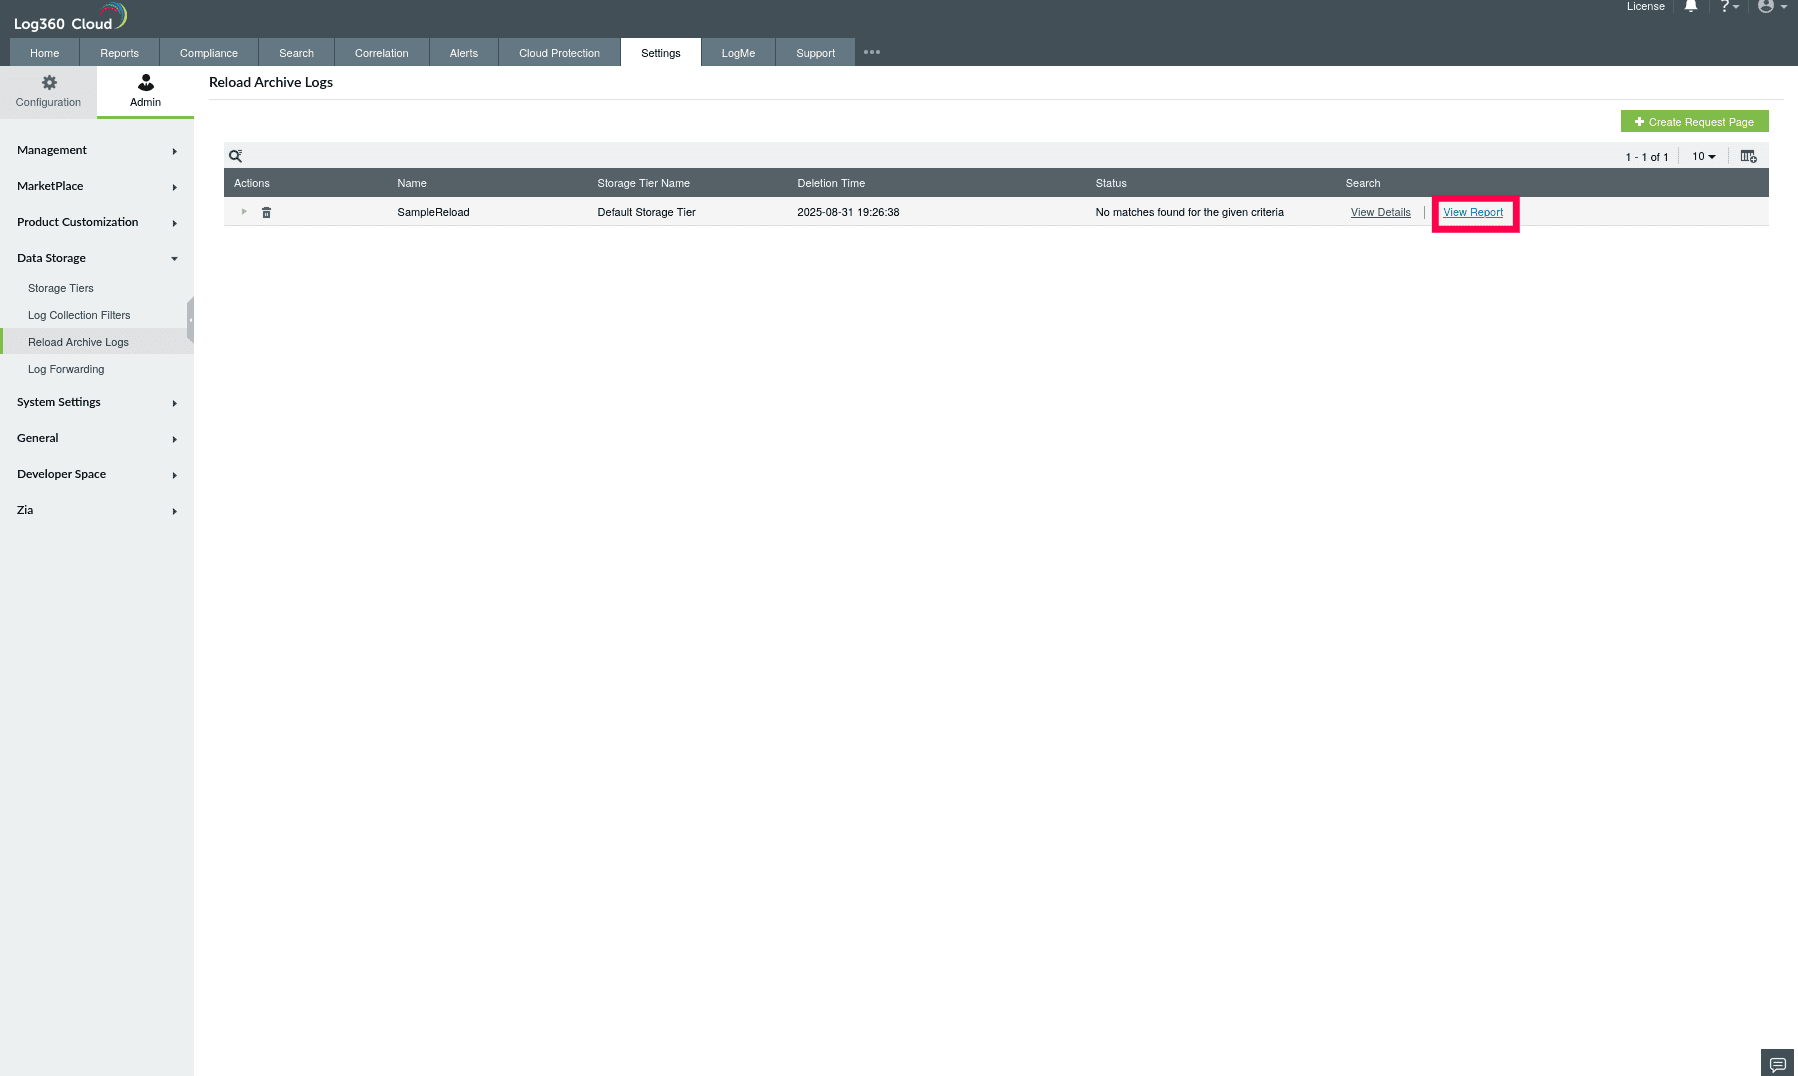
Figure 13: Viewing reports
NOTE: Based on your notification settings, you will receive alerts about reloading historical logs via email and SMS.
- Click View Details to view all configured request details.
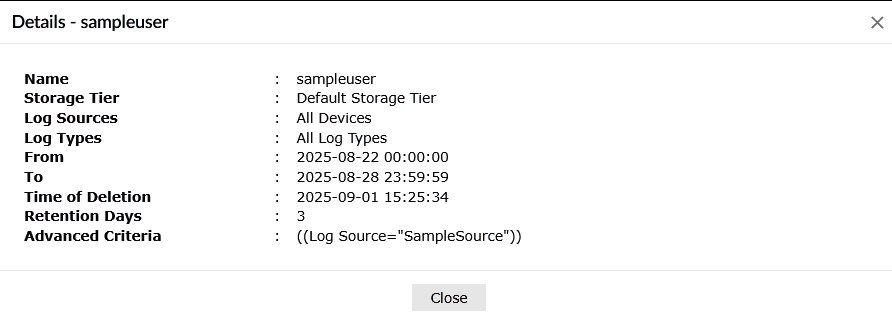
Figure 14: Viewing details of a request
- To delete a request. Click
 the icon next to a request you want to delete.
- In the confirmation pop-up, click Yes to delete the request.
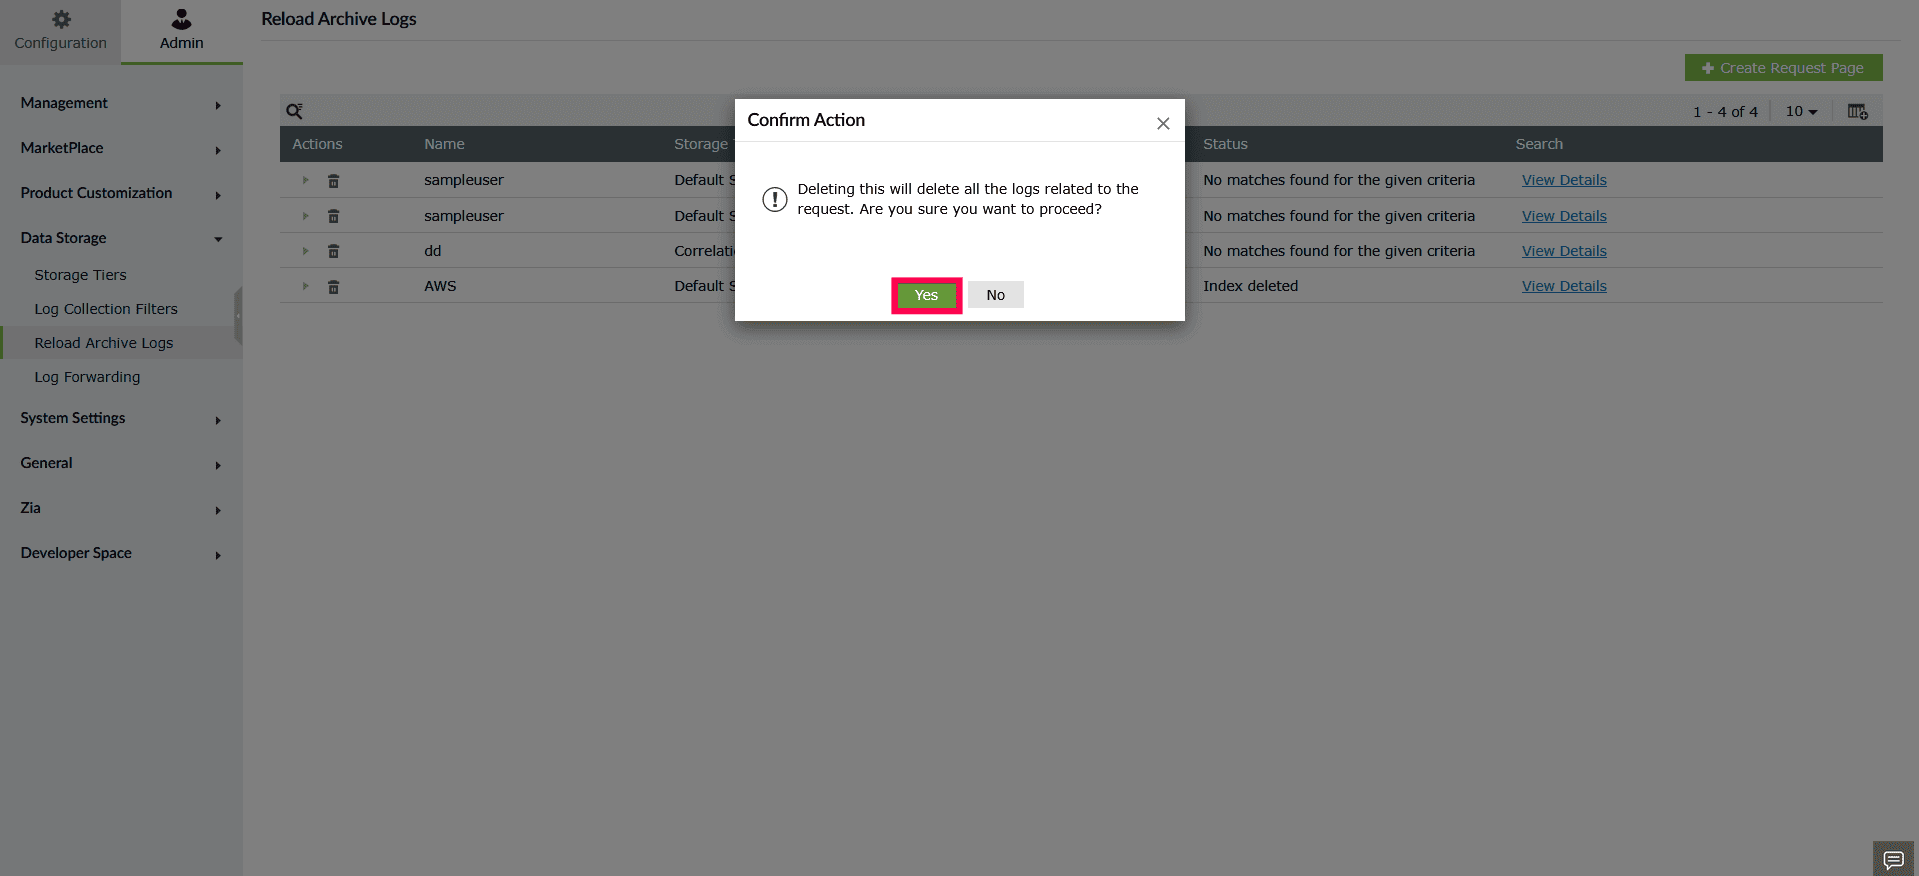
Figure 15: Deleting a request