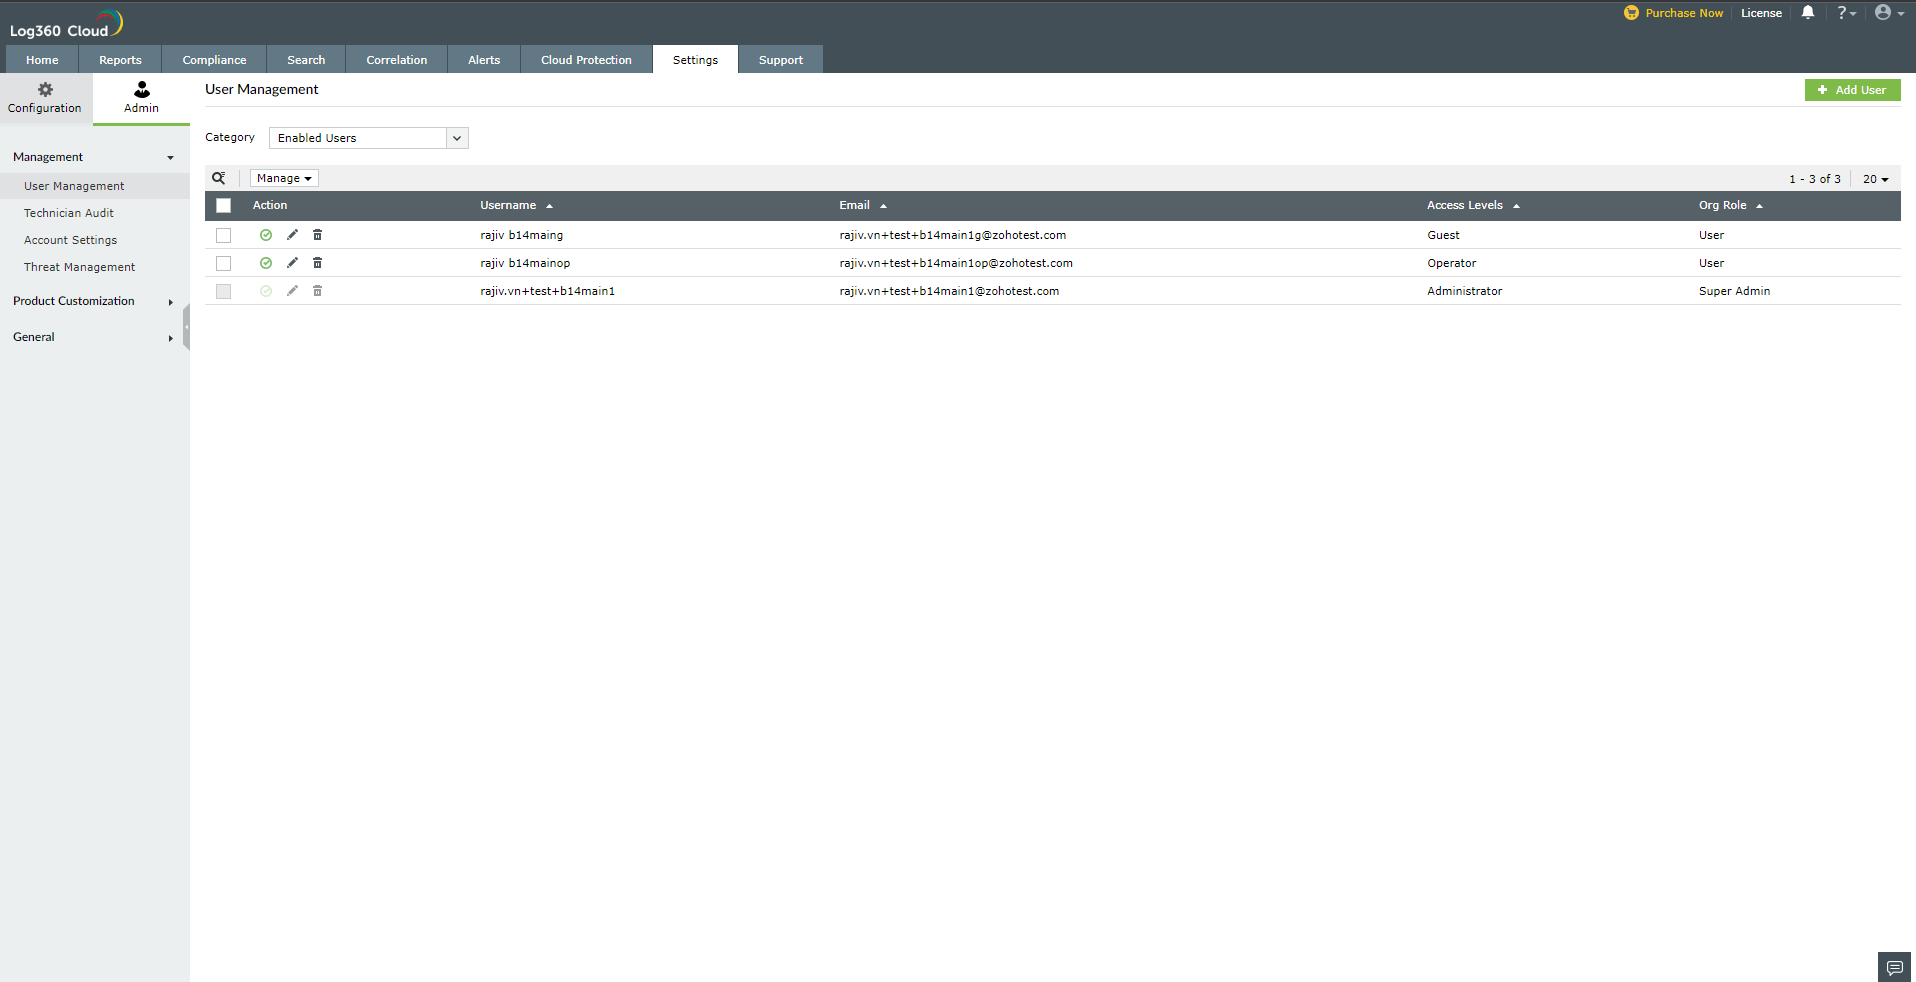
User Management
This page describes the various steps involved in managing users in Log360 Cloud.

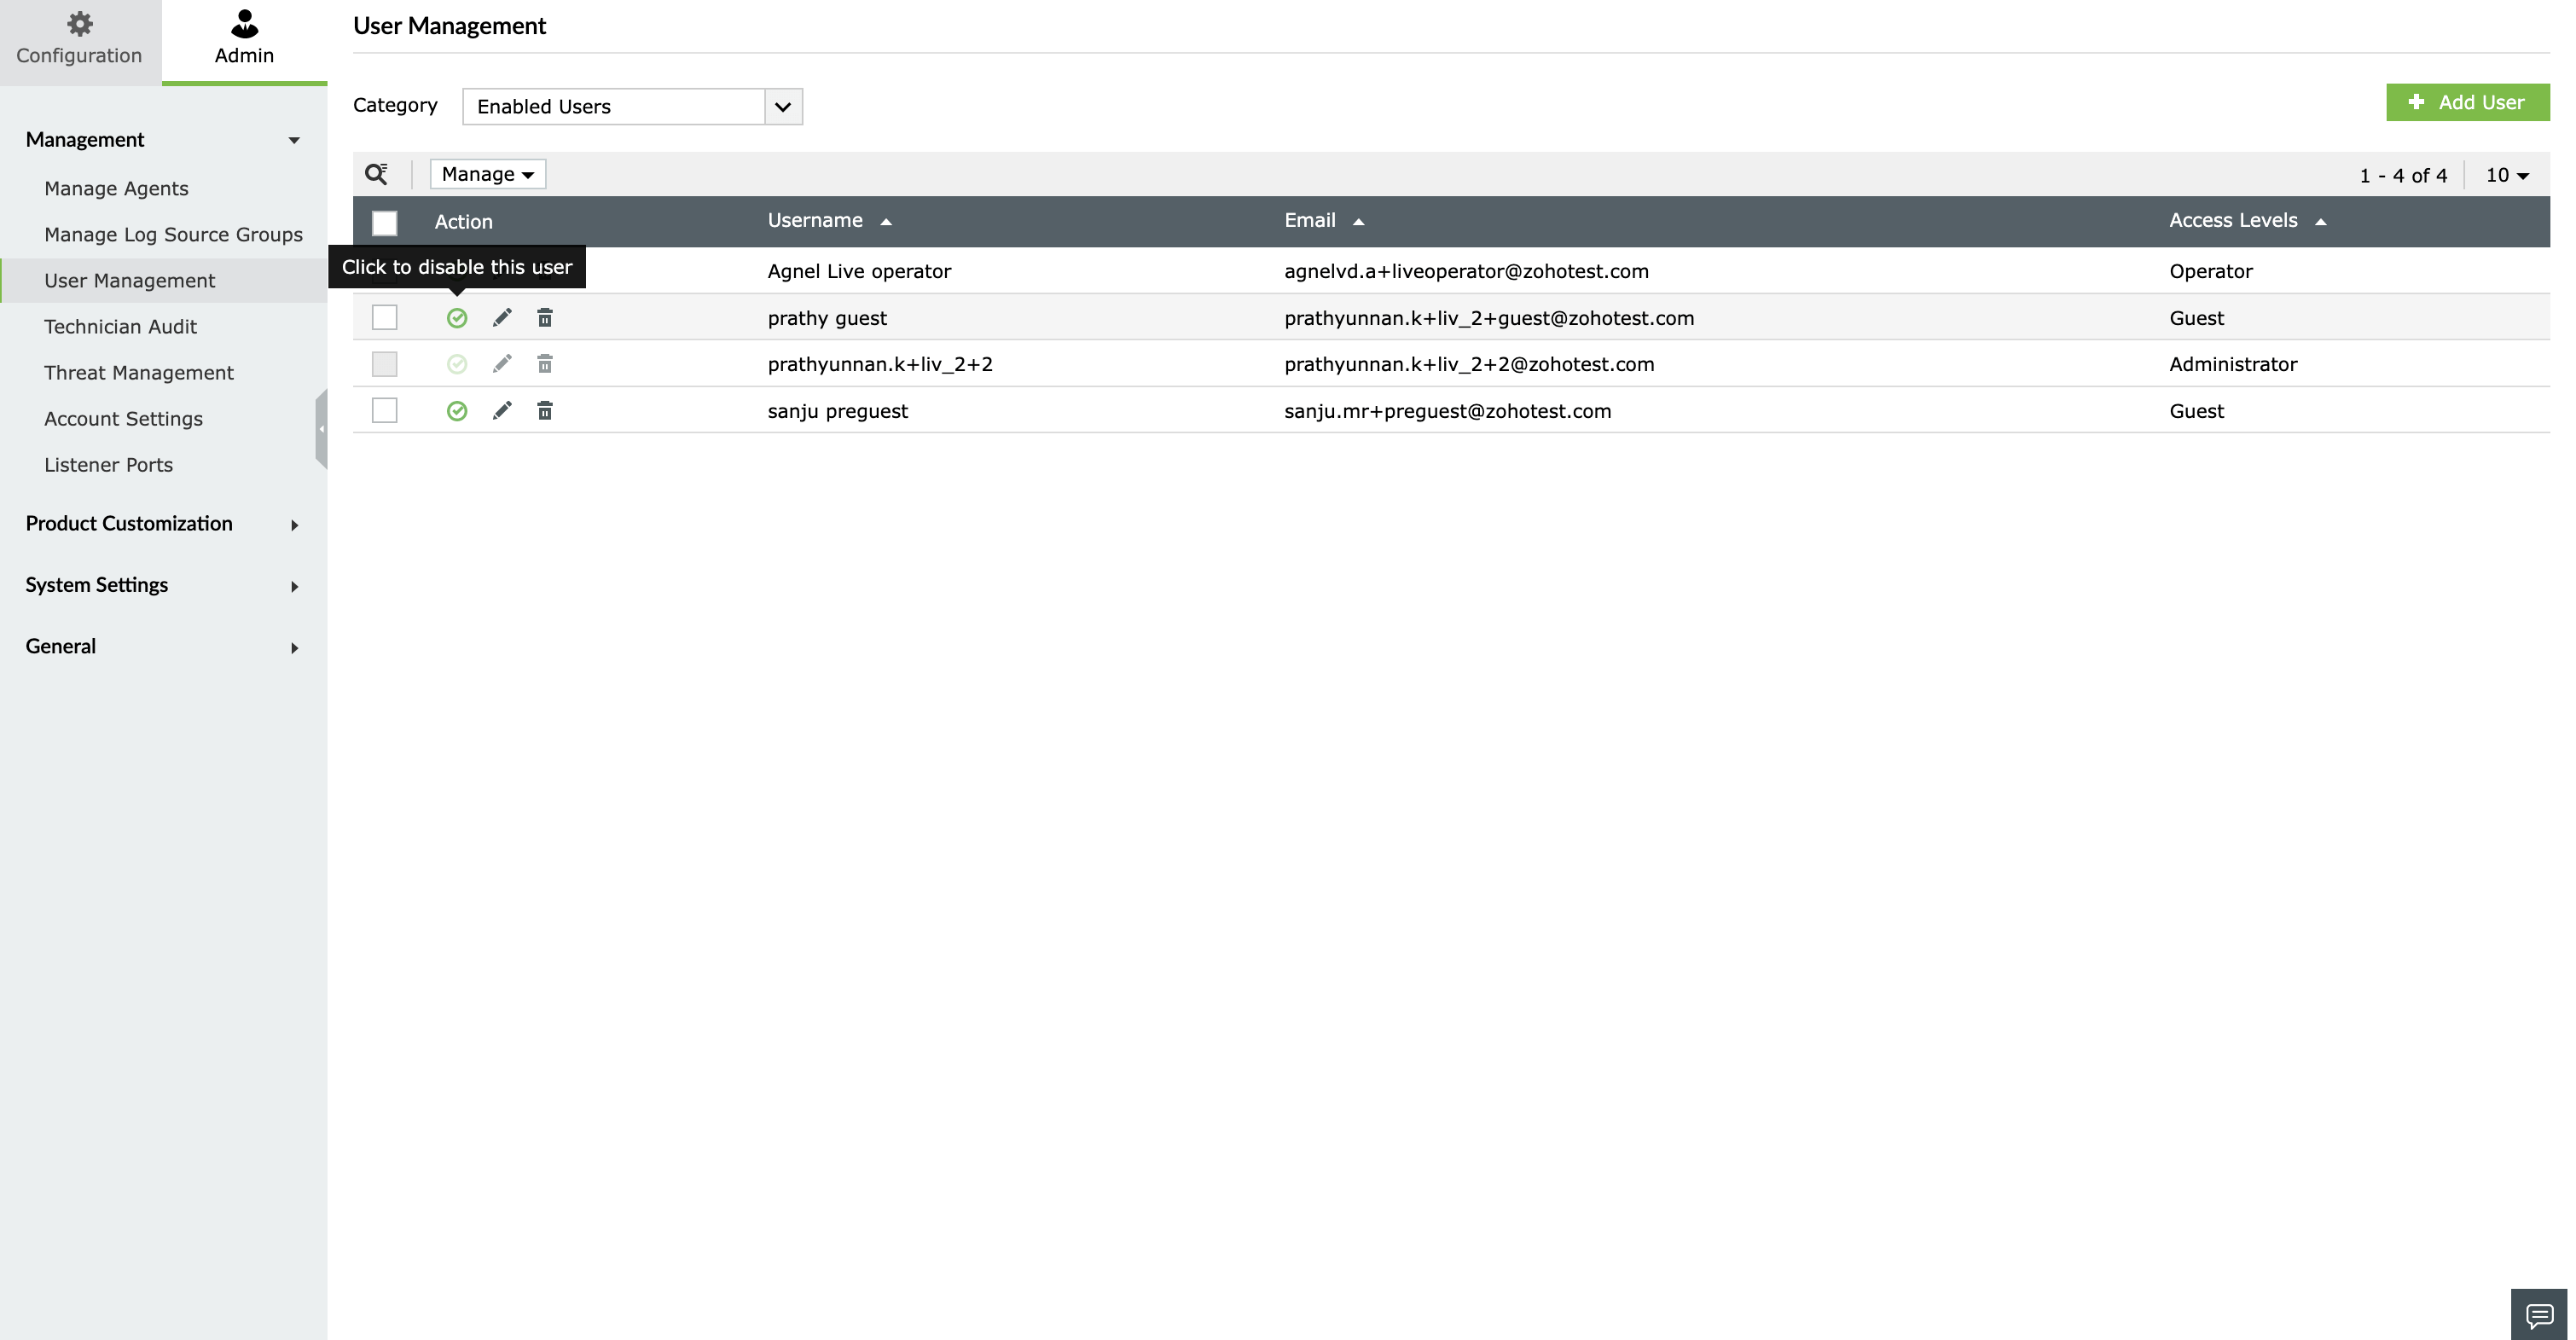
To manage users in Log360 Cloud, navigate to Settings → Admin → Management → User Management.
Adding a user
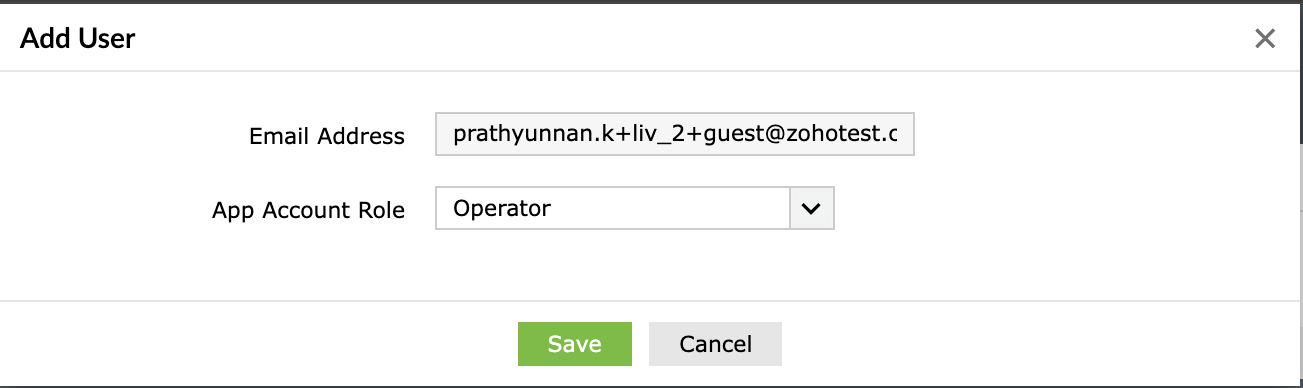
To add a user in Log360 Cloud,
- Click on Add user located at the top-right corner.
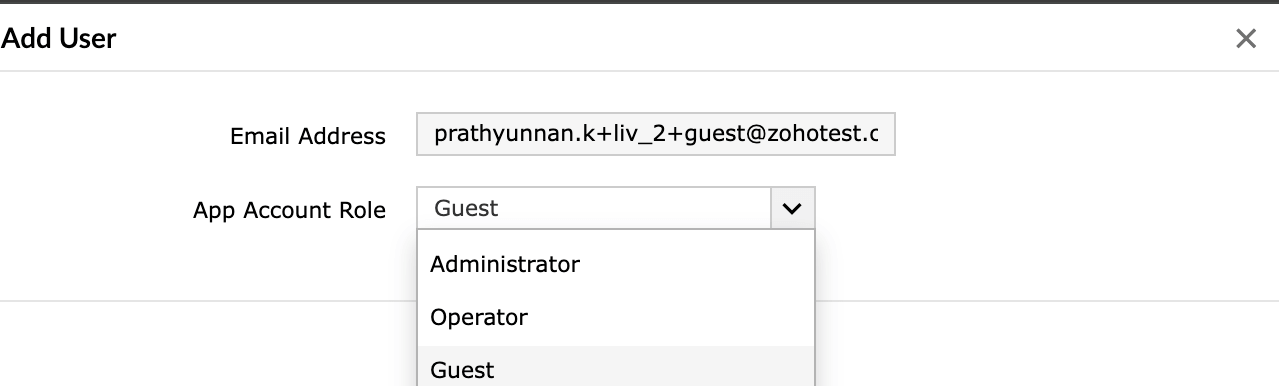
- In the Add User dialog box displayed, enter the email address.
- Choose the App Account Role (access levels) from the drop-down list.
- Administrator - Administrators will have all the privileges.
- Operator - Operators will have fewer privileges (they cannot perform operations such as license modification, user modification, etc).
- Guest - Guests will only have the privilege to view logs.
- Click on Save.
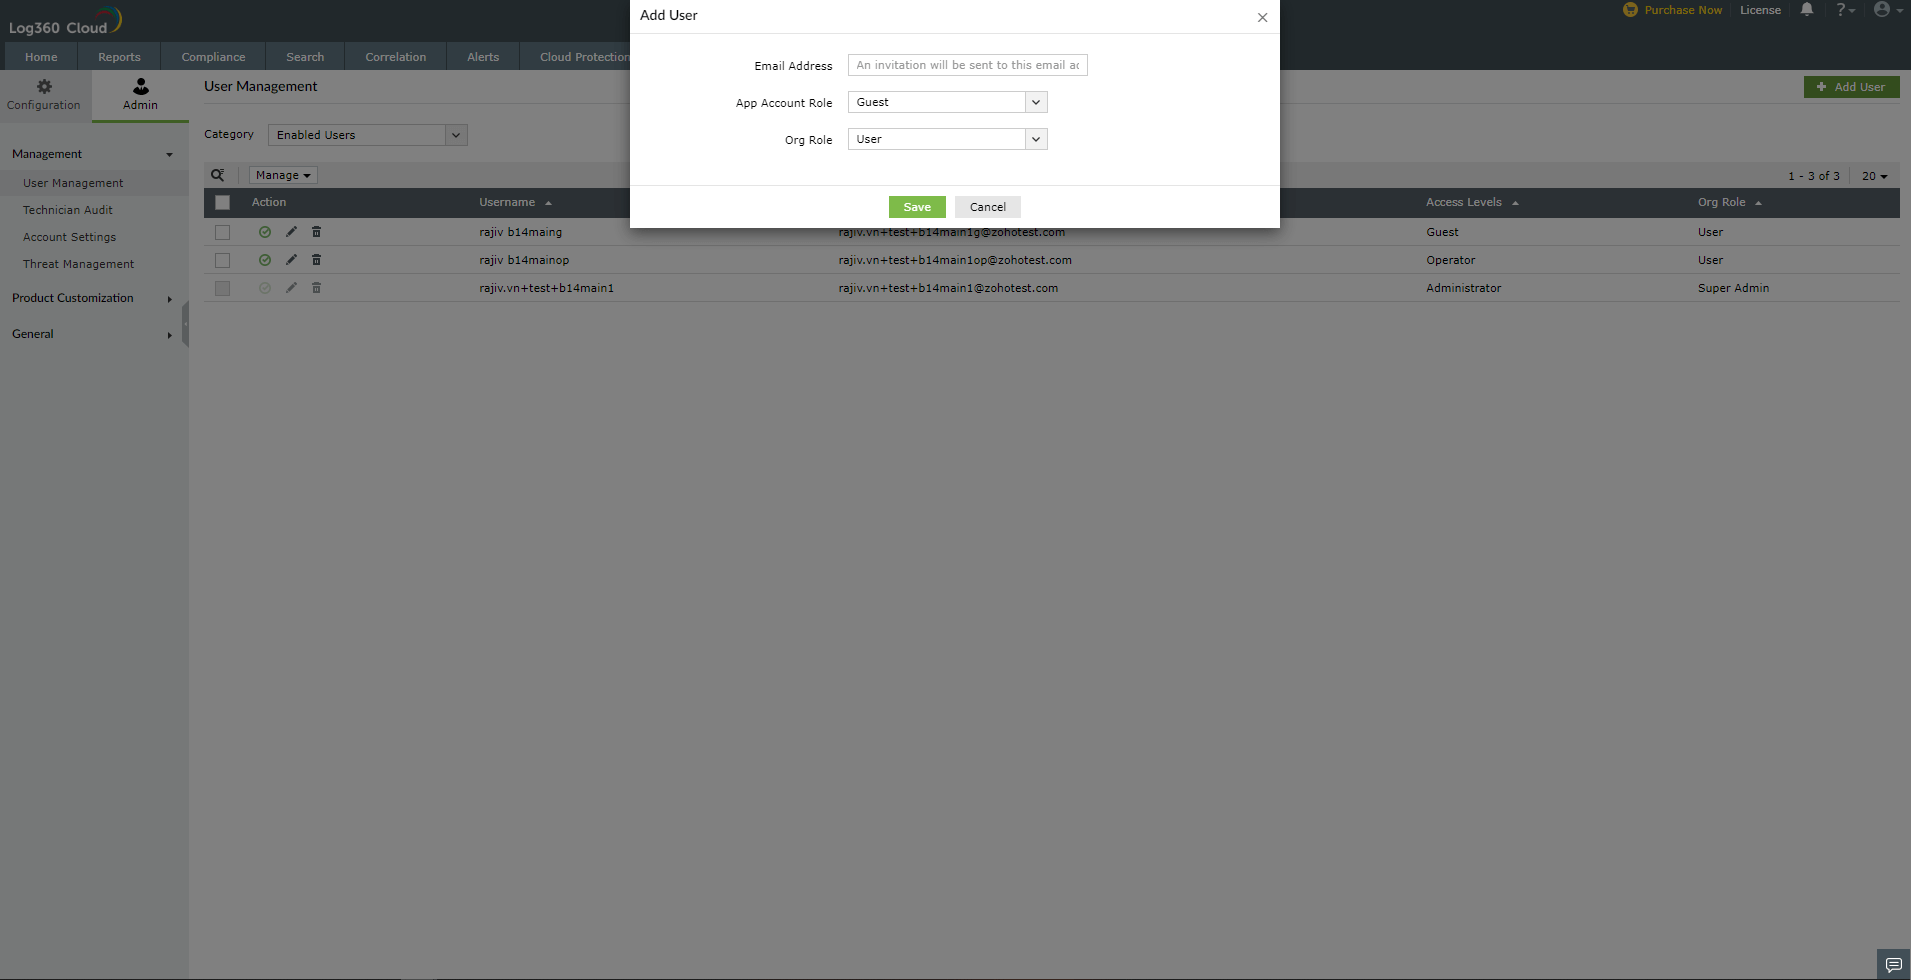
An invitation to join the organization will be sent to this email address. If the user is already present in the organization, he will be added directly (there will be no changes in the organization role that has already been assigned to him).
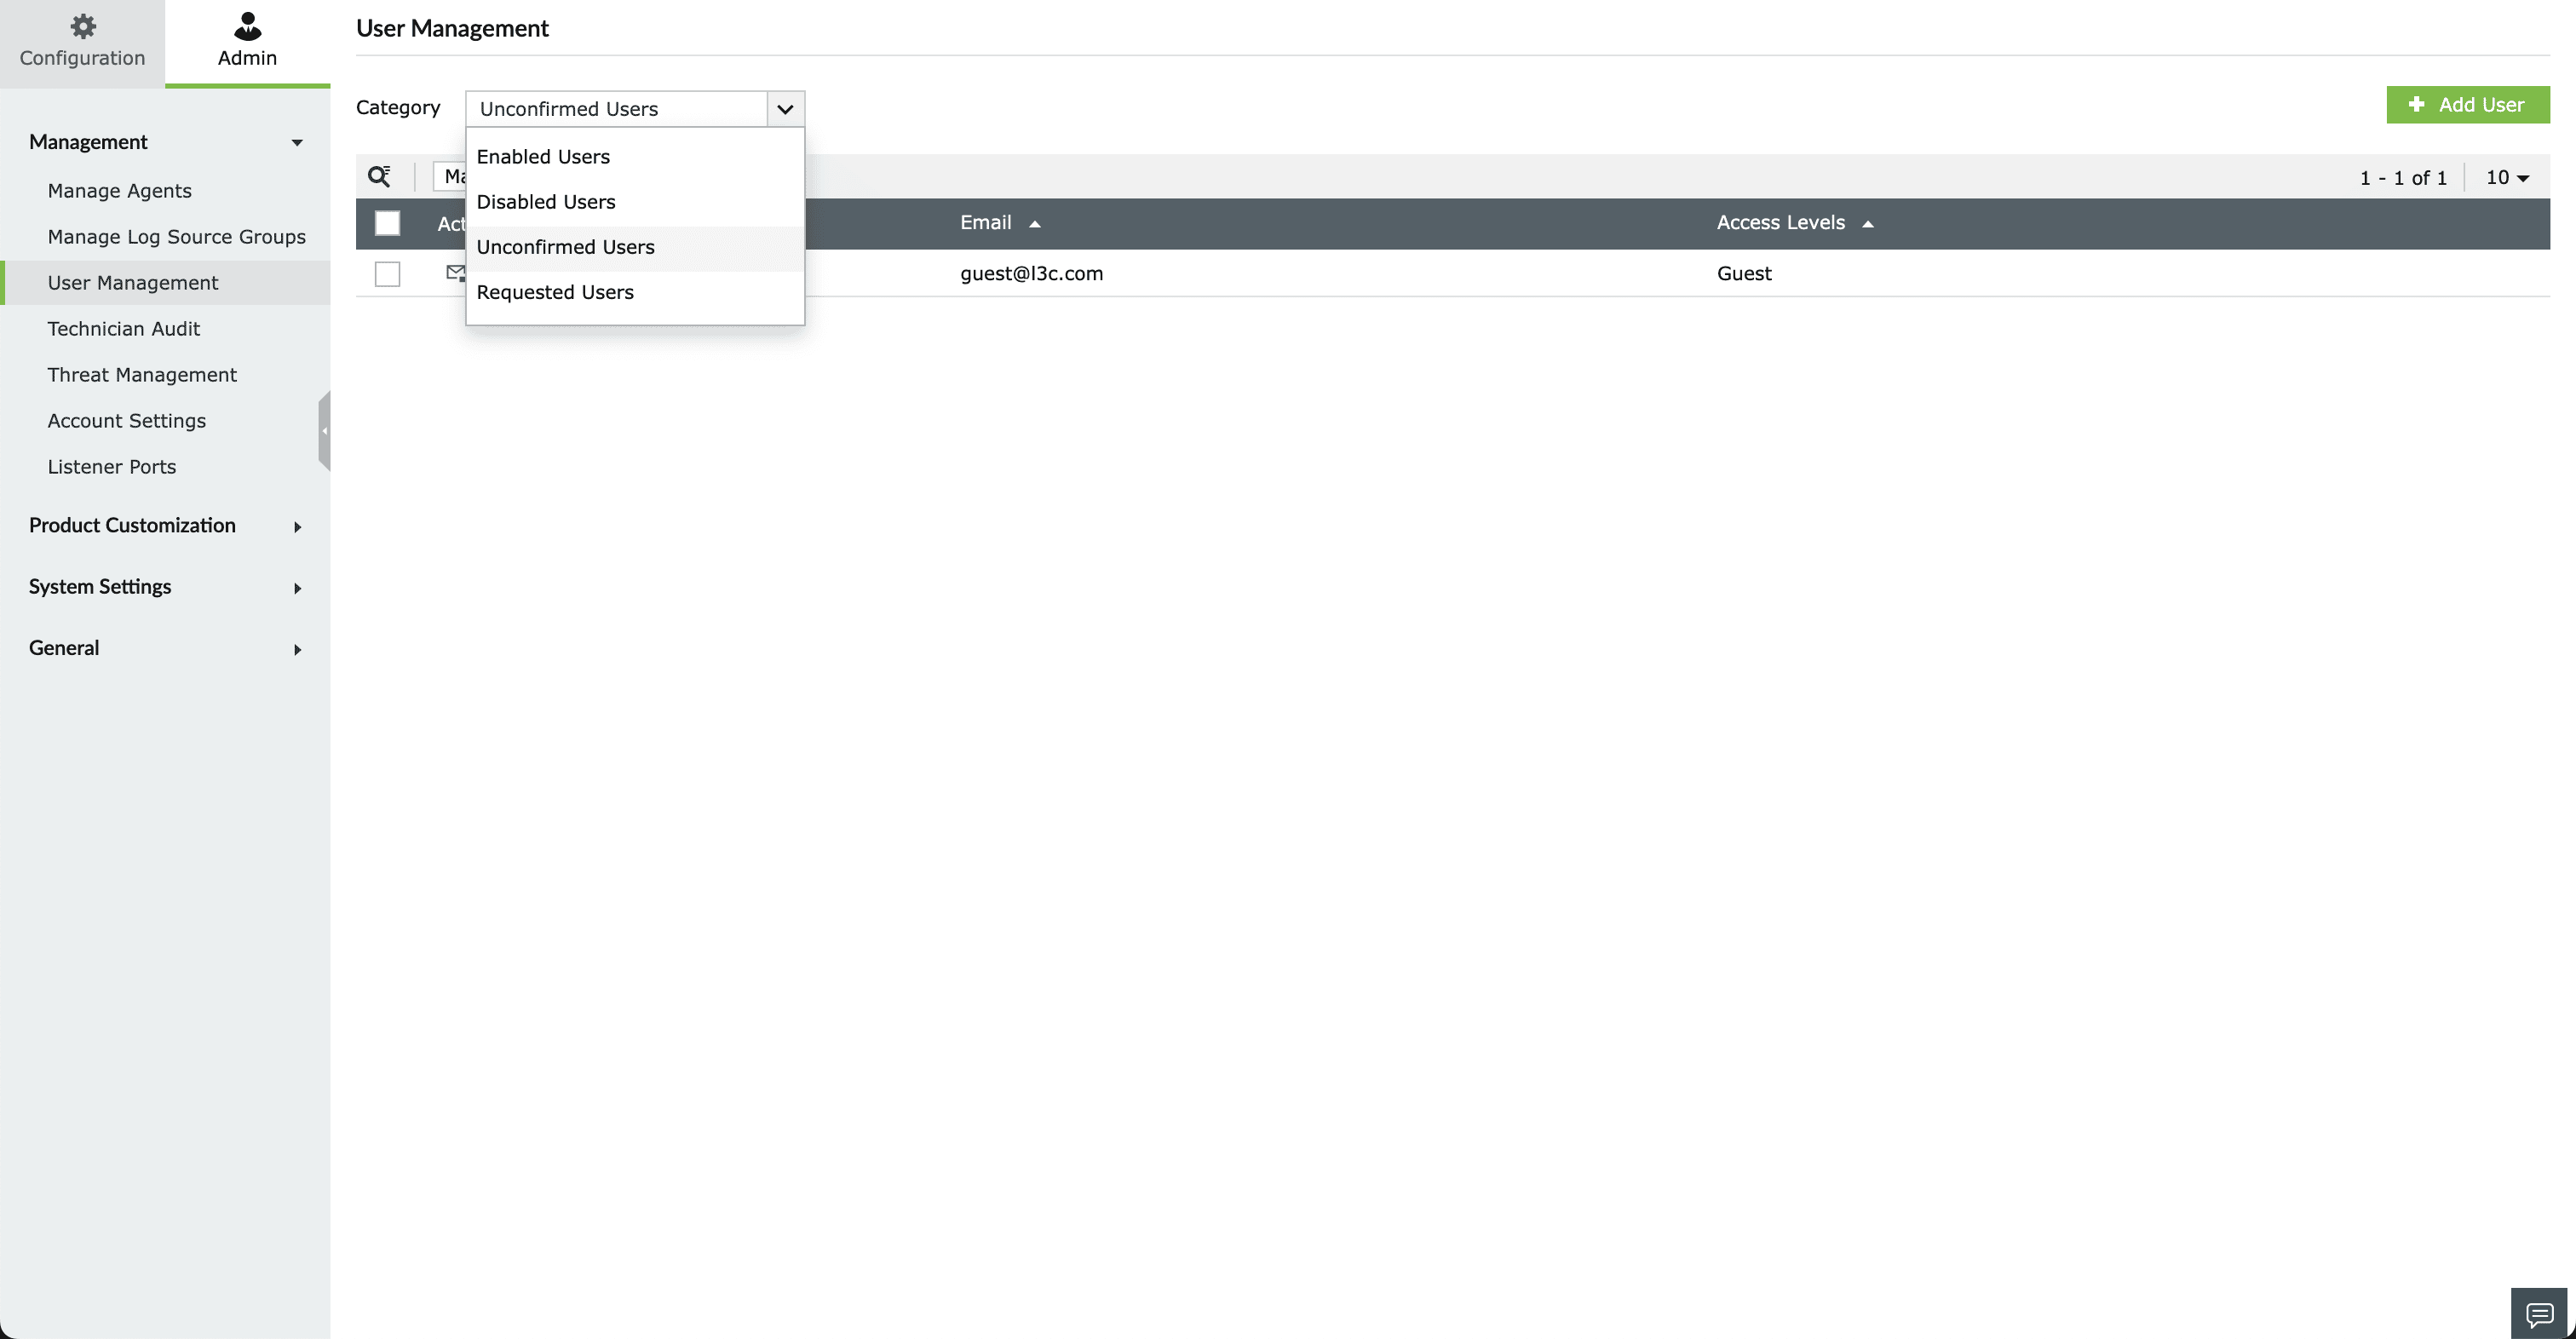
User invitations can be tracked by going to Category located at the top-left corner in the User management page and selecting Unconfirmed users from the drop-down list.
Deleting a user
To delete a user in Log360 Cloud,
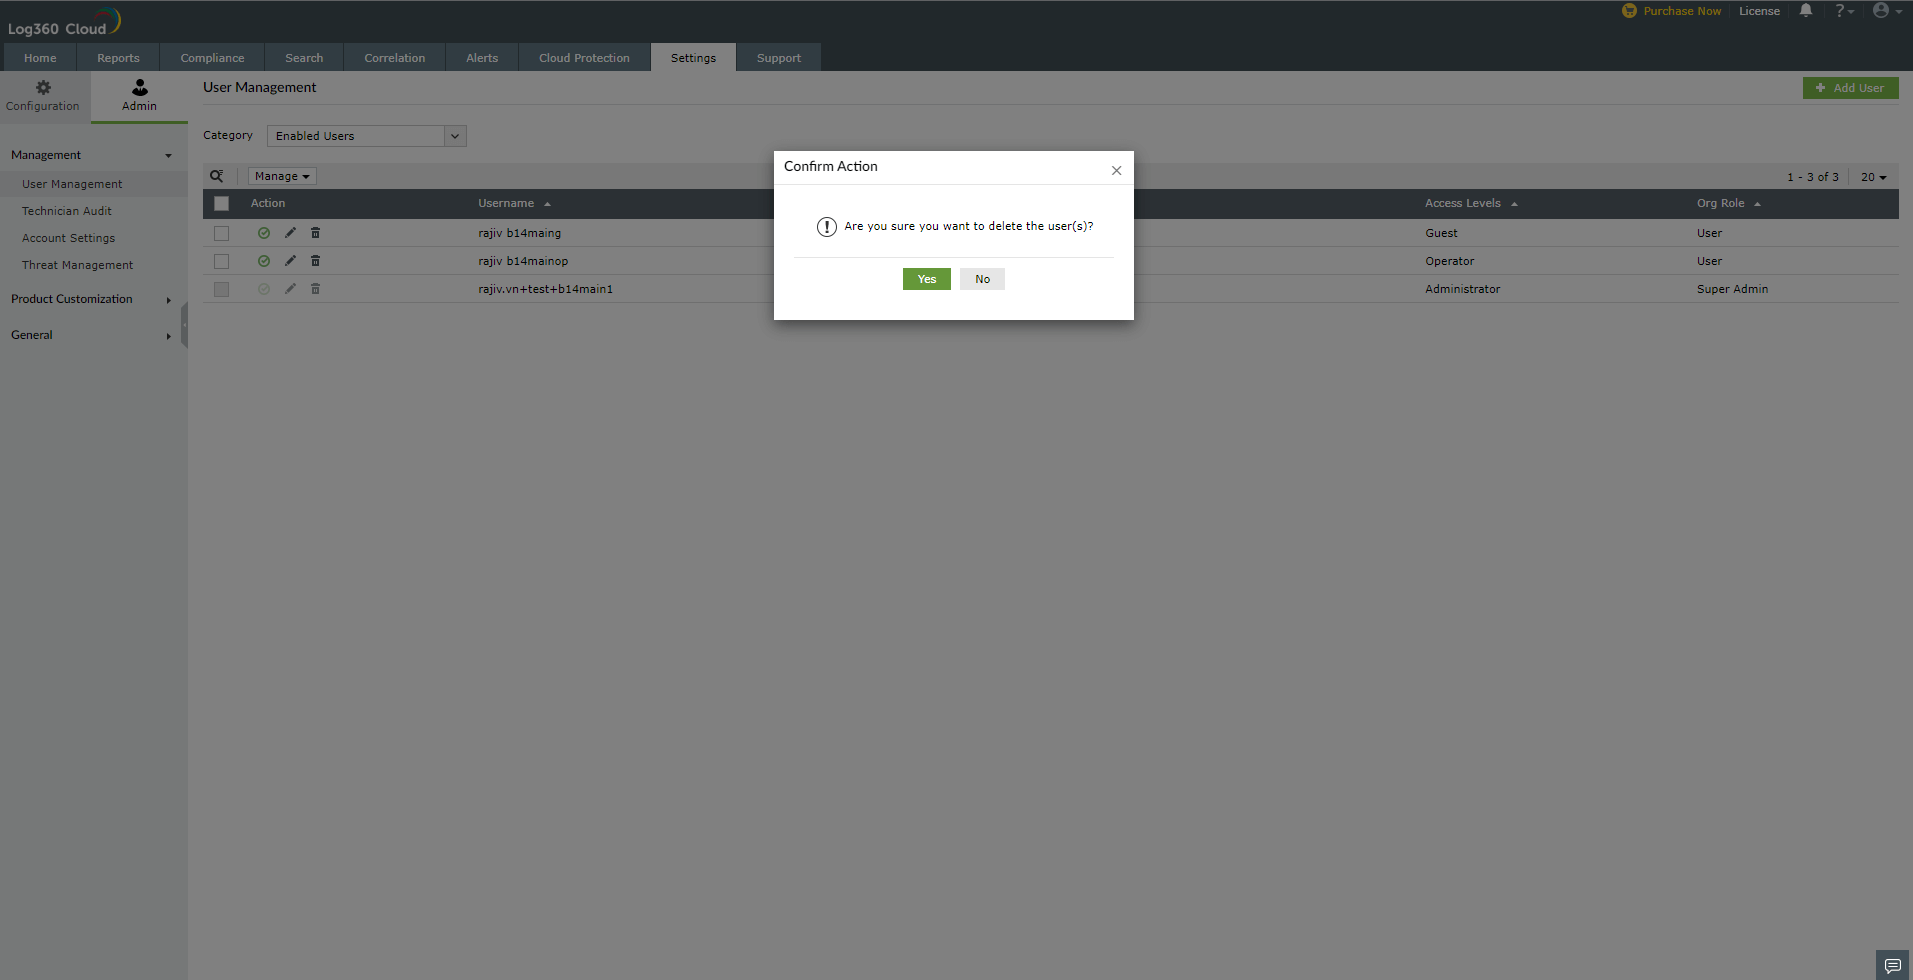
- Click delete icon
 located under the Action column for that particular user.
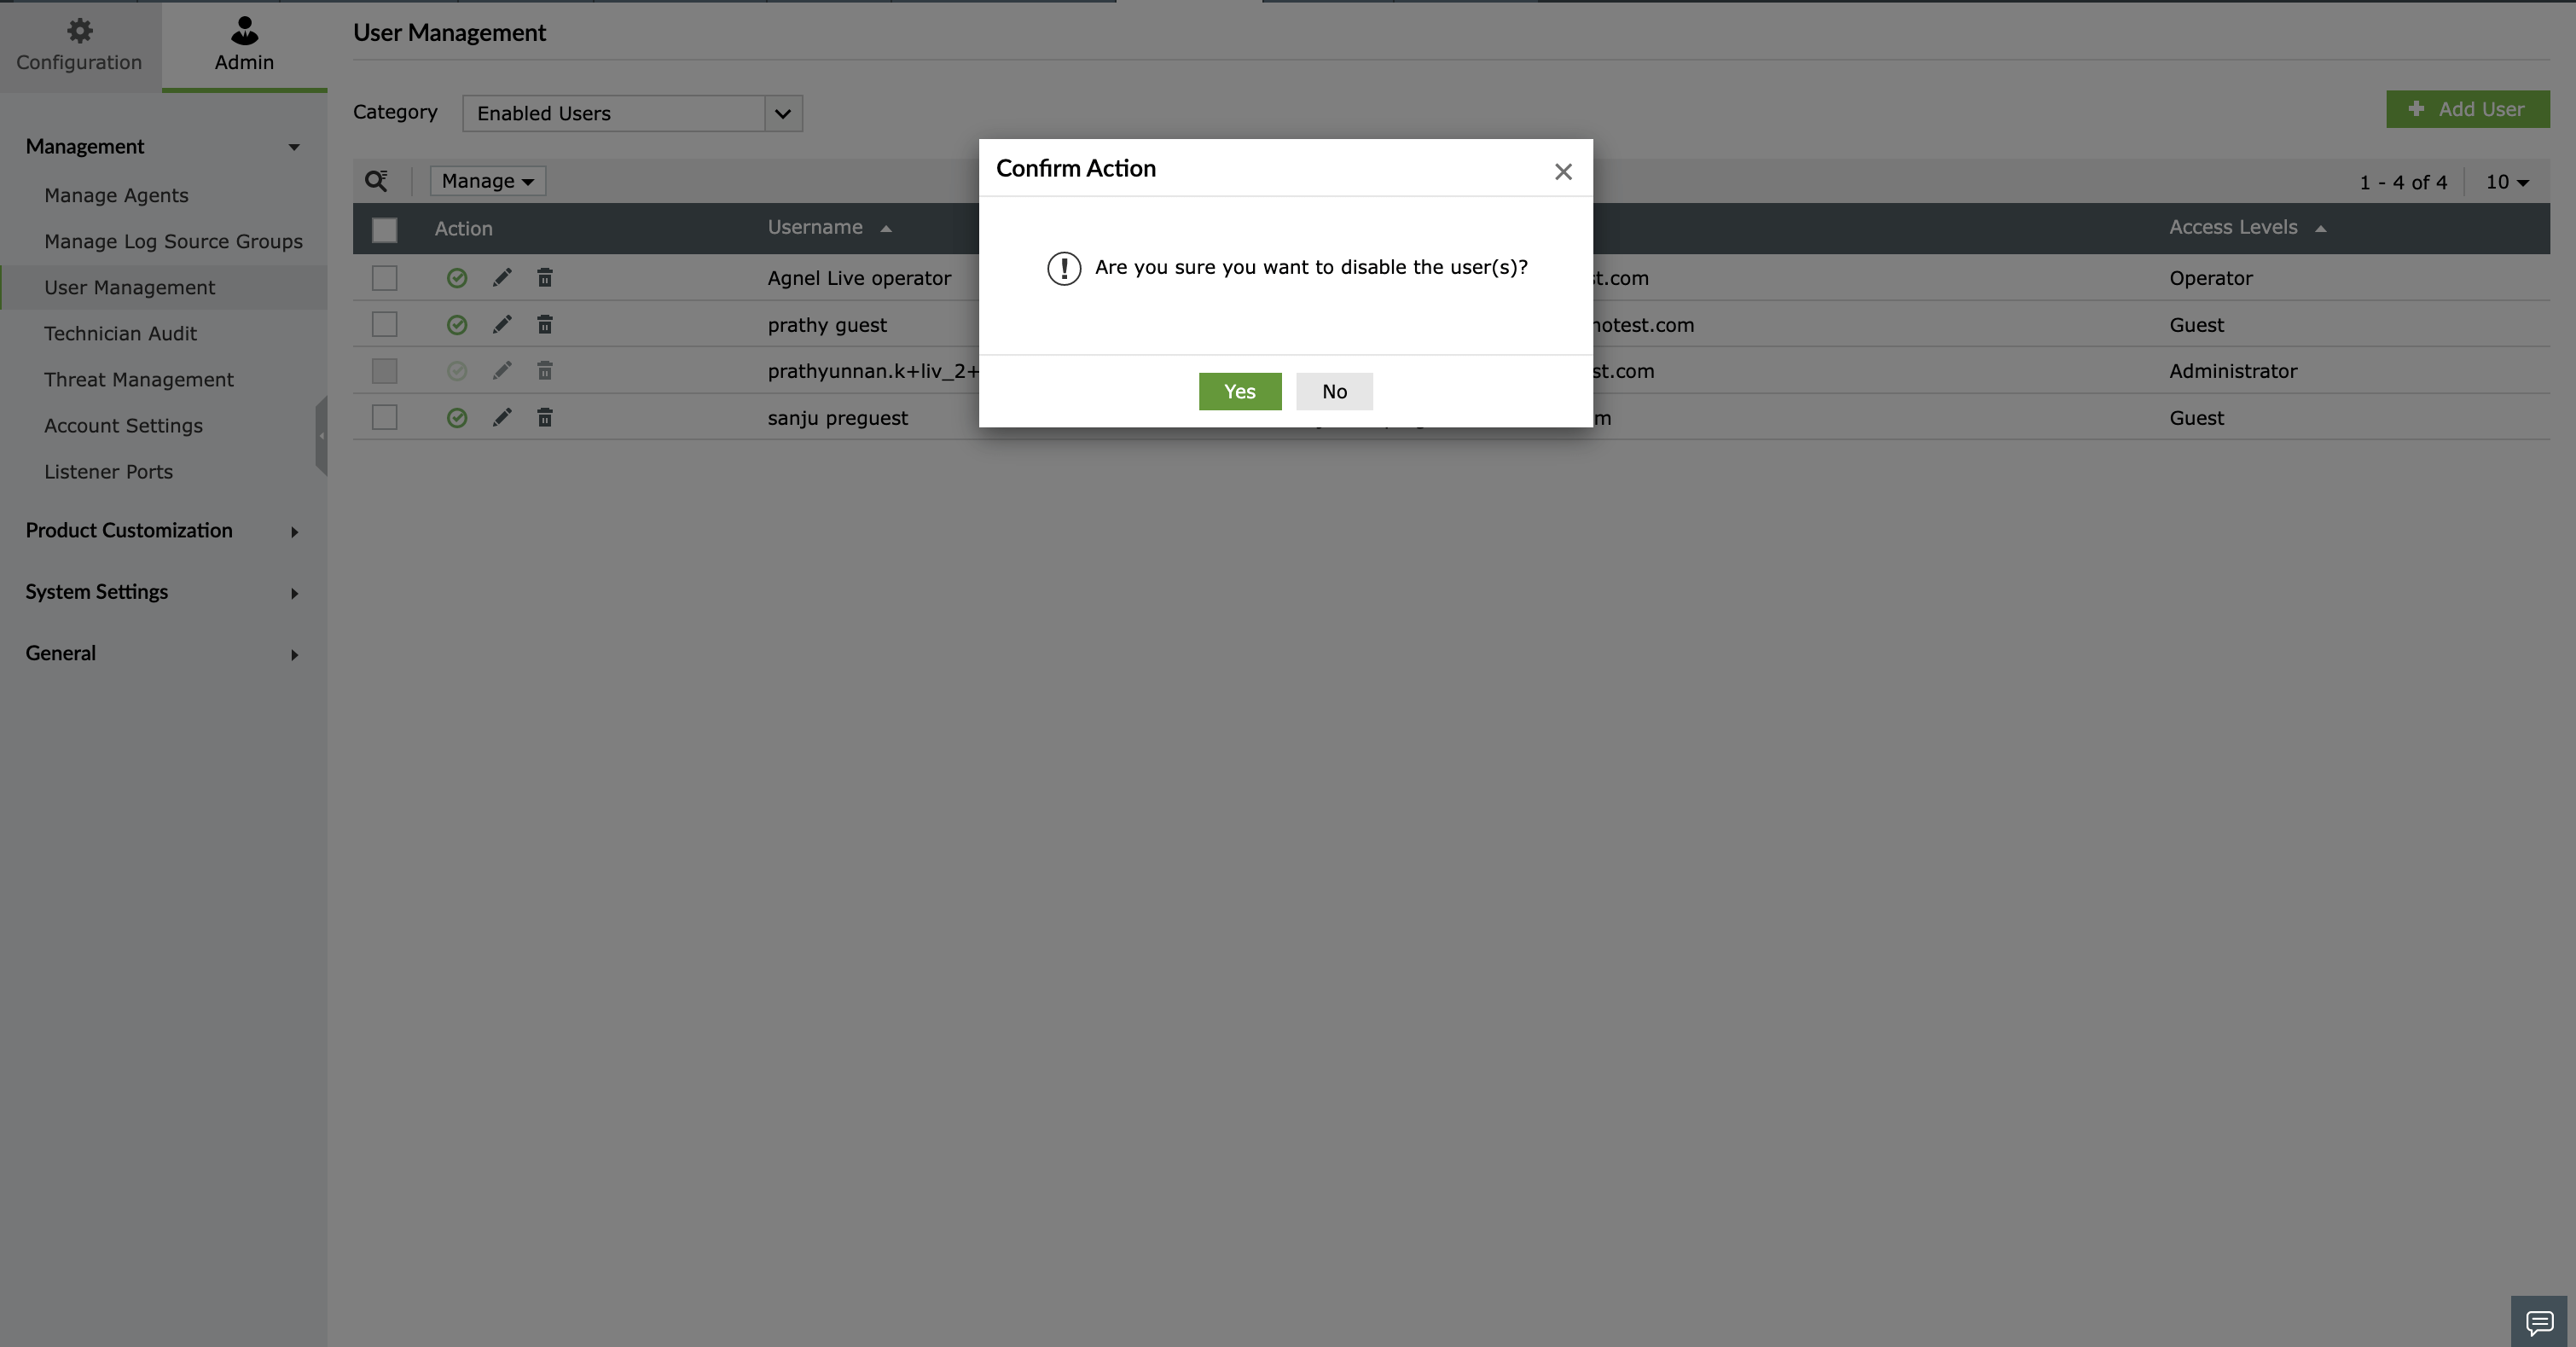
- A Confirm Action dialog box will be displayed, click yes.
To delete multiple users in Log360 Cloud,
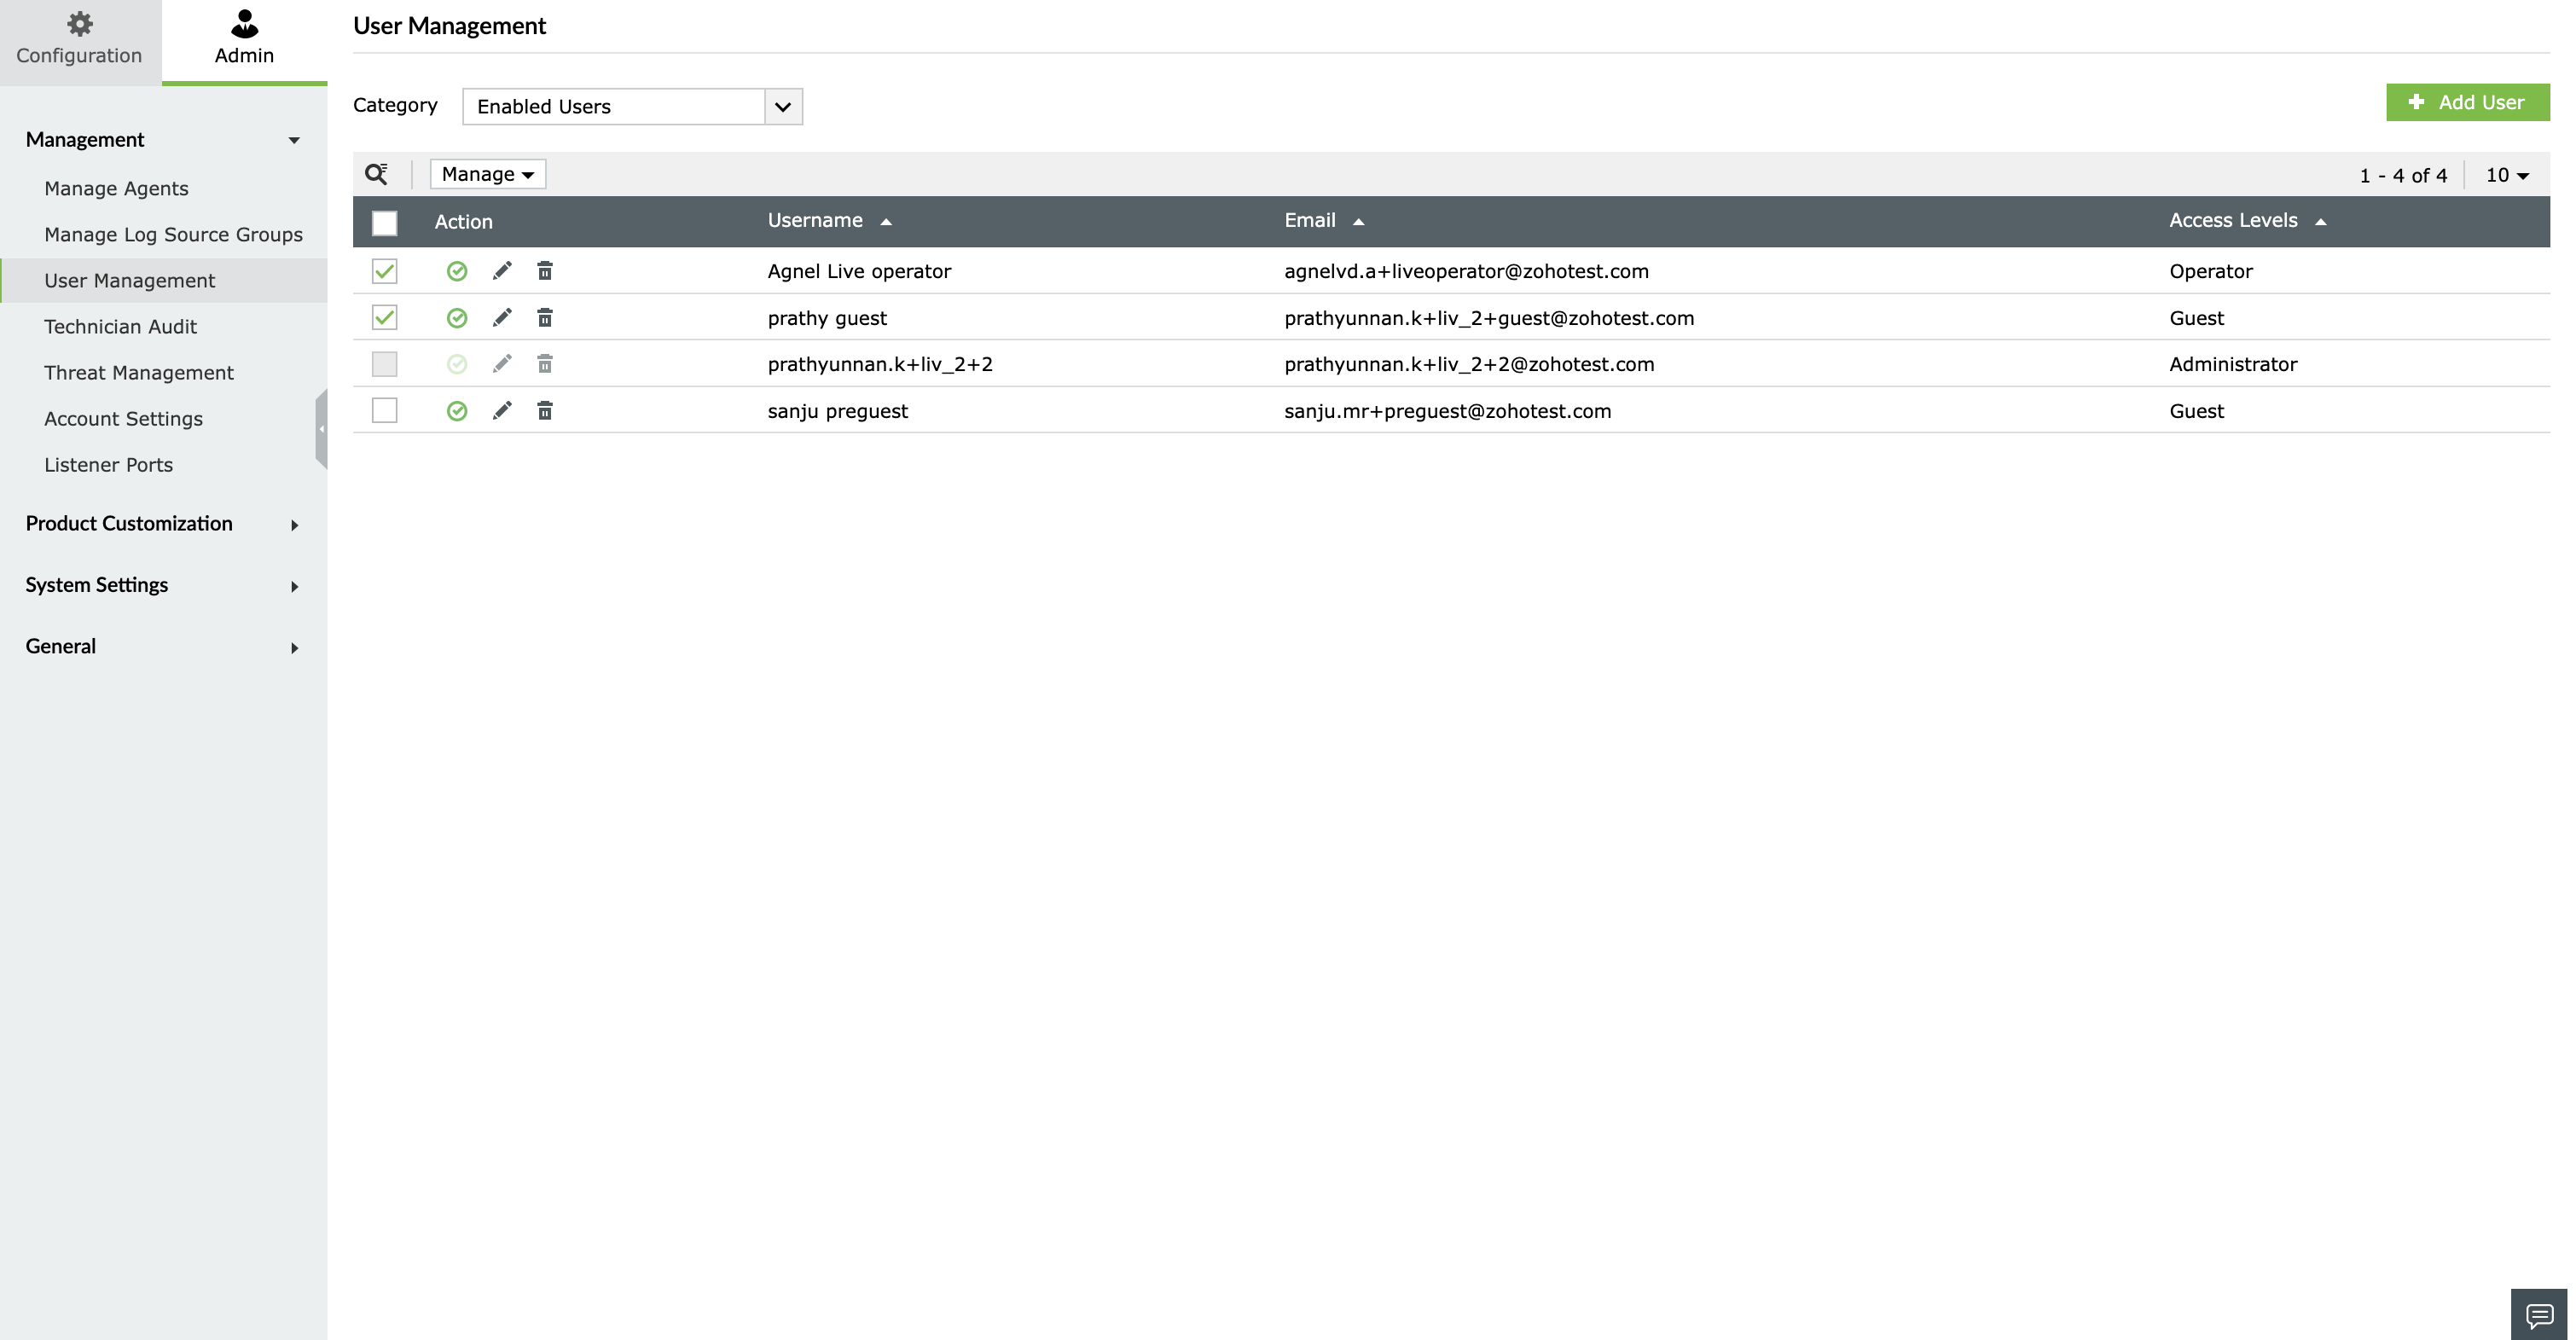
- Click on the checkbox for each user.
- Click on Manage located above the Action column and click on Delete User from the drop-down list.

The selected users will eb deleted.
To delete all the users in Log360 Cloud,
- Click on the checkbox located below the search icon next to the Action column. All the users will be selected.
- Click on Manage located above the Action column and click on Delete User from the drop-down list.

All the users will be deleted.
Modifying a user
To edit a user's access levels in Log360 Cloud,
- Click modify icon
 located under the Action column for that particular user.
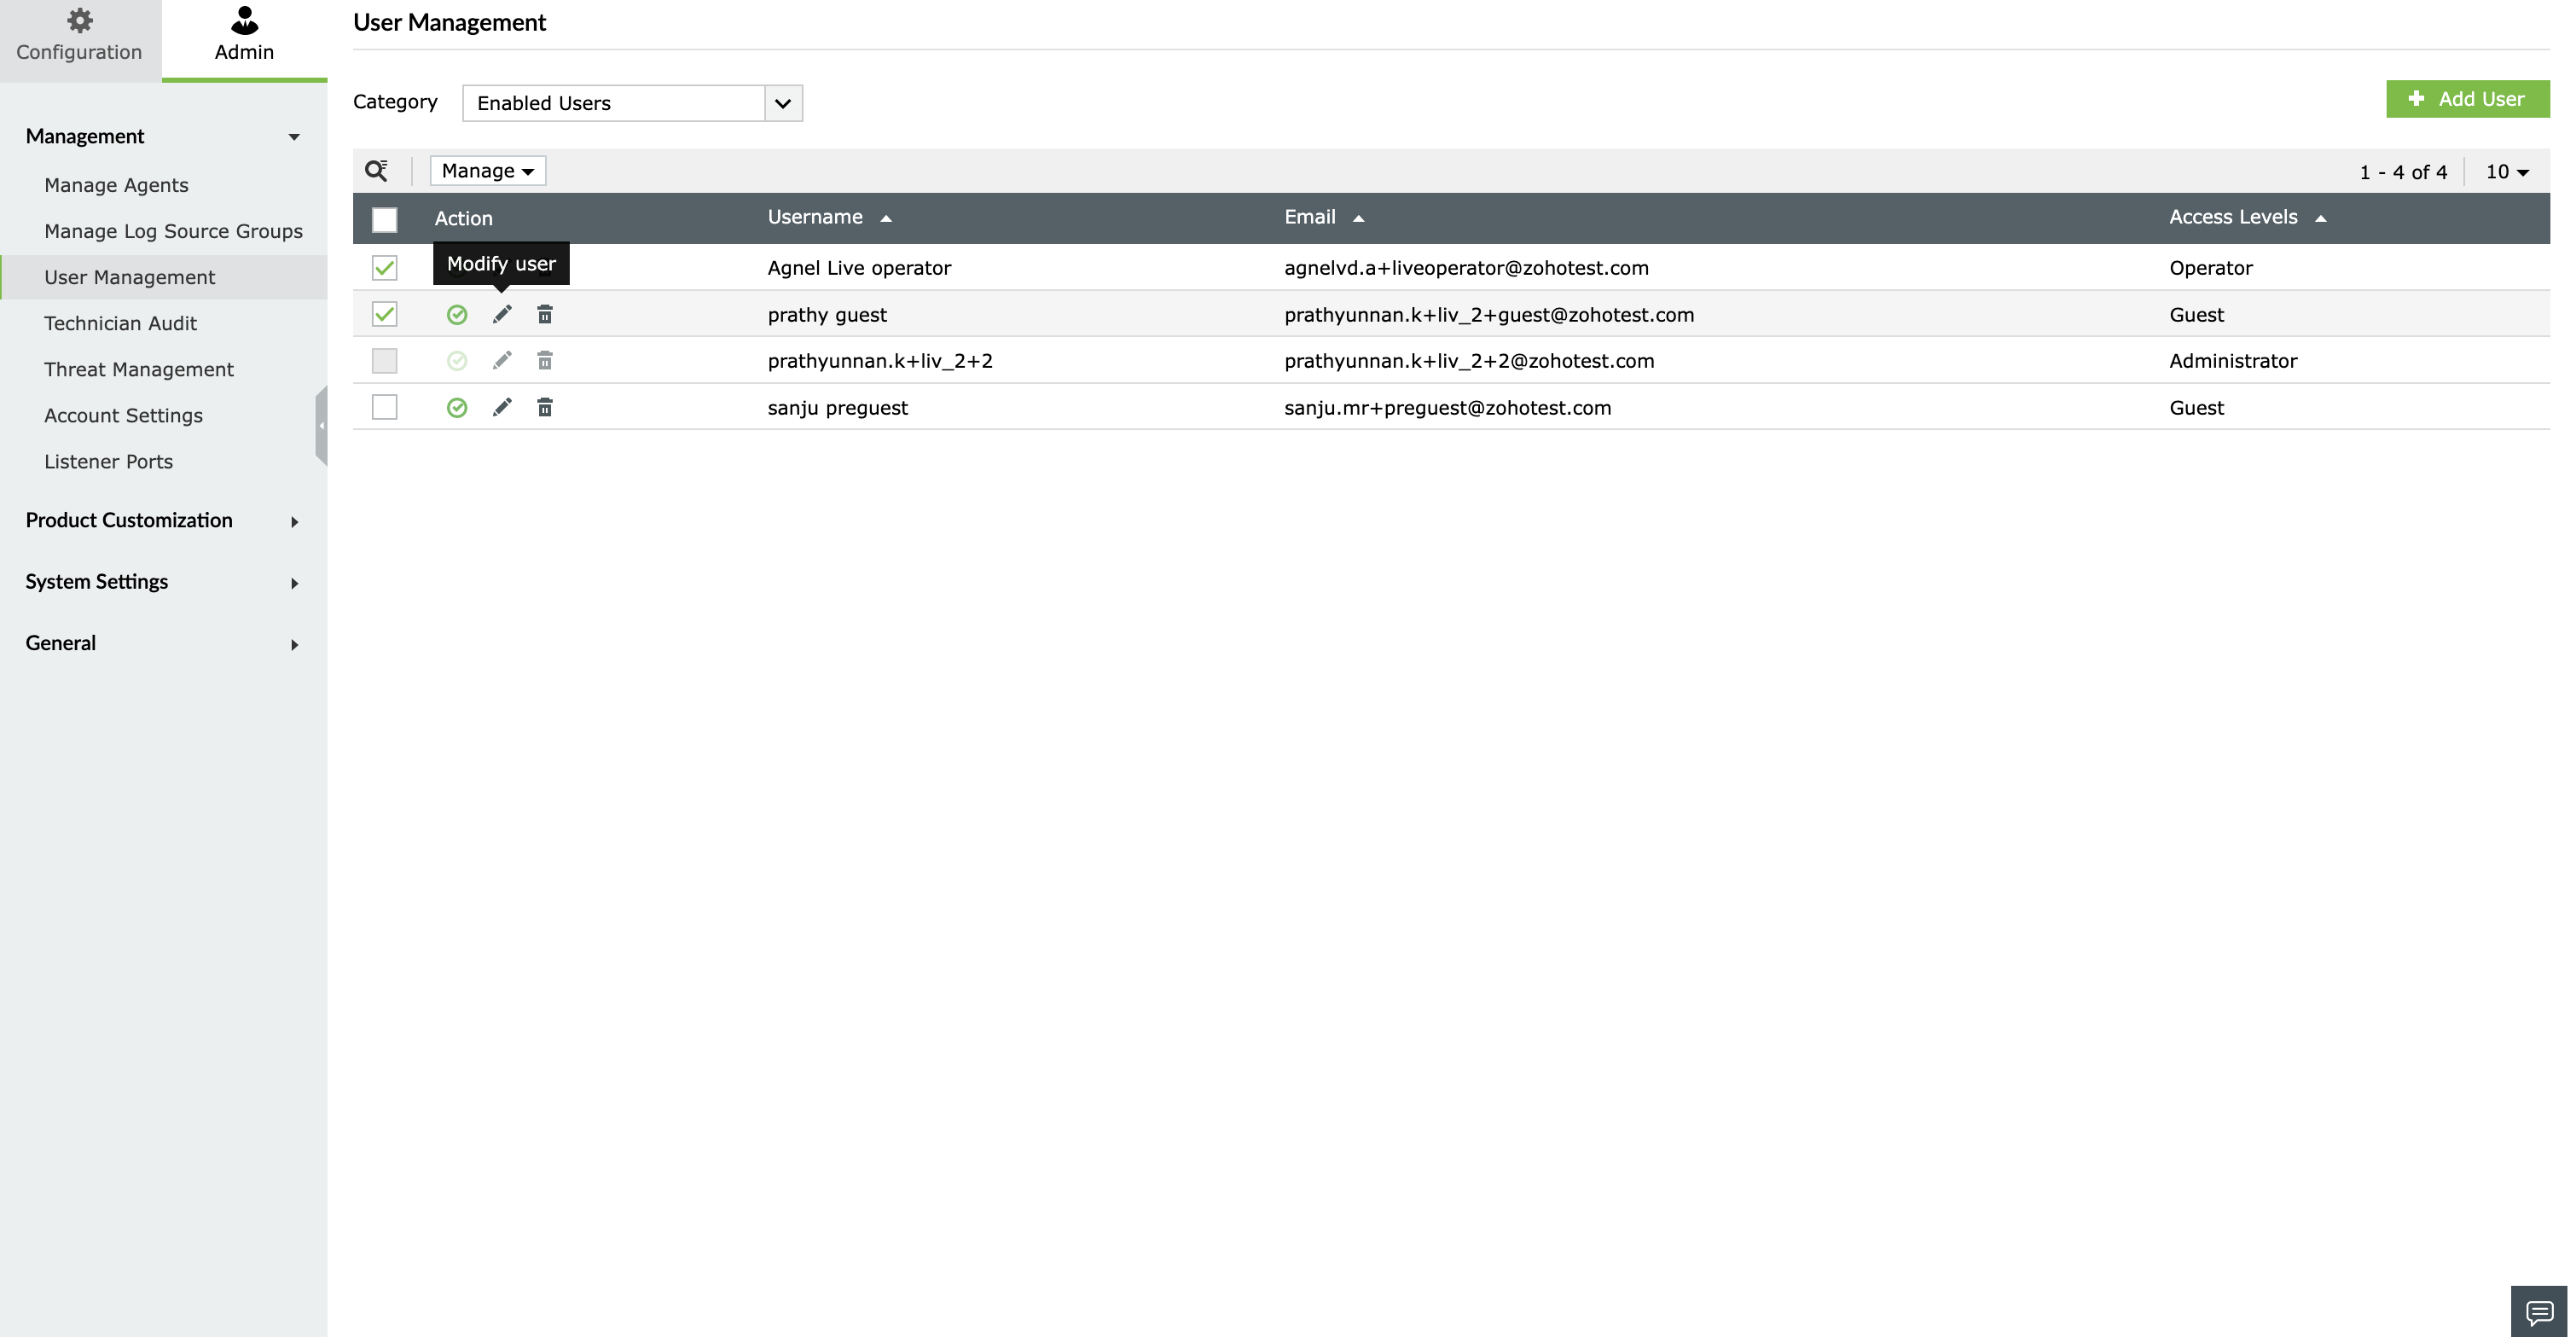
- You can modify the user's App Account Role (access levels).
- Click on Save.
The user details will be modified.
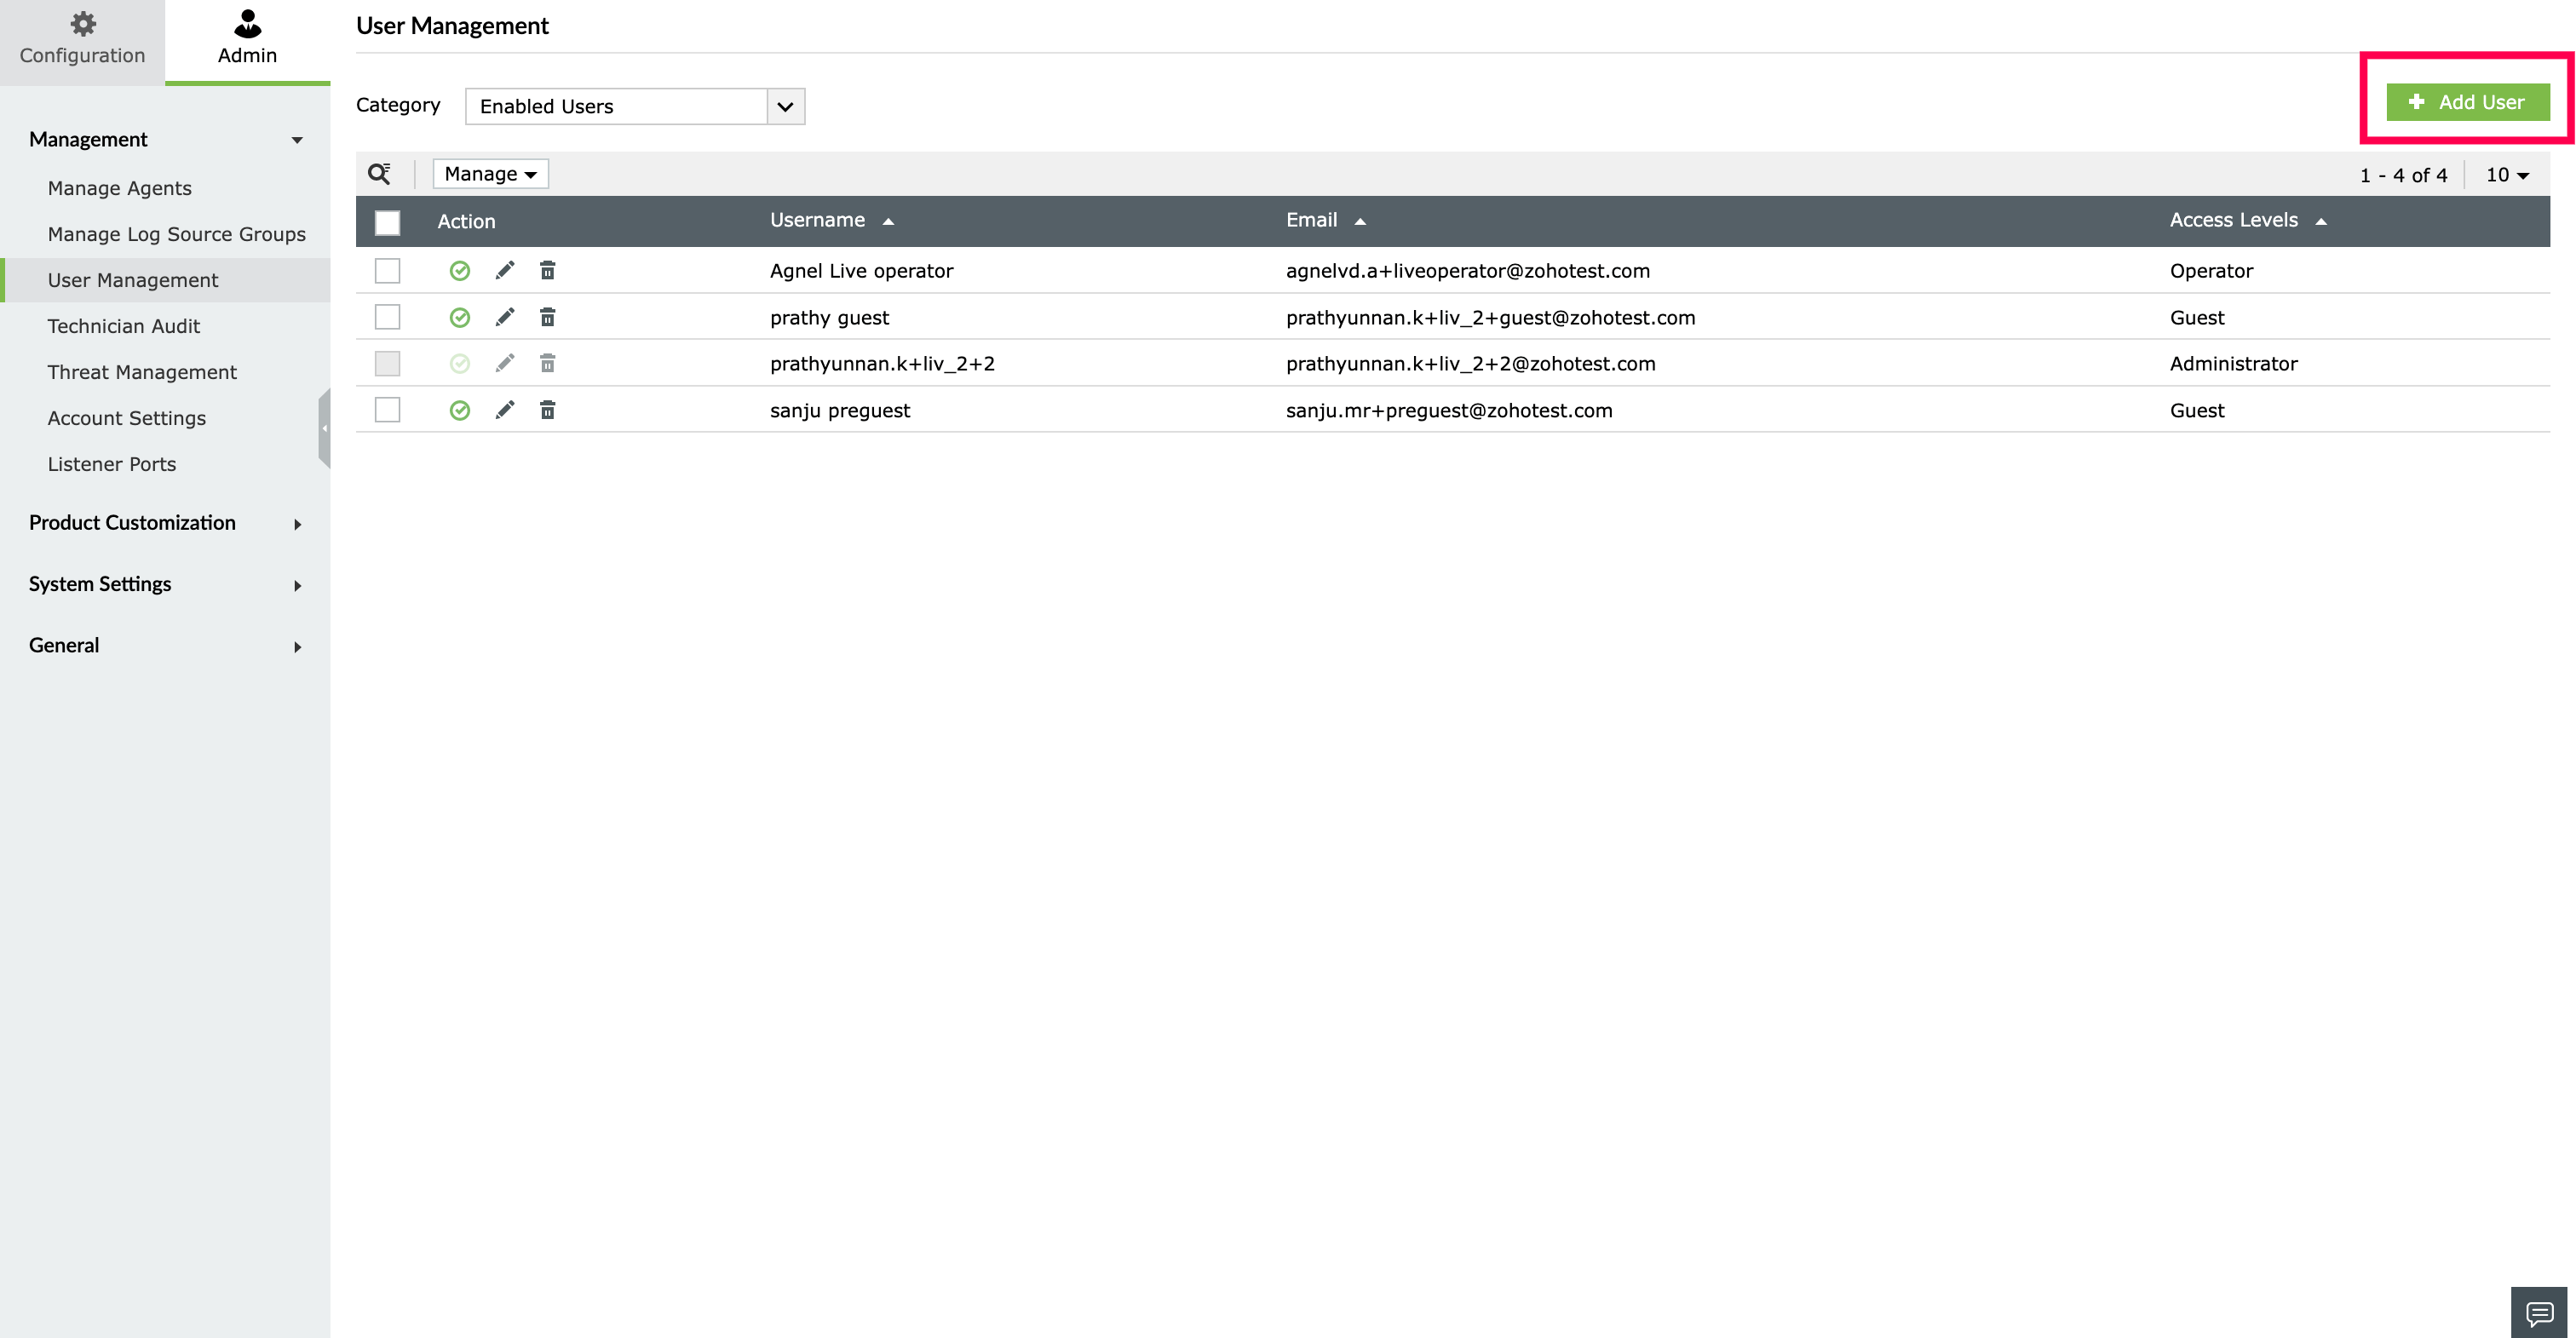
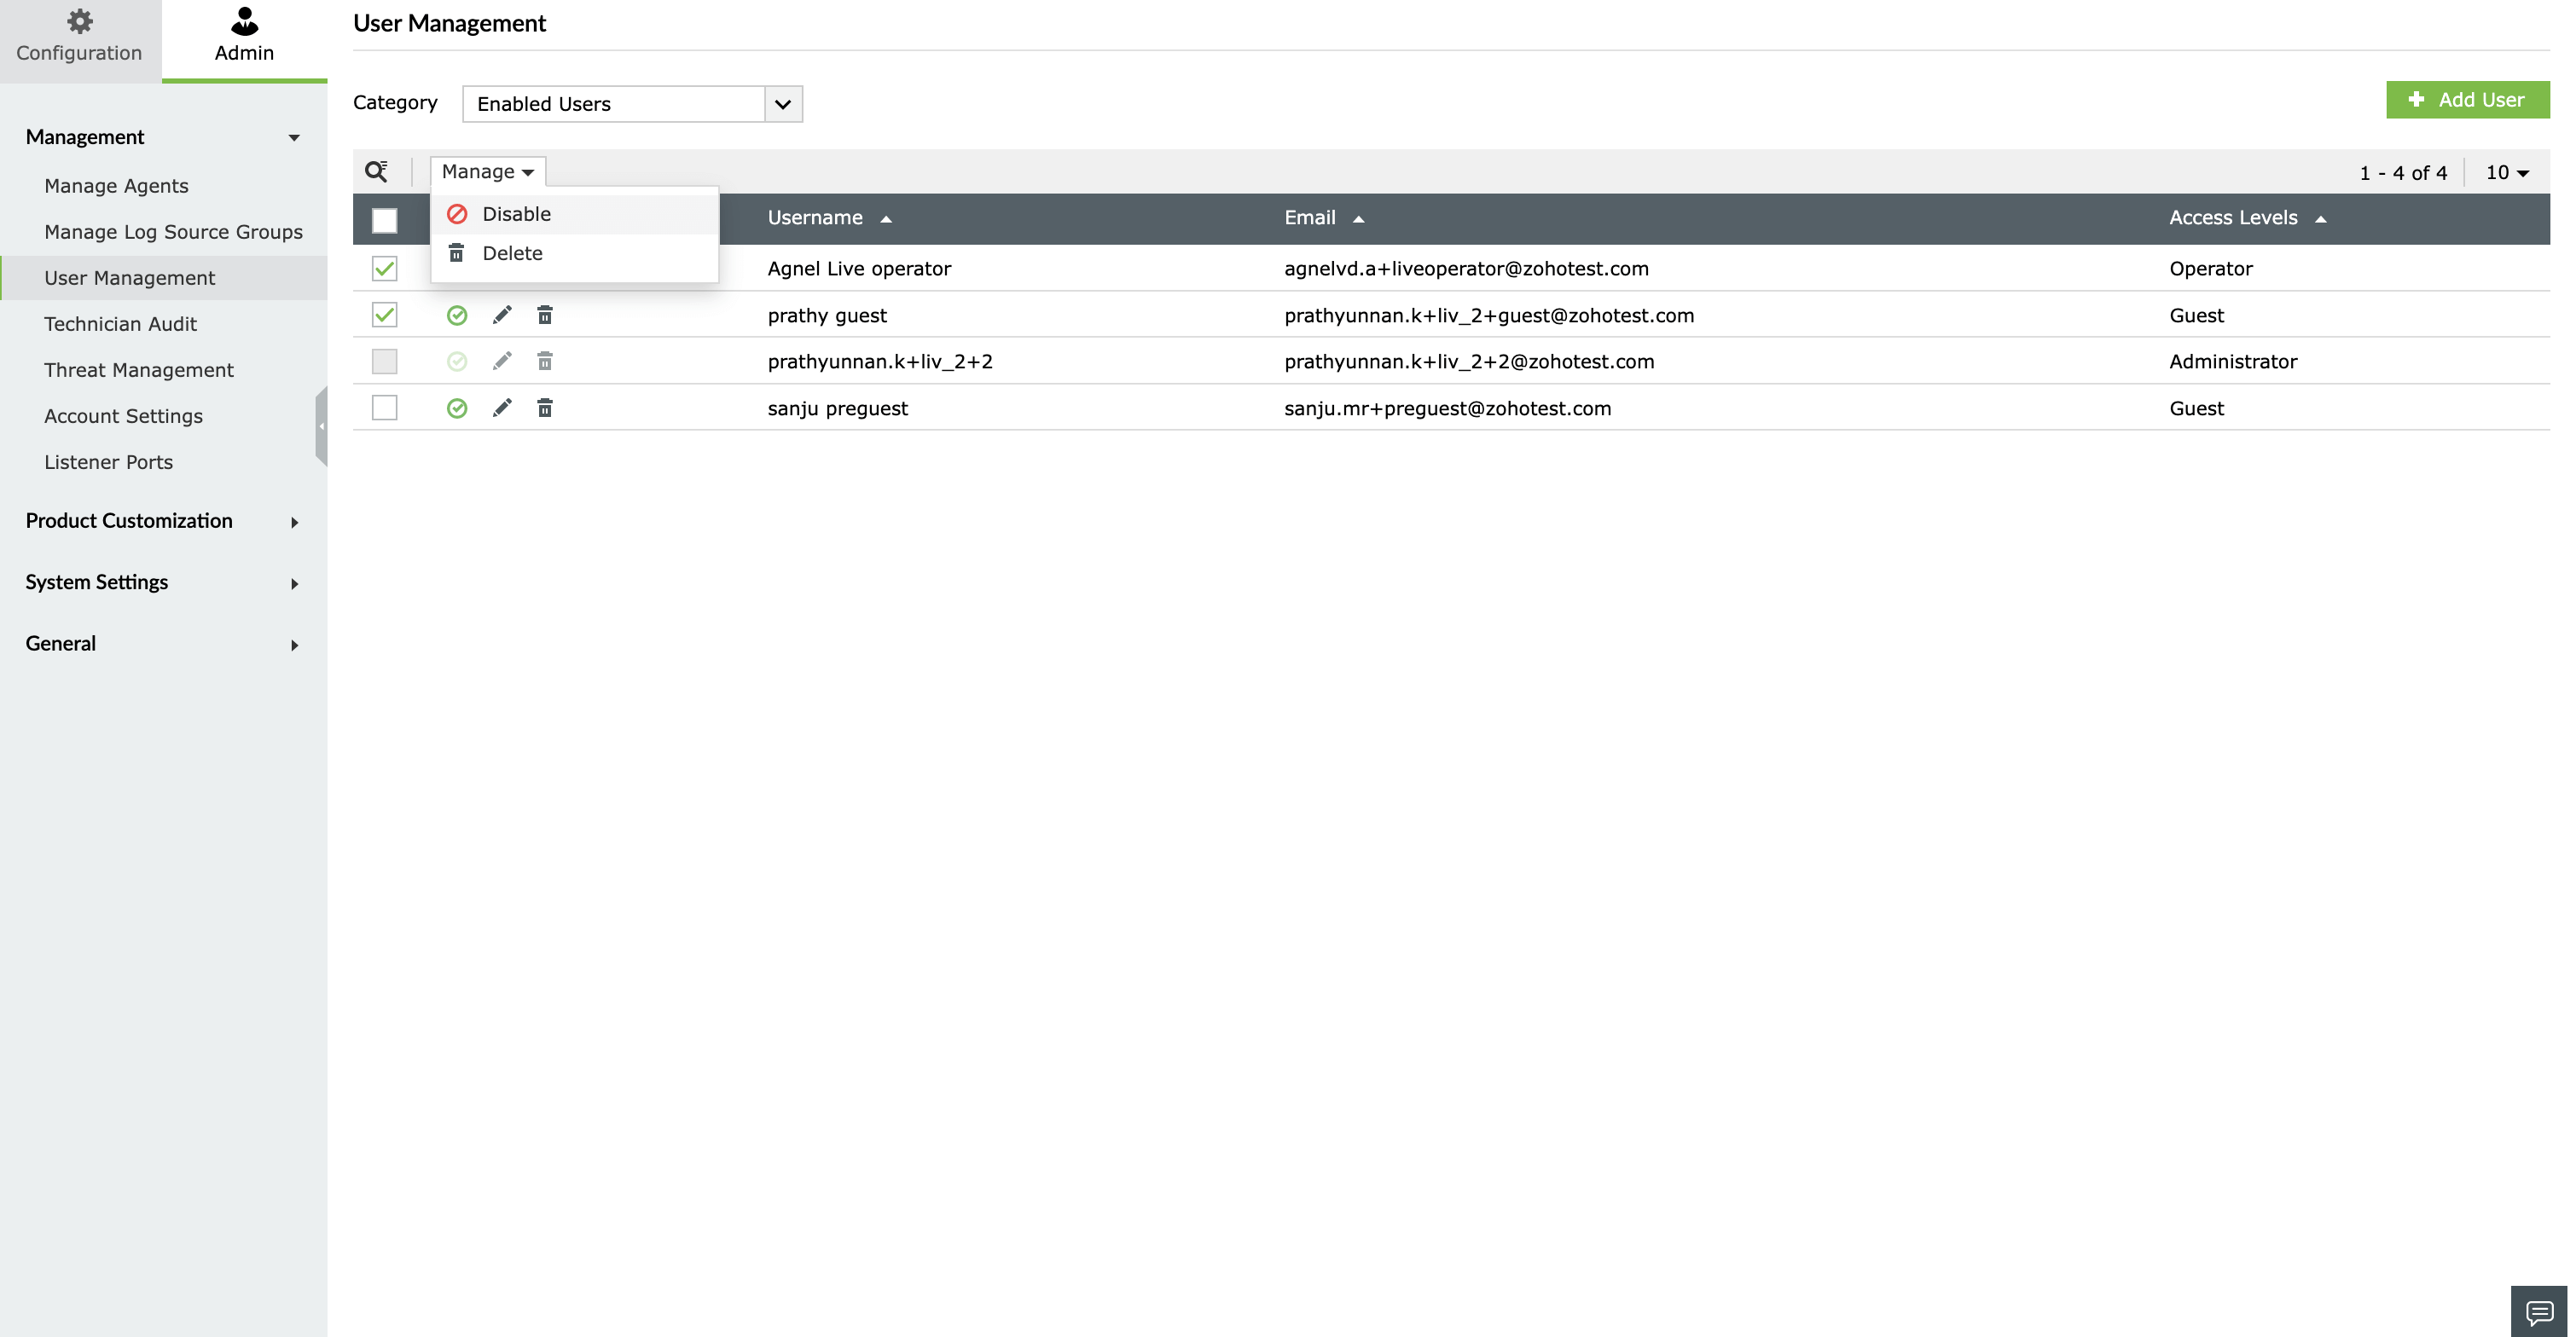
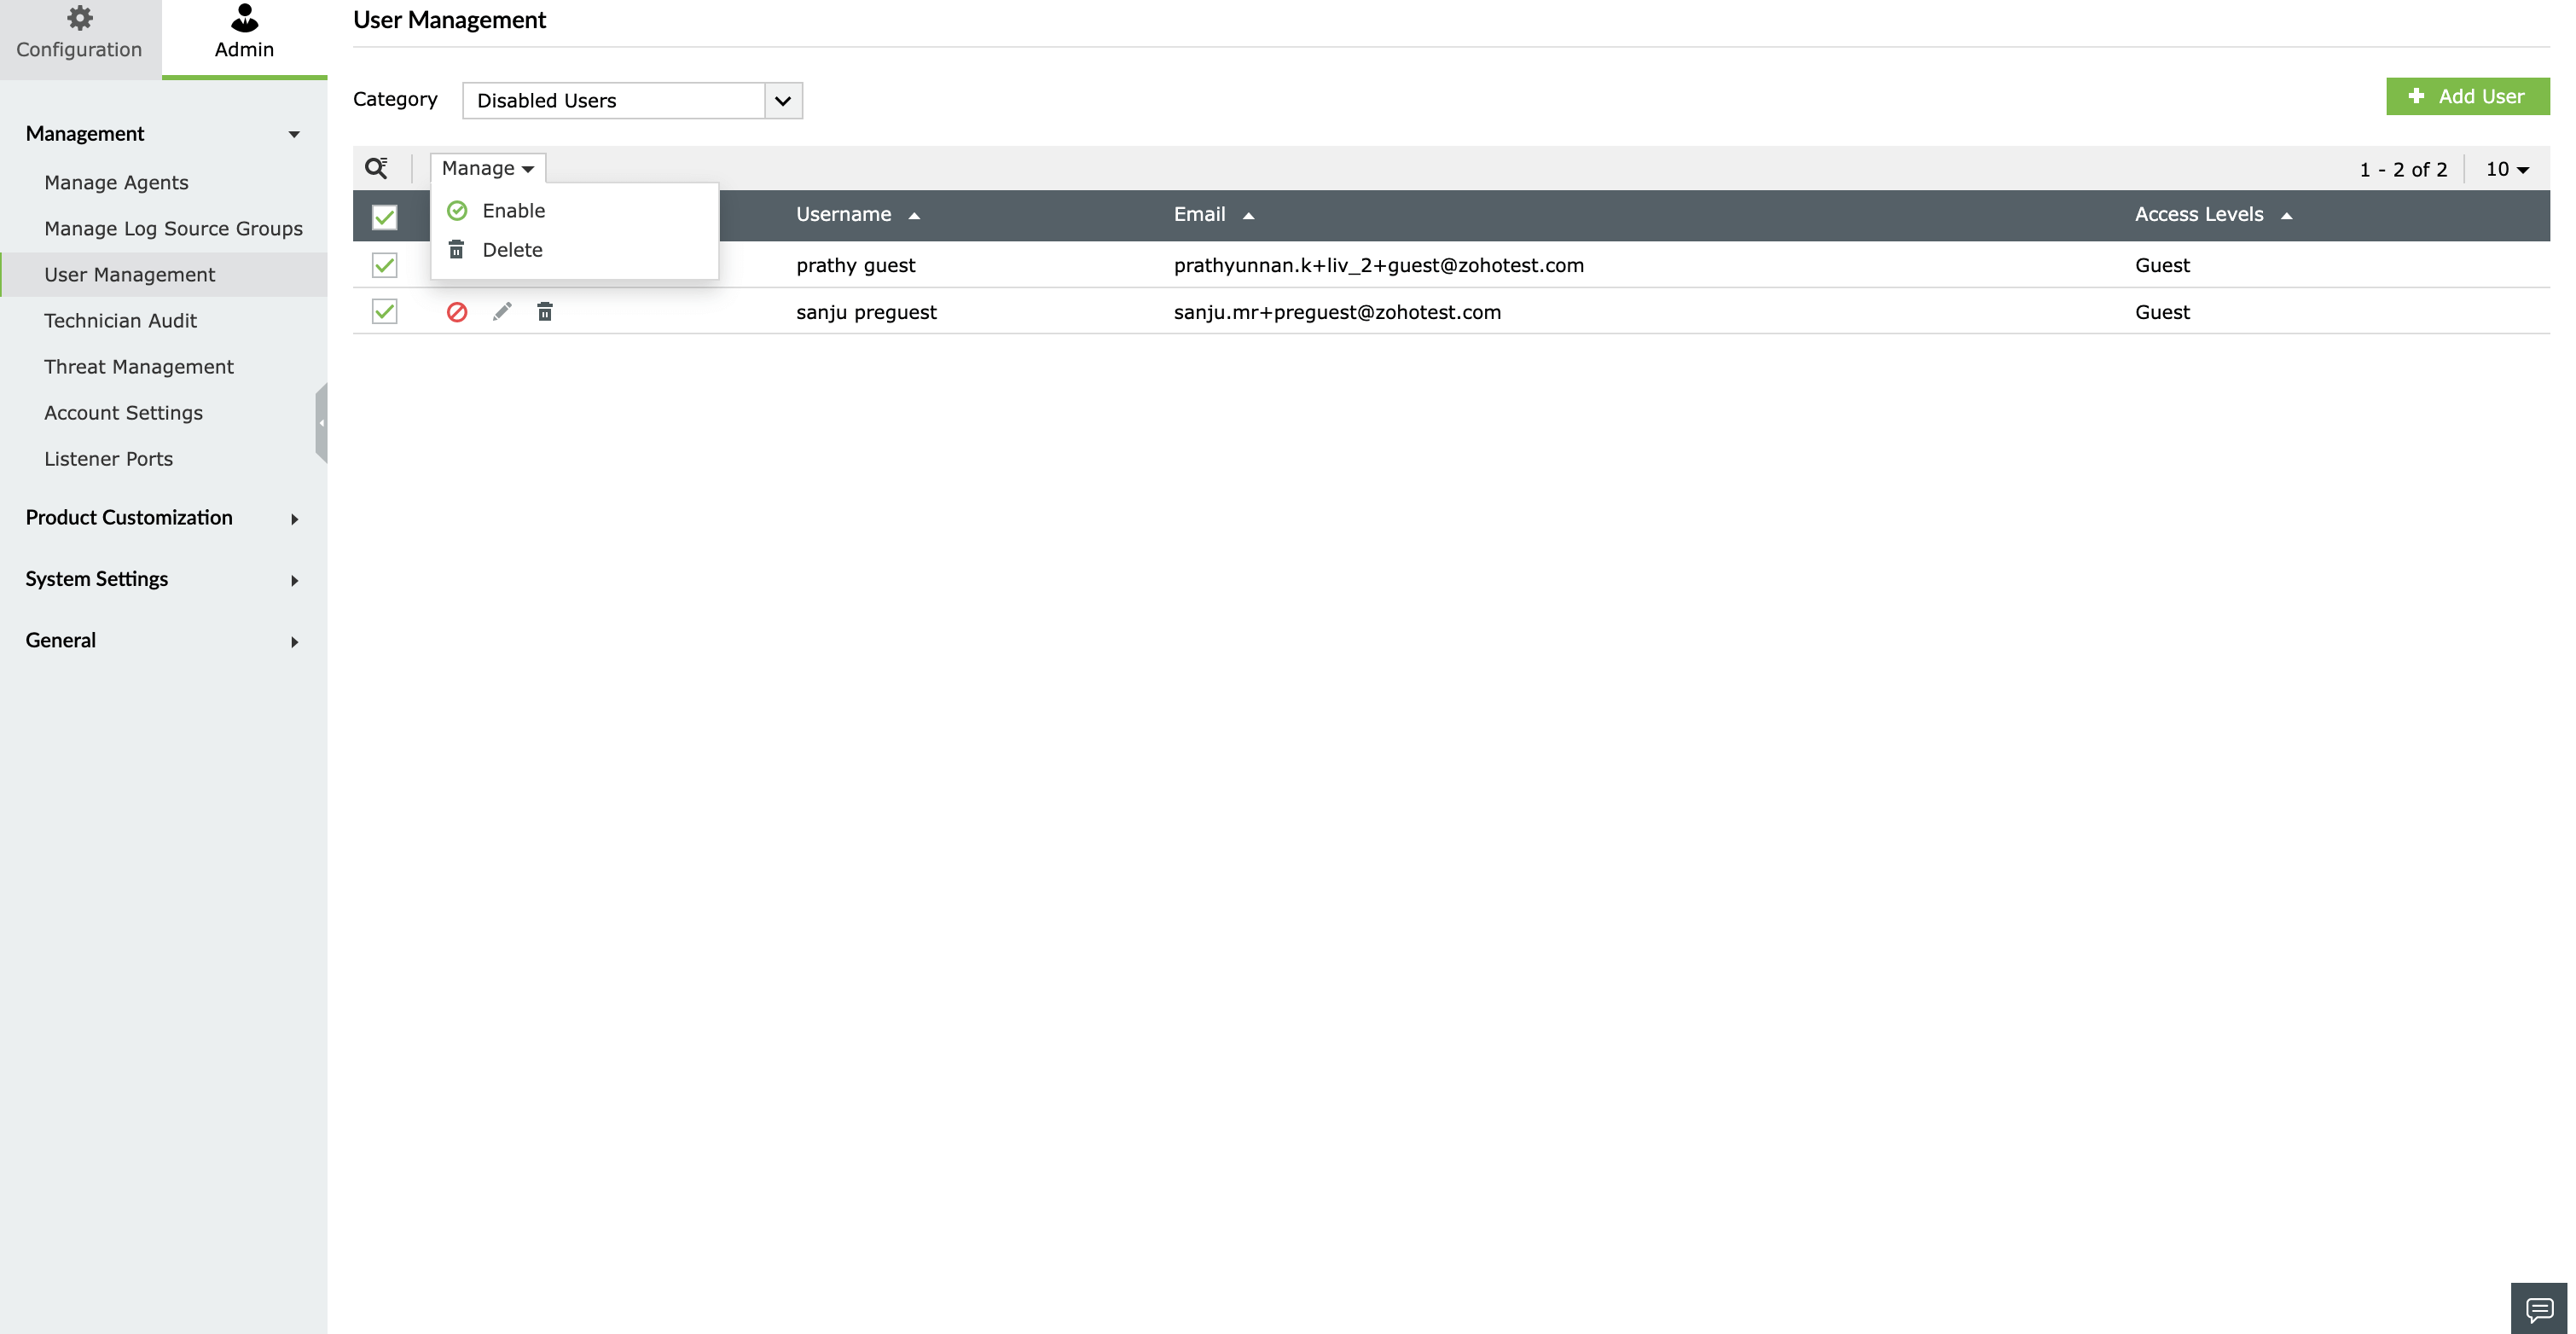
Enabling and disabling a user
Viewing enabled users:
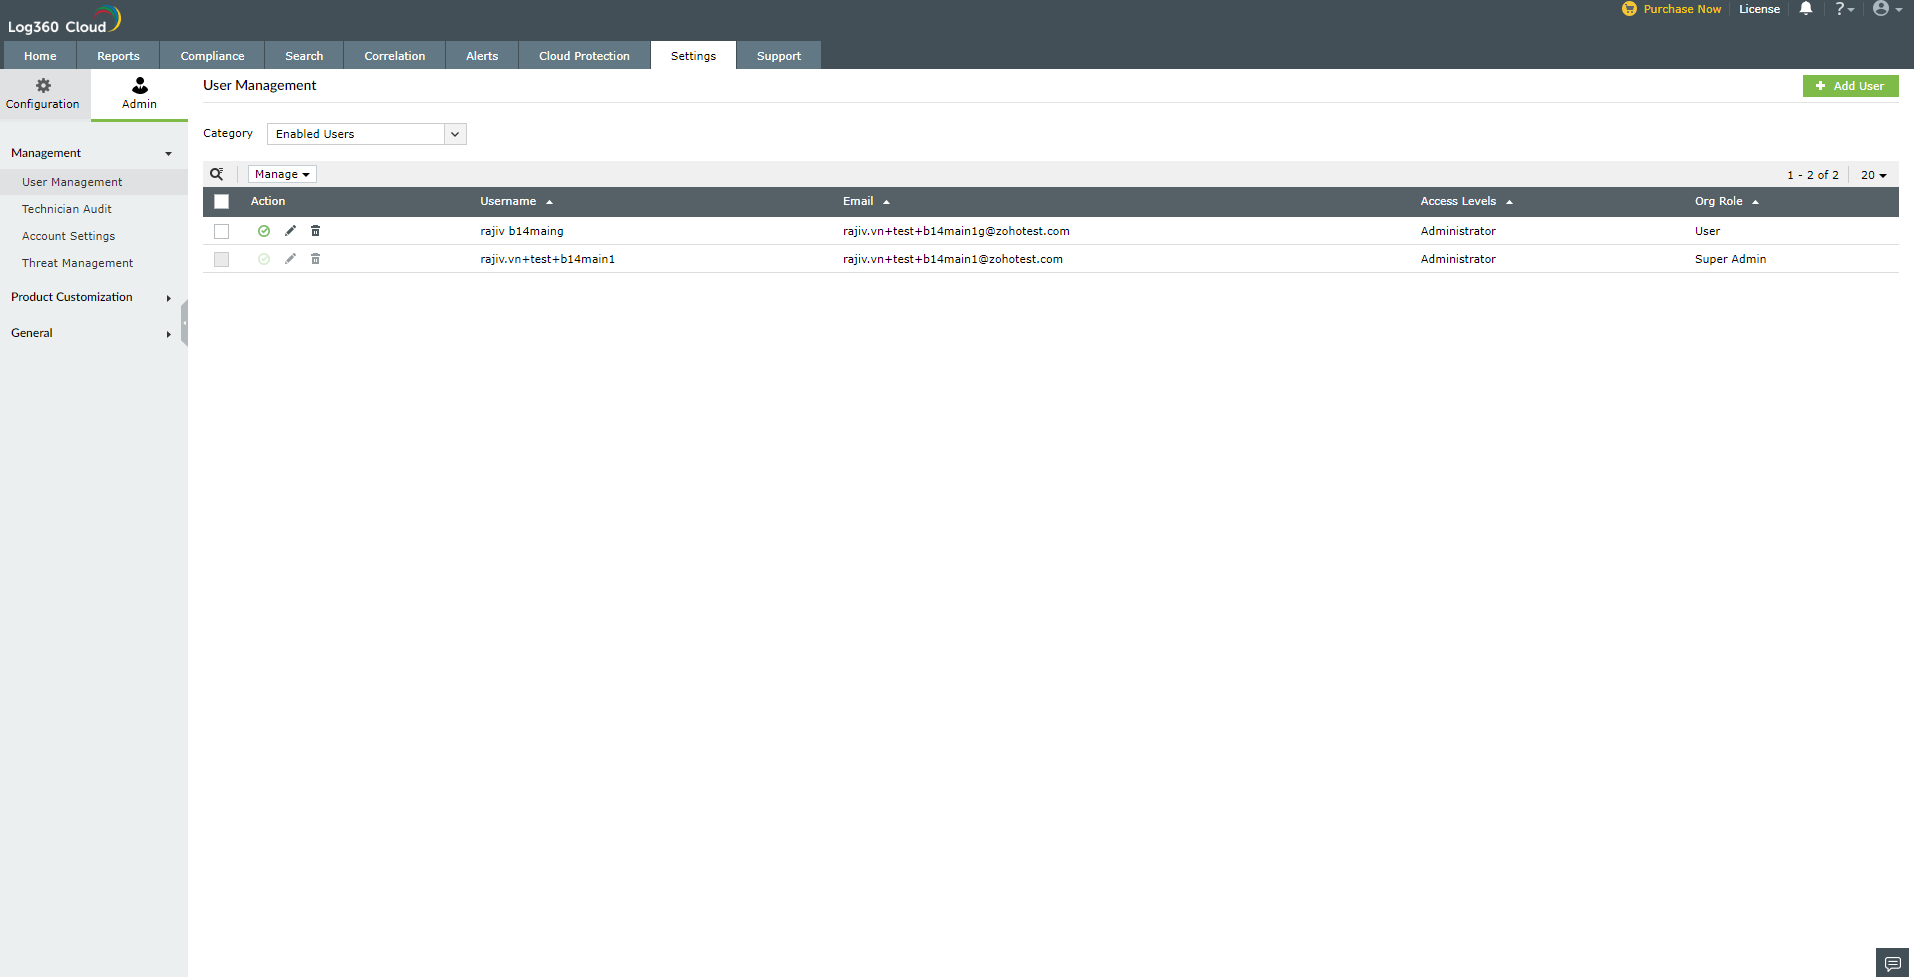
To view enabled users, go to Category located at the top-left corner in the User management page and select Enabled users from the drop-down list. All the enabled users will be displayed.
Disabling a user:
- Click
 located under the Action column for that particular user.
- A Confirm Action dialog box will be displayed, click yes.
The user will be disabled.
To disable multiple users in Log360 Cloud,
- Click on the checkbox for each user.
- Click on Manage located above the Action column and click on Disable User from the drop-down list.
The selected users will be disabled.
To disable all the users in Log360 Cloud,
- Click on the checkbox located below the search icon next to the Action column. All the users will be selected.
- Click on Manage located above the Action column and click on Disable User from the drop-down list.
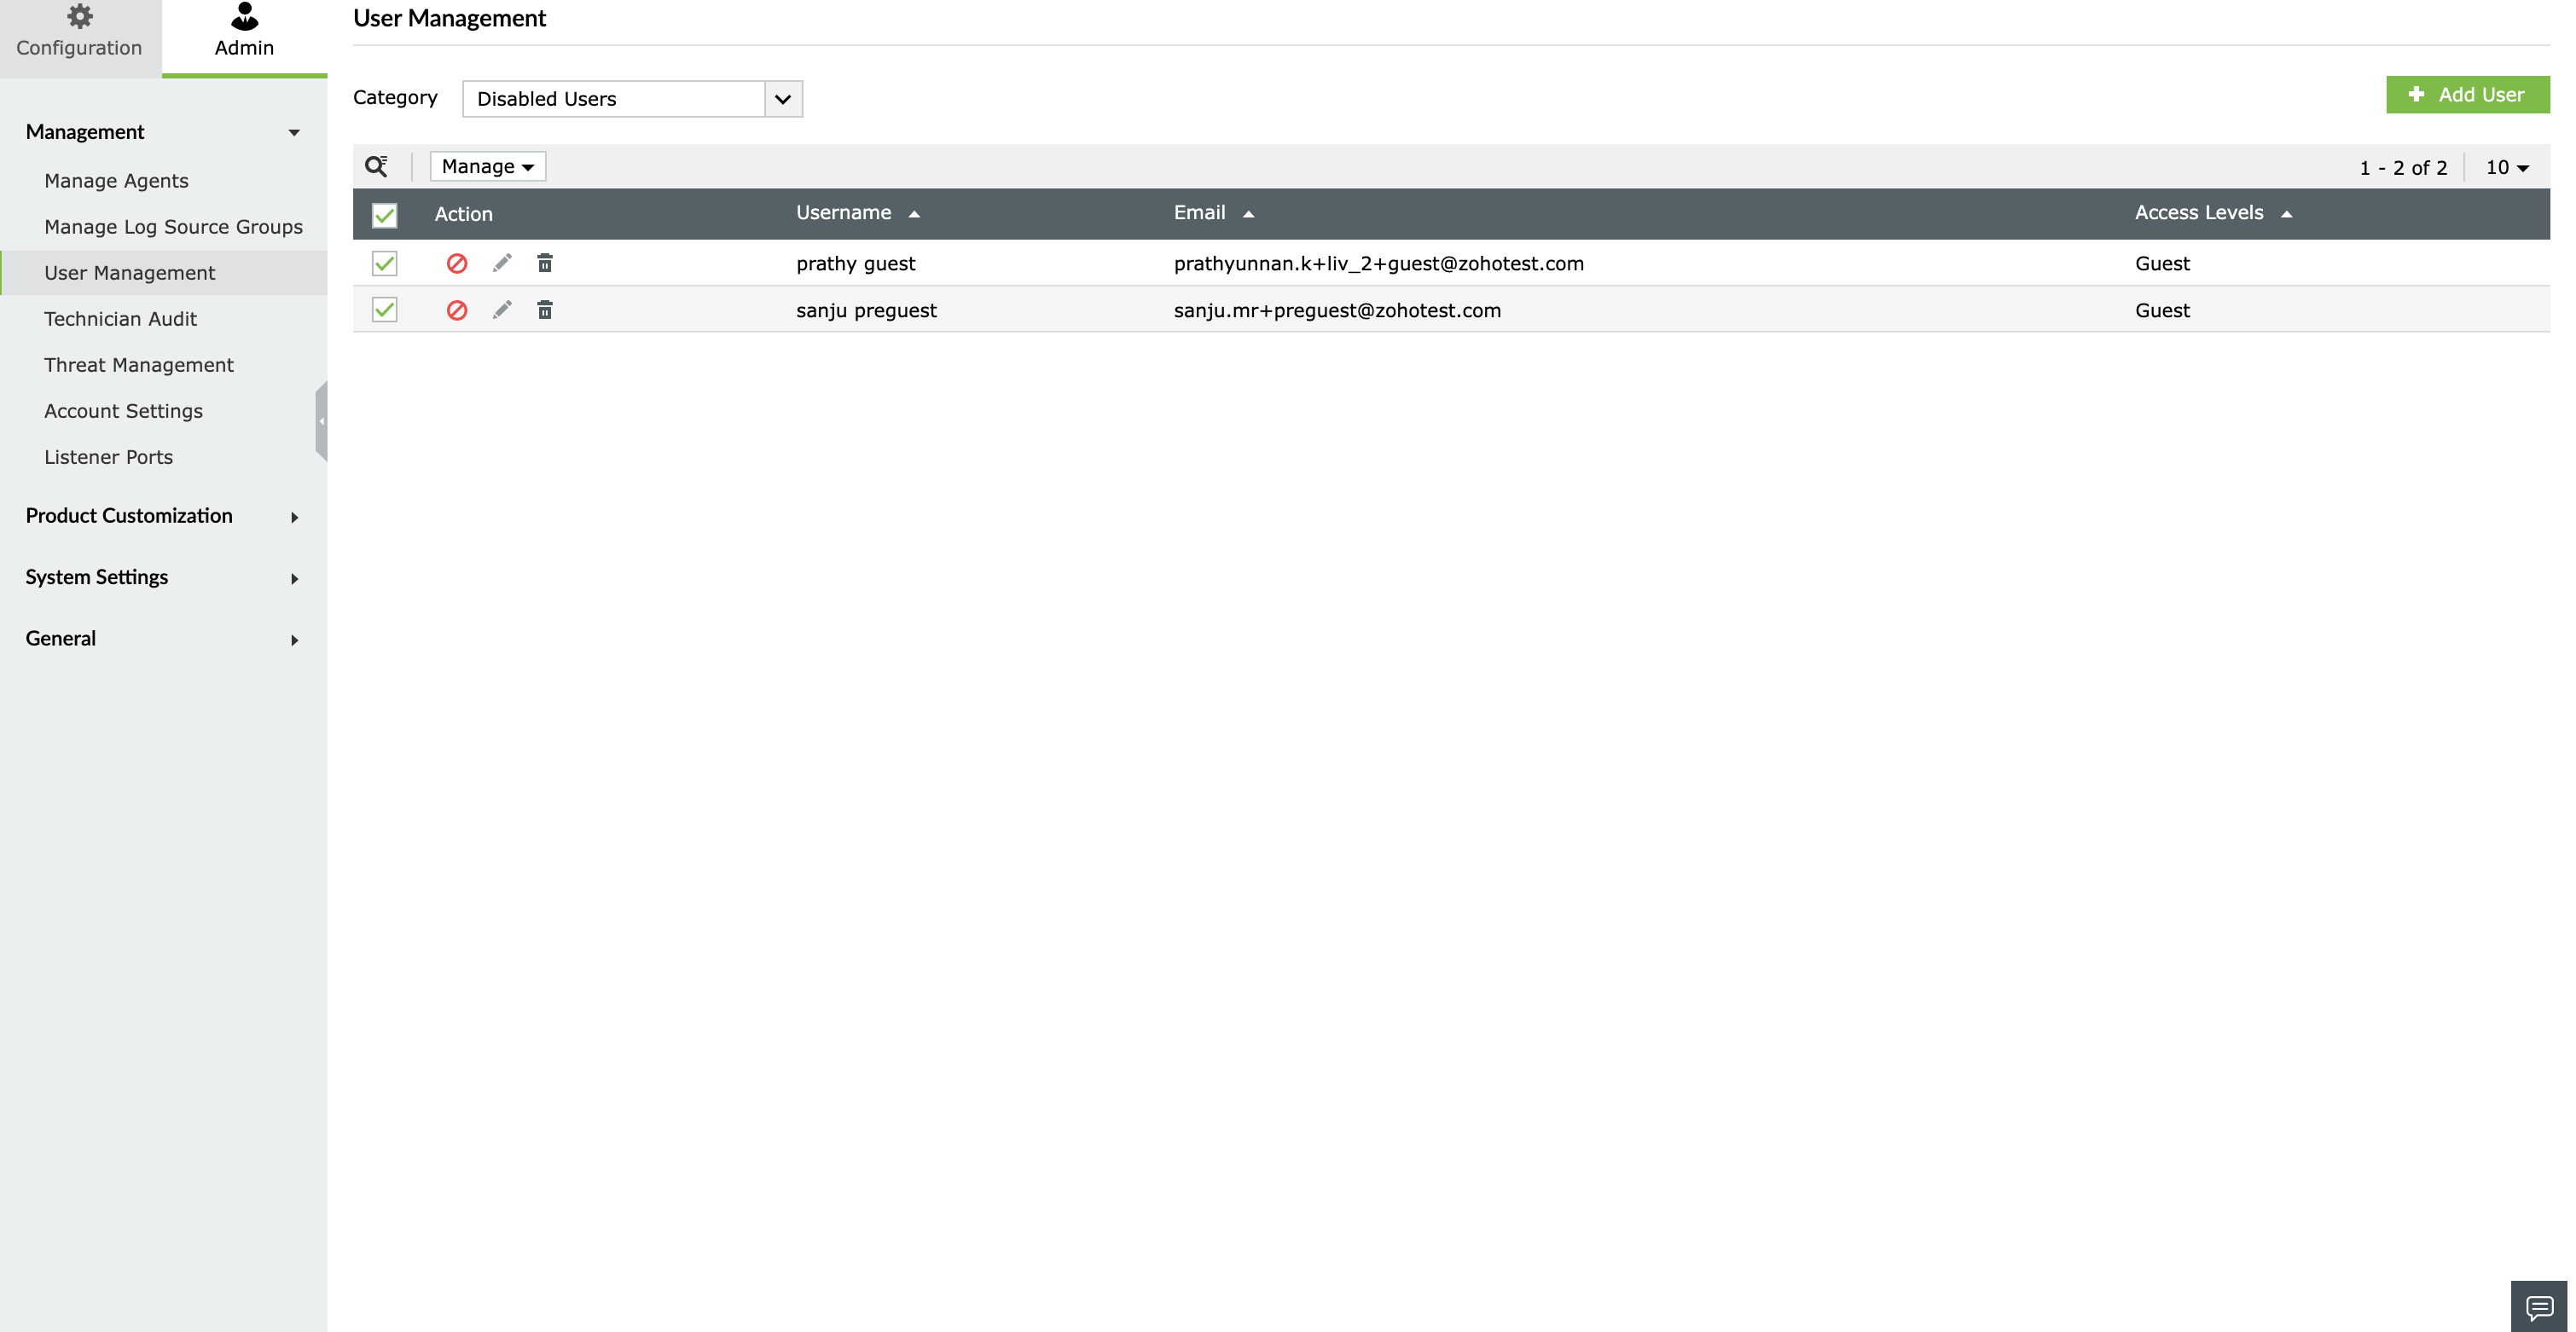
Viewing disabled users:
To view disabled users go to category located at the top-left corner in the User management page and select Disabled users from the drop-down list. All the disabled users will be displayed.
Enabling a user:
- Click
 located under the Action column for that particular user.
- A Confirm Action dialog box will be displayed, click yes.
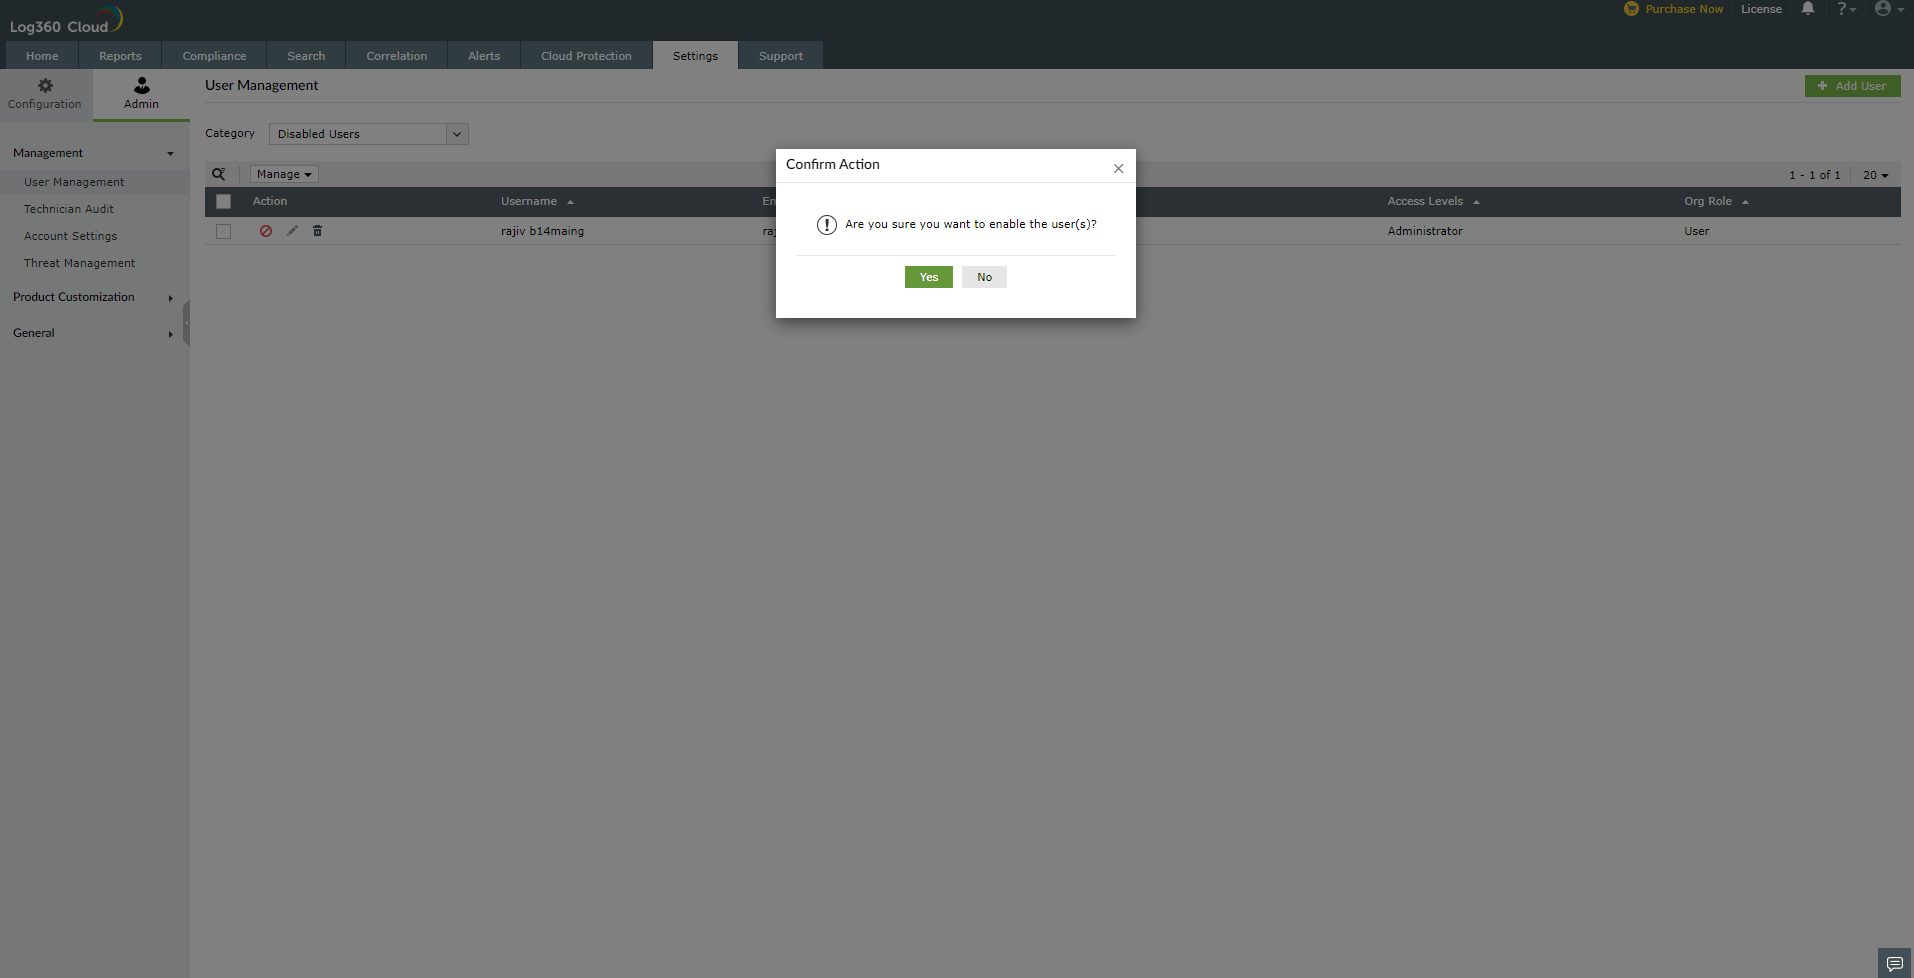
The user will be enabled.
To enable multiple users in Log360 Cloud,
- Click on the checkbox for each user.
- Click on Manage located above the Action column and click on Enable User from the drop-down list.
The selected users will be enabled.
To enable all the users in Log360 Cloud,
- Click on the checkbox located below the search icon next to the Action column. All the users will be selected.
- Click on Manage located above the Action column and click on Enable User from the drop-down list.
All the users will be enabled.
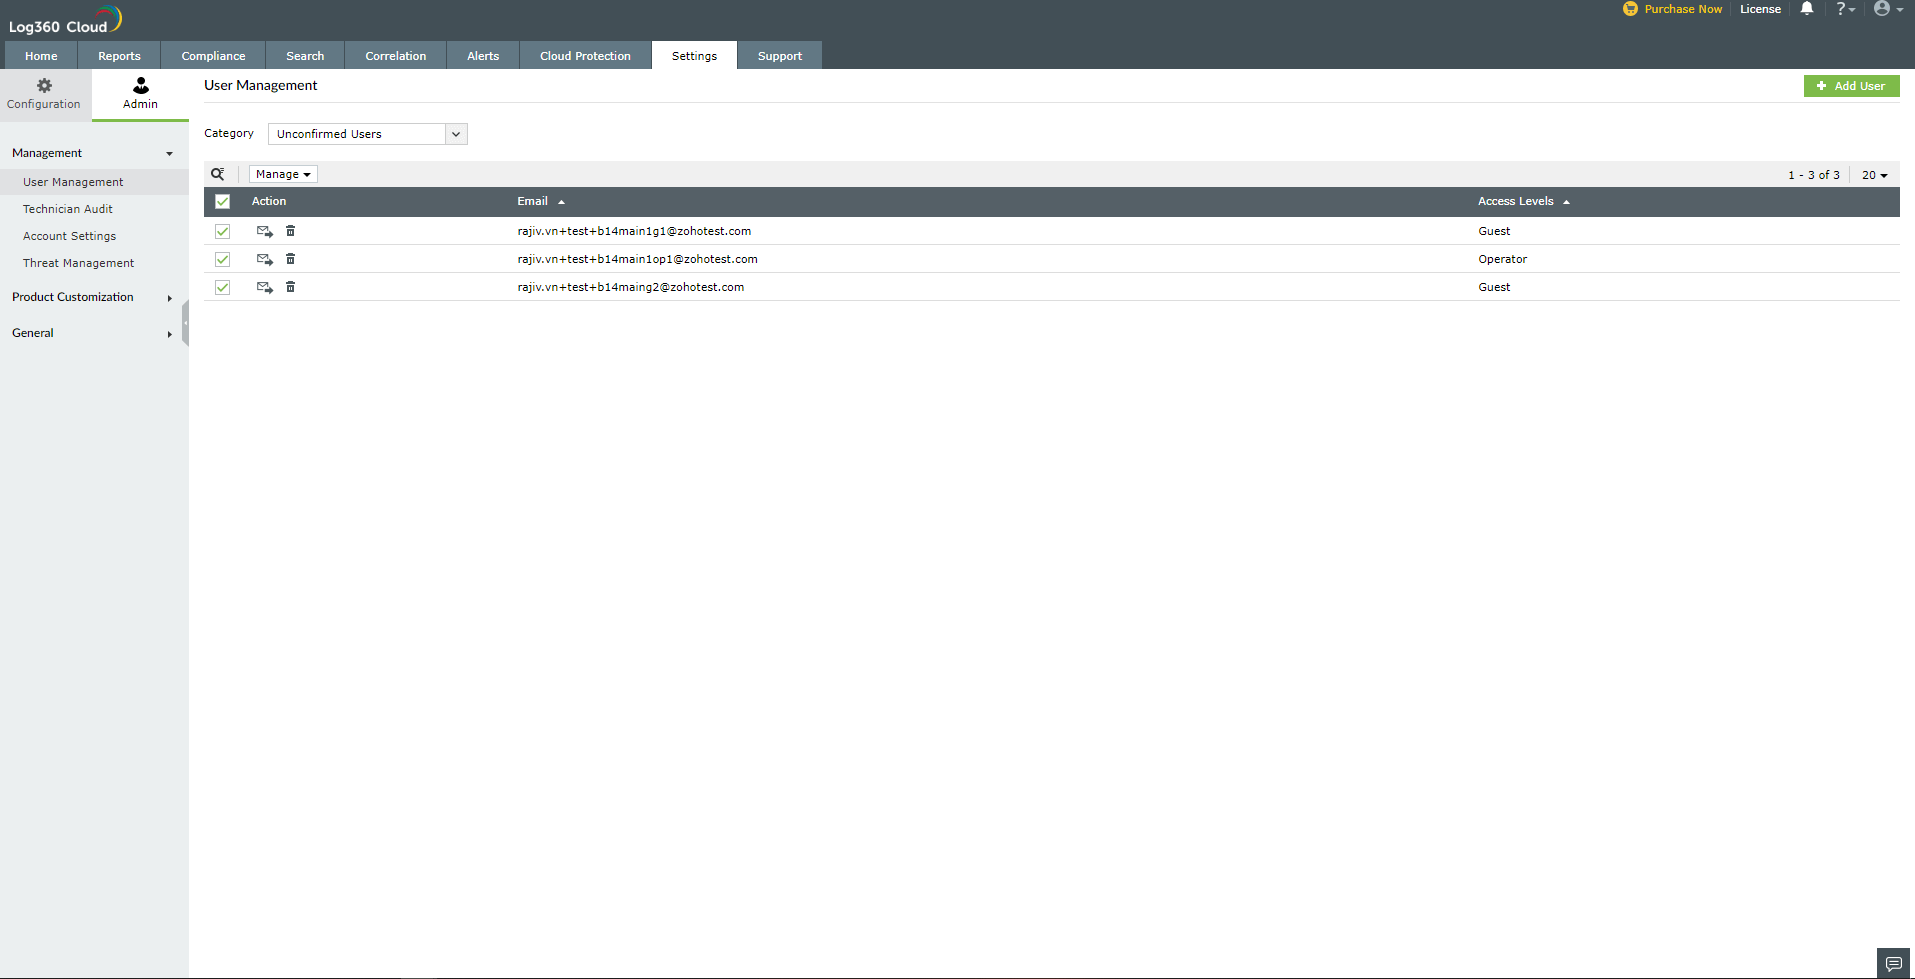
Re-inviting a user or deleting invitations
To re-invite or delete a user's invitation in Log360 Cloud, go to category located at the top-left corner in the User management page and select Unconfirmed users from the drop-down list. All the unconfirmed users will be displayed.
Re-invite a user:
- Click re-invite
 located under the Action column for that particular user.
- A Confirm Action dialog box will be displayed, click yes.
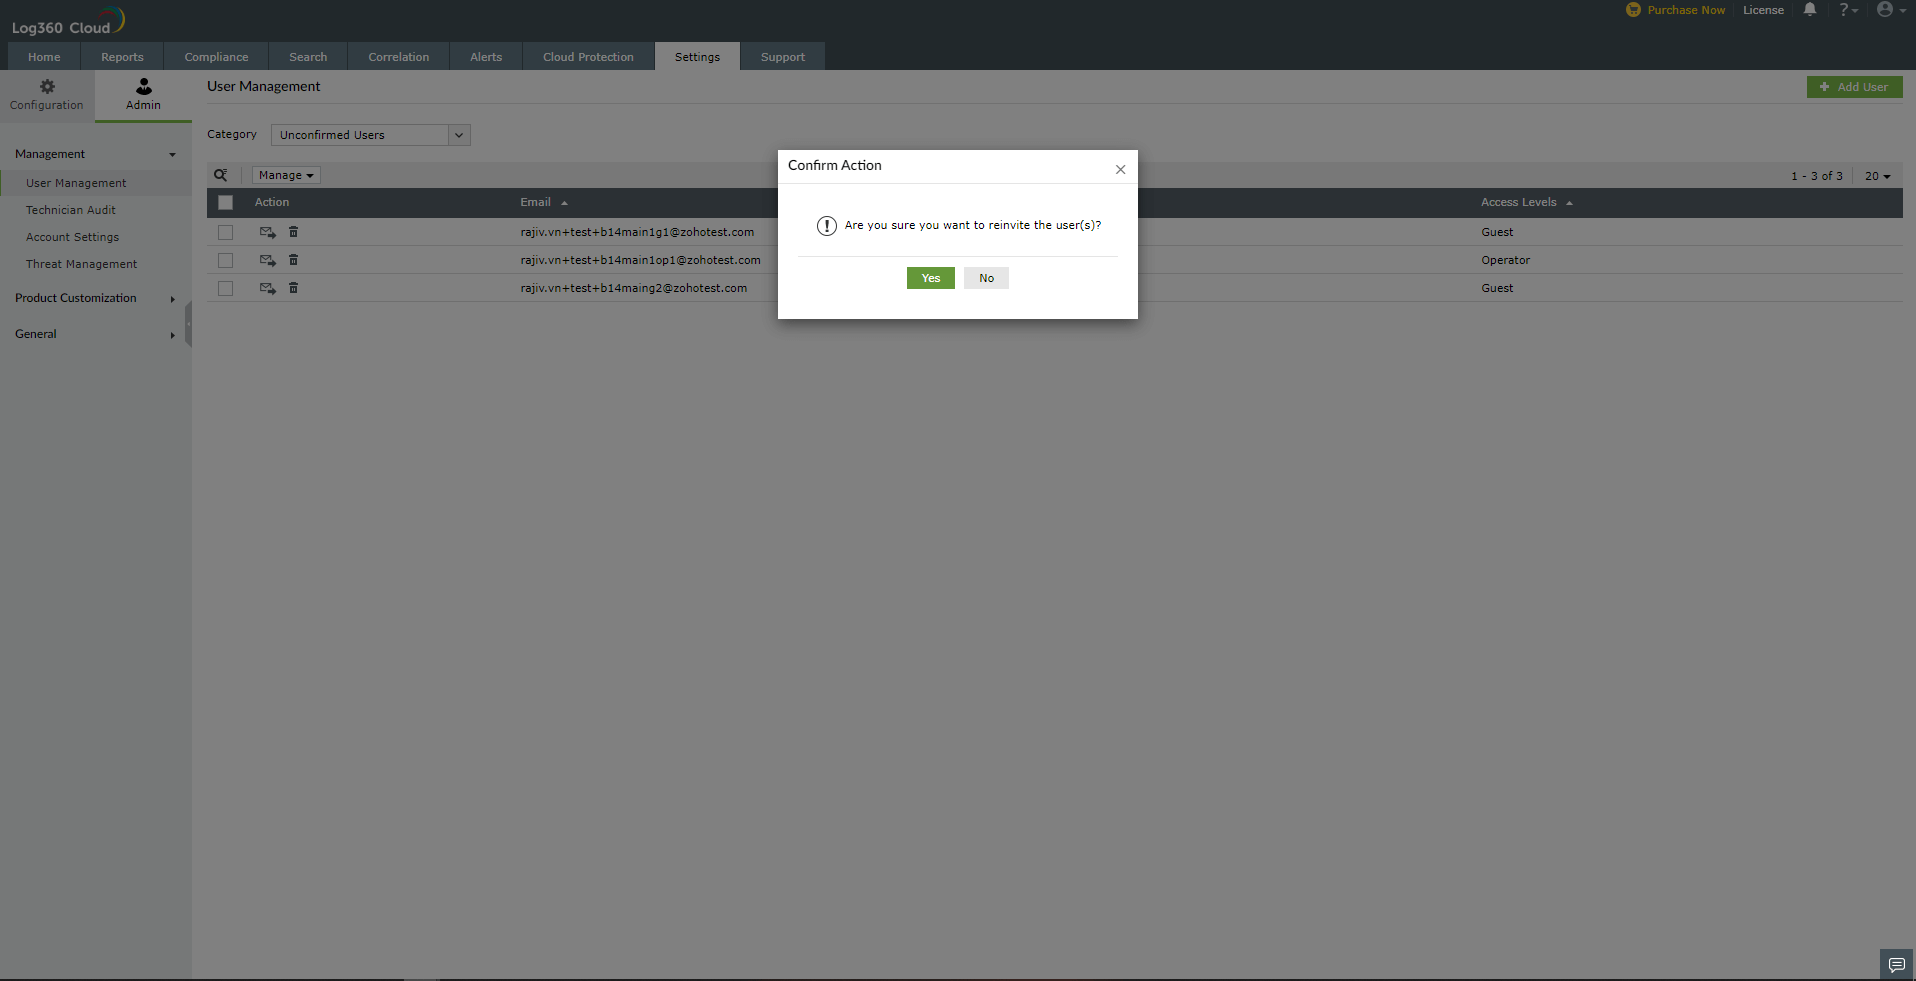
The user will be re-invited.
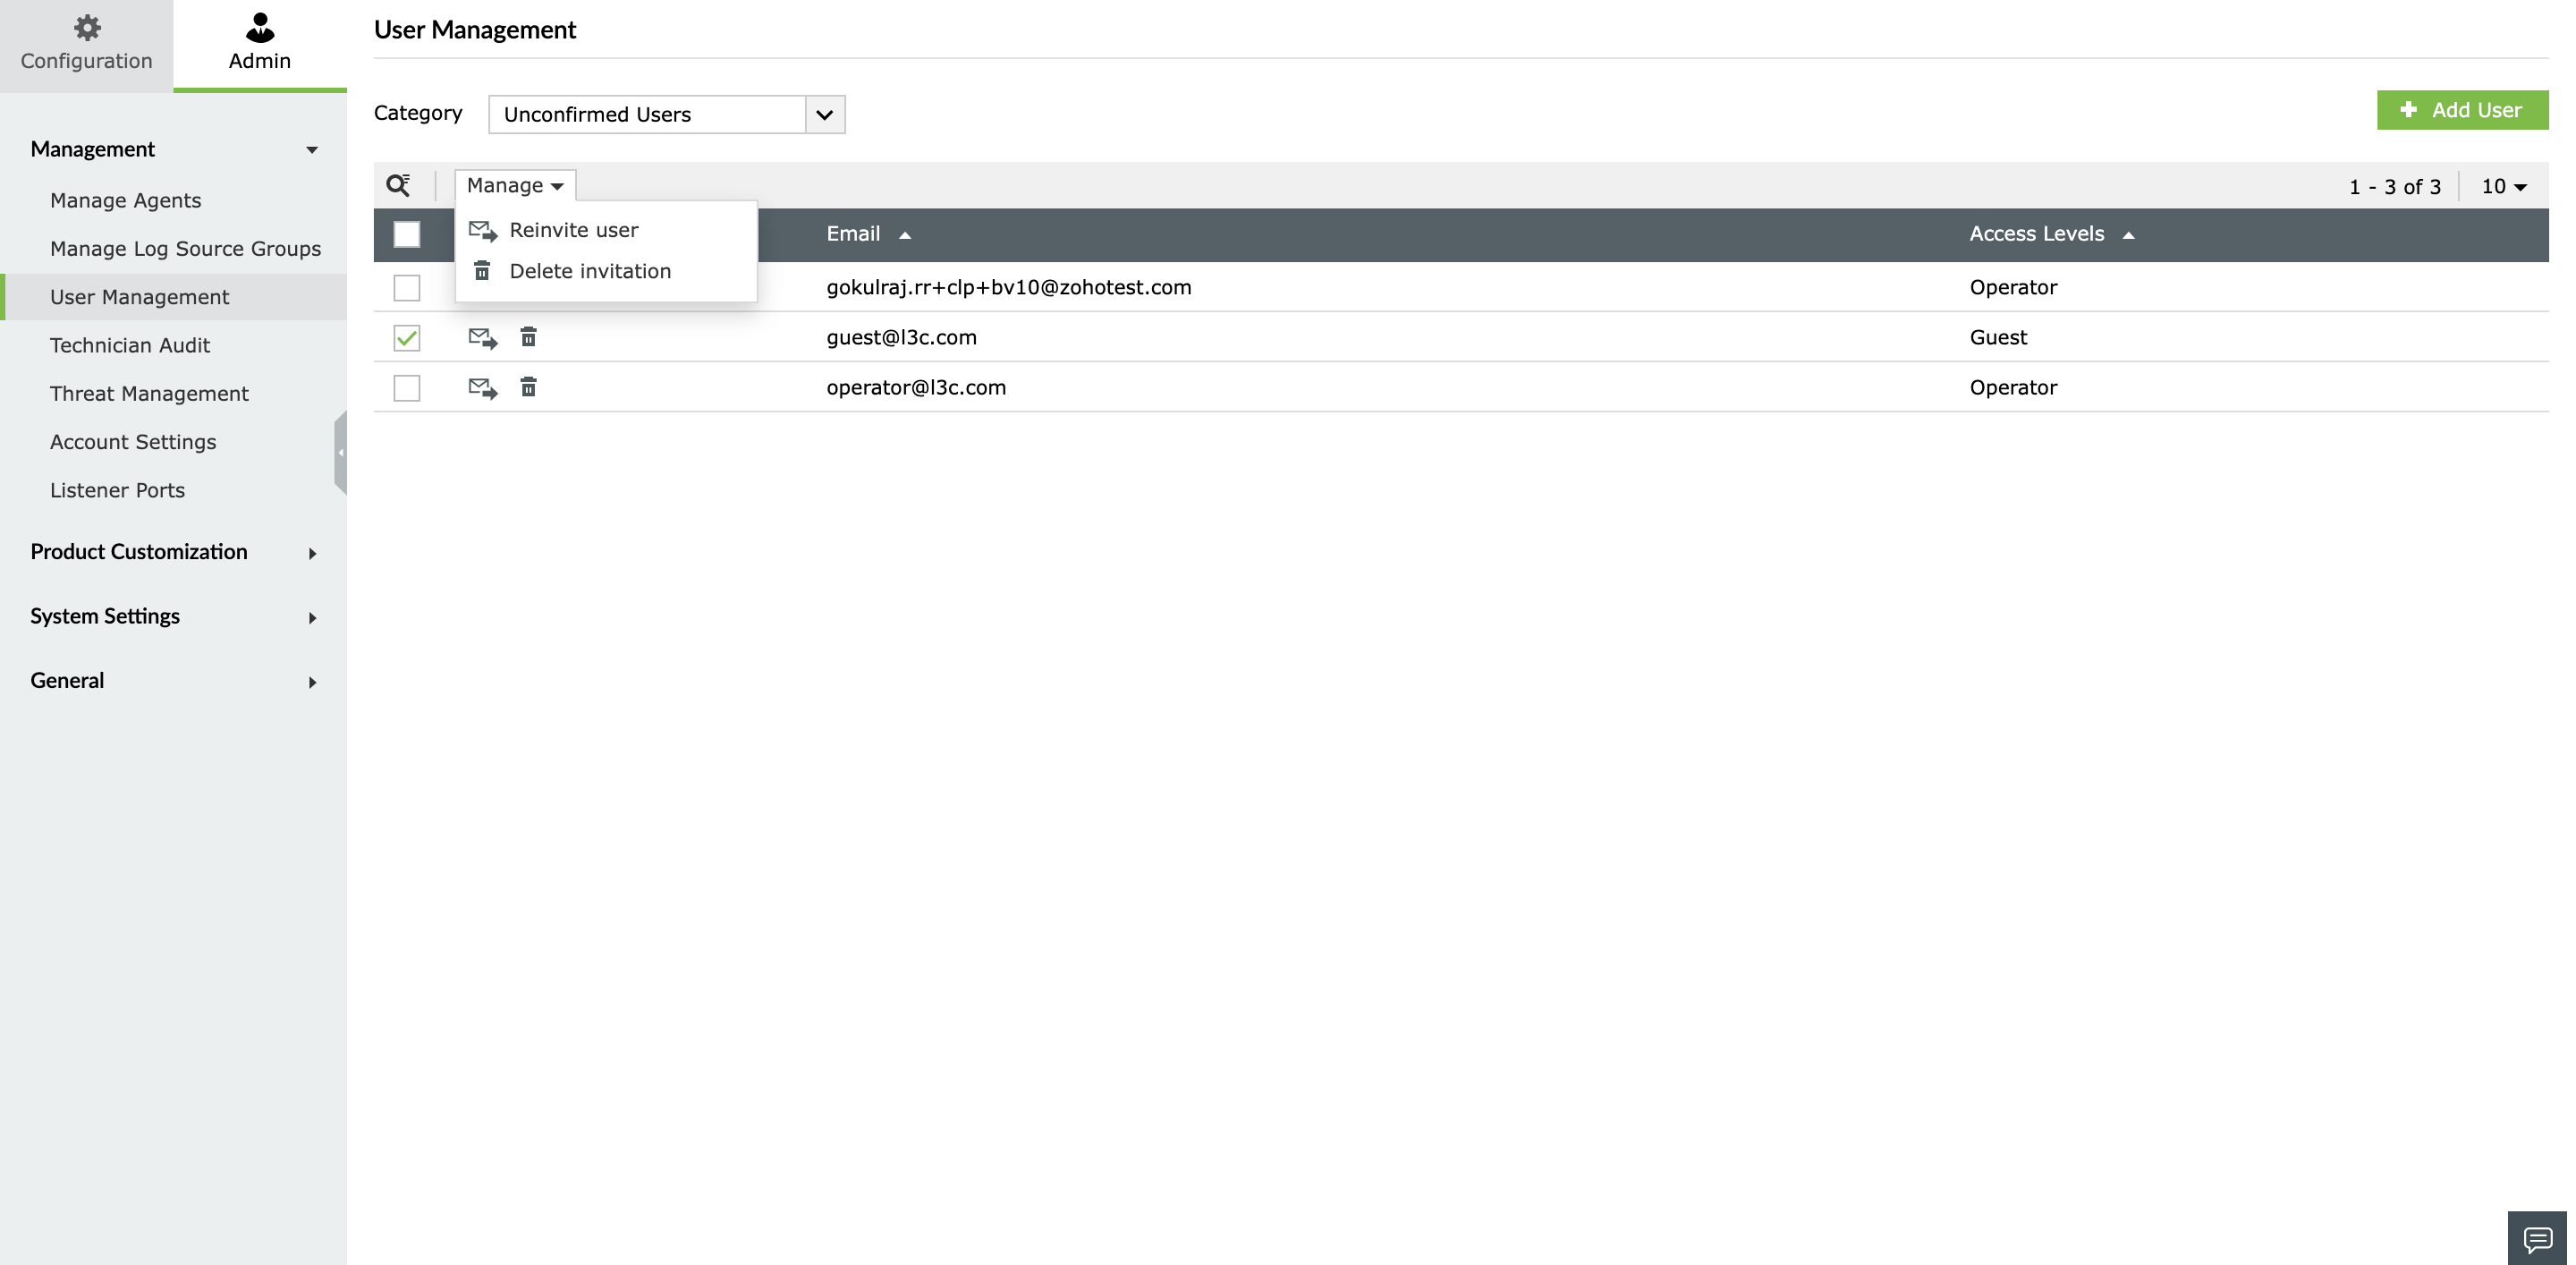
To re-invite multiple users in Log360 Cloud,
- Click on the checkbox for each user.
- Click on Manage located above the Action column and click on Re-invite User from the drop-down list.
The selected users will be re-invited.
To re-invite all the users in Log360 Cloud,
- Click on the checkbox located below the search icon next to the Action column. All the users will be selected.
- Click on Manage located above the Action column and click on Re-invite User from the drop-down list.
All the users will be re-invited.
Delete a user's invitation:
- Click delete icon located under the Action column for that particular user.
- A Confirm Action dialog box will be displayed, click yes.
The user's invitation will be deleted.
To delete invitations sent to multiple users in Log360 Cloud,
- Click on the checkbox for each user.
- Click on Manage located above the Action column and click on Delete Invitation from the drop-down list.

Invitations sent to the selected users will be deleted.
To delete invitations sent to all the users in Log360 Cloud,
- Click on the checkbox located below the search icon next to the Action column. All the users will be selected.
- Click on Manage located above the Action column and click on Delete Invitation from the drop-down list.
Invitations sent to all the users will be deleted.
Enabling and disabling a user invitation
Disabling a user:
- Click located under the Action column for that particular user invitation.

- A Confirm Action dialog box will be displayed, click yes.

The user invitation will be disabled.
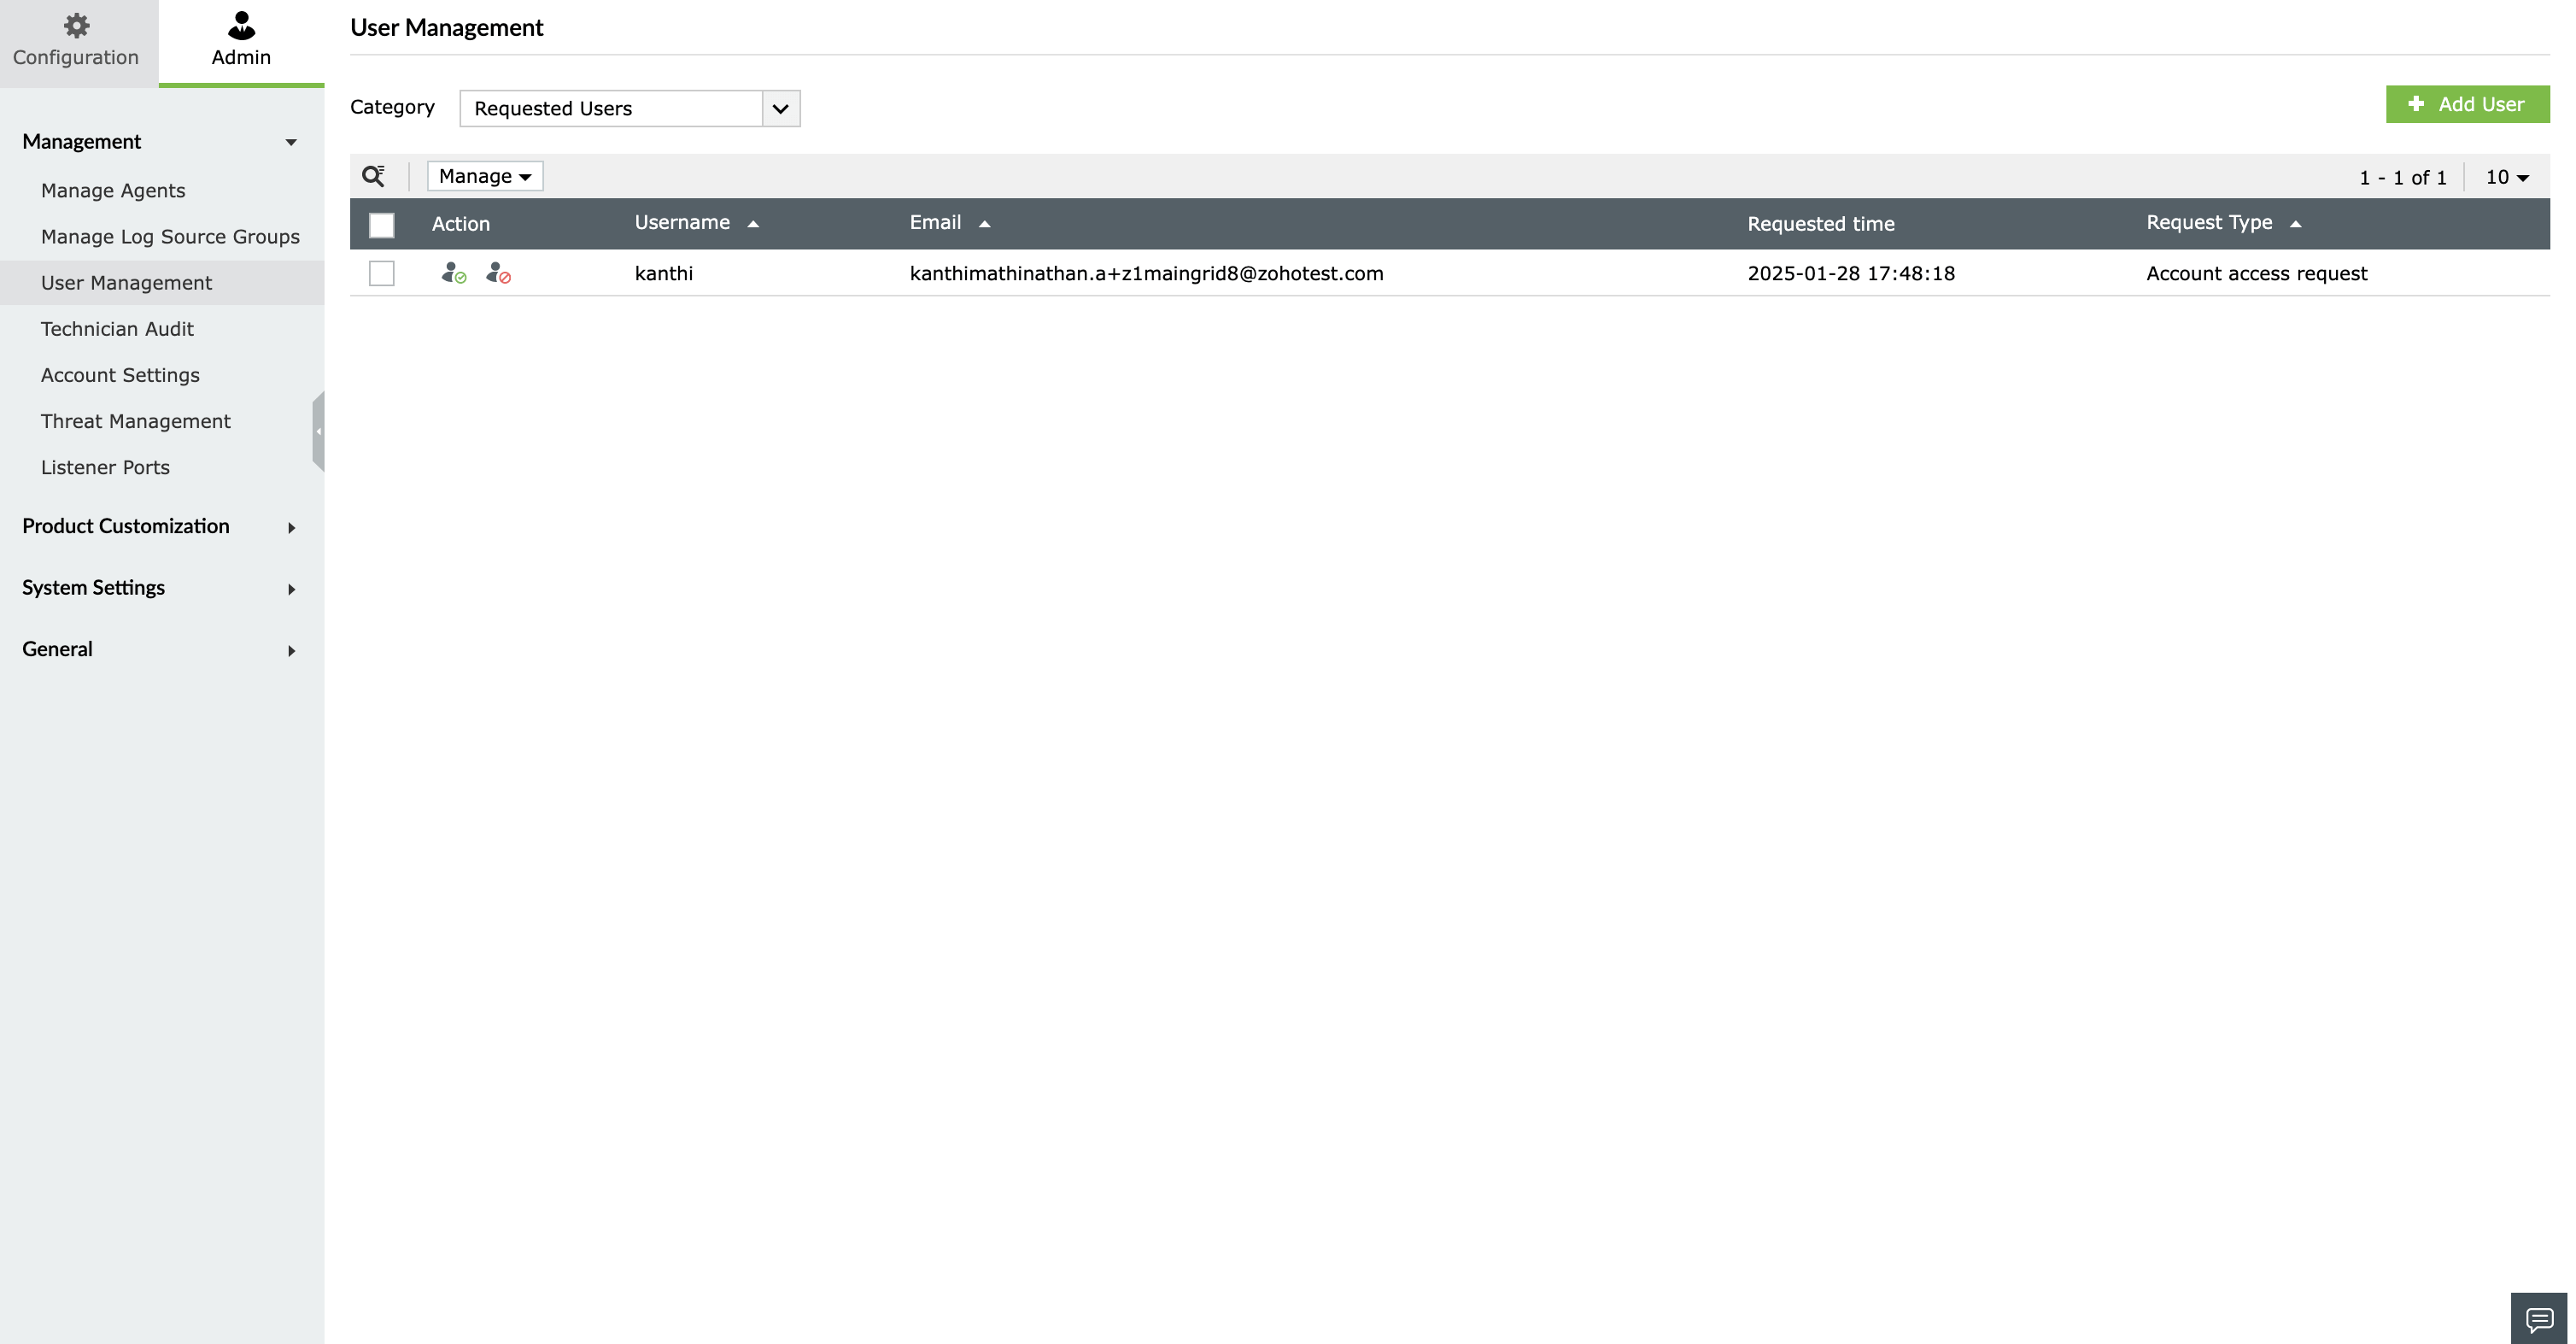
Accepting and rejecting user requests
To accept or delete a user's request in Log360 Cloud, go to category located at the top-left corner in the User management page and select Requested users from the drop-down list. All the requested users will be displayed.
Accept a user's request:
The user's request will be accepted and the user will be added.
Reject a user's request:
- Click the reject request icon
 located under the Action column for that particular user.
The user's request will be rejected.
To reject requests sent by multiple users in Log360 Cloud,
- Click on the checkbox for each user.
- Click on Manage located above the Action column and click on Reject request from the drop-down list.
Requests sent by the selected users will be rejected.
To reject requests sent by all the users in Log360 Cloud,
- Click on the checkbox located below the search icon next to the Action column. All the users will be selected.
- Click on Manage located above the Action column and click on Reject request from the drop-down list.
Requests sent by all the users will be rejected.