To protect machines with MFA and to let domain users reset passwords from their Windows, macOS, or Linux login screens, admins have to deploy the login agent on the users’ machines.
The different platforms supported by the login agent are listed below.
| Windows Servers | Windows Clients | macOS Clients | Linux Clients |
|---|---|---|---|
| Windows Server 2025 | Windows 11 | macOS 15 Sequoia | Red Hat Enterprise Linux 8.x-9.x * |
| Windows Server 2022 | Windows 10 | macOS 14 Sonoma | Rocky Linux 8.x-9.x * |
| Windows Server 2019 | Windows 8.1 | macOS 13 Ventura | Ubuntu-16.x-20.04.4 |
| Windows Server 2016 | Windows 8 | macOS 12 Monterey | Fedora - 27.x-31.x |
| Windows Server 2012 R2 | Windows 7 | macOS 11 Big Sur | CentOS - 7.X |
| Windows Server 2012 | Windows Vista | macOS 10.15 Catalina | |
| Windows Server 2008 R2 | macOS 10.14 Mojave | ||
| Windows Server 2008 | macOS 10.13 High Sierra | ||
| macOS 10.12 Sierra | |||
| OS X 10.11 El Capitan | |||
| OS X 10.10 Yosemite |
* Machines running Red Hat Enterprise Linux and Rocky Linux can be secured with machine login MFA. Self-service password resets and unlocks from the login screen are currently not supported for these platforms.
Note:
HTTPS needs to be enabled in the Access URL to install the login agent on remote machines. Learn how to enable HTTPS in ADSelfService Plus.
While the ADSelfService Plus login agent has been officially tested to be compliant with the three Linux distributions mentioned, it may support other Linux distributions as well. Please contact the support team (support@adselfserviceplus.com) to check if the Linux distribution used in your organization is supported.
The login agent can be deployed on users' machines in one of the following ways:
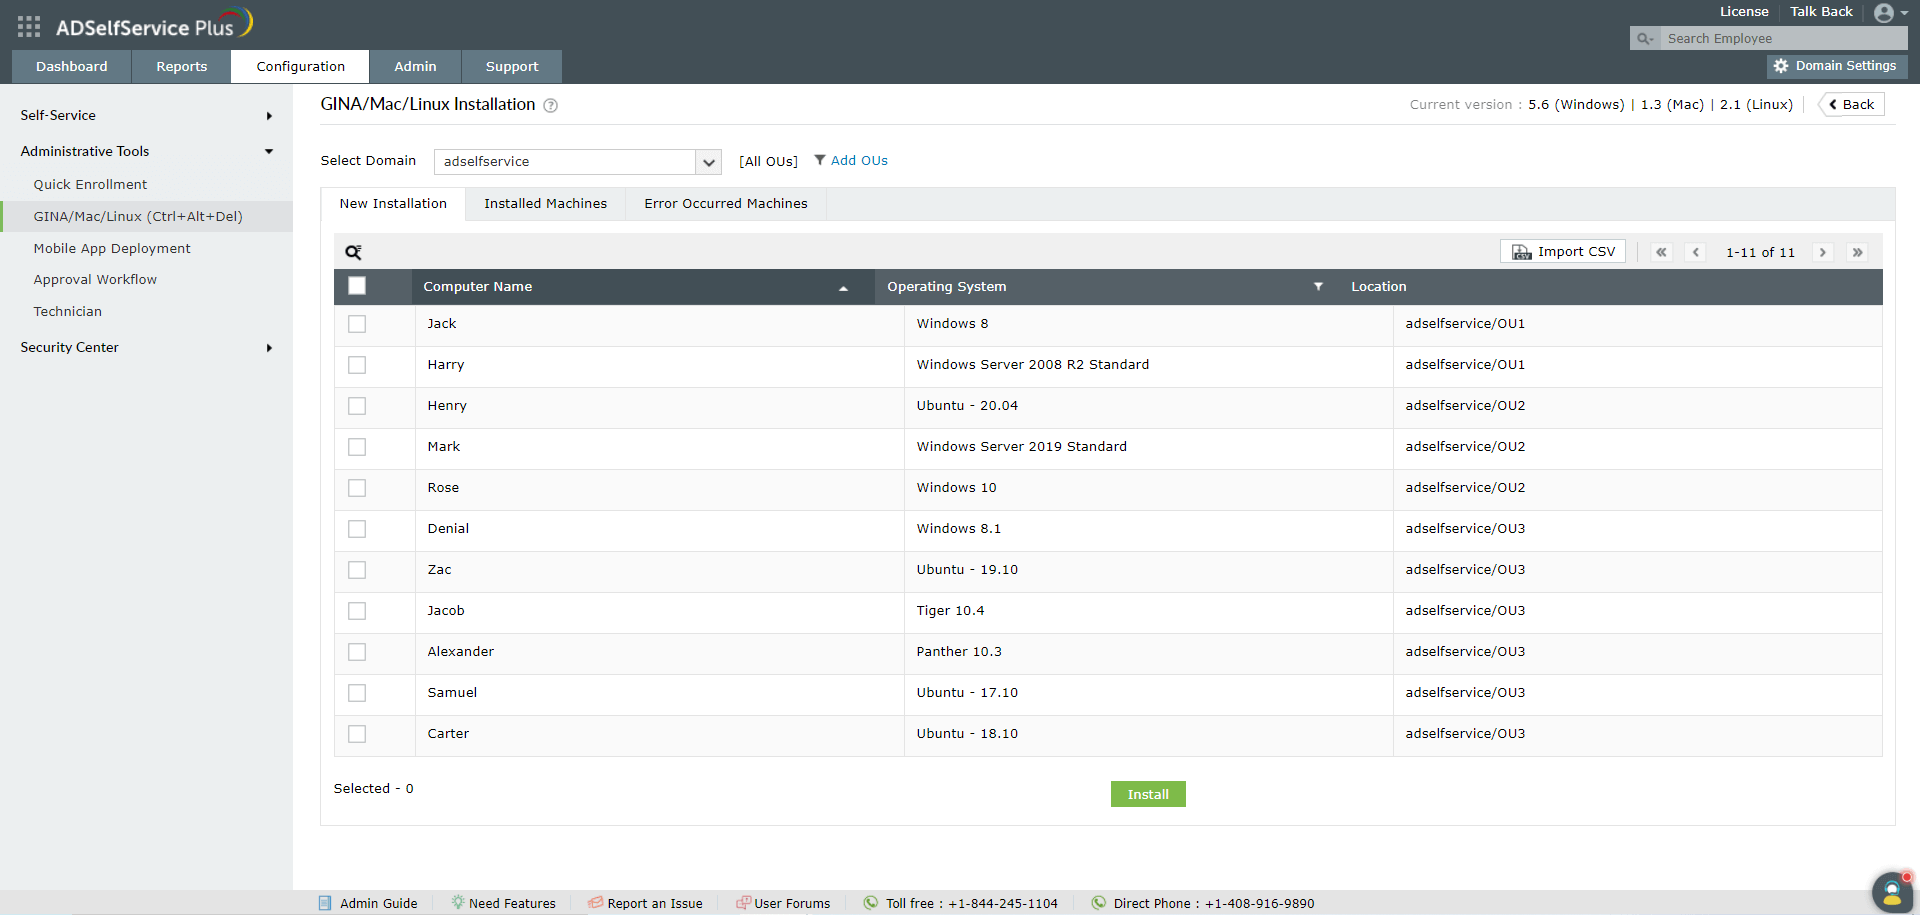
The ADSelfService Plus admin portal is a simple and effective way to install the login agent on domain-joined Windows, macOS and Linux machines.
Note: The login agent cannot be installed on Windows workgroup machines from the admin console.

Note: ADSelfService Plus now supports three different methods of Windows login agent installation to enhance the success rate. The three methods are:
When Remcom fails, PAExec is tried, and if that fails, WMI is implemented.
Click here for detailed information on installing and customizing the Login Agent through the ADSelfService Plus Admin Portal.
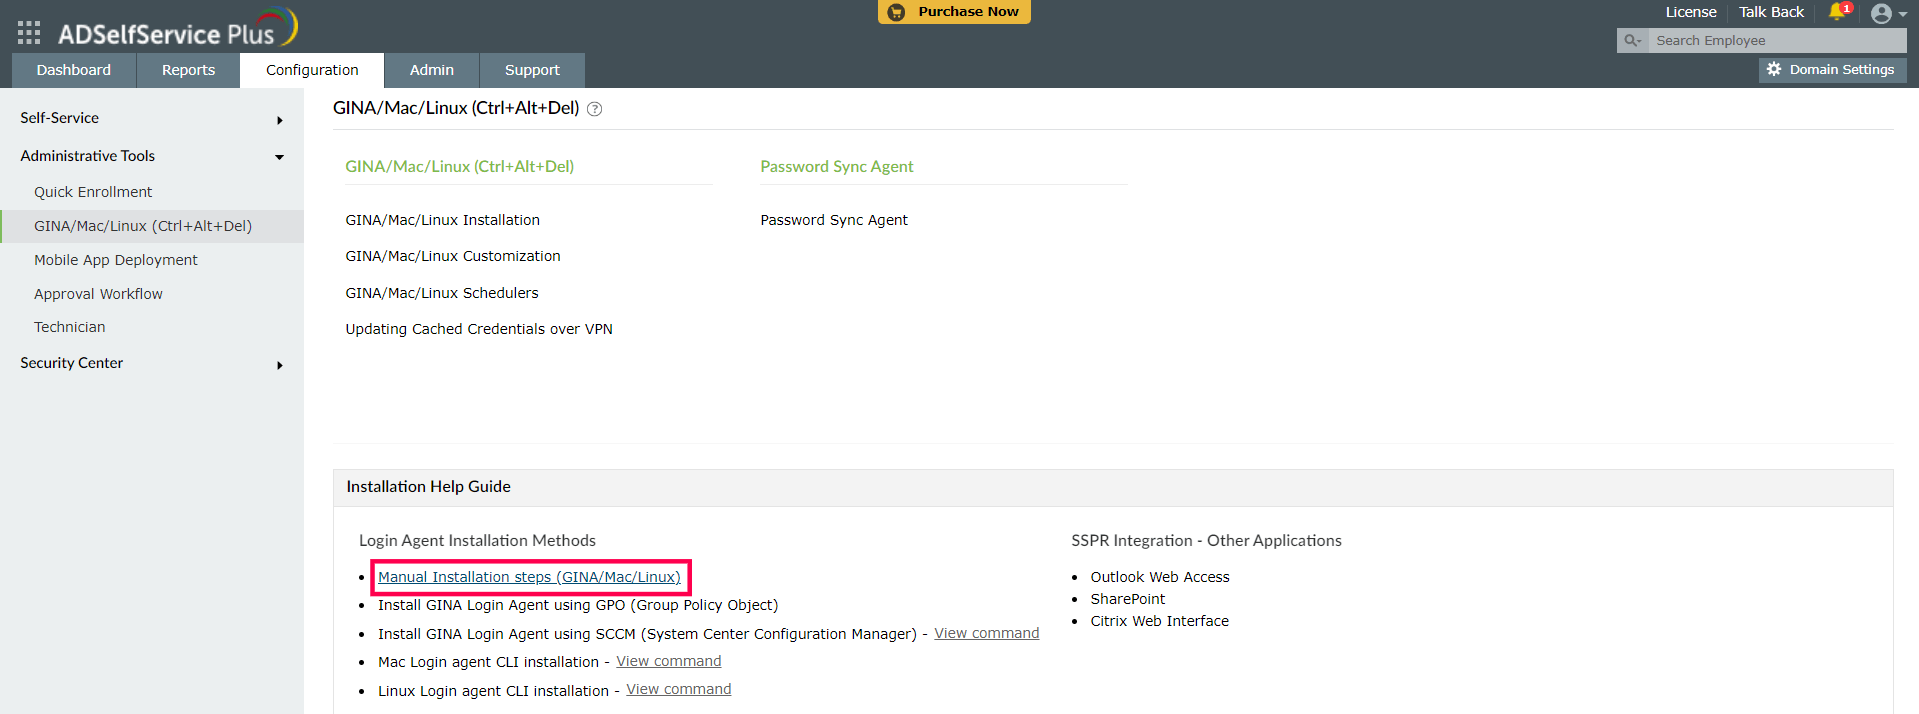
Manual agent installation on Windows/macOS/Linux clients using the installer package


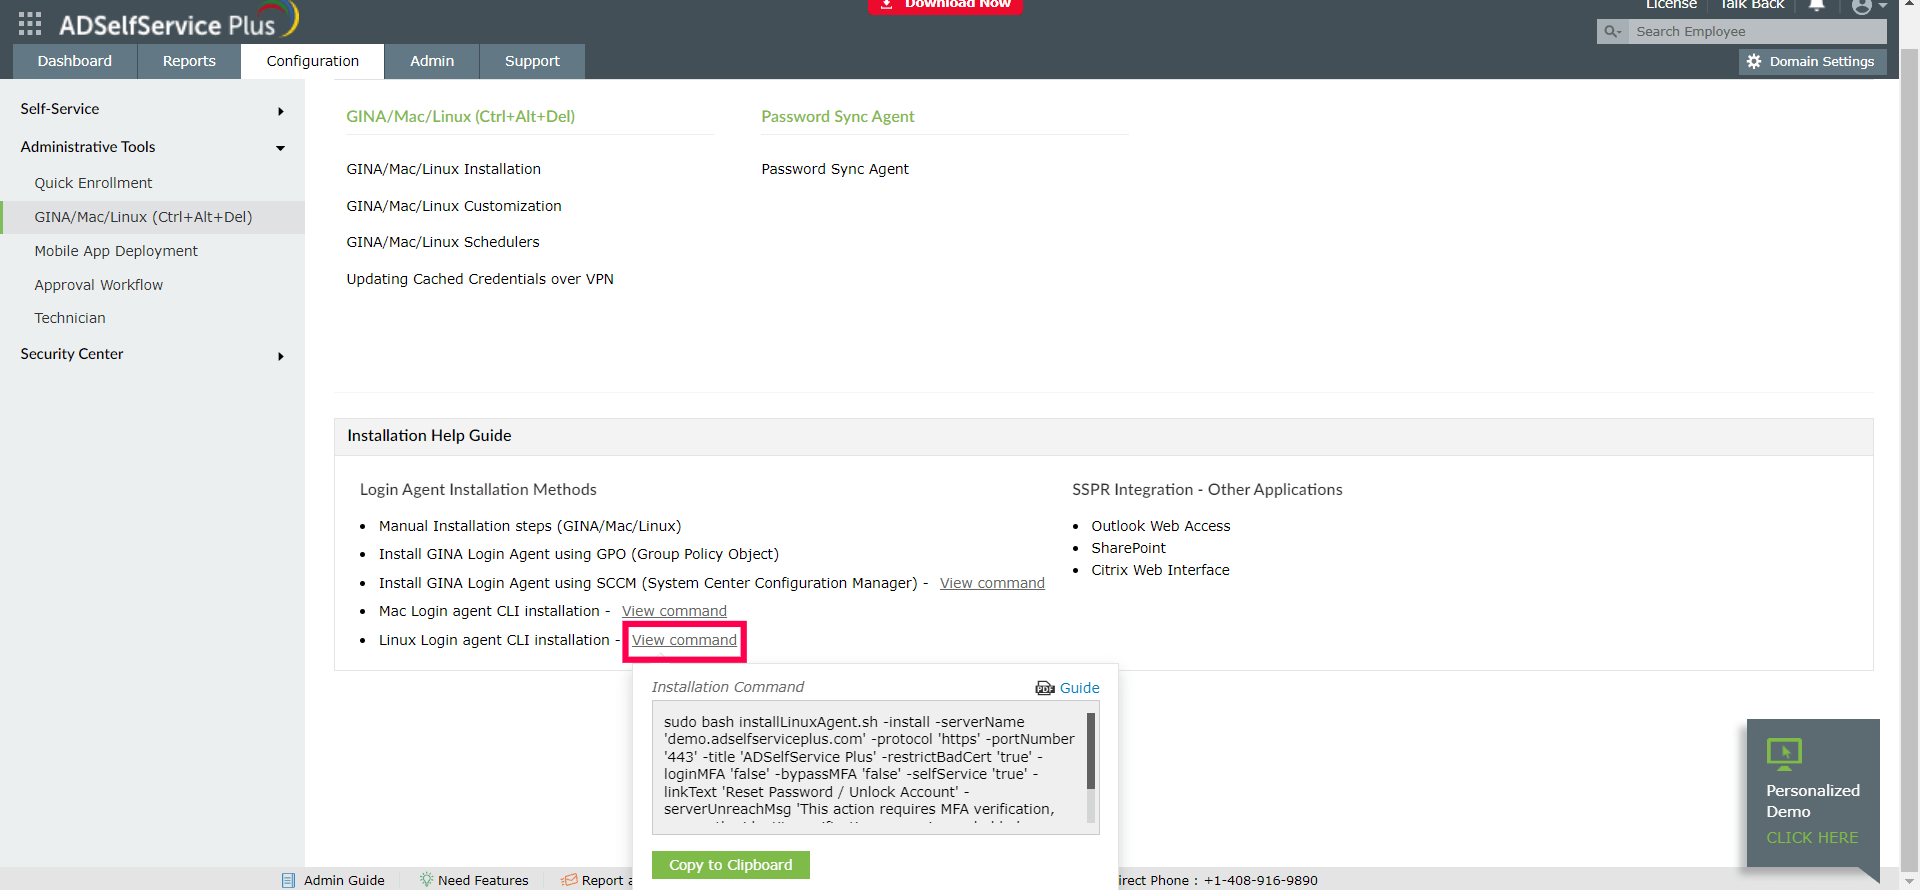
To install the Login Agent on Windows, macOS, and Linux machines, follow the steps given under the respective tabs.
a. Login agent CLI installation on workgroup and domain-joined Windows machines
When the login agent is installed manually using the MSI package on computers running Windows Vista and later operating systems with User Account Control (UAC) enabled, it may not function properly. In such cases, you can install the Windows login agent manually through the Command Prompt, as shown here.
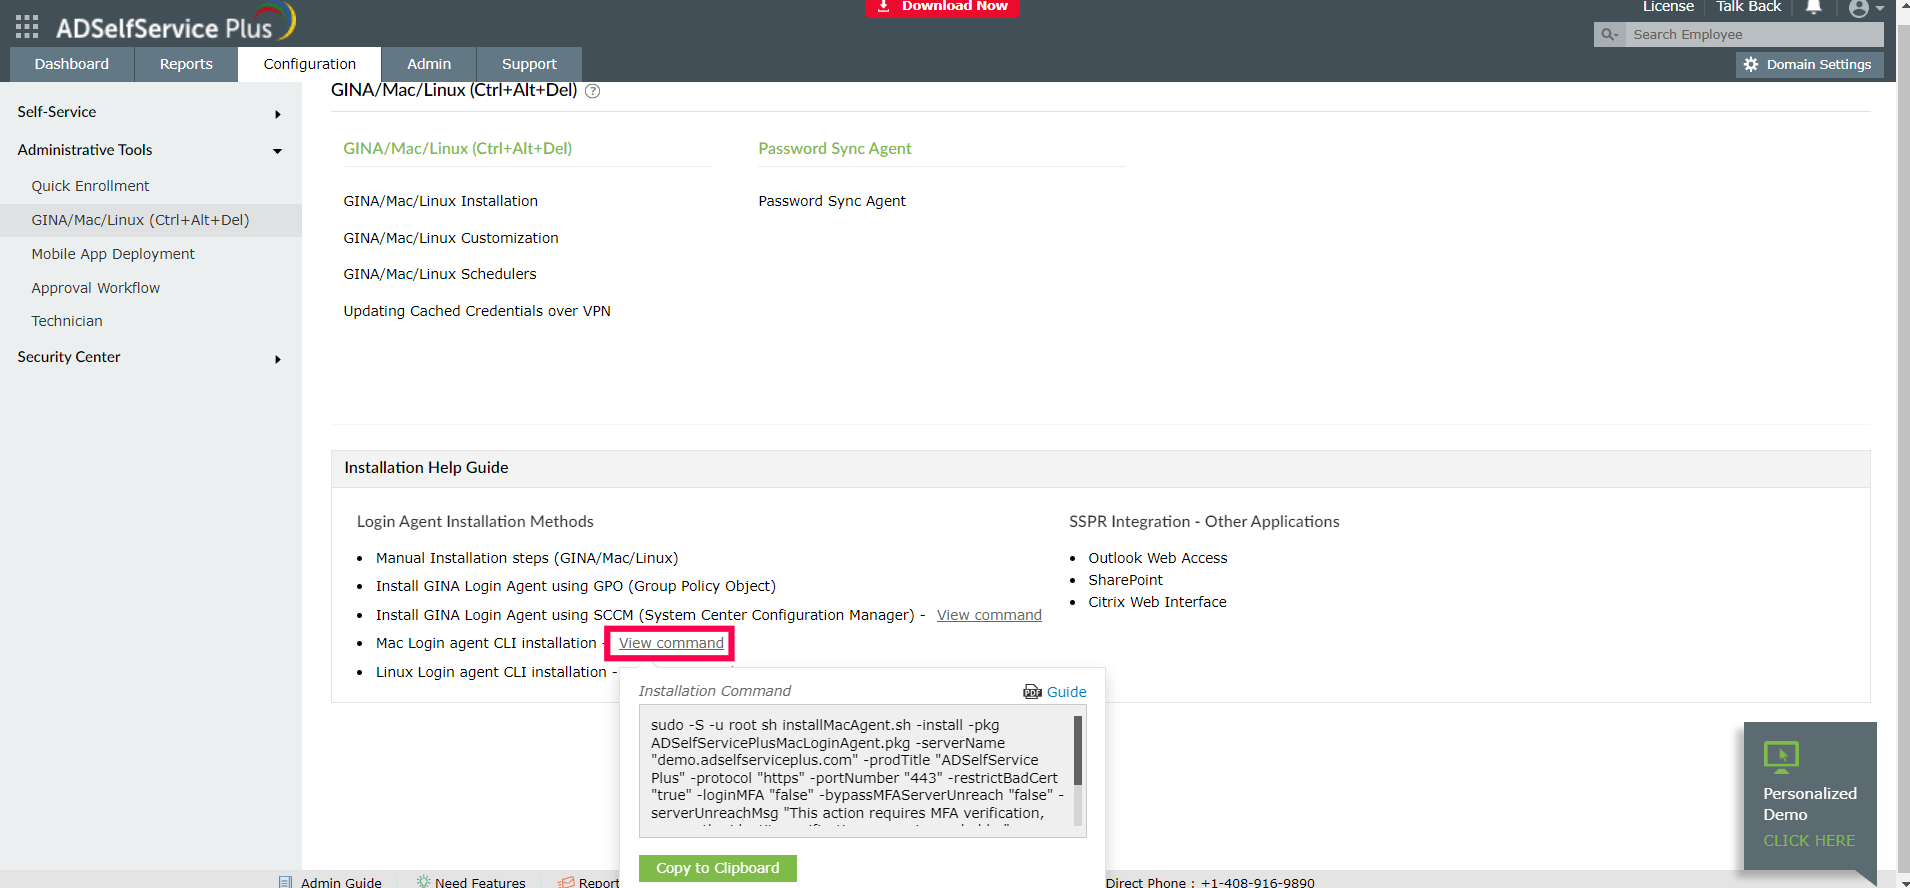
b. Login agent CLI installation on domain-joined macOS machines

Note: Use the macOS CLI command when you are silently installing the Login Agent via the terminal or via any 3rd party endpoint management tools like Endpoint Central.

Follow the steps in this login agent installation guide to install the Windows login agent on domain-joined Windows machines, using GPO.
Follow the steps in this login agent installation guide to install the Windows login agent on domain-joined Windows machines using Microsoft Configuration Manager.
Follow the steps in this Login Agent installation guide to install the login agent on domain-joined Windows, macOS, and Linux machines using Endpoint Central.
Note: The installation of the login agent via GPO and SCCM deployment methods is only applicable on domain-joined Windows machines.
You can find the steps to uninstall or update the login agent on Windows, macOS, and Linux machines, in this guide.
Your request has been submitted to the ADSelfService Plus technical support team. Our technical support people will assist you at the earliest.
Copyright © 2025, ZOHO Corp. All Rights Reserved.