Configuring a non-admin user account for WMI
1. Steps for Windows 2003 R2 SP2 Server & above versions
You can configure a regular Windows user to access WMI information by adding the regular user account to the Distributed COM Users and the Performance Monitor Users group using lusrmgr.msc, and then configuring the DCOM security settings to allow the groups to access the system remotely (using dcomcnfg).
Note: These configurations are required to be performed in the User profiles of the client devices that are to be monitored.
Configuring Distributed COM Users in Local user and Groups Setting:
To begin with, we are adding the DCOM user group in our local user settings.
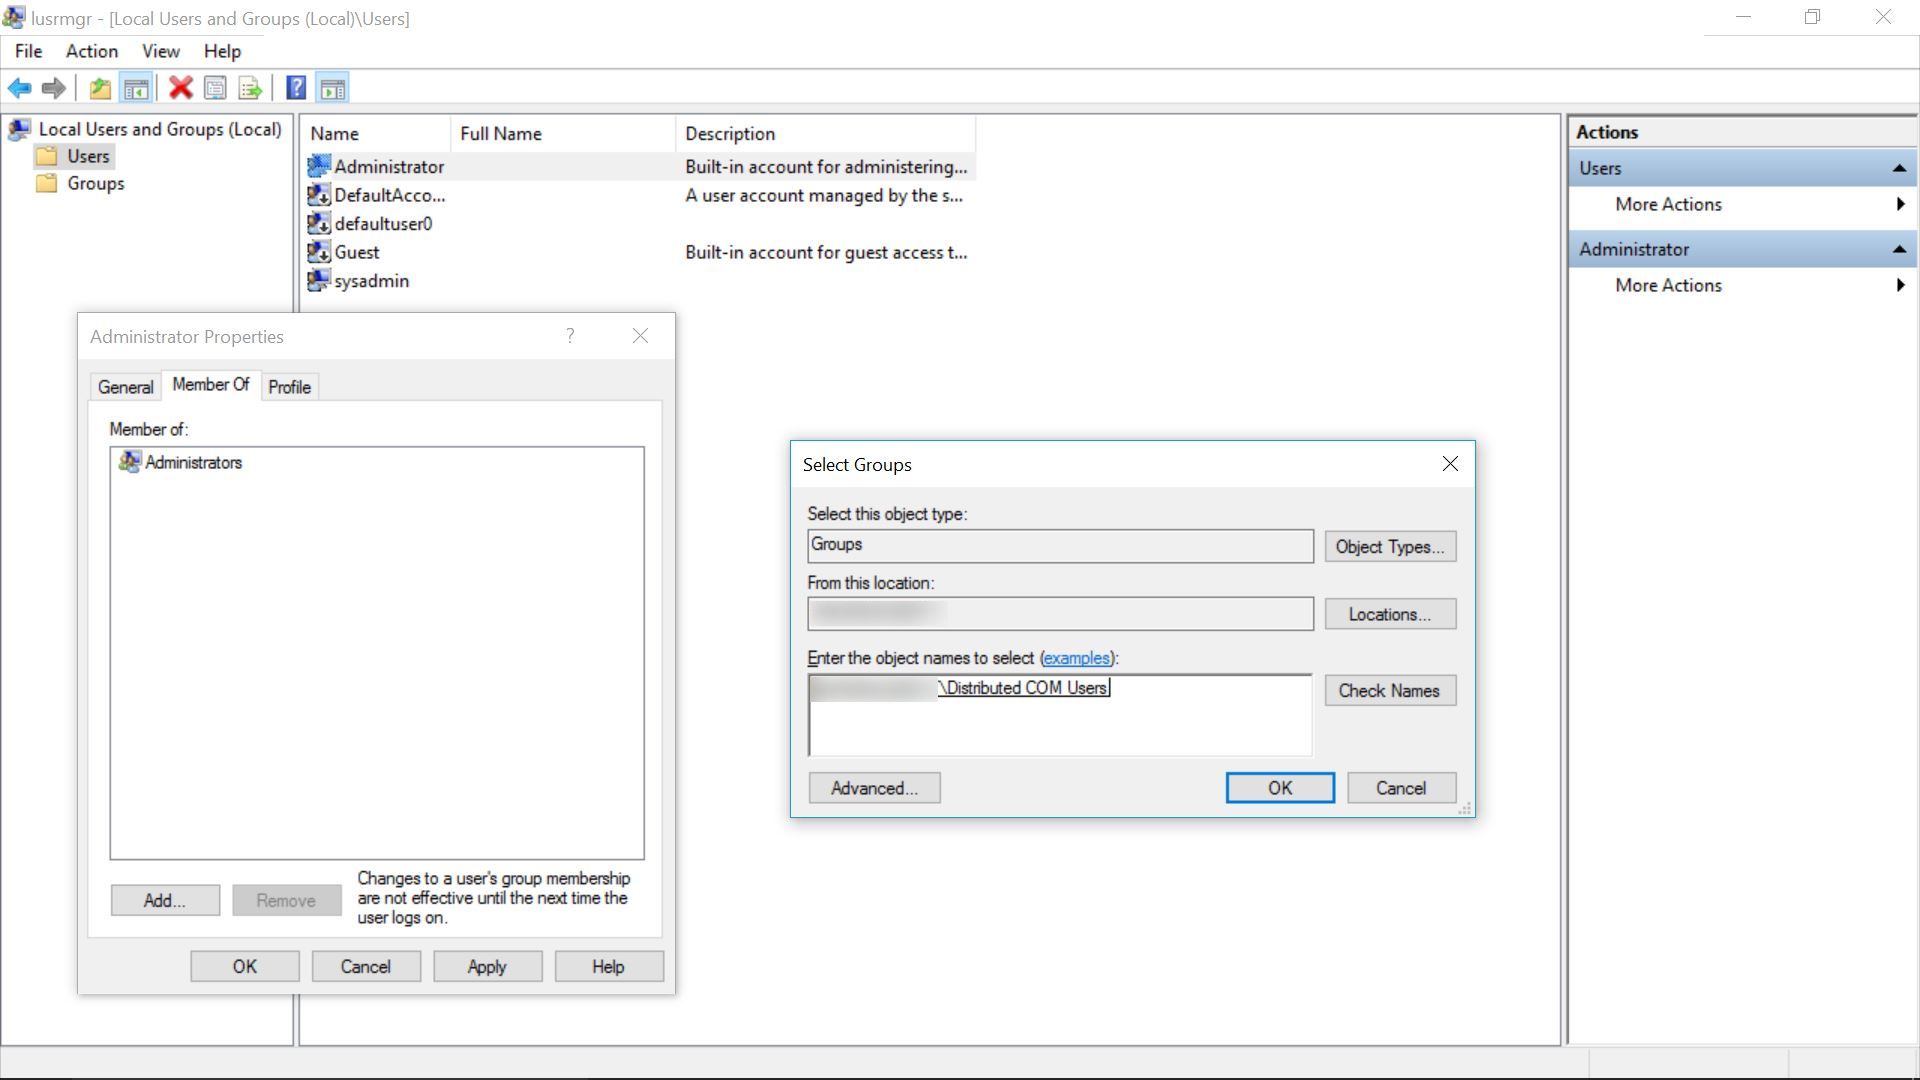
- Click Start → Run, type lusrmgr.msc and click OK.
- In the Users folder, right-click the user to bring up the menu, and select Properties.
- Click over to the Members of tab, and click Add.
- Under 'Enter the object names to select', type 'Distributed COM Users' (without quotes), click Check Names, then click OK.
- Click Add.
- Repeat steps 3-5 for the Performance Monitor Users and Event Log Readers group.
Configuring the DCOM Security Settings to allow the groups to access the system remotely:
Next, we're providing basic access permissions to the user groups (Distributed COM Users and Performance Monitor Users) to be able to gain control of the device remotely.
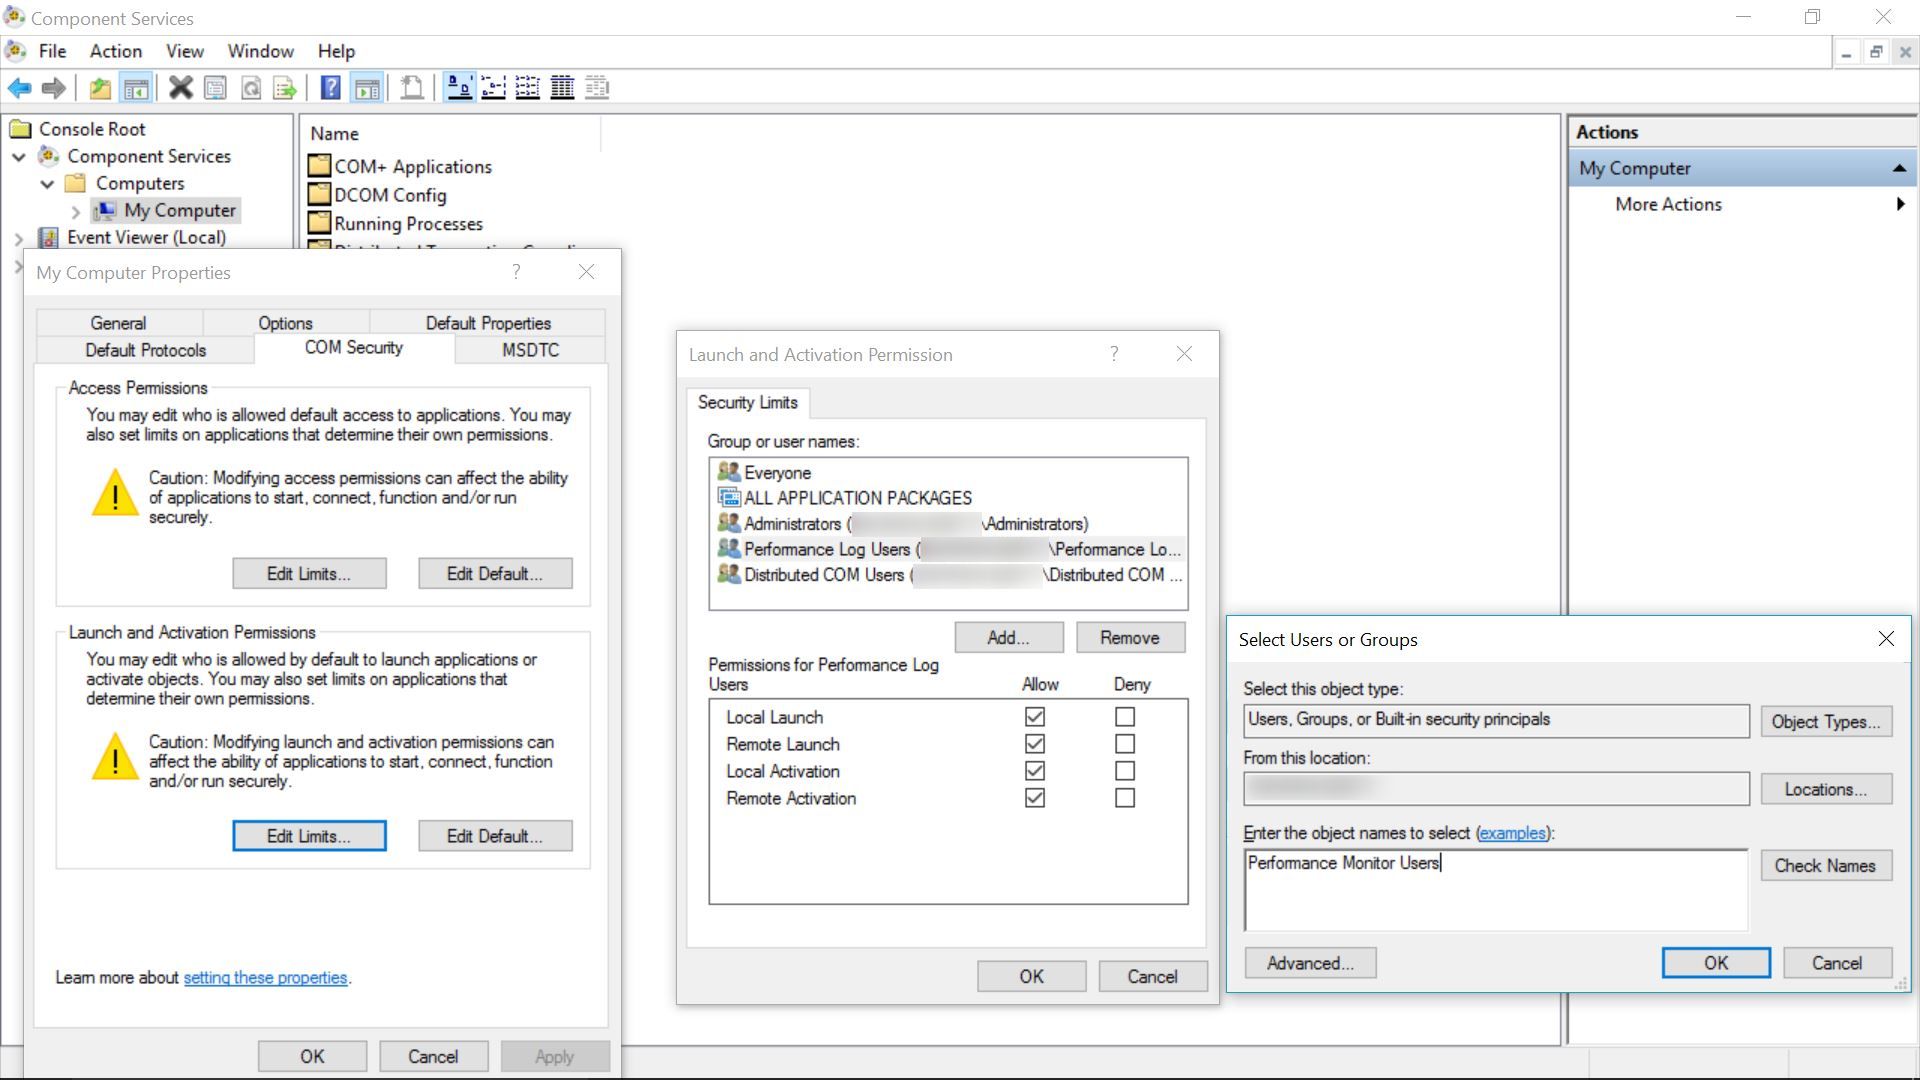
- Click Start → Run, type dcomcnfg and click OK.
- Drill down into the Component Services tree until you get to My Computer. Right-click 'My Computer' to bring up the menu, and click Properties.
- Click the COM Security tab, then click Edit Limits under the Launch and Activation Permissions section.
- Click Add.
- Under 'Enter the object names to select', type 'Distributed COM Users' (without quotes), click Check Names, then click OK.
- Click Add.
- Repeat steps 9-12 for the Performance Monitor Users group.
- Check Allow for each of the permissions (Local Launch, Remote Launch, Local Activation, Remote Activation) for each of these groups, and click OK.
Setting the WMI Control security settings to be applied to all namespaces:
Finally, access is provided for all classes under all namespaces for both the user groups, in order to enable OpManager to fetch those data using WMI monitor.
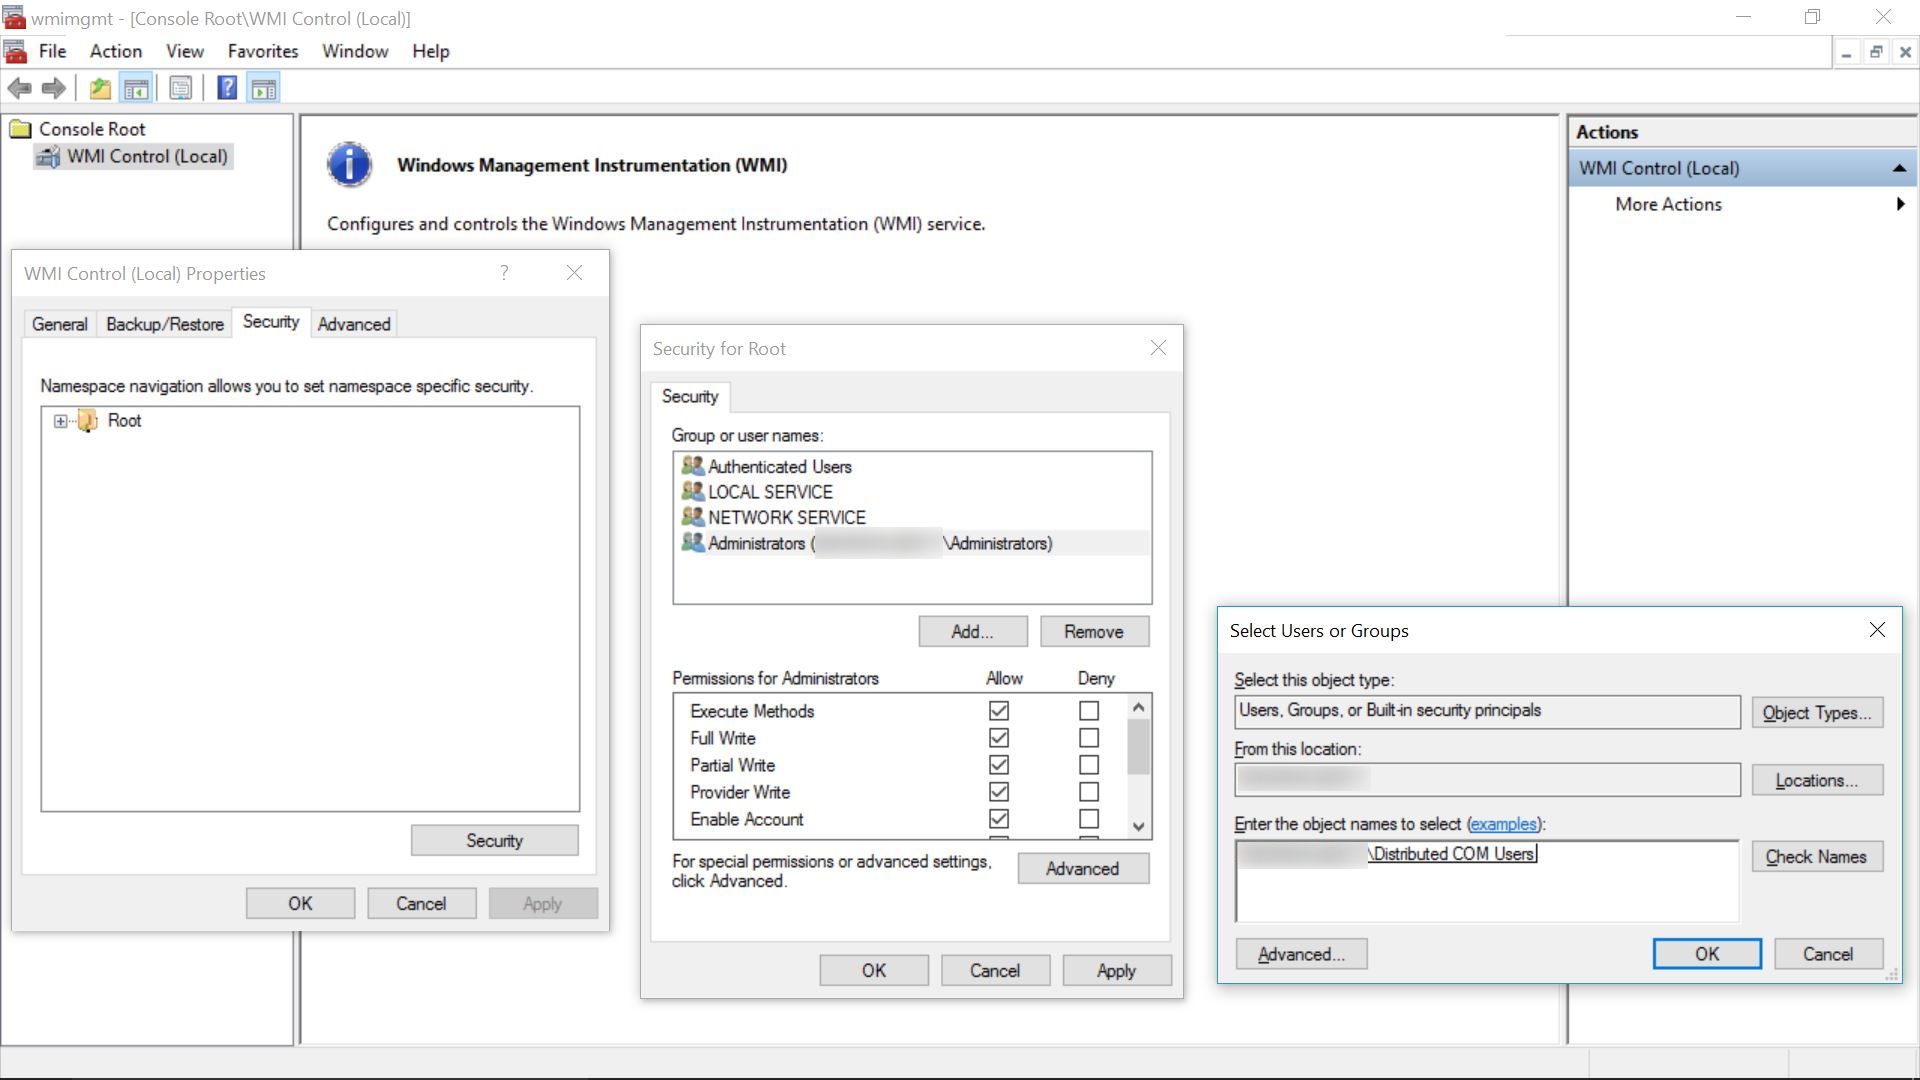
- Click Start → Run, type wmimgmt.msc and click OK.
- Right-click WMI Control (Local) to bring up the menu, and click Properties.
- Click over to the Security tab, then click Root, and click the Security button.
- Click Add.
- Under 'Enter the object names to select', type 'Distributed COM Users' (without quotes), click Check Names, then click OK.
- Make sure the Distributed COM Users group is selected, and click Advanced.
- Highlight the row with Distributed COM Users in it and click Edit.
- From the 'Applies to' drop-down list, select 'This namespace and subnamespaces'.
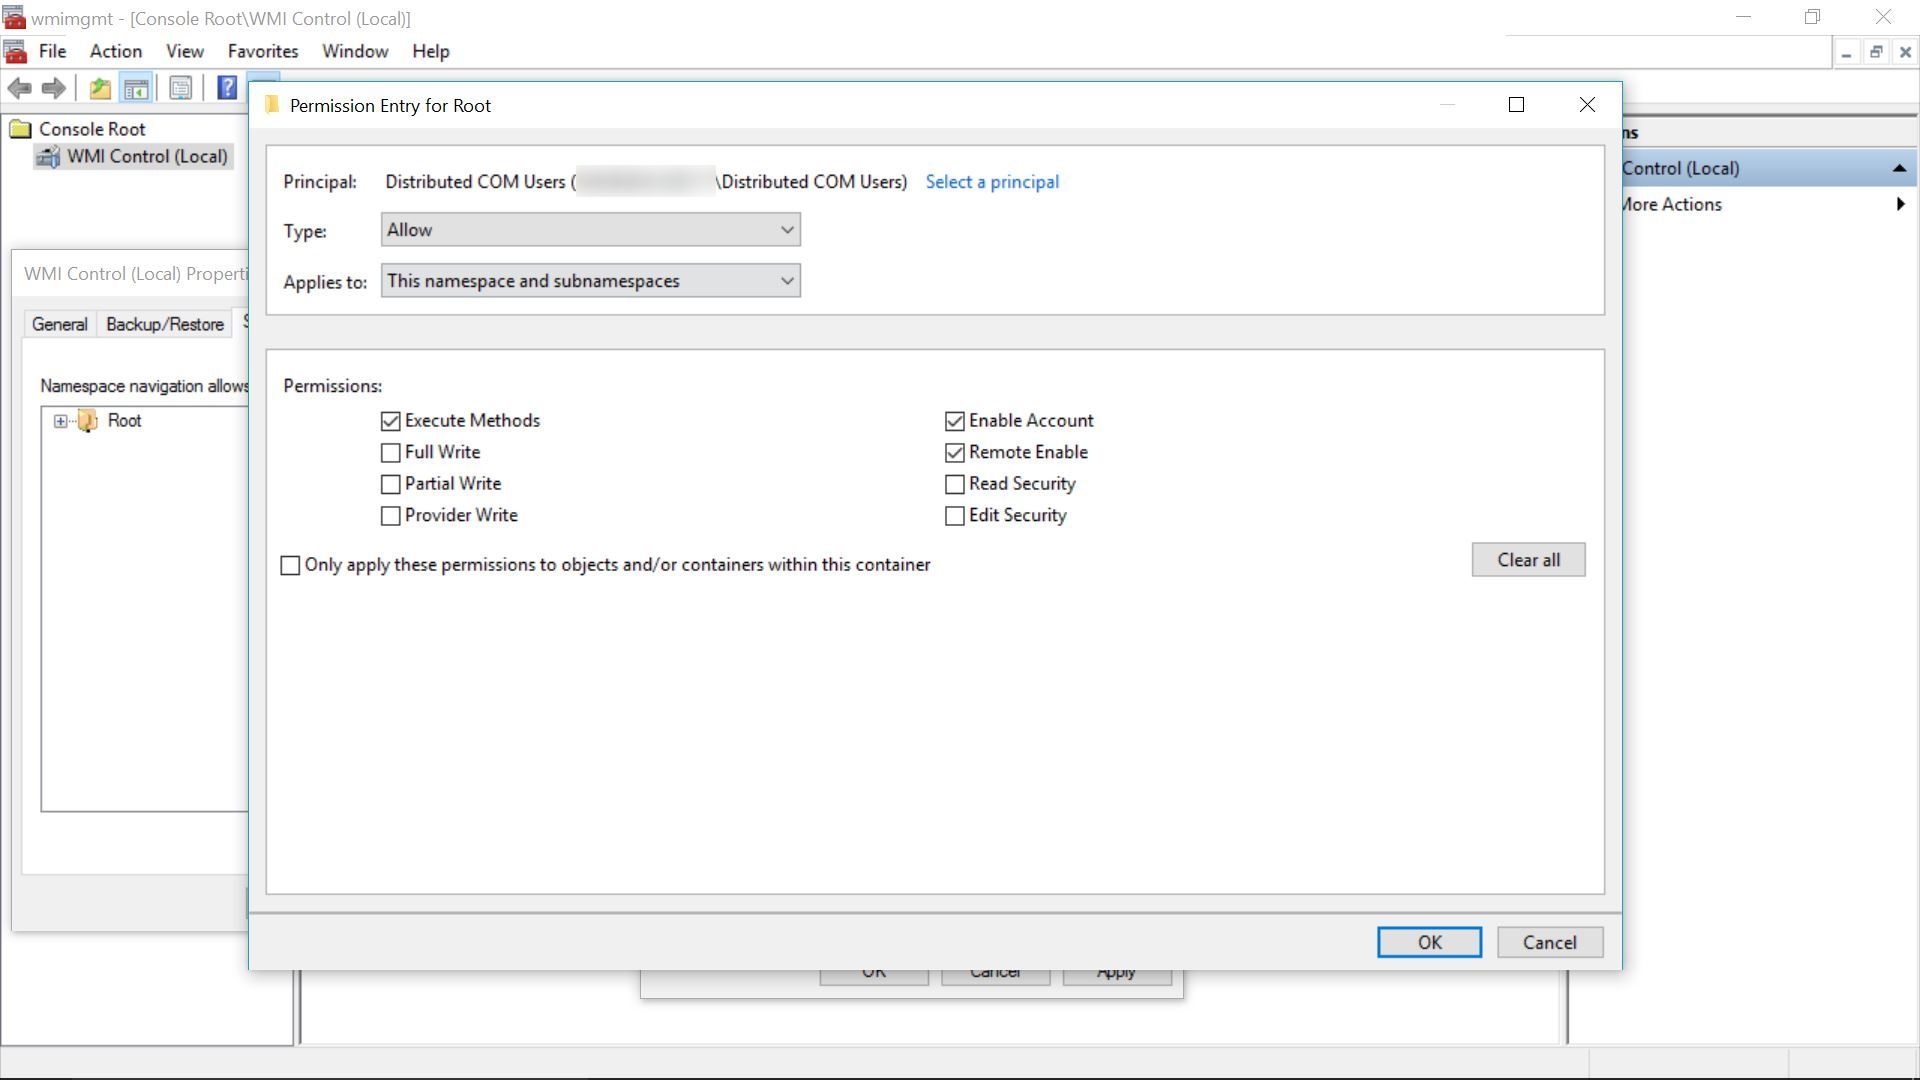
- Under the 'Allow' column, check Execute Methods, Enable Account and Remote Enable, and then click OK.
- Repeat steps 17-23 for the Performance Monitor Users group.
- Click OK to close all windows.
Set permissions to Service Control Manager Security for Windows Service Monitoring:
If you wish to monitor whether Windows Service monitors are up/down, you need to grant permission to SCManager. The access to the Windows services is controlled by the Security Descriptor of Service Control Manager, which by default is restricted for hardened OS. The below mentioned steps will grant remote access to Service Control Manager in user level, to get the list of services on a server.
Retrieve the user SID of the User Account
- From the monitored device, open Command Prompt in Administrator mode.
- Run the below command to retrieve the user SID. Replace UserName with the user name for the User account.
wmic useraccount where name="UserName" get name,sidExample:
wmic useraccount where name="administrator" get name,sid - Note down the SID. (Ex. S-1-0-10-200000-30000000000-4000000000-500)
Retrieve the current SDDL for the SC Manager
- Run the below command which will save the current SDDL for the SC Manager to the CurrentSDDL.txt.
sc sdshow scmanager > CurrentSDDL.txt - Edit the CurrentSDDL.txt and copy the entire content.
- The SDDL will be look like below:
D:(A;;CC;;;AU)(A;;CCLCRPRC;;;IU)(A;;CCLCRPRC;;;SU)(A;;CCLCRPWPRC;;;SY)(A;;KA;;;BA)(A;;CC;;;AC)S:(AU;FA;KA;;;WD)(AU;OIIOFA;GA;;;WD)
Update the SDDL:
- Frame new SDDL snippet for above SID
Ex.(A;;CCLCRPWPRC;;;<SID of User>)(A;;CCLCRPWPRC;;;S-1-0-10-200000-30000000000-4000000000-500) - Now place this snippet in before "S:" of original SDDL.
- Updated SDDL will be like this:
D:(A;;CC;;;AU)(A;;CCLCRPRC;;;IU)(A;;CCLCRPRC;;;SU)(A;;CCLCRPWPRC;;;SY)(A;;KA;;;BA)(A;;CC;;;AC)(A;;CCLCRPWPRC;;;S-1-0-10-200000-30000000000-4000000000-500)S:(AU;FA;KA;;;WD)(AU;OIIOFA;GA;;;WD) - Finally Execute the below command with Updated SDDL:
This will grant the following permissions to the user:sc sdset scmanager D:(A;;CC;;;AU)(A;;CCLCRPRC;;;IU)(A;;CCLCRPRC;;;SU)(A;;CCLCRPWPRC;;;SY)(A;;KA;;;BA)(A;;CC;;;AC)(A;;CCLCRPWPRC;;;S-1-0-10-200000-30000000000-4000000000-500)S:(AU;FA;KA;;;WD)(AU;OIIOFA;GA;;;WD)
CC - To Get Service's current configuration
LC - To Get Service's current status
RP - To Read Properties/Start the Service
WP - To Write Properties/Stop the Service
RC - To Read the Security Descriptor.
You should now be able to perform WMI monitoring on this Windows host with a regular user account instead of an admin account.
- How to discover devices and interfaces in OpManager?
- How to add a new credential?
- Can I add devices using SSH?
- Why are devices discovered as 'Unknown'?
- What are devices supported in OpManager?
- Why are interfaces not discovered for my device?
- How can I associate device templates to a newly discovered device?
- How to associate monitors to the discovered device?
- What is a discovery filter?
- How do I configure a new discovery rule?
- How to manage or unmanage a device?
- How to configure device dependencies?
- How can find the missing VMs and hosts?
- How can I discover a VLAN?.
- How does availability monitoring work in OpManager?
- What are the basic system requirements to install and use OpManager?
- How can I troubleshoot issues with device discovery?
- How can I troubleshoot issues with VCenter/ESX discovery?